
ALUSSO LIGHTING 24 Inch LED Under Cabinet Lighting
Instruction Manual - Model: UCL60-15W5D
Introduction
This manual provides detailed instructions for the installation, operation, and maintenance of your ALUSSO LIGHTING 24 Inch LED Under Cabinet Light. Please read this manual thoroughly before installation and use to ensure proper function and safety.

Image: Two ALUSSO LIGHTING 24-inch LED under cabinet lights, along with various accessories including connectors, power cords, and mounting hardware. The image also displays the 5CCT color options and the '2 Pack' label.
Safety Information
- Always turn off the power at the circuit breaker before beginning installation or maintenance.
- Ensure all electrical connections are made in accordance with local codes and ordinances.
- Do not install in wet locations. This product is for indoor use only.
- Do not attempt to modify the fixture. Any modifications may void the warranty and create a safety hazard.
- If you are unsure about any part of the installation, consult a qualified electrician.
Package Contents
Verify that all components are present before installation:
- 2 x ALUSSO LIGHTING 24 Inch LED Under Cabinet Lights
- 2 x Clamp Type Connectors
- 8 x Mounting Screws
- 2 x Linking Cables (11.8 inches)
- 2 x Power Cords (59 inches)

Image: A visual representation of the items included in the package, detailing the two light fixtures, clamp connectors, mounting screws, linking cables, and power cords.
Setup: Installation
Your ALUSSO LIGHTING under cabinet lights offer two installation methods: Plug-in or Hardwired.
Method 1: Plug-in Installation
- Remove the port cover from the fixture.
- Insert the power cord into the fixture's port.
- Mount the fixture to the desired surface using the provided mounting screws.
- Plug the power cord into a standard electrical outlet.

Image: A four-step visual guide demonstrating the plug-in installation process, from removing the port cover to plugging the light into an outlet.
Method 2: Hardwired Installation
- Loosen the screws to remove the fixing plate from the fixture.
- Knock out the wire hole on the fixing plate.
- Loosen the screws of the fixing plate with a tool, then remove the fixing plate.
- Fix the clamp type connector with the fixing plate and connect the power terminal, then tighten the upper screws.
- Secure the fixture to the desired surface using the provided mounting screws.

Image: A four-step visual guide illustrating the hardwired installation process, including removing the fixing plate, preparing the wire hole, connecting wires, and securing the fixture.
For a visual demonstration of the installation process, please refer to the official installation video:
Video: An official installation guide demonstrating how to install the LED Under Cabinet Lighting. This video provides a step-by-step visual walkthrough of both plug-in and hardwired installation methods.
Operating Instructions
1. Power On/Off
Locate the toggle switch on the fixture. Slide the switch to the 'I' position to turn the light on, and to the 'O' position to turn it off.
2. 5CCT Color Temperature Selection
Your light fixture features 5 selectable color temperatures. Use the slider switch on the fixture to choose between 2700K (Warm White), 3000K, 3500K (Natural White), 4000K, and 5000K (Cool White) to suit your preference or environment.

Image: A visual representation of the five color temperature options (2700K, 3000K, 3500K, 4000K, 5000K) and how they appear when illuminated, demonstrating the versatility of the light.
3. Dimming Methods
The fixture offers two dimming options:
- Built-in Dimmer: The fixture has a switch that allows you to select between 50% and 100% brightness. Slide the switch to '50%' for reduced brightness or '100%' for full brightness.
- Universal Dimmer Compatibility: For finer control, the light is compatible with most standard universal dimmers (not included), allowing adjustment from 10% to 100% brightness.
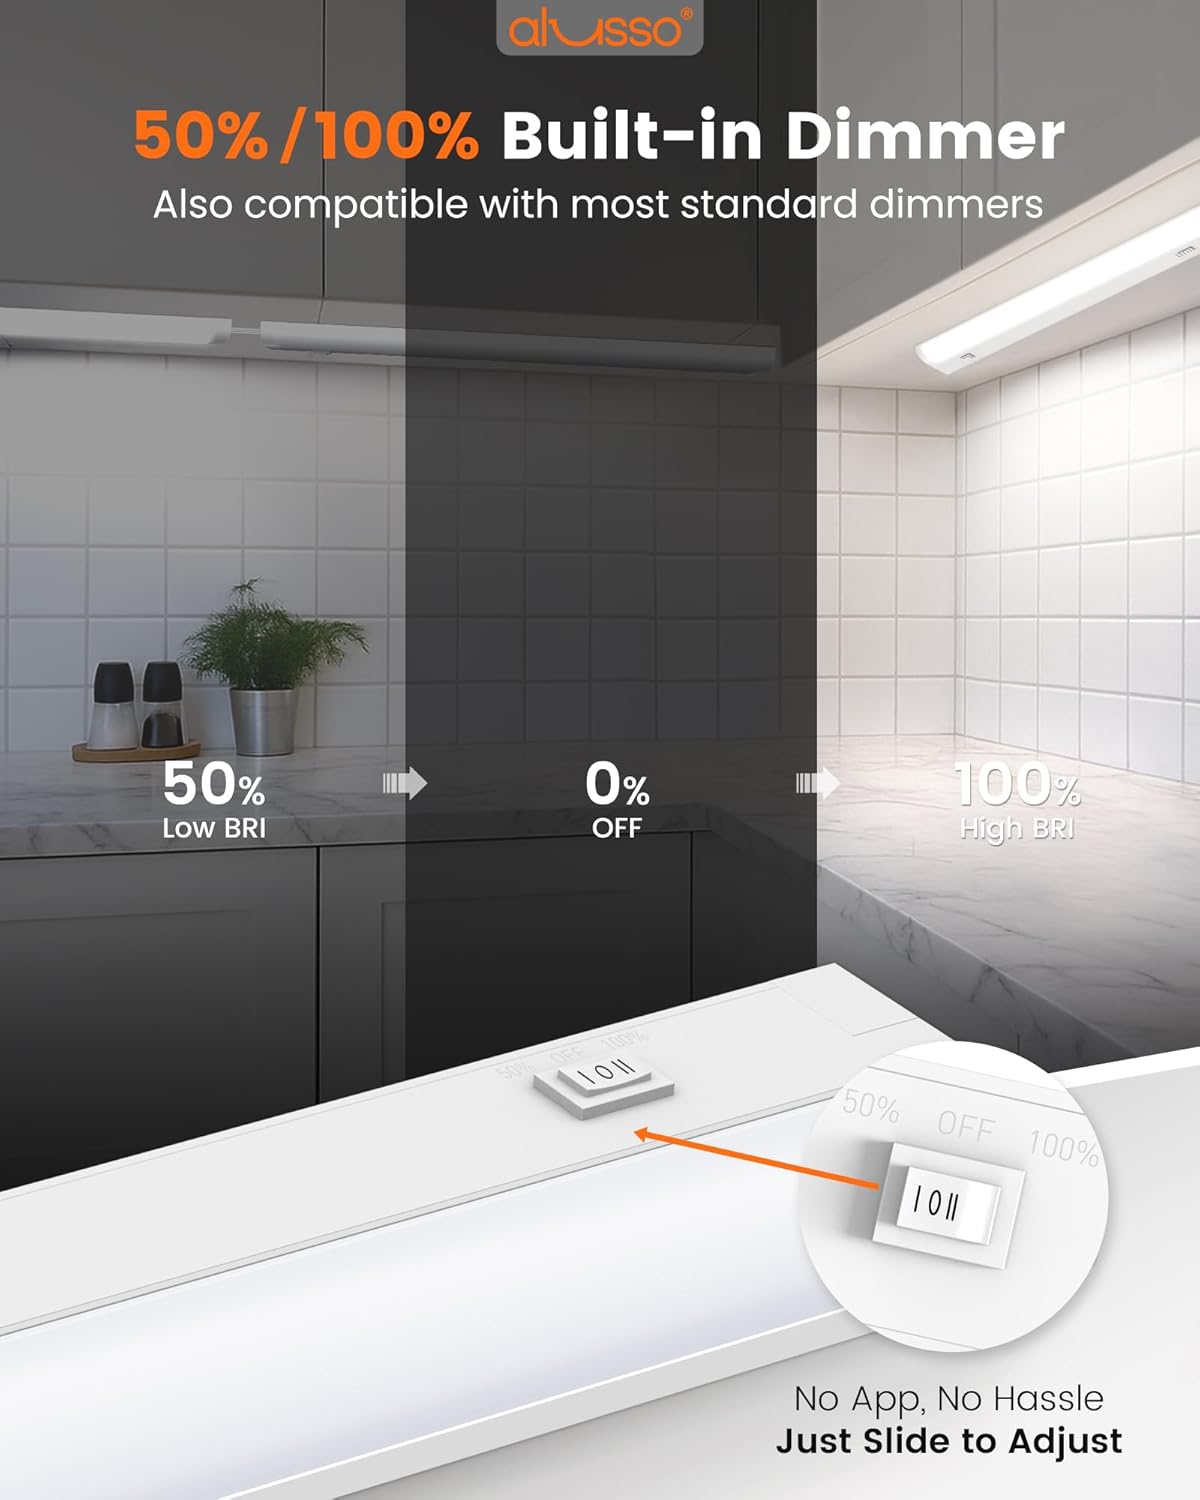
Image: A visual demonstrating the built-in dimmer switch on the light fixture, showing options for 50% brightness, OFF, and 100% brightness.
4. Linking Multiple Fixtures
Multiple ALUSSO LIGHTING under cabinet lights can be linked together using the provided 11.8-inch linking cables. Up to 20 lights can be interconnected to create a continuous lighting solution. Ensure the total wattage of linked fixtures does not exceed the maximum recommended load.
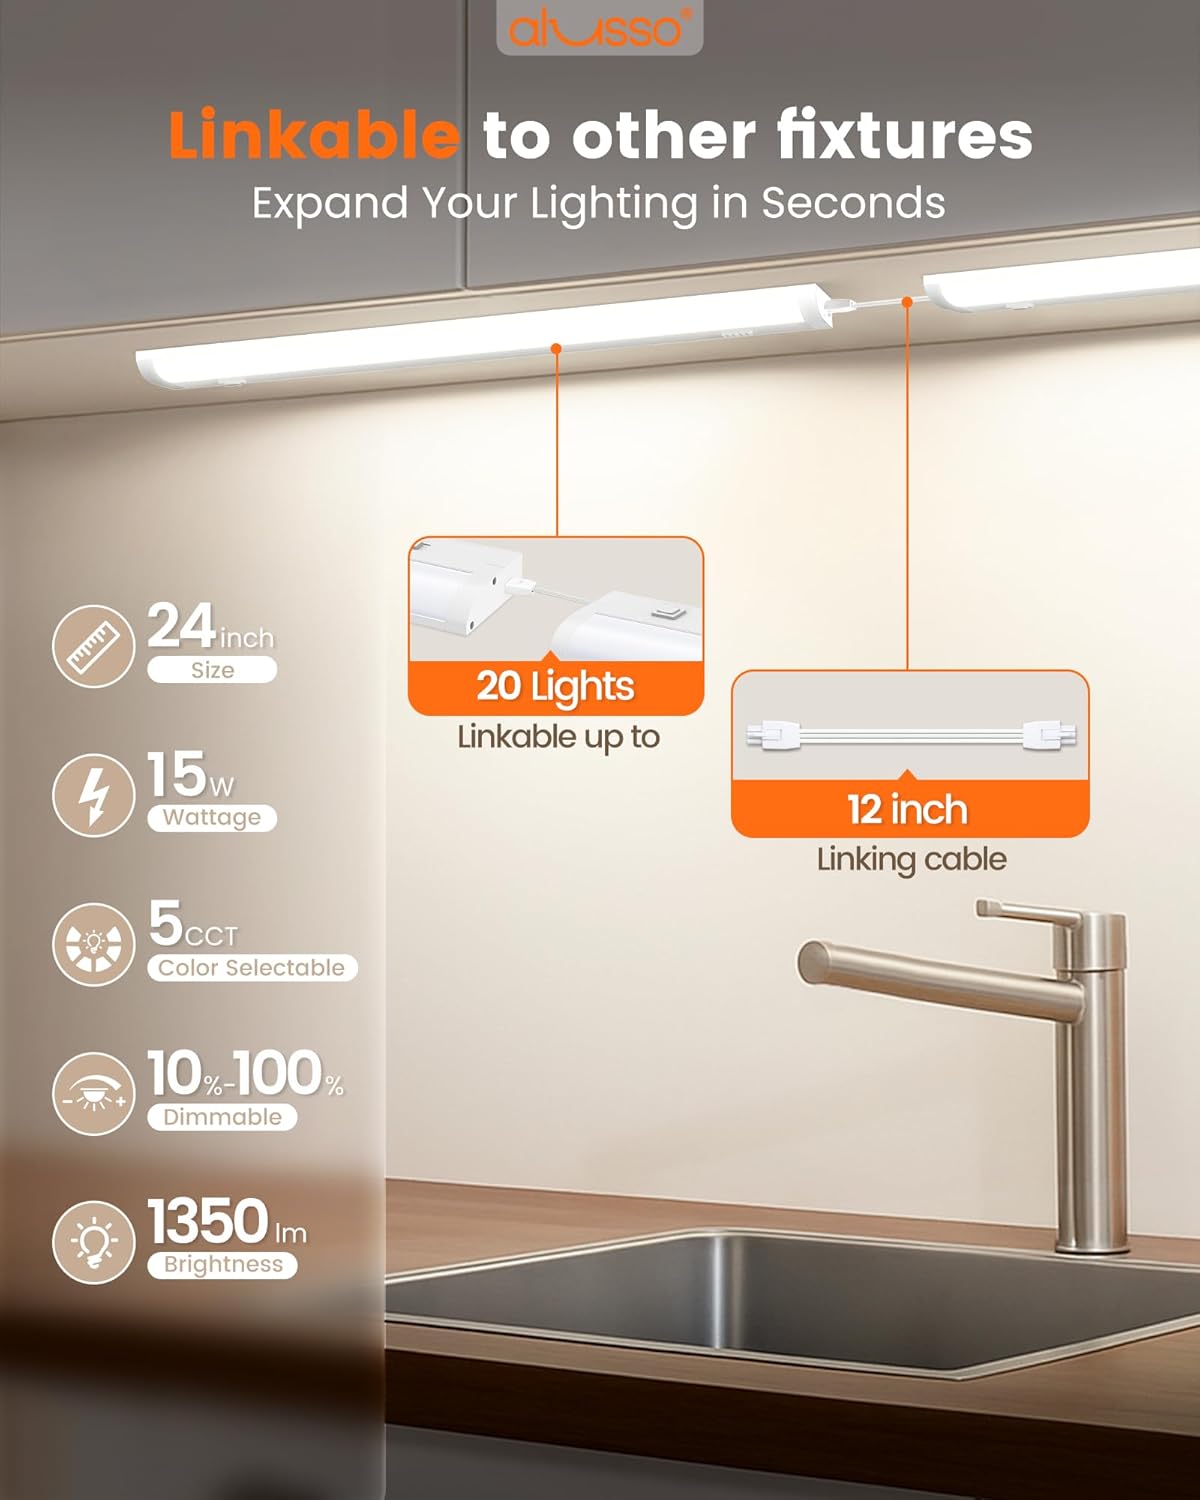
Image: A diagram illustrating the concept of linking multiple 24-inch under cabinet lights using a 12-inch linking cable, indicating that up to 20 lights can be connected.
Maintenance
- Cleaning: To clean the fixture, ensure the power is off. Use a soft, dry cloth. Do not use abrasive cleaners or solvents, as they may damage the finish or electrical components.
- Bulb Replacement: This LED fixture uses integrated LED components and does not require bulb replacement.
Troubleshooting
- Light does not turn on:
- Check if the power cord is securely plugged into the outlet or if hardwired connections are correct.
- Ensure the wall switch (if applicable) is in the ON position.
- Verify the circuit breaker is not tripped.
- Light flickers or is dim:
- Ensure the dimmer switch on the fixture is set to the desired brightness level (50% or 100%).
- If using an external dimmer, ensure it is compatible with LED lighting and functioning correctly.
- Check for loose connections in hardwired installations.
- Incorrect color temperature:
- Adjust the 5CCT slider switch on the fixture to select the desired color temperature.
Specifications
| Feature | Specification |
|---|---|
| Brand | ALUSSO LIGHTING |
| Model Number | UCL60-15W5D |
| Size | 24 Inch |
| Wattage | 15 Watts |
| Brightness | 1350 Lumens |
| Color Temperature | 2700K-5000K (5CCT Selectable) |
| Dimming | Built-in 50%/100% switch, compatible with 10%-100% universal dimmers |
| Installation Type | Plug-in / Hardwired |
| Linkable | Up to 20 lights |
| Voltage | 120 Volts |
| Material | Polycarbonate, Aluminum Alloy |
| Average Life | 30,000 Hours |
| Color Rendering Index (CRI) | 85.0 |
| Product Dimensions | 29.13"L x 3.54"W x 2.76"H (Packaging) |
Warranty & Support
ALUSSO LIGHTING offers a 3-year replacement warranty for this product. To extend your warranty for 1 year, please contact support@alussolighting.com. When applying for a replacement warranty, include the following information:
- Email subject: Replacement Warranty
- Details of Defective Item: Purchase platform + order number + product photos (including lamp printing)

Image: A warranty card detailing instructions on how to extend the product warranty for an additional year by contacting customer support via email and providing specific purchase and product details.
For further assistance or inquiries, please visit the ALUSSO LIGHTING Store on Amazon.