Introduction
Thank you for choosing the KEEPEEZ FWD-501 Electric Kitchen Composter. This appliance is designed to efficiently convert food waste into nutrient-rich fertilizer, reducing household waste and promoting environmental sustainability. Please read this manual thoroughly before operating the composter to ensure safe and optimal performance.
Important Safety Instructions
For your safety and to prevent damage to the appliance, always adhere to the following guidelines:
- Always use clean hands when handling food waste.
- Avoid placing sharp objects or hazardous materials in the composter.
- Keep the composter clean and dry to prevent pest attraction.
- Unplug the composter before cleaning or performing any maintenance.
- Always follow the manufacturer's instructions for safe operation.
- Do not immerse the main unit in water or other liquids.
- Ensure the composter is placed on a stable, level surface.
- Keep out of reach of children and pets.
Product Overview
The KEEPEEZ FWD-501 is a 4-liter electric kitchen composter designed for indoor use. It features an advanced system to process food waste efficiently and quietly.
Components:
- Main Composter Unit (Stainless Steel Body)
- Removable Composting Bucket (Cast Aluminum with Nonstick Coating)
- Lid with Control Panel
- Activated Carbon Filter Boxes (1 removable, 2 built-in)
- Power Cord

Image: The KEEPEEZ FWD-501 Electric Kitchen Composter, showing its sleek design, food waste being added, and the resulting natural fertilizer.
Setup Instructions
- Unpacking: Carefully remove all components from the packaging. Retain packaging for future transport or storage.
- Placement: Place the composter on a flat, stable, and heat-resistant surface in your kitchen or desired indoor location. Ensure adequate ventilation around the unit.
- Filter Installation: The composter comes with 3 activated carbon filters (1 removable, 2 built-in). Ensure all filters are correctly seated in their designated compartments to ensure optimal odor control. Refer to the "Maintenance" section for details on accessing and replacing filters.
- Composting Bucket: Insert the nonstick coated cast aluminum composting bucket into the main unit. Ensure it is seated properly.
- Power Connection: Plug the power cord into the composter and then into a standard electrical outlet. The unit is now ready for operation.

Image: A user adding food scraps to the KEEPEEZ composter, demonstrating the initial filling step.
Operating Instructions
The KEEPEEZ FWD-501 composter is designed for simple, one-button operation.
Acceptable Food Waste:
- Fruits and vegetables (peels, scraps)
- Coffee grounds and tea bags
- Bread and grain products
- Animal products (small amounts of meat, fish, dairy)
- Yard waste (small amounts, e.g., flower trimmings)
- Degradable paper (e.g., paper towels, napkins)
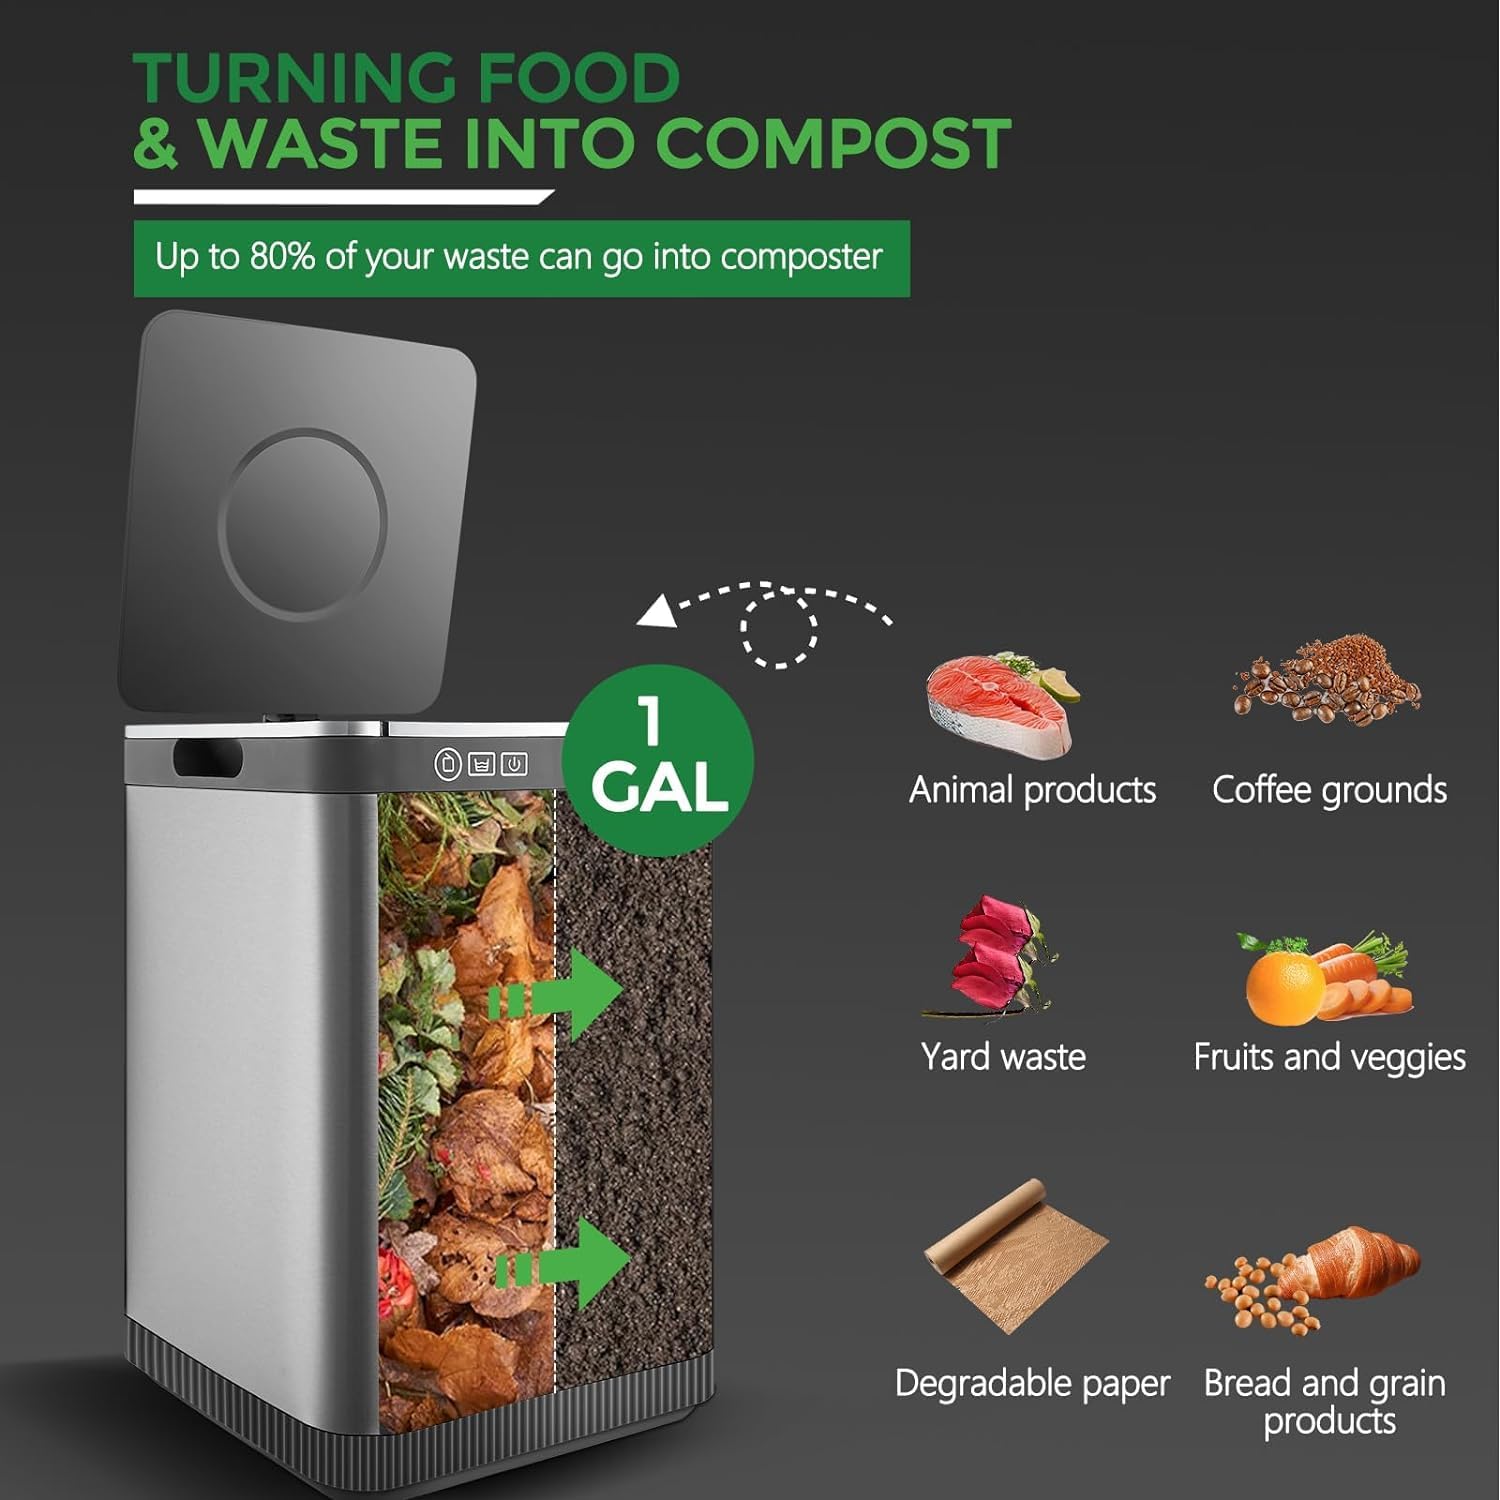
Image: A visual guide illustrating acceptable food waste types for the composter, such as fruits, vegetables, coffee grounds, and small amounts of animal products.
Composting Process:
- Fill: Open the lid and add your food waste into the composting bucket. Do not exceed the 4-liter capacity line. Close the lid securely.
- Start: Press the power button on the control panel. The composter will begin its cycle. The unit operates quietly, typically below 35dB.
- Cycle: The composter utilizes a multi-stage process including high-temperature drying, milling, and cooling, combined with freeze-drying technology. This process efficiently breaks down food waste and reduces odors. The cycle duration typically ranges from 4 to 8 hours, depending on the type and moisture content of the waste. For larger loads, it may take up to 12 hours.
- Completion: Once the cycle is complete, the unit will automatically shut off. The food waste will have been transformed into dry, nutrient-rich fertilizer, significantly reduced in volume (up to 90%).
- Retrieve: Carefully remove the composting bucket and empty the processed material. This can be used as a soil conditioner for plants or disposed of.

Image: An illustration of the composter's internal mechanism during operation, highlighting its energy efficiency and the role of activated charcoal in odor control.
Maintenance
Cleaning the Composting Bucket:
- The cast aluminum composting bucket with nonstick coating is dishwasher safe.
- Alternatively, wash the bucket by hand with warm, soapy water and a non-abrasive sponge. Rinse thoroughly and dry completely before returning it to the unit.
- The composter also features a self-cleaning function. Refer to the control panel for activation.
Replacing Carbon Filters:
The KEEPEEZ FWD-501 uses an upgraded activated charcoal system with one removable charcoal box and two built-in charcoal boxes for superior odor adsorption. Filters should be replaced periodically to maintain optimal odor control, typically every 3-6 months depending on usage.
- Power Off: Ensure the composter is unplugged from the power outlet before attempting to replace filters.
- Access Filters: Locate the filter compartments, usually on the underside of the lid or at the back of the unit. The removable filter box is typically easily accessible.
- Remove Old Filters: Carefully remove the used carbon filters. Dispose of them responsibly.
- Install New Filters: Insert new KEEPEEZ replacement carbon filters into the compartments, ensuring they are seated correctly.
- Close Compartments: Securely close the filter compartments.
Replacement carbon filters can be purchased from authorized KEEPEEZ retailers or the official KEEPEEZ website.
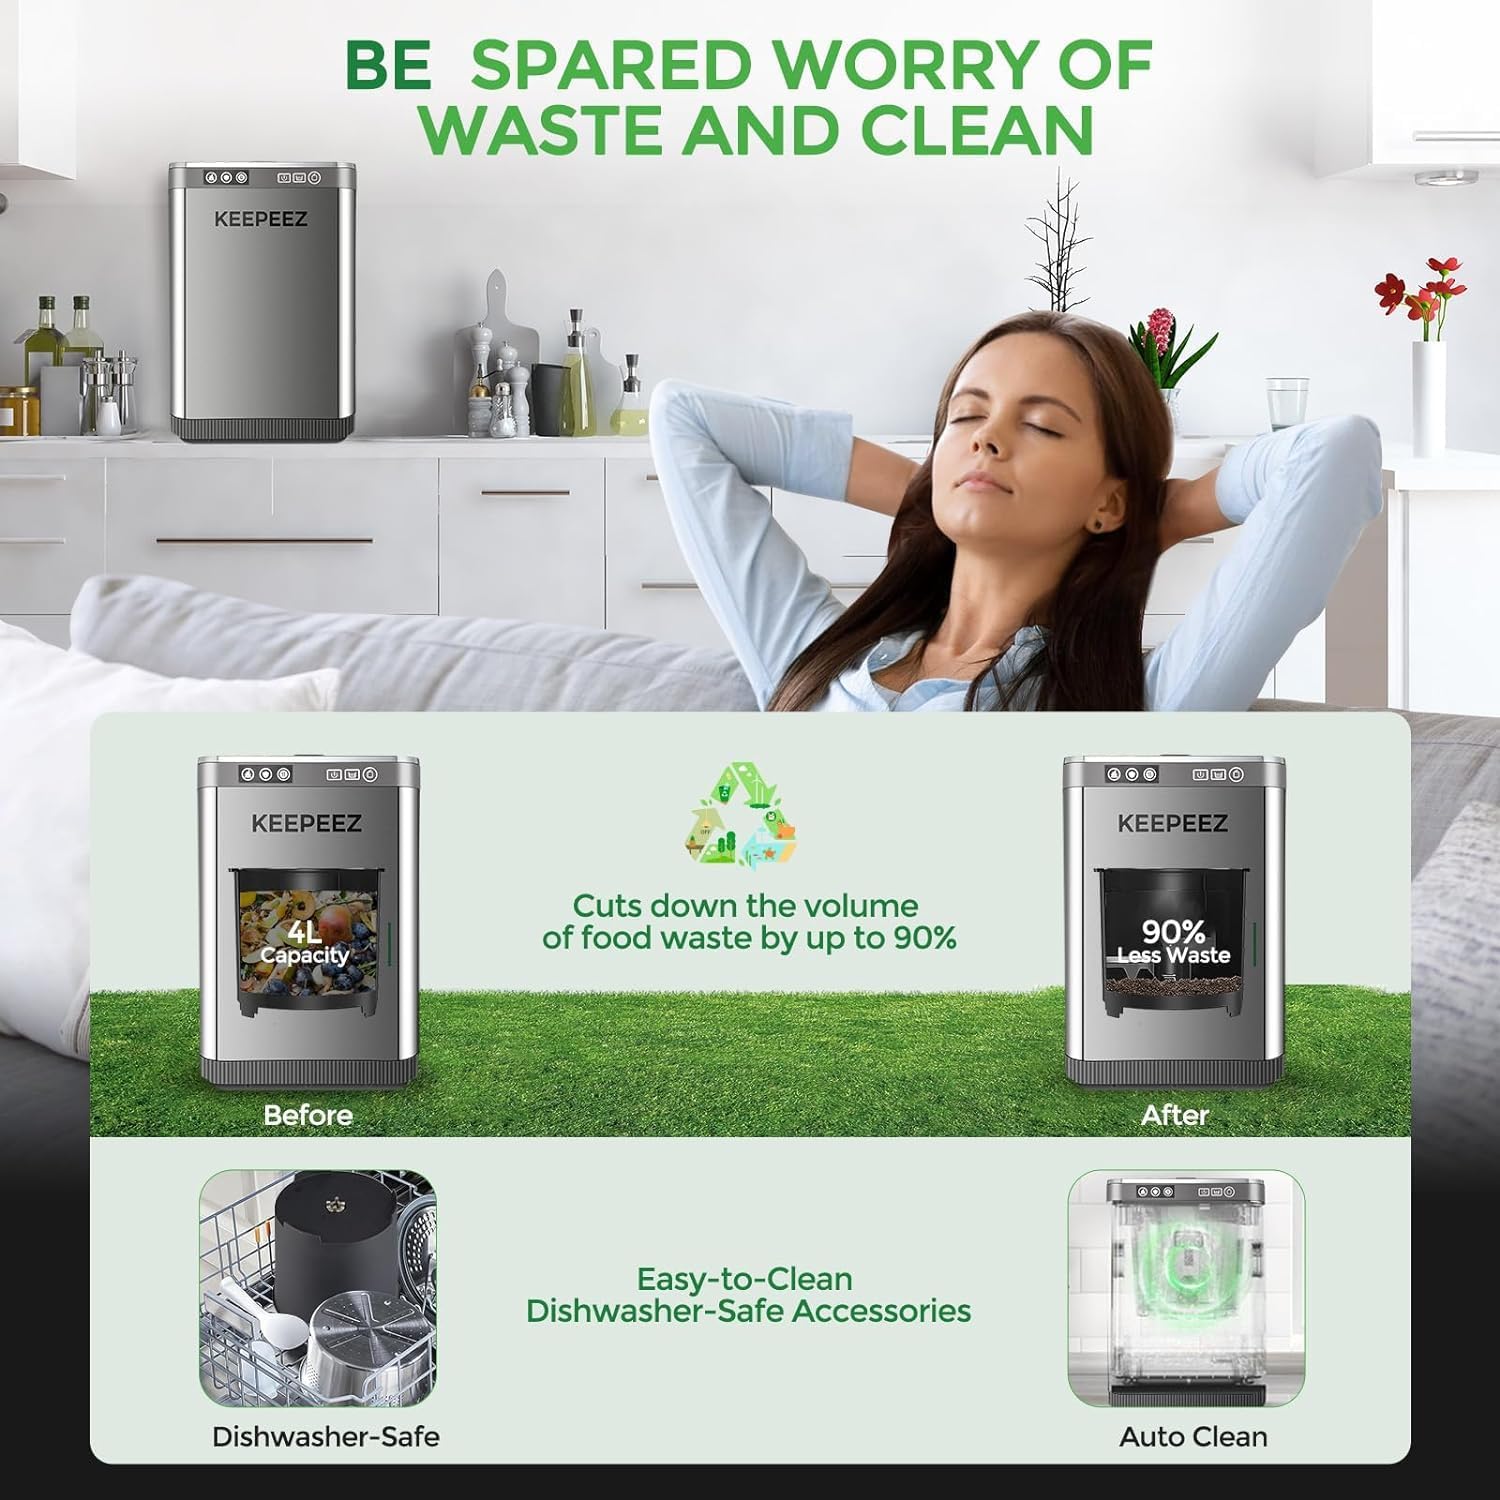
Image: Visual representation of the composter's waste reduction capability and ease of cleaning, including dishwasher-safe parts and an auto-clean feature.
Troubleshooting
If you encounter issues with your KEEPEEZ FWD-501 composter, please refer to the following common problems and solutions:
| Problem | Possible Cause | Solution |
|---|---|---|
| Composter does not turn on or start cycle. |
|
|
| Unpleasant odors during operation. |
|
|
| Composter is unusually loud. |
|
|
| Food waste not fully processed. |
|
|
If the problem persists after attempting these solutions, please contact KEEPEEZ customer support for further assistance.
Specifications
| Feature | Detail |
|---|---|
| Brand | KEEPEEZ |
| Model Number | FWD-501 |
| Capacity | 4 Liters |
| Product Dimensions (L x W x H) | 14.5" x 13.6" x 19.9" |
| Item Weight | 19.9 Pounds |
| Material | 100% Stainless Steel body, Cast Aluminum bucket with Nonstick Coating |
| Color | Silver |
| Power Consumption | 500W |
| Noise Level | Less than 35dB |
| Odor Control | 3 Activated Carbon Filters (1 removable, 2 built-in) |
| Cleaning | Dishwasher safe bucket, Self-cleaning function |
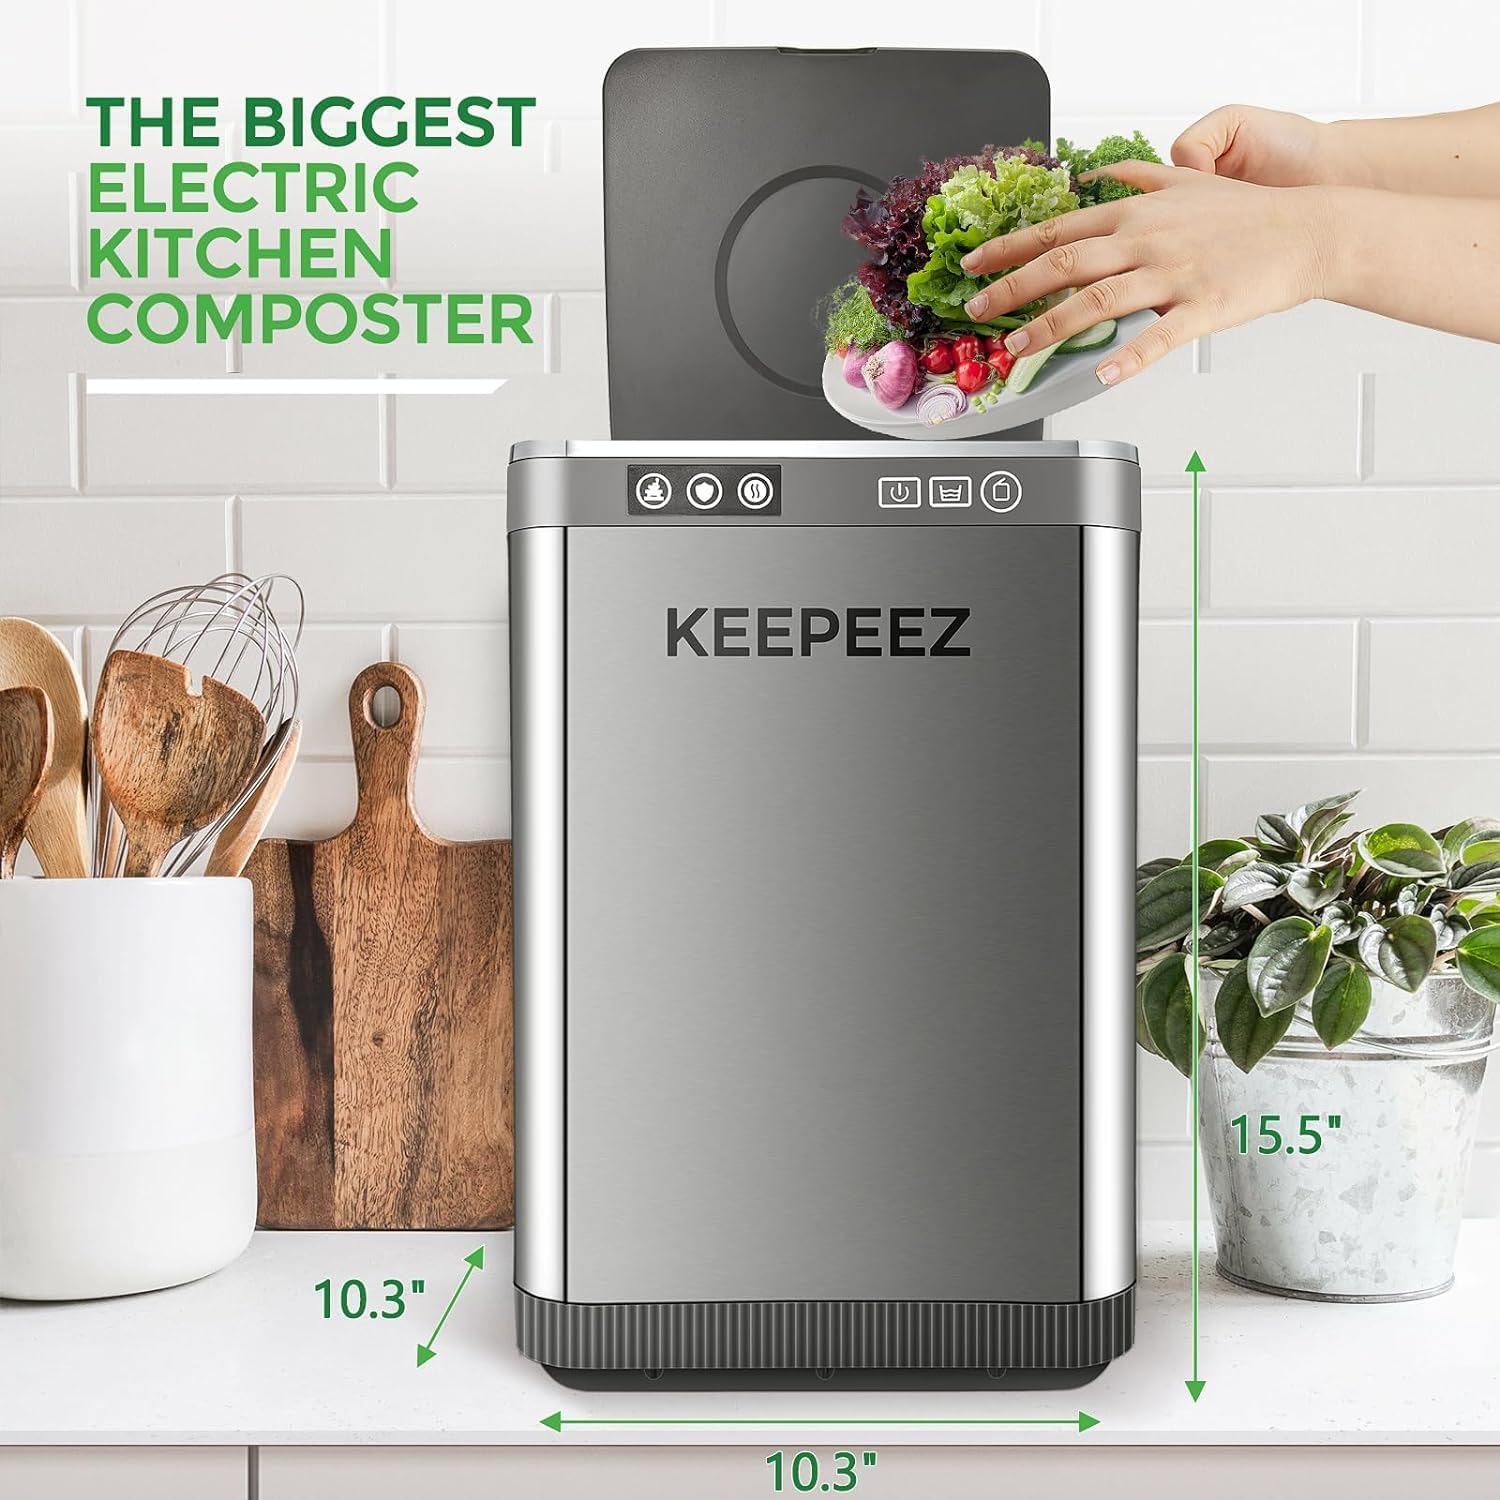
Image: The KEEPEEZ composter with key dimensions (height, width, depth) indicated.
Warranty and Customer Support
The KEEPEEZ FWD-501 Electric Kitchen Composter comes with a 1-year basic warranty, extended by 2 additional years for a total of 3 years of coverage. This warranty covers manufacturing defects and ensures product quality.
For any technical support, warranty claims, or inquiries, please contact KEEPEEZ customer service. Our team is available to provide professional assistance.
- Returns: Free returns are available within 30 days from the date of purchase for any reason.
- Contact: Refer to the KEEPEEZ official website or product packaging for the most current customer support contact information.


