Introduction
This document serves as the instruction manual for the Generic Replacement Remote Control, designed for various Furrion TV models including FEHD19S0N, FEFD22S0A, and FEFS55F7A LCD LED HDTVs. This remote is a dedicated replacement and aims to provide essential control functions for your television, projector, or audio/video players.
It is important to note that as a replacement unit, some advanced or specific functions present on your original remote control may not be available or fully supported by this replacement. This remote is tested for functionality before dispatch to ensure stable performance and a farther transmitting distance.
Key features include: no programming or setup required (simply install batteries), durable ABS material construction, and sensitive, low power consumption operation.
Product Overview

Figure 1: Front view of the replacement remote control. This image displays the full layout of the remote, including the power button, numerical keypad, navigation buttons, volume and channel controls, and various function buttons for TV, projector, and audio/video players.
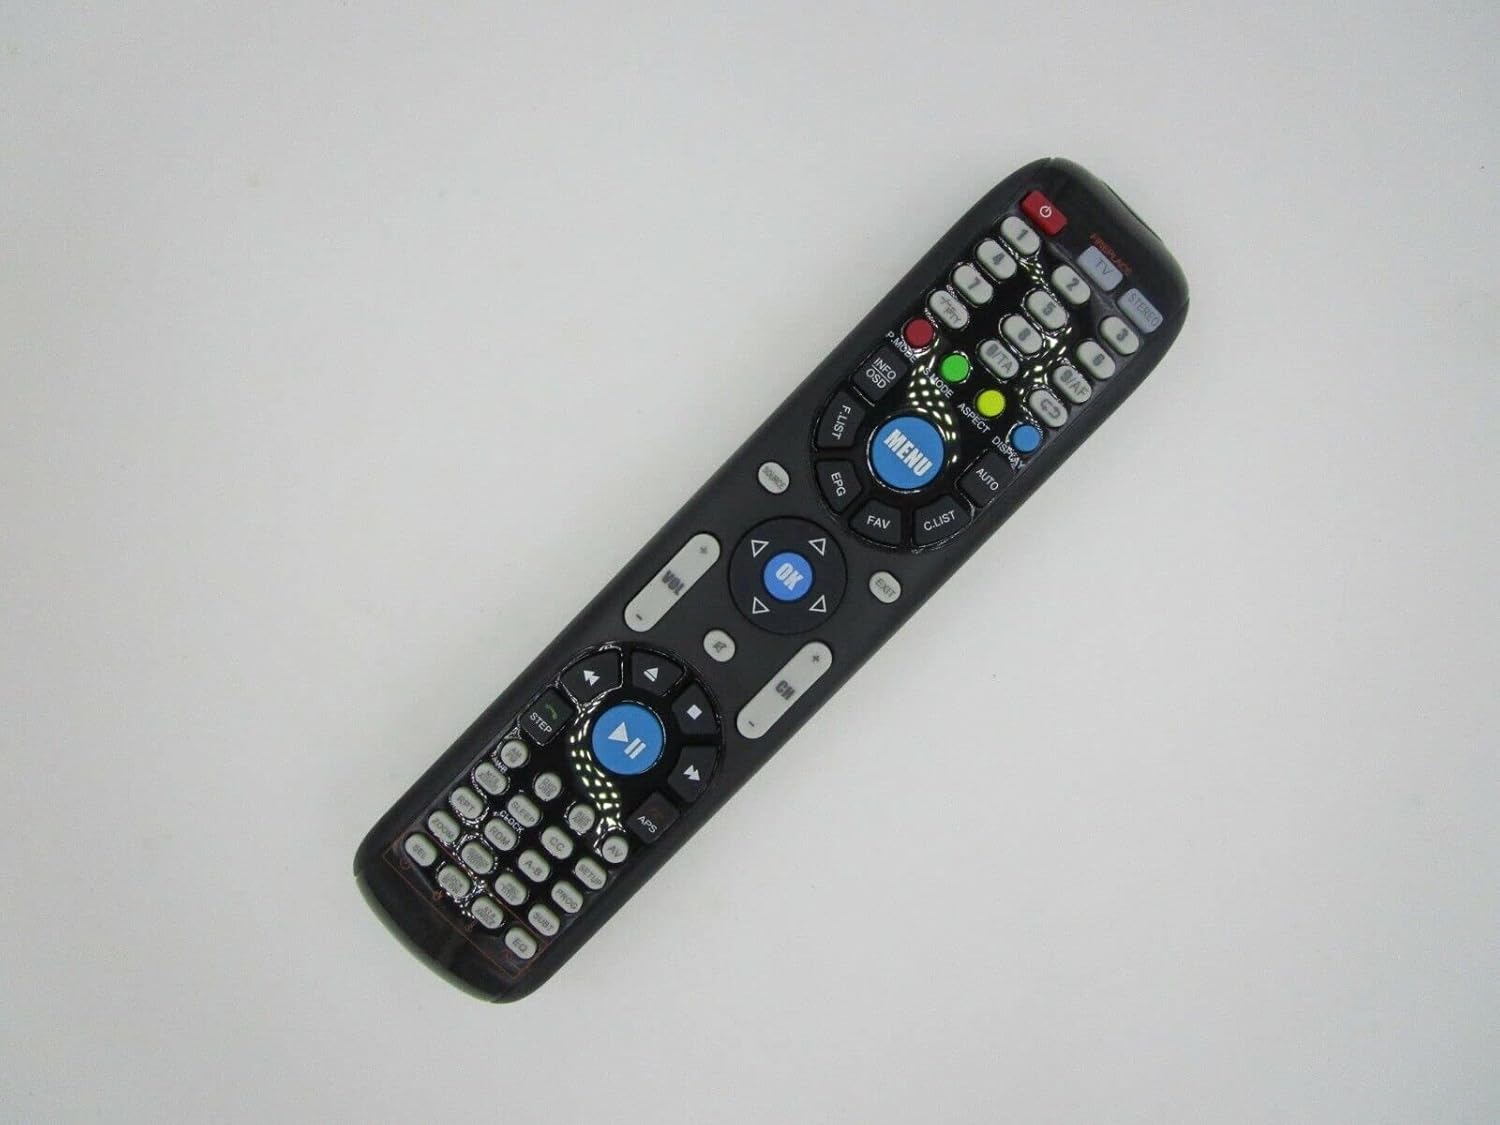
Figure 2: Angled view of the replacement remote control. This perspective highlights the ergonomic shape and the arrangement of buttons from a slightly elevated side angle, providing a better sense of its physical form.

Figure 3: Close-up view of the central buttons on the replacement remote control. This detailed image focuses on the MENU, OK, navigation (up, down, left, right), volume, and channel buttons, along with playback controls, illustrating their labels and layout for easy identification.
Setup
Battery Installation
This remote control requires batteries for operation, which are not included in the package. Please ensure you have the correct type and quantity of batteries before proceeding.
- Locate the battery compartment on the back of the remote control.
- Slide open the battery compartment cover.
- Insert the new batteries, ensuring the positive (+) and negative (-) terminals align correctly with the markings inside the compartment.
- Close the battery compartment cover securely.
Important: Do not mix old and new batteries or different types of batteries. This can lead to reduced performance or battery leakage.
Initial Use
This replacement remote control is designed for immediate use with compatible models. No programming or complex setup is required. Once batteries are correctly installed, the remote should be ready to operate your device.
Operating Instructions
Point the remote control directly at the infrared (IR) receiver on your television or compatible device. Ensure there are no obstructions between the remote and the device.
Basic Functions
- Power Button: Turns the device on or off.
- Numerical Keypad (0-9): Used for direct channel input or other numerical selections.
- Volume Up/Down (VOL +/-): Adjusts the audio volume.
- Channel Up/Down (CH +/-): Changes the television channel.
- Mute Button: Toggles audio mute on/off.
- Menu Button: Accesses the device's main menu.
- Navigation Buttons (Up, Down, Left, Right): Used to navigate through menus and options.
- OK/Enter Button: Confirms selections within menus.
- Source/Input Button: Cycles through available input sources (e.g., HDMI, AV).
- Playback Controls (Play, Pause, Stop, Rewind, Fast Forward): For controlling media playback on compatible devices.
Please note that the functionality of specific buttons may vary slightly depending on the model of your television or device. As a replacement remote, some advanced or smart TV functions may not be supported.
Maintenance
Proper care and maintenance will extend the life of your remote control.
- Cleaning: Use a soft, dry cloth to clean the remote control. For stubborn dirt, a slightly damp cloth can be used, but ensure no moisture enters the remote. Do not use abrasive cleaners or solvents.
- Battery Replacement: Replace batteries when the remote's performance diminishes or it stops responding. Always replace all batteries at the same time with new ones of the same type.
- Storage: If the remote control will not be used for an extended period, it is advisable to remove the batteries to prevent leakage and potential damage to the remote.
- Avoid Damage: Do not drop the remote control, expose it to extreme temperatures, or immerse it in water.
Troubleshooting
Remote Not Responding
- Check Batteries: Ensure batteries are correctly installed with the correct polarity (+/-) and are not depleted. Replace with fresh batteries if necessary.
- Line of Sight: Make sure there are no obstructions between the remote control and the device's IR receiver. The remote requires a clear line of sight.
- Distance: Ensure you are within the effective operating range of the remote control.
- Device Power: Confirm that the television or device you are trying to control is powered on and functioning correctly.
Certain Functions Not Working
As a replacement remote, it may not support all functions of your original remote control. This is not indicative of a defect. Please refer to the product description or contact the seller if you have specific concerns about unsupported functions.
If the issue persists after following these steps, it is recommended to verify the compatibility of the remote with your specific device model or contact customer support.
Specifications
| Property | Value |
|---|---|
| Brand | Generic |
| Compatible Devices | Television, Audio/Video Players, Projector |
| Wireless Communication | Infrared (IR) |
| Material | ABS/Plastic |
| Battery Requirement | Not included |
| Max Number of Supported Devices | 1 |
| Color | FEFD22S0A & FEFD22S0D (refers to compatible models) |
Warranty and Support
This product is a replacement remote control. For specific warranty information, please refer to the terms and conditions provided by the seller at the time of purchase, or contact the seller directly.
For further assistance, troubleshooting not covered in this manual, or inquiries regarding compatibility, please reach out to the customer support channel provided by the retailer or seller from whom you purchased this remote control. Providing your original remote part number or unit model can assist in resolving specific issues.
