
1. Introduction
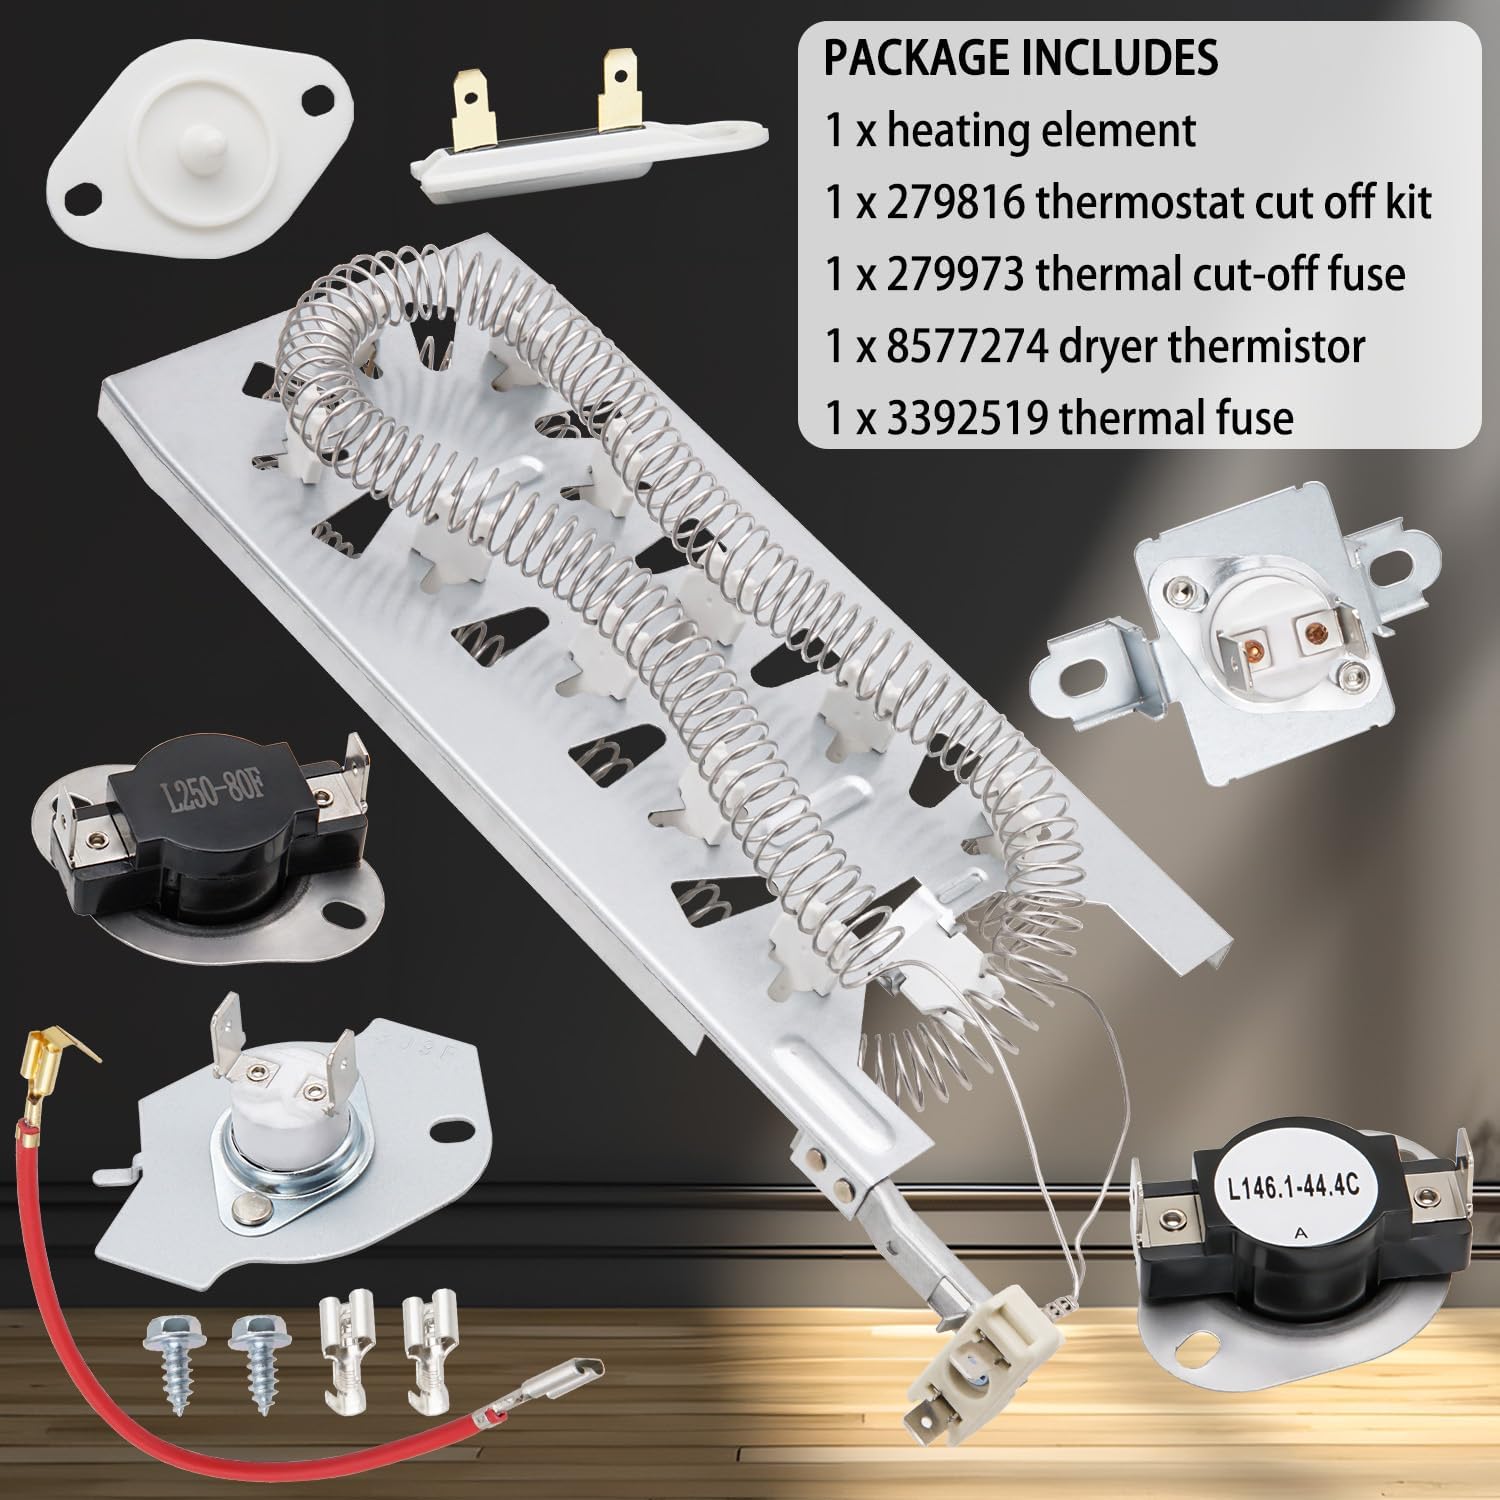
This manual provides essential information for the installation and maintenance of the Siwdoy Dryer Heating Element Kit. This kit is designed as a replacement for various dryer models, restoring proper heating function. It includes a heating element, thermal cut-off kit, thermal fuses, and a thermistor.
Kit Components
- 1 x Dryer Heating Element
- 1 x 279816 Thermostat Cut-off Kit
- 1 x 279973 Thermal Cut-off Fuse
- 1 x 8577274 Dryer Thermistor
- 1 x 3392519 Dryer Thermal Fuse
2. Compatibility
This heating element kit is compatible with a wide range of dryer models. Please verify your dryer's model number against the list below to ensure proper fitment. If your model is not listed, please contact customer support for assistance.
Compatible Models Include:
- WED5100HC0
- WED5100HC1
- WED5100HC2
- WED5100HC3
- WED5100HW0
- WED5100HW1
- WED5100HW2
- WED5100HW3
- WED5500BW0
- WED5500XL0
- WED5500XW0
- WED5500XW1
- WED5550XW0
- WED5600XW0
- WED5600XW1
- WED5605MC0
- WED5605MW0
- WED560LHW0
- WED560LHW1
- WED560LHW2
- WED5610XW0
- WED5610XW1
- WED5620HW0
- WED5620HW1
- WED5620HW2
- WED5700AC0
- WED5700AC1
- WED5700XL0
- WED5700XW0
- WED5800BC0
- WED5800BW0
- WED5810BW0
- WED6120HC0
- WED6120HC1
- WED6120HC2
- WED6120HC3
- WED6120HW0
- WED6120HW1
- WED6120HW2
- WED6120HW3
- WED6605MC0
- WED6605MW0
- WED6620HC0
- WED6620HC1
- WED6620HC2
- WED6620HW0
- WED6620HW1
- WED6620HW2
- WED7120HC0
- WED7120HC1
- WED7120HC2
- WED7120HC3
- WED7120HW0
- WED7120HW1
- WED7120HW2
- WED7120HW3
- WED7540FW1
- WED7590FW1
- WED75HEFW1
- WED8120HC0
- WED8120HW0
- WED8127LC0
- WED8127LC1
- WED8127LW0
- WED8127LW1
- WED8300SB2
- WED8300SE2
- WED8300SW2
- WED8410SW2
- WED8540FW1
- WED8540FW2
- WED85HEFC1
- WED85HEFW2
- WED8500DC4
- WED8500DR4
- WED8500DW4
- WED85HEFW1
- WED85HEFC2
- WED8620HC0
- WED8620HC1
- WED8620HC2
- WED8620HW0
- WED8620HW1
- WED8620HW2
- WED9050XW0
- WED90HEFC1
- WED90HEFC2
- WED90HEFW1
- WED90HEFW2
- WED9150WW0
- WED9250WL0
- WED9250WR0
- WED9250WW0
- WED9270XL0
- WED9270XR0
- WED9270XW0
- WED92HEFBD1
- WED92HEFBD2
- WED92HEFC1
- WED92HEFC2
- WED92HEFU1
- WED92HEFU2
- WED92HEFW1
- WED92HEFW2
- WED9620HBK0
- WED9620HBK1
- WED9620HBK2
- WED9620HC0
- WED9620HC1
- WED9620HC2
- WED9620HW0
- WED9620HW1
- WED9620HW2
- GEW9200LL1
- GEW9200LL2
- GEW9200LQ0
- GEW9200LQ1
- GEW9200LQ2
- GEW9200LT1
- GEW9200LT2
- GEW9200LW0
- GEW9200LW1
- GEW9200LW2
- GEW9250PL0
- GEW9250PT0
- GEW9250PT1
- GEW9250PW0
- GEW9250PW1
- GEW9250SU0
- GEW9260PL0
- GEW9260PL1
- GEW9260PW0
- GEW9260PW1
- GEW9868KL0
- GEQ8811PW1
- GEQ8858KQ0
- GEQ9800PW1
- GEQ9800PW2

3. Specifications
Detailed specifications for each component included in the kit:
GEW9200LW1 Dryer Heating Element
- Function: Produces heat during dryer operation.
- Material: Metal / Ceramic with a coiled nickel-chrome alloy wire.
- Rating: 5400 Watts, 240 Volts.
- Terminals: 2-5/16 inches.
279816 Thermostat Kit
- Components: Thermal cut-off fuse, high-limit thermostat, electrical connection hardware.
- Replaces Part Numbers: 3399848, 3977393, AP3094244, WP279816, 279816, N197.

279973 Dryer Thermal Fuse
- Function: Safety device that blows to prevent overheating.
- Replaces Part Numbers: 279973VP, 3391913, 3404151, 3404152, 3977395, 8318314, 897710, AP3094323.
8577274 Thermistor
- Function: Monitors and regulates dryer temperature.
- Replaces Part Numbers: WP8577274, AP6013514, 8577274, 3390292, 3406294, 3976615, 772546, ER8577274, PS11746740, WP8577274VP.
3392519 Dryer Thermal Fuse
- Function: Another safety device to prevent overheating.
- Replaces Part Numbers: 3388651, 3392519, 694511, 80005, WP3392519VP, ET401.

4. Safety Information
WARNING: Before attempting any repair or installation, always disconnect the dryer from its power source to prevent electrical shock. Failure to do so can result in serious injury or death.
- Wear appropriate personal protective equipment, such as work gloves, to protect hands from sharp edges and potential burns.
- Ensure the work area is well-lit and clear of obstructions.
- If you are unsure about any step of the installation process, consult a qualified appliance technician.
- Keep children and pets away from the work area.
5. Installation Instructions
This section provides general guidance for replacing dryer heating elements and related components. Specific steps may vary depending on your dryer model. It is recommended to consult your dryer's service manual for precise instructions.
General Installation Steps:
- Disconnect Power: Unplug the dryer from the electrical outlet or turn off the circuit breaker supplying power to the dryer.
- Access Components: Depending on your dryer model, you may need to remove the back panel, front panel, or top panel to access the heating element assembly and thermal components. Take a photo before disassembly to confirm the original installation location of wires and components.
- Remove Old Components: Carefully disconnect the wiring from the old heating element, thermal fuses, thermostat, and thermistor. Note the position of each wire. Remove the mounting screws or clips holding the components in place.
- Install New Components: Install the new heating element, thermal fuses, thermostat, and thermistor in the reverse order of removal. Ensure all connections are secure and components are properly seated.
- Reassemble Dryer: Reattach any panels removed during disassembly. Ensure all screws are tightened.
- Restore Power and Test: Plug the dryer back into the electrical outlet or turn on the circuit breaker. Run a short cycle to verify that the dryer heats correctly and operates without issues.
Important: The edge of the heating element can be sharp. Please wear gloves before installation to prevent scratching your skin.
6. Operating Instructions
Once the heating element kit components are correctly installed, your dryer should resume normal operation. Refer to your dryer's original user manual for specific operating instructions, cycle selections, and care guidelines.
7. Maintenance
Regular maintenance of your dryer can help prolong the life of its components, including the heating element kit. Key maintenance tips include:
- Clean Lint Filter: Clean the lint filter before or after every load to ensure proper airflow and prevent overheating.
- Inspect Venting: Periodically check the dryer's exhaust vent for blockages. A clogged vent can cause the dryer to overheat and lead to premature failure of thermal fuses and the heating element.
- Professional Inspection: Consider a professional inspection of your dryer's internal components and venting system every few years.
8. Troubleshooting
If your dryer is experiencing issues after installing the kit, consider the following common problems:
- Dryer Not Heating: This often indicates a problem with the heating element itself, a thermal fuse, or the high-limit thermostat. Ensure all electrical connections are secure and that the new components are functioning correctly. A blown thermal fuse will prevent the heating element from receiving power.
- Dryer Overheating: Overheating can be caused by a faulty thermistor, a malfunctioning high-limit thermostat, or restricted airflow due to a clogged lint filter or vent. Check these components and ensure proper ventilation.
- Dryer Not Starting: While less common for heating element issues, a blown thermal fuse can sometimes prevent the dryer from starting at all as a safety measure.
If troubleshooting steps do not resolve the issue, it is recommended to consult a qualified appliance repair technician.
9. Warranty and Support
This Siwdoy Dryer Heating Element Kit comes with a 1-year warranty. If you encounter any issues or are not completely satisfied with your purchase, please contact our service team. We are committed to assisting you and ensuring your needs are met.
For questions regarding compatibility or any other inquiries, please reach out to us through the customer questions and answer section on the product page or send a message via the Siwdoy storefront.