1. Introduction
The Canyon Precede:ON Comfort 7 is an electric city bike designed for effortless urban mobility, combining power, comfort, and style. It features a powerful Bosch Performance Line motor and a fully integrated 625Wh battery, providing smooth and efficient pedal assist for daily commutes and weekend adventures. The bike is equipped with a step-through aluminum frame, an adjustable stem, an ergonomic saddle, and a suspension seatpost for a comfortable riding experience. Its Gates Carbon Belt Drive and Shimano Nexus hub ensure a silent, low-maintenance drivetrain. Integrated lights, a sturdy rear rack, and durable fenders make it ideal for urban environments.
Key Features:
- Effortless urban mobility – The Precede:ON Comfort 7 is a sleek, powerful e-bike designed for smooth, stress-free city rides with premium comfort and style.
- Bosch Performance Line motor – A 75 Nm mid-drive motor delivers smooth, natural-feeling pedal assist up to 28 mph, perfect for commuting and cruising.
- Long-range 625Wh battery – Go the extra mile with a high-capacity Bosch PowerTube 625Wh battery, seamlessly integrated for a clean, modern look.
- Premium comfort & control – A step-through aluminum frame, riser cockpit, and suspension fork ensure an upright, relaxed riding position with a plush feel.
- Fully equipped for city life – Integrated lights, a sturdy rear rack, fenders, and a Gates Carbon Belt Drive for a quiet, low-maintenance ride.
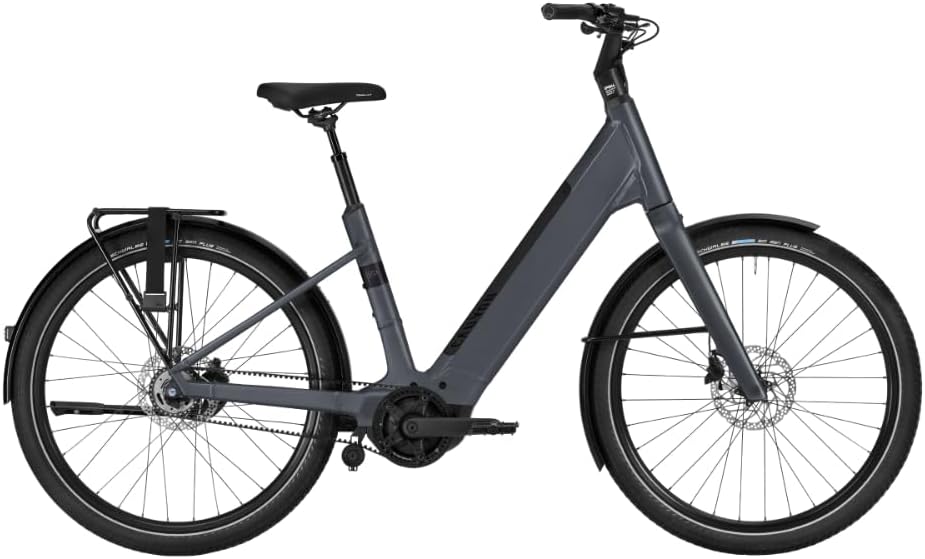
Figure 1: Canyon Precede:ON Comfort 7 Electric Bicycle.
2. Setup and Assembly
Your Canyon Precede:ON Comfort 7 is designed for easy assembly. Please follow these steps carefully to ensure proper setup and safe operation.
2.1. Unboxing and Initial Inspection
Carefully open the shipping box. Remove all packaging materials and inspect the bicycle and its components for any signs of damage. Keep all packaging until assembly is complete and you are satisfied with the product.
2.2. Components Overview
Before starting assembly, identify all included components:
- Torque Wrench and Bit Set (2.5mm, 6mm, 4mm bits)
- Assembly Paste
- Dry Bag
- Pedals and Pedal Spanner (Note: Pedals are marked 'L' or 'R' for left/right installation)
- Abus Lock (included with Precede:ON Comfort 7)
- Battery Keys
- Bosch Charging Cable and 2A Charger
- Seatpost and Saddle Assembly
- Seatpost Clamp and Cover
2.3. Handlebar Installation
- Remove the protective cardboard from the steerer tube.
- Apply a small amount of assembly paste to the steerer tube.
- Carefully slide the handlebar assembly onto the steerer tube, ensuring cables are not pinched.
- Align the cockpit (handlebars) with the front wheel.
- Using the 2.5mm hex bit on the torque wrench, tighten the top cap bolt to 1 Nm.
- Using the 4mm hex bit on the torque wrench, tighten the two stem bolts to 12 Nm.

Figure 2: Handlebar assembly showing integrated design.
2.4. Front Wheel Attachment
- Remove the protective spacer from the front brake caliper.
- Carefully insert the front wheel into the fork dropouts, ensuring the brake rotor slides correctly into the brake caliper.
- Insert the front axle through the hub and tighten it using the 6mm hex bit on the torque wrench to 14 Nm.

Figure 3: Front wheel and disc brake detail.
2.5. Seatpost and Saddle Adjustment
- Insert the seatpost and saddle assembly into the seat tube of the frame.
- Place the seatpost clamp and cover over the seat tube.
- Adjust the saddle height to your preference. Ensure the minimum insertion mark on the seatpost is not visible.
- Using the 4mm hex bit on the torque wrench, tighten the seatpost clamp bolt to 7 Nm.

Figure 4: Suspension seatpost for enhanced comfort.
2.6. Pedal Installation
Note: Pedals are specific to left (L) and right (R) sides. Use bike pedal grease (not included) on the pedal threads before installation.
- Identify the left (L) and right (R) pedals. The markings are typically on the pedal spindle or body.
- Thread the right pedal (R) into the right crank arm (clockwise to tighten).
- Thread the left pedal (L) into the left crank arm (counter-clockwise to tighten).
- Use the provided pedal spanner to firmly tighten both pedals.

Figure 5: Rear wheel assembly with belt drive and disc brake.
2.7. Front Light Adjustment
Adjust the angle of the integrated front light to ensure optimal visibility and to avoid dazzling oncoming traffic. Use the appropriate hex bit (likely 3mm) to loosen, adjust, and then re-tighten the light's mounting bolt to 2.5 Nm.
2.8. Initial Battery Charging
Before your first ride, fully charge the Bosch 625Wh battery. Connect the charging cable to the charger, then plug the charger into the bike's charging port (located near the motor) and into a standard wall outlet. The battery indicator on the display will show charging progress.
3. Operating Your Electric Bicycle
3.1. Powering On/Off and Assist Levels
To power on your Precede:ON Comfort 7, press the power button on the Bosch display unit. Use the '+' and '-' buttons to cycle through the different assist modes (e.g., Eco, Tour, Sport, Turbo) to find the level of assistance that suits your riding conditions. To power off, press and hold the power button.
3.2. Riding Tips
- Gear Shifting: The Shimano Nexus hub allows for smooth gear changes even when stationary, which is ideal for city riding. Shift gears proactively to maintain an efficient pedaling cadence.
- Braking: The hydraulic disc brakes provide strong and consistent stopping power in all weather conditions. Apply both brakes simultaneously for optimal control and shorter stopping distances.
- Safety: Always wear a helmet. Obey all traffic laws and signals. Be aware of your surroundings and ride defensively.
3.3. Battery Management
Monitor your battery level on the Bosch display. For optimal battery life, avoid completely draining the battery regularly. Charge the battery in a cool, dry place. If storing the bike for an extended period, ensure the battery is charged to 60-80% and check it periodically.
4. Maintenance and Care
Regular maintenance will prolong the life and performance of your Precede:ON Comfort 7.
4.1. Cleaning
Clean your bike regularly with mild soap and water. Avoid high-pressure washers, especially near electrical components and bearings. Dry thoroughly after washing.
4.2. Tire Pressure
Check tire pressure before each ride. The recommended pressure range is usually indicated on the tire sidewall. Proper tire pressure improves efficiency, comfort, and reduces the risk of punctures.
4.3. Brake System
Inspect brake pads for wear and replace them when necessary. Ensure brake levers feel firm and responsive. If you notice any sponginess or reduced braking power, have your hydraulic brakes serviced by a qualified technician.
4.4. Gates Carbon Belt Drive
The Gates Carbon Belt Drive is designed for low maintenance. Keep it clean from excessive dirt and debris. Unlike a chain, it does not require lubrication.
4.5. Battery Care
Store the battery in a moderate temperature range (ideally 10-20°C or 50-68°F). Avoid extreme hot or cold temperatures. Do not expose the battery to direct sunlight for prolonged periods. Only use the original Bosch charger.
5. Troubleshooting
If you encounter issues with your Precede:ON Comfort 7, consider these common troubleshooting steps:
- No Power: Check if the battery is properly seated and charged. Ensure the power button on the display is pressed firmly.
- Motor Not Assisting: Verify that an assist mode is selected on the display. Check for any error codes on the display and consult the Bosch eBike system manual for their meaning.
- Brakes Squealing: This can be normal for disc brakes, especially in wet conditions. If persistent, clean the rotors and pads, or consider professional brake adjustment.
- Unusual Noises: Inspect for loose components, especially around the wheels, handlebars, and seatpost. Ensure all bolts are tightened to their specified torque values.
For persistent issues or complex repairs, please contact Canyon customer support or a certified e-bike technician.
6. Specifications
| Attribute | Value |
|---|---|
| Bike Type | Electric Bike, Commuting Bike |
| Age Range (Description) | Adult |
| Brand | Canyon |
| Number of Speeds | 5 |
| Color | Anchor Grey |
| Wheel Size | 27.5 Inches |
| Frame Material | Aluminum |
| Suspension Type | Rigid |
| Special Feature | Multi-Speed, Durable, Rechargeable, Dual Disc Brake, Adjustable Seat |
| Included Components | Reflectors |
| Size | One Size |
| Brake Style | Disc |
| Specific Uses For Product | Road, Gravel |
| Model Name | Precede:ON Comfort 7 |
| Power Source | Electric |
| Wheel Material | Aluminum |
| Year | 2024 |
| Lithium Battery Energy Content | 33.3 Watt Hours |
| Warranty Type | Limited |
| Maximum Weight Recommendation | 260 Pounds |
| Assembly Required | Yes |
| Bicycle Gear Shifter Type | Trigger |
| Bicycle Drivetrain Type | Belt Drive |
| Electric Assist Type | Mid-drive |
| Manufacturer | Canyon Bicycles |
| Item Package Dimensions L x W x H | 69.5 x 40 x 22.5 inches |
| Package Weight | 31.75 Kilograms |
| Item Dimensions LxWxH | 75.3 x 29.5 x 42.7 inches |
| Brand Name | Canyon |
| Warranty Description | 6 year warranty on Canyon Engineered Components, All other components follow components manufacturers warranty policy |
| Material | Aluminum |
| ASIN | B0DPLLWNN8 |
| Date First Available | December 4, 2024 |
7. Warranty and Support
Canyon offers a 6-year warranty on Canyon Engineered Components. All other components follow the respective manufacturers' warranty policies. For detailed warranty information, please refer to the documentation included with your bicycle.
Your purchase includes a 30-day return policy, allowing you to ride with confidence. If the product is not perfect, you can send it back. For customer support, assistance with assembly, or any other inquiries, please visit the official Canyon website or contact their customer service team. You can also find additional support resources and FAQs on the Amazon product page.