1. Introduction
This manual provides detailed instructions for the installation, operation, and maintenance of your Dzxiaso QLED 8-Core Car Stereo system, designed specifically for Toyota Camry models manufactured between 2007 and 2011. Please read this manual thoroughly before installation and use to ensure proper functionality and to maximize your product experience.
2. Package Contents
Verify that all items listed below are included in your package:
- Android Car Stereo Unit
- Dash Frame Kit with Wire Harness and CANBUS Box
- GPS Module
- Radio Antenna Adapter
- USB Cables
- Back Camera
- Installation Instructions
- User Manual (this document)

Figure 2.1: Overview of included components, including the stereo unit, wiring, GPS antenna, CANBUS, USB cables, and backup camera.
3. Setup and Installation
This section outlines the general steps for installing the car stereo. Professional installation is recommended. Ensure the vehicle's battery is disconnected before beginning installation.
- Preparation: Gather necessary tools (pry tool, screwdriver). Disconnect the negative terminal of the car battery.
- Remove Factory Radio: Carefully remove the existing factory radio and dashboard trim using a pry tool.
- Connect Wiring Harness: Connect the provided wiring harness and CANBUS box to the vehicle's existing wiring. Ensure all connections are secure.
- Install GPS Antenna: Mount the GPS module in a location with a clear view of the sky, typically on the dashboard or under the windshield.
- Connect USB Cables: Route the USB cables to a convenient location, such as the glove compartment or center console.
- Install Backup Camera (Optional): If installing the included backup camera, route its cable from the rear of the vehicle to the stereo unit and connect it.
- Mount New Stereo: Secure the new Dzxiaso QLED 8-Core stereo unit into the dashboard opening using the provided frame kit.
- Reconnect Battery: Reconnect the vehicle's battery and test the stereo's functionality.
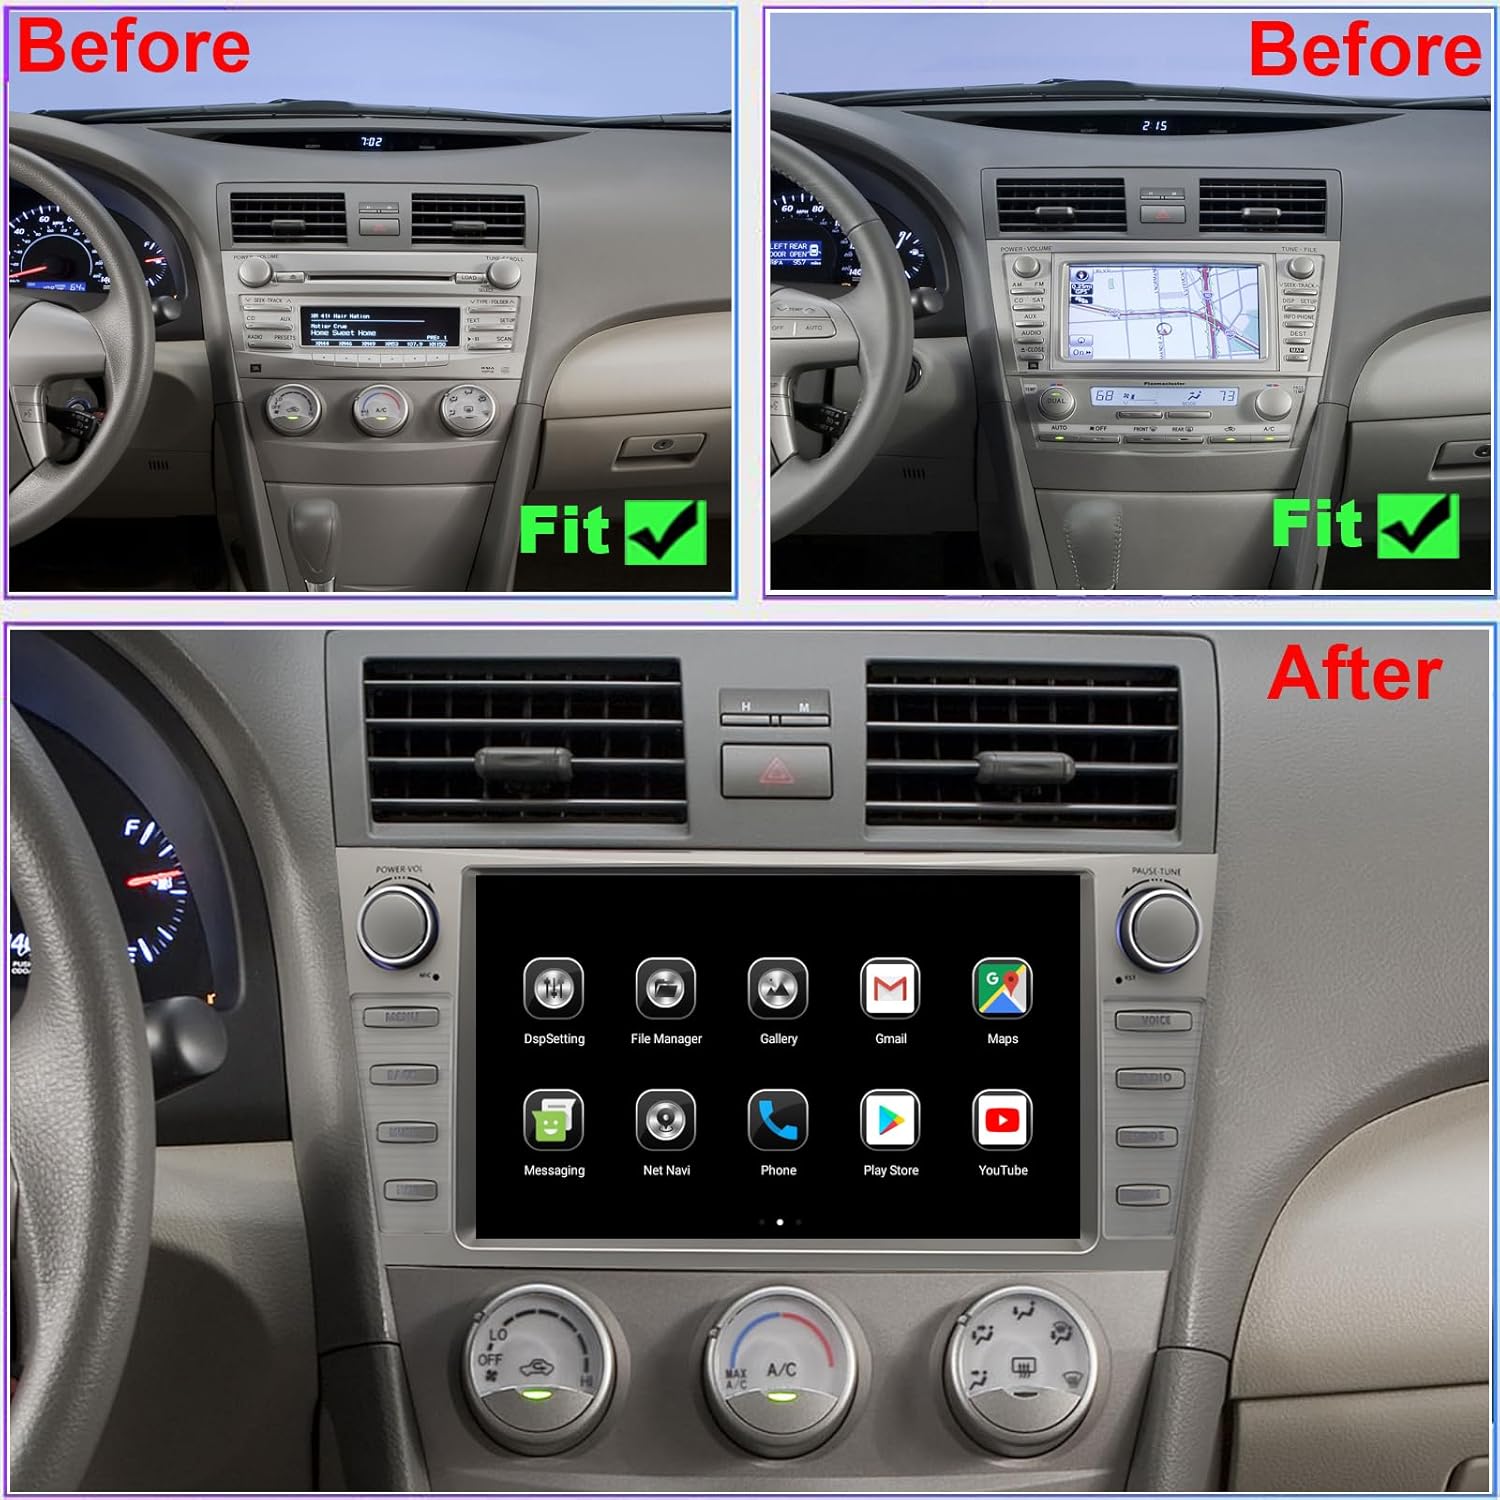
Figure 3.1: Visual comparison of the Toyota Camry dashboard before and after the installation of the Dzxiaso QLED 8-Core Car Stereo.
Video 3.1: An overview of the Dzxiaso QLED 8-Core Car Stereo installed in a Toyota Camry (2007-2011), demonstrating its appearance and basic interface navigation.
4. Operating Instructions
4.1. Basic Functions
- Power On/Off: Press and hold the power button (usually a knob on the left) to turn the unit on or off. A short press typically mutes/unmutes audio.
- Volume Control: Rotate the volume knob to adjust audio levels.
- Touch Screen: Navigate the interface by tapping and swiping on the 9-inch QLED touch screen.
4.2. Wireless CarPlay & Android Auto
The unit supports both wireless Apple CarPlay and wired Android Auto for seamless smartphone integration.
- Connect via Bluetooth: Enable Bluetooth on your smartphone and pair it with the car stereo.
- Activate CarPlay/Android Auto: Once paired, select the CarPlay or Android Auto icon on the stereo's home screen. Follow on-screen prompts to complete the connection.
- Voice Control: Use voice commands (e.g., "Hey Siri" or "OK Google") for navigation, calls, and music playback.
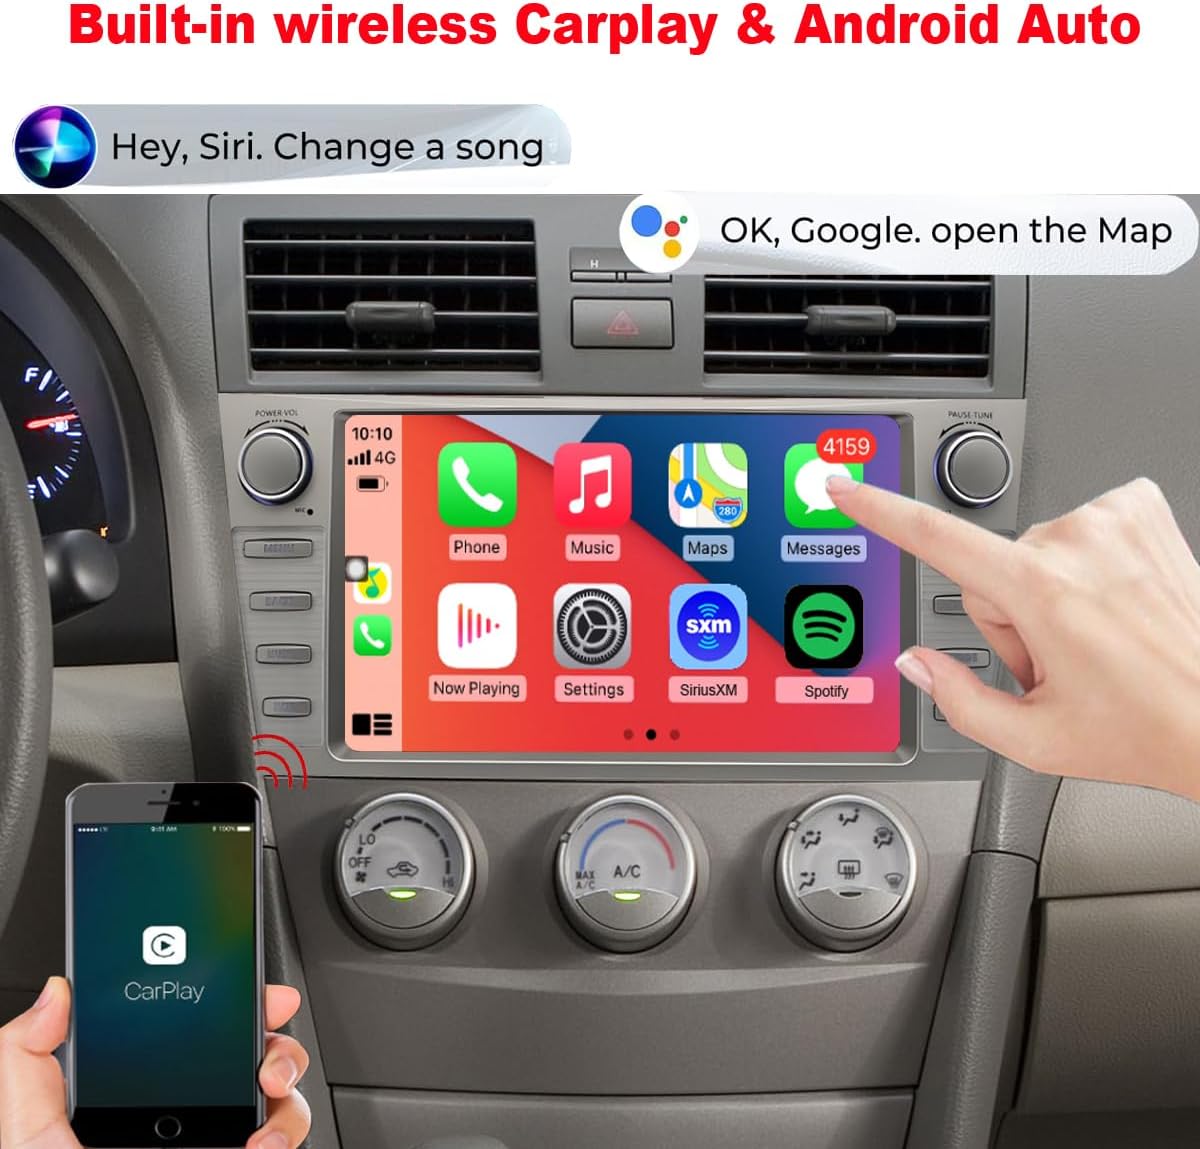
Figure 4.1: The car stereo display showcasing the Apple CarPlay interface, allowing access to phone functions, music, navigation, and messaging.

Figure 4.2: A smartphone screen showing the CarPlay logo, confirming its connection to the car stereo system.
4.3. Navigation (GPS)
The built-in GPS module provides accurate navigation. Ensure the GPS antenna is properly installed for optimal signal reception.
- Access the navigation application from the home screen.
- Enter your destination using the on-screen keyboard or voice commands.
- Follow the displayed route and audio prompts.
4.4. FM Radio & Bluetooth Audio
- FM Radio: Select the "Radio" application. Use the touch screen to scan for stations or manually tune to a frequency.
- Bluetooth Audio: Pair your device via Bluetooth. Select the "Bluetooth Music" application to stream audio from your smartphone.

Figure 4.3: The car stereo interface showing both Bluetooth music playback controls and the FM radio tuning screen.
4.5. Backup Camera
When the vehicle is shifted into reverse, the display automatically switches to the backup camera view, providing visual assistance for parking and maneuvering.

Figure 4.4: The car stereo screen showing the rear view from the backup camera, complete with parking guidelines, and examples of the camera's performance in both daytime and nighttime conditions.
4.6. Digital Sound Processor (DSP)
The integrated DSP allows for advanced audio customization. Access the DSP settings to adjust equalizer bands, sound field, and other audio parameters to optimize your listening experience.

Figure 4.5: Screenshots illustrating the Digital Sound Processor (DSP) equalizer and sound field adjustment options available on the car stereo interface.

Figure 4.6: A diagram illustrating the concept of speaker sound delay adjustments to create an optimized audio staging effect within the vehicle's cabin.
5. Maintenance
- Screen Cleaning: Use a soft, lint-free cloth to gently wipe the QLED touch screen. Avoid abrasive cleaners or solvents.
- Software Updates: Periodically check for available software updates to ensure optimal performance and access to new features. Updates can typically be performed via Wi-Fi.
- General Care: Keep the unit free from dust and extreme temperatures.
6. Troubleshooting
| Problem | Possible Cause | Solution |
|---|---|---|
| Unit does not power on. | Loose power connection, blown fuse. | Check wiring harness connections. Inspect vehicle's fuse box for blown fuses. |
| No sound. | Volume muted, incorrect audio source, loose speaker wires. | Increase volume. Select correct audio source. Check speaker wire connections. |
| GPS signal weak or inaccurate. | GPS antenna obstructed or improperly placed. | Ensure GPS antenna has a clear view of the sky. Reposition if necessary. |
| CarPlay/Android Auto not connecting. | Bluetooth not paired, phone settings, cable issue (for wired Android Auto). | Ensure Bluetooth is on and paired. Check phone settings for CarPlay/Android Auto permissions. Try a different USB cable for wired connections. |
| Screen unresponsive or lagging. | Temporary software glitch, excessive background applications. | Restart the unit. Close unnecessary applications. Perform a factory reset if issues persist (note: this will erase data). |
If you encounter issues not listed here, please contact customer support.
7. Specifications
- Display Size: 9 Inches QLED Touch Screen
- Processor: Android 8-Core CPU
- Operating System: Android
- Connectivity: Wireless CarPlay, Wired Android Auto, Bluetooth, Wi-Fi
- Features: FM Radio, GPS Module, Dual USB Ports, DSP (Digital Sound Processor)
- Compatibility: Toyota Camry 2007, 2008, 2009, 2010, 2011
- Mounting Type: Dashboard Mount
- Audio Output Mode: Stereo
- Item Weight: Approximately 4.09 pounds
- Package Dimensions: 14.21 x 10.59 x 4.69 inches

Figure 7.1: Visual comparison demonstrating the enhanced color reproduction and wider viewing angles of an IPS screen compared to a normal screen.
8. Warranty Information
This product comes with a 6-month warranty from the date of purchase. The warranty covers manufacturing defects and malfunctions under normal use. It does not cover damage caused by improper installation, misuse, accidents, or unauthorized modifications. Please retain your proof of purchase for warranty claims.
9. Customer Support
For technical assistance, troubleshooting, or warranty inquiries, please contact Dzxiaso customer support. Our technical support team is available 24/7 to answer your questions.
Contact Information: Refer to the contact details provided with your purchase or on the official Dzxiaso website.