1. Introduction
Thank you for choosing the MSmask Twin Size Loft Bed. This instruction manual provides essential information for the safe assembly, operation, and maintenance of your new loft bed. This multi-functional bed is designed to maximize space, featuring an integrated L-shaped desk, LED lighting, a charging station, and ample storage shelves. Please read this manual thoroughly before beginning assembly and retain it for future reference.
Important Safety Notice: Always use the ladder to access the loft bed. Do not jump or climb onto the bed from the side. Be cautious of sharp edges. Do not exceed the maximum weight capacity of 400 pounds.

Image 1.1: Fully assembled MSmask Twin Size Loft Bed with L-shaped desk, LED lights, and storage.
2. Package Contents
Before assembly, verify that all components listed below are present and undamaged. If any parts are missing or damaged, please contact MSmask customer service.
- Loft Bed Frame Components (metal pipes, slats)
- L-Shaped Desk Panels
- Charging Station Unit
- LED Light Strip with Controller and Remote
- Storage Shelf Panels (6 tiers)
- Ladder with Self-Adhesive Foam Padding
- Safety Guardrails
- Anti-Tipping Devices (2 units)
- Assembly Hardware (screws, bolts, nuts, washers)
- Necessary Assembly Tools (e.g., Allen wrench)
- Installation Manual

Image 2.1: Overview of the loft bed frame structure and power cord for the charging station.
3. Setup and Assembly
Assembly is required for this product. Please follow the detailed instructions provided in the included Installation Manual. Ensure you have adequate space and assistance if needed. All necessary components and numbered parts are included for a straightforward assembly process.
3.1 L-Shaped Desk and Storage Shelves
The L-shaped desk provides a spacious area for study or leisure. The integrated 4-tier vertical storage organizer allows for convenient placement of books, potted plants, and other items. Assemble these sections according to the manual, ensuring all connections are secure.

Image 3.1: The L-shaped desk area with integrated shelving, providing ample workspace and storage.
3.2 Charging Station Installation
The built-in charging station includes 2 AC outlets, 1 USB port, and 1 Type-C port. Install the charging station into the designated slot on the desk. Ensure the power cord is routed safely and connected to a suitable power outlet.

Image 3.2: Close-up view of the integrated charging station with AC outlets, USB, and Type-C ports.
3.3 LED Lights Installation
The smart LED light strip adds ambient lighting. Attach the LED strip to the designated areas of the bed frame as per the manual. Connect the LED controller and power supply. Refer to the 'Operating Instructions' section for details on controlling the lights.

Image 3.3: The LED light strip installed, illuminating the desk area.
3.4 Ladder Pads
Equipped with self-adhesive foam pads, the ladder rungs can be covered for comfort and to prevent discomfort to feet. Cut the foam pads to the required size and apply them firmly to each ladder rung.

Image 3.4: Close-up of the ladder with self-adhesive foam padding applied to the rungs.
4. Operating Instructions
4.1 LED Lights Operation
The LED lights can be controlled via a remote control or a dedicated smartphone application. Over 60,000 RGB colors are available, along with 29 dynamic modes, music sync, and timing functions. Refer to the LED light kit's specific instructions for pairing the remote or app.
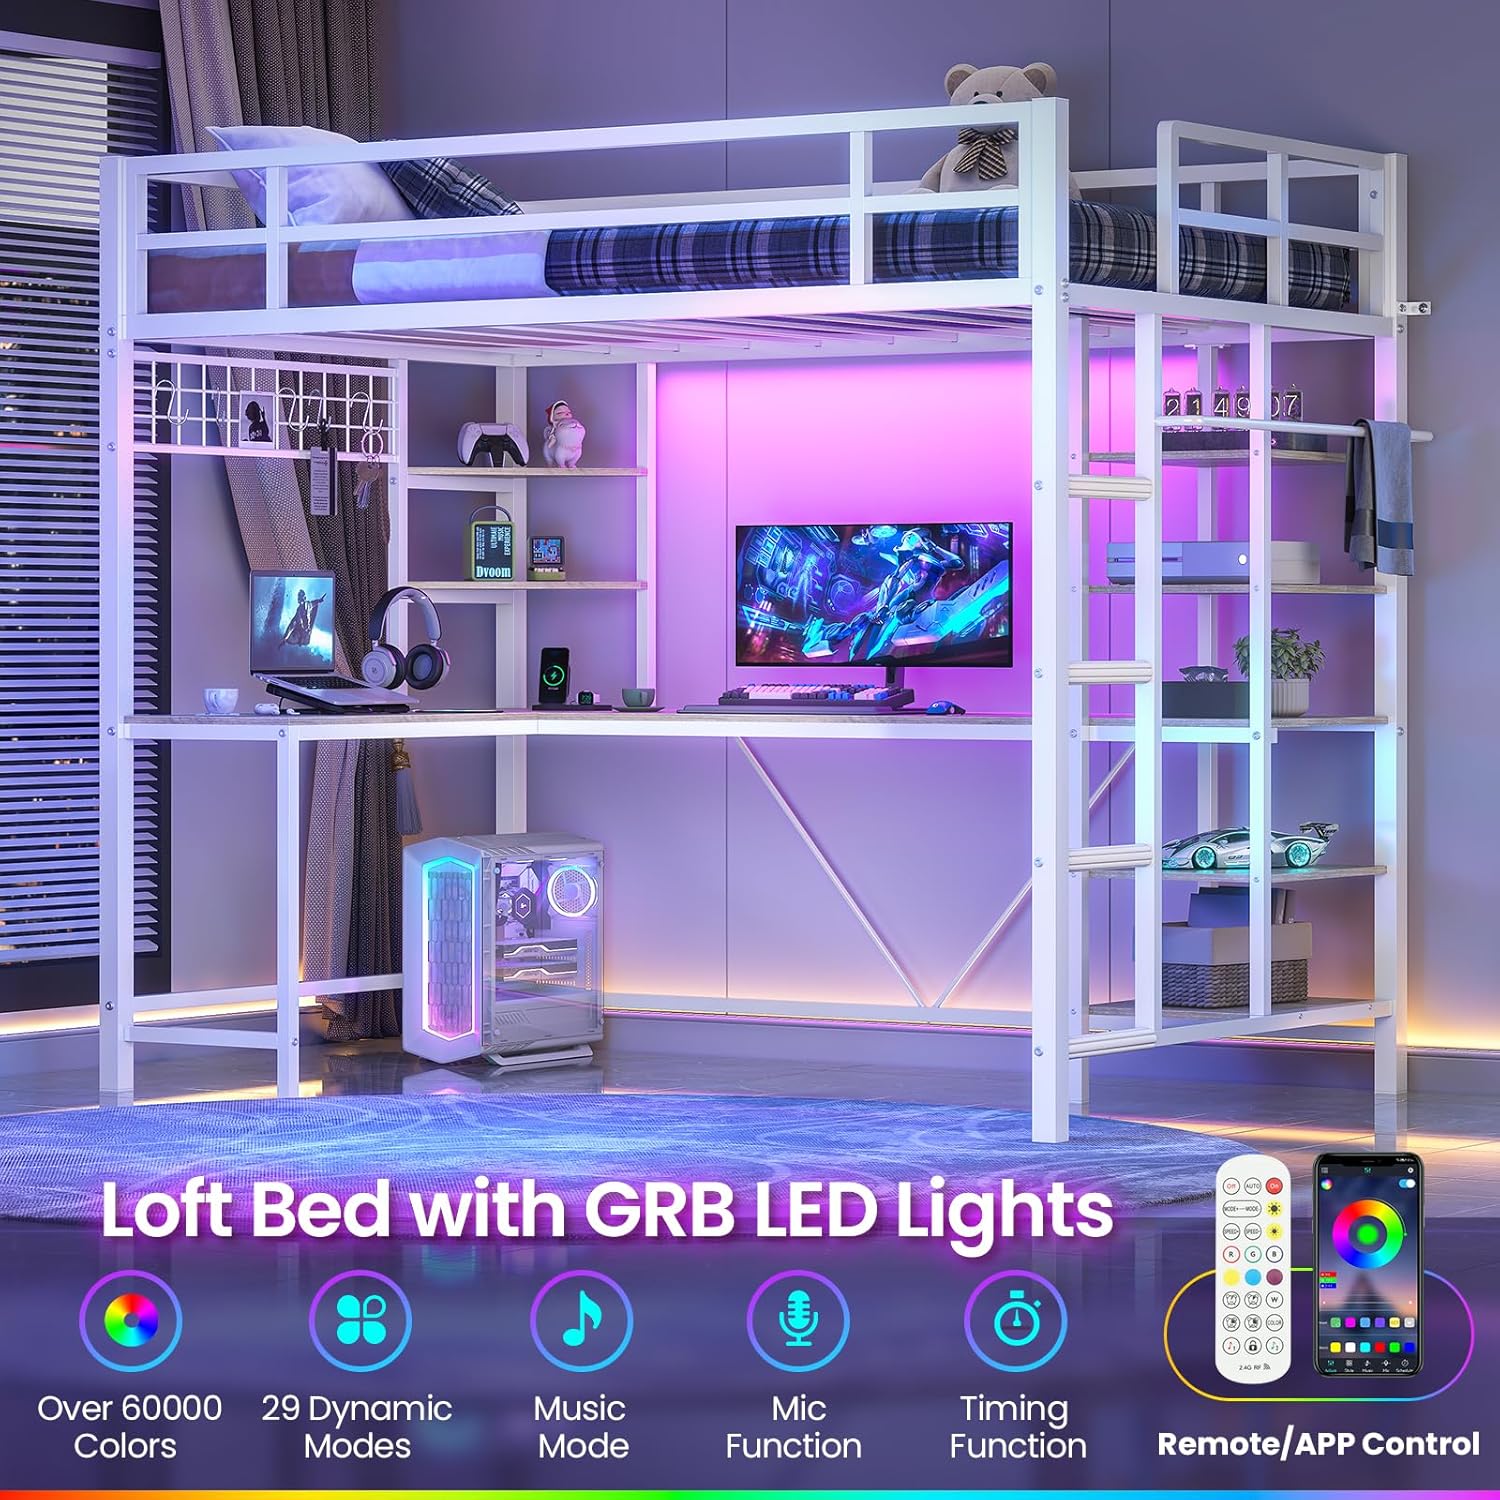
Image 4.1: The loft bed illuminated by the integrated LED lights, showcasing color options.
4.2 Charging Station Usage
Plug your electronic devices into the available AC outlets, USB port, or Type-C port on the charging station. Ensure the charging station is powered by connecting its main plug to a wall outlet. The charging station is designed for convenient power access for various devices.
4.3 General Use
Utilize the L-shaped desk for studying, working, or creative activities. The storage shelves are suitable for organizing personal items, books, and decorations. Always ensure items on shelves are stable and do not obstruct movement or pose a falling hazard.
5. Maintenance and Care
- Cleaning: Wipe down metal surfaces with a soft, damp cloth. Avoid abrasive cleaners that may damage the powder-coated finish. For desk and shelf surfaces, use a mild household cleaner.
- Hardware Check: Periodically inspect all bolts, screws, and connections to ensure they remain tight. Re-tighten any loose hardware to maintain stability and safety.
- Ladder Pads: Check the self-adhesive foam pads on the ladder rungs regularly for wear and tear. Replace them if they become flat or lose their cushioning to ensure continued foot comfort and safety.
- Electrical Components: Ensure the charging station and LED light wiring are free from damage. Do not attempt to repair electrical components yourself; contact a qualified technician if issues arise.
6. Safety Guidelines
Adherence to these safety guidelines is crucial for preventing injury and ensuring the longevity of your loft bed.
- Ladder Use: Always use the provided ladder for ascending and descending the loft bed. Never jump from the bed.
- Weight Capacity: Do not exceed the maximum load-bearing capacity of 400 pounds for the top bunk.
- Guardrails: The top bunk is equipped with raised guardrails (13.4 inches high) on all sides for safety. Ensure they are properly installed and secure.
- Mattress Recommendation: The recommended mattress height is 4-6 inches. This ensures that the guardrail height is at least 5 inches above the mattress surface, providing adequate protection.
- Anti-Tipping Device: Install the anti-tipping devices on both sides of the bed and fix them securely to the wall. This prevents accidental tipping and enhances overall stability.
- Clearance: Ensure there is sufficient overhead clearance between the top bunk and the ceiling.
- Supervision: Children using the loft bed should be supervised, especially during initial use.

Image 6.1: Illustration of the guardrail height and recommended mattress thickness.

Image 6.2: Detail of the anti-tipping device installation, securing the bed to the wall.
7. Troubleshooting
| Problem | Possible Cause | Solution |
|---|---|---|
| Bed feels unstable or wobbly | Loose hardware; improper assembly; anti-tipping device not installed | Check and tighten all bolts and screws. Ensure all parts are assembled correctly according to the manual. Install the anti-tipping device securely to the wall. |
| LED lights not working | Power disconnected; faulty controller/remote; damaged LED strip | Ensure the LED power adapter is plugged in. Check connections to the LED strip and controller. Replace remote batteries if applicable. If issues persist, contact customer service. |
| Charging station not providing power | Power cord disconnected; wall outlet issue; faulty charging unit | Verify the charging station's power cord is fully plugged into a working wall outlet. Test the wall outlet with another device. If still no power, contact customer service. |
| Noise from bed frame | Loose connections; friction between metal parts | Tighten all assembly hardware. Apply a small amount of lubricant (e.g., silicone spray) to contact points if friction is identified as the cause. |
If you encounter problems not listed here or if the suggested solutions do not resolve the issue, please contact MSmask customer service for assistance.
8. Product Specifications
| Feature | Detail |
|---|---|
| Size | Twin |
| Product Dimensions (L x W x H) | 81.9" x 42.1" x 72.4" |
| Item Weight | 94.8 pounds |
| Material | Heavy-Duty Metal Frame |
| Finish Type | Powder Coated |
| Color | White |
| Special Features | L-Shaped Desk, Built-in Charging Station (2 AC, 1 USB, 1 Type-C), LED Lights (RGB, APP/Remote Control), 6 Storage Shelves, Safety Guardrails, Ladder with Foam Padding |
| Guardrail Height | 13.4 inches |
| Recommended Mattress Height | 4-6 inches |
| Maximum Load Capacity | 400 pounds |
| Assembly Required | Yes |

Image 8.1: Detailed dimensions of the MSmask Twin Size Loft Bed.
9. Warranty and Customer Support
MSmask is committed to providing professional customer service. For any questions regarding assembly, missing parts, product defects, or operational issues, please contact our customer support team. While specific warranty details are not provided in this manual, please retain your proof of purchase for any warranty claims.
Contact Information: Please refer to the contact details provided with your purchase documentation or visit the official MSmask website for support.