
1. Introduction
This manual provides essential information for the setup, operation, maintenance, and troubleshooting of your Hedlaoy 16800 Games 3D Pandora Box TT Arcade Game Console. Please read this manual thoroughly before using the product to ensure proper function and longevity.
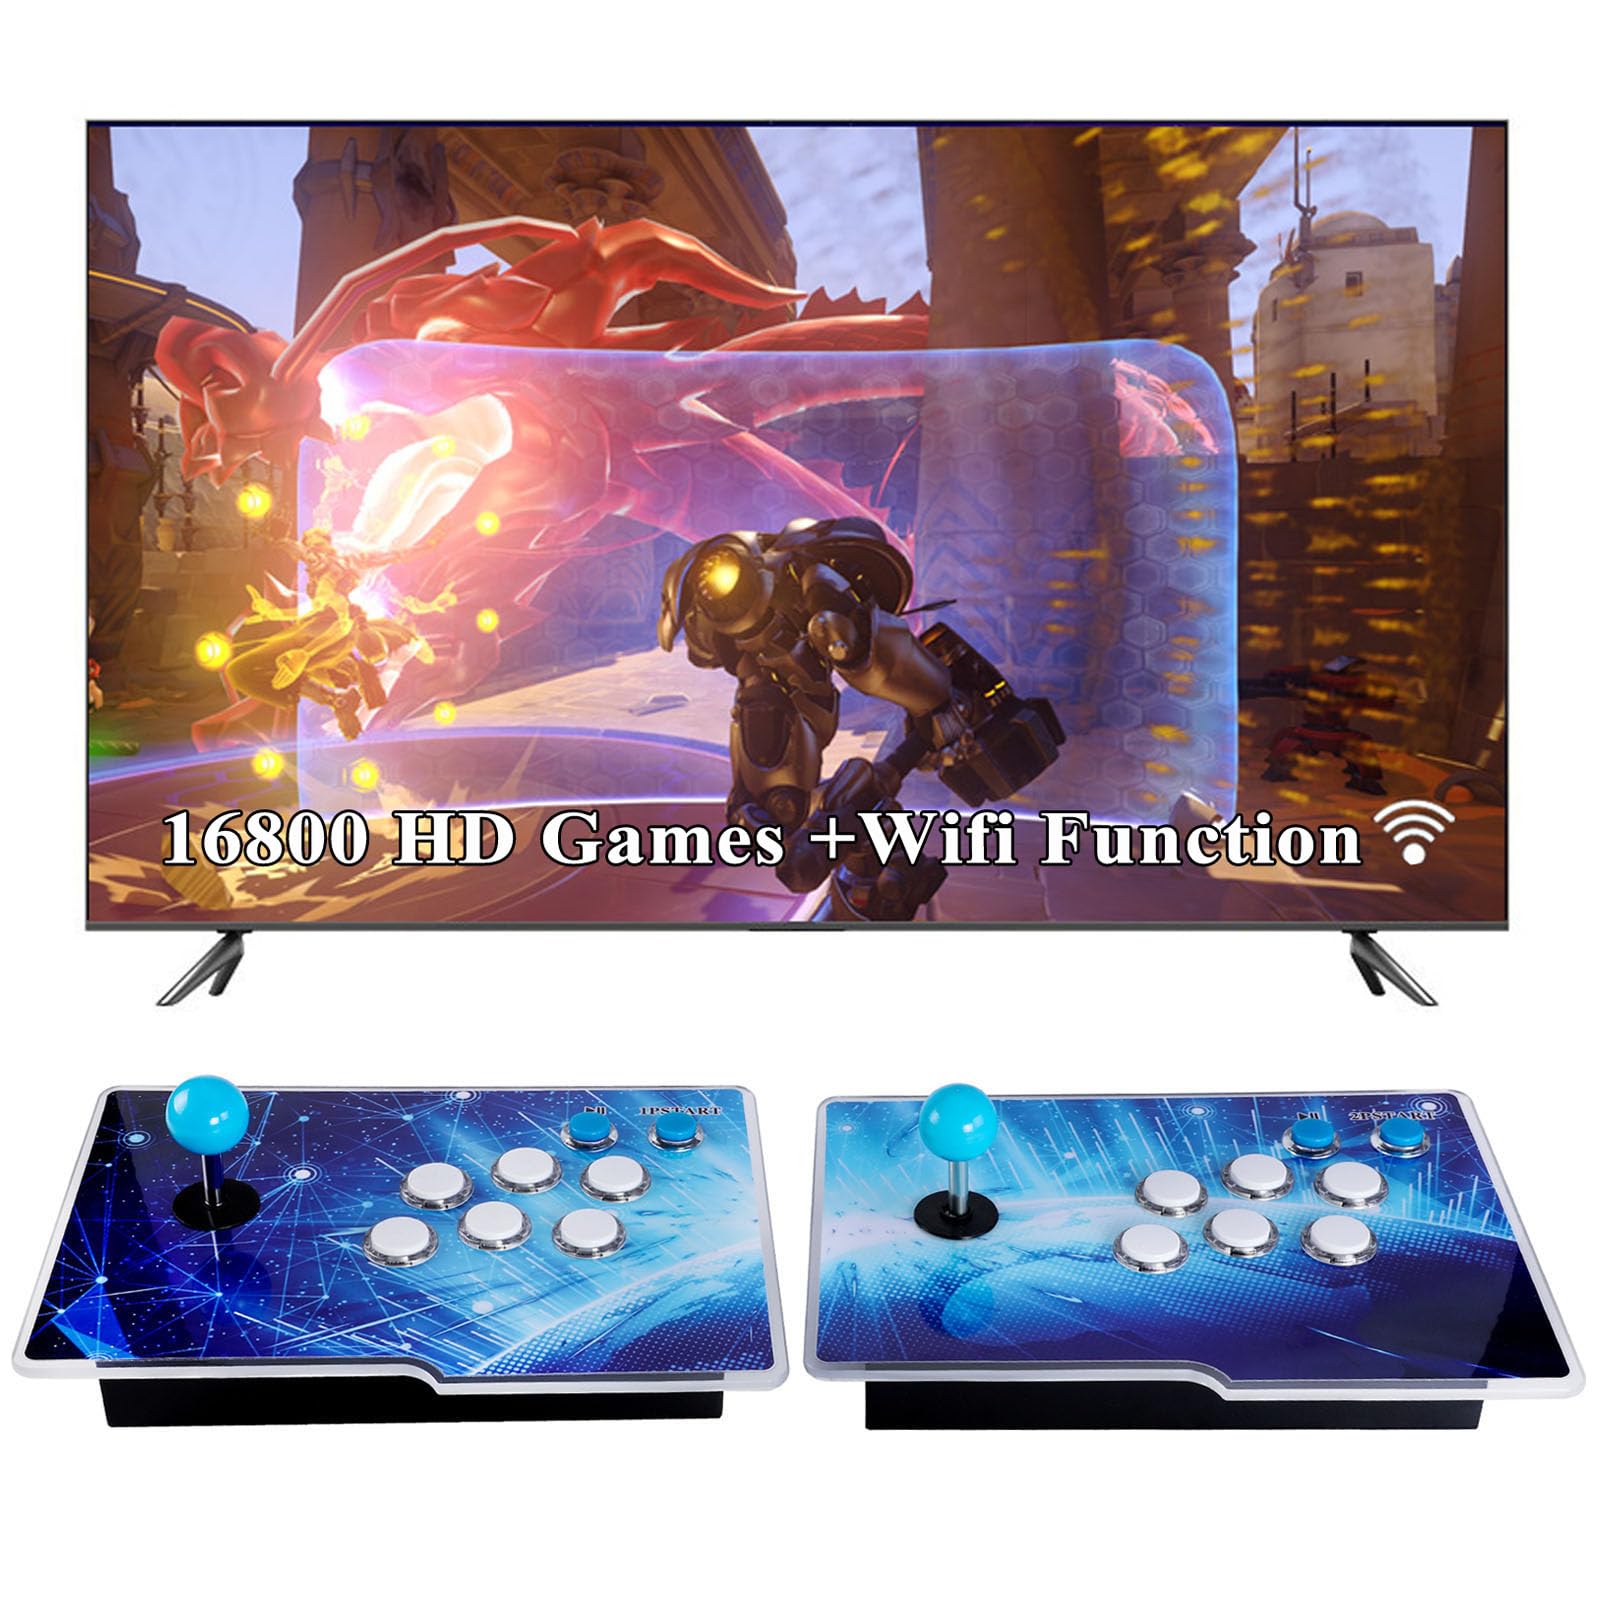
Image 1.1: Hedlaoy 16800 Games 3D Pandora Box TT Arcade Game Console.
2. Package Contents
Verify that all items listed below are included in your package:
- 1 x Hedlaoy 16800 Games 3D Pandora Box TT Arcade Game Console (Split Joysticks)
- 1 x Power Adapter
- 1 x HDMI Data Cable
- 1 x VGA Data Cable and adapter
- 1 x USB Cable
- 1 x User Manual (this document)
- 1 x Connecting Cable (for split joysticks)
- 2 x Spare Joysticks
- 2 x Spare Buttons

Image 2.1: Illustration of package contents and console dimensions.
3. Product Features
- Extensive Game Library: Preloaded with 16800 games, including 382 3D titles, supporting various mainstream emulators.
- High-Definition Output: Supports 1280x720 full HD output for clear visual experience.
- Enhanced Performance: Equipped with a 12-core CPU and 32GB RAM for stable and smooth gameplay.
- Wireless Connectivity: Built-in WiFi function allows access to an online game market for downloading additional games.
- Multi-Device Compatibility: Connects to TVs, PCs, Xbox, PS3, monitors, and projectors via HDMI or VGA.
- Multiplayer Support: Supports up to 4 players with additional controllers.
- Split Joystick Design: Two separated joysticks provide ample space for two players.
- Game Management: Features for searching, saving, hiding, and pausing games.

Image 3.1: Visual comparison of 800x600 and 1280x720 HD output.

Image 3.2: Depiction of the 12-core CPU and 32GB RAM chip.
4. Hardware Overview
Familiarize yourself with the ports and controls on your arcade console:

Image 4.1: Back panel ports and connection diagram.
- Network Port: For wired internet connection (alternative to WiFi).
- DC 12V: Power input port.
- VOLUME: Volume control knob.
- HDMI Output: Connects to HDMI-compatible displays (TVs, monitors, projectors).
- VGA Output: Connects to VGA-compatible displays.
- Main Switch: Power on/off switch.
- USB Ports (U1, U2, U3): For connecting external controllers, USB drives, or other peripherals.
- Light Switch: Controls internal lighting.
- SETTING Button: Accesses system settings.
5. Initial Setup
- Unpack the Console: Carefully remove all components from the packaging.
- Connect Joysticks: If using the split joystick setup, connect the two joystick units using the provided connecting cable.
- Connect to Display: Use the HDMI cable to connect the console to your TV, monitor, or projector. Alternatively, use the VGA cable if your display supports it.
- Connect Power: Plug the power adapter into the DC 12V port on the console, then plug the adapter into a power outlet.
- Power On: Flip the Main Switch to the 'ON' position. The console will boot up automatically.
- Remove Protective Film: Gently peel off any protective film from the console's surface for optimal visual clarity.

Image 5.1: Illustration of removing the protective film from the console surface.
6. Operating Instructions
6.1. Basic Navigation
Use the joystick to navigate through the game selection menu and the action buttons to select or confirm choices. The 'START' button typically initiates a game, and the 'COIN' button adds credits in arcade-style games.
6.2. System Settings
Press the SETTING button on the back panel of the console to access the system settings menu. Here you can configure various options:

Image 6.1: Overview of the system settings menu.
- Image Optimization: Adjust display settings (e.g., HD output).
- Language: Change the system language.
- Wi-Fi: Enable and configure Wi-Fi connection.
- Game Store: Access the online game market.
- Customize Buttons: Remap control buttons.
6.3. Wi-Fi Function and Game Download
To access the online game market and download additional games:
- Enter the System Settings menu.
- Select 'Wi-Fi' and connect to your wireless network.
- Navigate to the 'Game Store' option.
- Browse and download from over 20,000 available games.
If Wi-Fi is unstable, connect an Ethernet cable to the Network Port for a stable internet connection.

Image 6.2: Steps to access the Game Store from system settings.
6.4. Game Management Functions
The console supports several game management features:
- Search Games: Find specific titles within the extensive library.
- Save Game: Save your progress in compatible games.
- Hide Games: Conceal unwanted games from the main list.
- Pause Game: Temporarily suspend gameplay.
- Recently List: View recently played games.
- Favorite List: Mark and access your preferred games quickly.
Image 6.3: Game management options visible on the system menu.
6.5. Customizing Buttons
You can customize the button layout to suit your preference:
- Access the System Settings menu.
- Select the 'Customize Buttons' option.
- Follow the on-screen prompts to remap your joystick and action buttons.

Image 6.4: Diagram illustrating 8-way joystick movement and custom button configurations.
6.6. Multiplayer Gaming
The console supports up to four players. To enable 3-4 player gameplay:
- Connect two additional game controllers (e.g., PS3 controllers) to the console's USB ports (U1, U2, U3). A USB hub may be required if more than two external controllers are used.
- Ensure the game selected supports 3 or 4 players.
- Start the game and configure player settings as prompted.
Image 6.5: Illustration of connecting external controllers via USB for multiplayer gaming.

Image 6.6: Example of multiple players enjoying the arcade console.
7. Maintenance
- Cleaning: Use a soft, dry cloth to wipe the console's surface. Avoid abrasive cleaners or solvents.
- Storage: Store the console in a cool, dry place away from direct sunlight and extreme temperatures.
- Handling: Handle the console with care to prevent damage to joysticks, buttons, or internal components.
- Power Off: Always power off the console using the Main Switch before disconnecting power or moving the unit.
8. Troubleshooting
| Problem | Possible Cause | Solution |
|---|---|---|
| No power | Power adapter not connected; Main Switch off; Power outlet issue. | Ensure power adapter is securely connected and plugged into a working outlet. Turn the Main Switch to 'ON'. |
| No display on screen | HDMI/VGA cable loose or incorrect input selected on display. | Check cable connections. Ensure your TV/monitor is set to the correct HDMI or VGA input source. |
| Joysticks/buttons unresponsive | Loose connection; button mapping issue; hardware fault. | Check the connecting cable between split joysticks. Verify button mapping in System Settings. If issue persists, contact support. |
| Cannot connect to Wi-Fi | Incorrect password; out of range; network issue. | Double-check Wi-Fi password. Move console closer to router. Try a wired network connection. |
| Game performance issues (lag, freezing) | System overload; software glitch. | Restart the console. Ensure no background processes are consuming resources (if applicable). |
9. Technical Specifications
| Feature | Specification |
|---|---|
| Model Number | Pandora box 16800 WIFI |
| Number of Games | 16800 (including 382 3D titles) |
| CPU | 12-core |
| RAM | 32 GB |
| Output Resolution | 1280x720 HD |
| Hardware Interface | HDMI, VGA, USB |
| Connectivity | Wi-Fi, Ethernet |
| Number of Players | 1-4 |
| Controller Type | Button Control, Joystick |
| Power Source | Corded Electric (DC 12V) |
| Material Type | Metal |
| Item Dimensions (L x W x H) | 25" x 9" x 4.6" (64 x 22 x 5 cm) |
10. Customer Support
For any inquiries, technical assistance, or to request a games list, please contact Hedlaoy customer support. Our team aims to respond to your requests within 24 hours.
To contact support:
- Visit the Hedlaoy store page on Amazon.
- Locate the "Ask a Question" option.
- Submit your query.
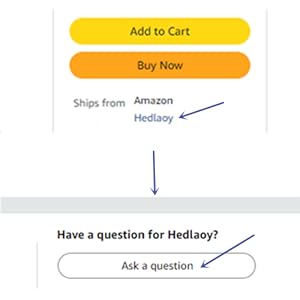
Image 10.1: Illustration of how to find the 'Ask a Question' option for support.