Seesii CG100
SEESII Cordless Caulking Gun (Model CG100) User Manual
21V Battery Powered Caulk Gun with Auto-Retract and LED Light
1. Introduction
Thank you for choosing the SEESII Cordless Caulking Gun, Model CG100. This 21V battery-powered tool is designed to simplify your caulking and sealing tasks, offering efficiency and precision for various applications. This manual provides essential information for safe operation, proper setup, maintenance, and troubleshooting to ensure optimal performance and longevity of your device.
2. Safety Instructions
Always observe basic safety precautions when using electrical tools to reduce the risk of fire, electric shock, and personal injury. Read all instructions carefully before operation.
- Work Area Safety: Keep your work area clean and well-lit. Cluttered or dark areas invite accidents. Do not operate power tools in explosive atmospheres, such as in the presence of flammable liquids, gases, or dust.
- Electrical Safety: Avoid body contact with earthed or grounded surfaces such as pipes, radiators, ranges, and refrigerators. Do not expose power tools to rain or wet conditions.
- Personal Safety: Always wear appropriate personal protective equipment, including safety glasses, gloves, and a dust mask if necessary. Stay alert, watch what you are doing, and use common sense when operating a power tool.
- Tool Use and Care: Do not force the power tool. Use the correct power tool for your application. Disconnect the battery pack from the power tool before making any adjustments, changing accessories, or storing power tools.
- Battery Pack Use and Care: Recharge only with the charger specified by the manufacturer. Do not use battery packs with any other power tools. Store idle battery packs out of reach of children and do not short-circuit a battery pack.
3. Package Contents
Verify that all items are present and in good condition upon opening the package. If any items are missing or damaged, please contact customer support.

Image: All components included in the SEESII Cordless Caulking Gun package.
- 1 x Cordless Caulk Gun
- 2 x 2000mAh Rechargeable Batteries
- 1 x Charger
- 1 x 3-in-1 Silicone Caulk Remover Tool
- 5 x Replaceable Silicone Pads
- 3 x Caulk Nozzles
- 1 x User Manual (this document)
4. Product Features
The SEESII Cordless Caulking Gun is engineered with features to enhance your caulking experience:
4.1. Effortless Caulking
Eliminates manual squeezing, significantly reducing hand fatigue during prolonged use. Ideal for both minor touch-ups and extensive projects such as window installations, automotive sealing, and bathroom fixtures.

Image: The cordless design allows for efficient and comfortable application, reducing physical strain.
4.2. Long-Lasting Battery Performance
Equipped with two robust 2000mAh batteries, providing up to 180 minutes of continuous operation. The powerful thrust capability can speed up sealing tasks by 50% or more compared to manual methods, allowing you to complete large projects without interruption.

Image: Two 2000mAh batteries ensure extended operation time for various projects.
4.3. No-Drip Precision Technology
Delivers an impressive 300KG of push force and features an innovative no-drip mechanism. This mechanism instantly stops material flow upon trigger release, ensuring clean, precise applications with minimal mess and material waste.

Image: The no-drip feature prevents excess material from flowing after the trigger is released.
4.4. Four-Speed Adjustable Control
Offers four customizable speed settings, ranging from 0 to 220 MM/min. This allows for precise control over material flow, accommodating various viscosity levels from thick construction adhesives to fluid sealants, ensuring perfect results for detailed work or larger areas.
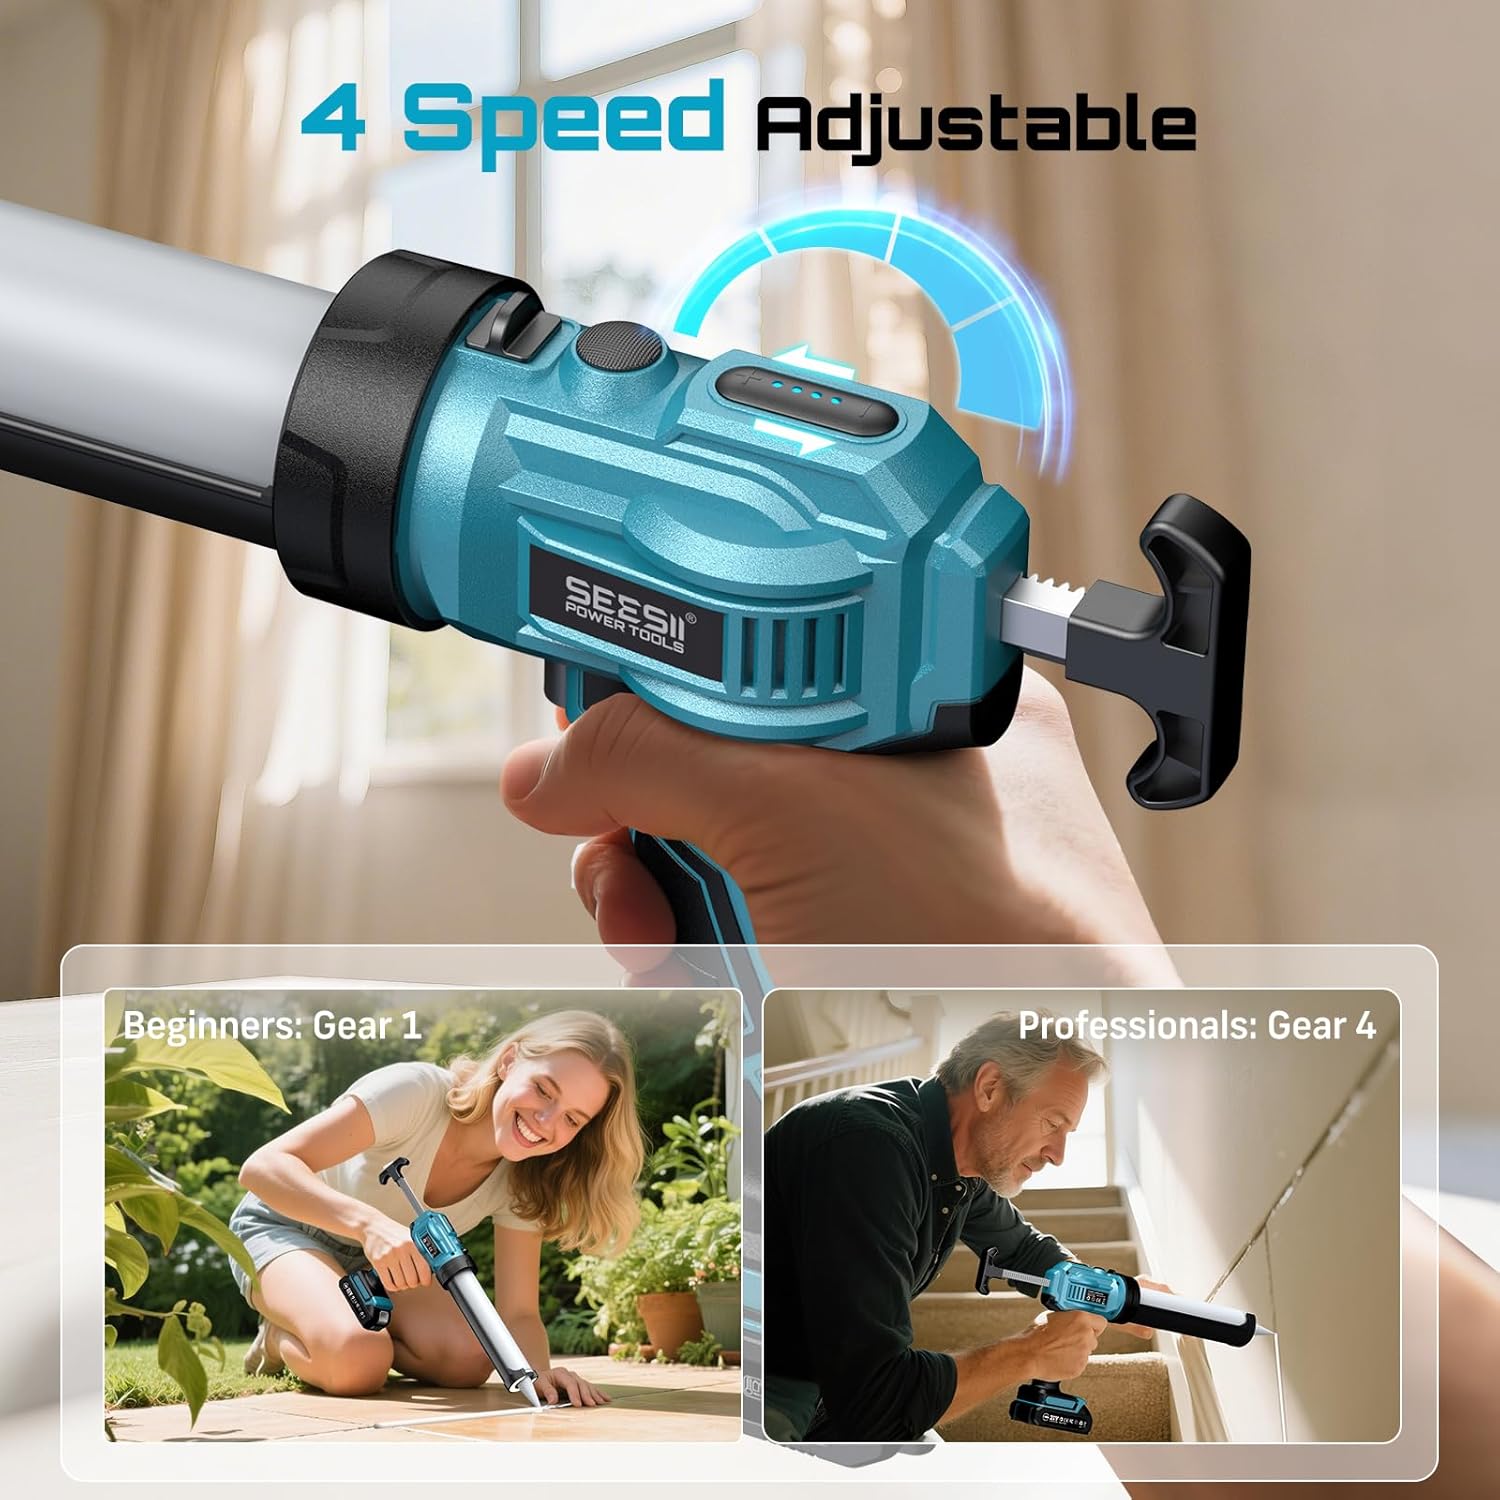
Image: The four-speed control allows adjustment for different materials and application needs.
4.5. Universal Cartridge Compatibility
Designed to accommodate all standard 10oz (300ml) cartridges. This versatility makes it suitable for a wide range of sealants, including silicone and acrylic, across diverse projects from bathroom sealing to window installation.
4.6. Ergonomic Handle
The tool features an ergonomically designed handle for comfortable grip and reduced user fatigue during extended periods of use.

Image: The ergonomic handle provides a comfortable and secure grip for various tasks.
4.7. Built-in LED Light
An integrated LED light illuminates the work area, ensuring visibility and precision even in dimly lit conditions.

Image: The built-in LED light enhances visibility for precise application in low-light conditions.
5. Setup Instructions
Follow these steps to prepare your SEESII Cordless Caulking Gun for use:
5.1. Battery Installation and Charging
- Ensure the battery is fully charged before first use. Connect the charger to a power outlet and then to the battery. The charger indicator light will show charging status.
- Align the charged battery pack with the battery slot on the bottom of the caulk gun handle.
- Slide the battery into the slot until it clicks securely into place. To remove, press the release button on the battery and slide it out.
5.2. Loading a Caulk Cartridge

Image: Essential steps for preparing a caulk cartridge and preventing overflows.
- Prepare the Cartridge: Using a utility knife, carefully cut the tip of the caulk nozzle at a 45-degree angle to the desired bead size (minimum diameter of 4mm).
- Pierce the Inner Seal: Insert the included piercing tool or a long nail through the cut nozzle to break the inner foil seal of the caulk cartridge. This is crucial for proper material flow.
- Load the Cartridge: Pull the plunger rod of the caulk gun fully back. Insert the prepared caulk cartridge into the barrel of the gun, nozzle first.
- Engage the Plunger: Push the plunger rod forward until it makes contact with the back of the caulk cartridge.
6. Operating Instructions
Once the caulk gun is set up, follow these steps for effective operation:
6.1. Powering On and Adjusting Speed
- Ensure the battery is securely installed.
- The caulk gun features a speed adjustment dial, typically located near the handle. Rotate the dial to select your desired speed setting (1-4). For beginners or delicate work, start with the lowest speed (Gear 1). For faster application or thicker materials, increase the speed.
6.2. Applying Caulk
- Position the nozzle at the starting point of your application area, maintaining a consistent angle.
- Press the trigger to begin dispensing caulk. Move the gun steadily along the seam or gap you are sealing.
- Release the trigger to stop the flow of caulk. The auto-retract mechanism will pull the plunger back slightly to prevent dripping.
- Use the included caulk remover tool and silicone pads to smooth the caulk bead as needed.
6.3. Using the LED Light
The built-in LED light activates automatically when the trigger is pressed, illuminating your work surface for improved visibility in low-light conditions.
7. Maintenance
Regular maintenance ensures the longevity and optimal performance of your caulk gun.
7.1. Cleaning the Caulk Gun
- After each use, especially if using quick-drying materials, remove the caulk cartridge.
- Wipe down the barrel and nozzle area with a damp cloth to remove any excess caulk. For dried caulk, use a suitable solvent recommended by the caulk manufacturer, ensuring it does not damage the gun's plastic components.
- Keep the plunger rod clean and free of debris to ensure smooth operation.
7.2. Battery Care and Storage
- Always store batteries in a cool, dry place away from direct sunlight and extreme temperatures.
- For long-term storage, charge batteries to approximately 50% capacity.
- Do not store batteries in a discharged state.
- Keep battery terminals clean.
8. Troubleshooting
If you encounter issues with your SEESII Cordless Caulking Gun, refer to the following common problems and solutions:
| Problem | Possible Cause | Solution |
|---|---|---|
| Caulk not dispensing or dispensing slowly. | Inner foil seal not pierced; nozzle clogged; battery low; incorrect speed setting; air pocket in cartridge. | Ensure inner seal is fully pierced. Clean or replace nozzle. Charge battery. Increase speed setting. Tap cartridge gently to dislodge air. |
| Caulk continues to drip after trigger release. | No-drip mechanism malfunction; very fluid material; air pocket in cartridge. | Ensure plunger rod is clean and moves freely. For very fluid materials, release trigger slightly before reaching end of bead. Check for air pockets. If issue persists, contact support. |
| Gun freezes or stops working. | Battery discharged; motor overload; mechanical obstruction. | Charge battery. Reduce load on the motor (e.g., use a lower speed for very thick materials). Check for any debris obstructing the plunger mechanism. |
| Difficulty removing caulk cartridge. | Plunger rod not fully retracted. | Ensure the plunger rod is pulled back as far as possible before attempting to remove the cartridge. |
| Battery not charging or no indicator light. | Faulty charger or battery; improper connection. | Ensure charger is properly plugged in. Check battery and charger for visible damage. If possible, try another compatible charger or battery. Contact support if issue persists. |
9. Specifications
| Specification | Detail |
|---|---|
| Model Number | CG100 |
| Manufacturer | Seesii |
| Item Weight | 4.75 pounds |
| Package Dimensions | 15.98 x 9.09 x 3.27 inches |
| Power Source | Battery Powered |
| Voltage | 21 Volts |
| Battery Type | Lithium Ion |
| Battery Capacity | 2000mAh (x2 included) |
| Material | Plastic + Metal |
| Caulk Cartridge Size | Standard 10oz (300ml) |
| Speed Settings | 4 (0 to 220 MM/min) |
10. Warranty and Support
SEESII stands behind the quality of its products. This battery caulk gun is backed by Lifetime after-sale service and 24/7 customer support. If you have any questions, concerns, or require assistance, please do not hesitate to contact our dedicated support team. We are committed to ensuring your satisfaction and are always ready to assist.
For support, please visit the official Seesii website or refer to the contact information provided with your purchase documentation.
Ask a question about this manual
Ask about setup, troubleshooting, compatibility, parts, safety, or missing instructions. Manuals+ will review the question and use this page’s manual context to help answer it.