Introduction
This instruction manual provides guidance for the installation, operation, and maintenance of the Generic Replacement Dryer Roller, Belt, and Pulley Kit, designed for compatibility with KitchenAid Dryer Model KEYS850JQ1. This kit includes essential components for restoring proper dryer function. Please read all instructions carefully before proceeding with installation.
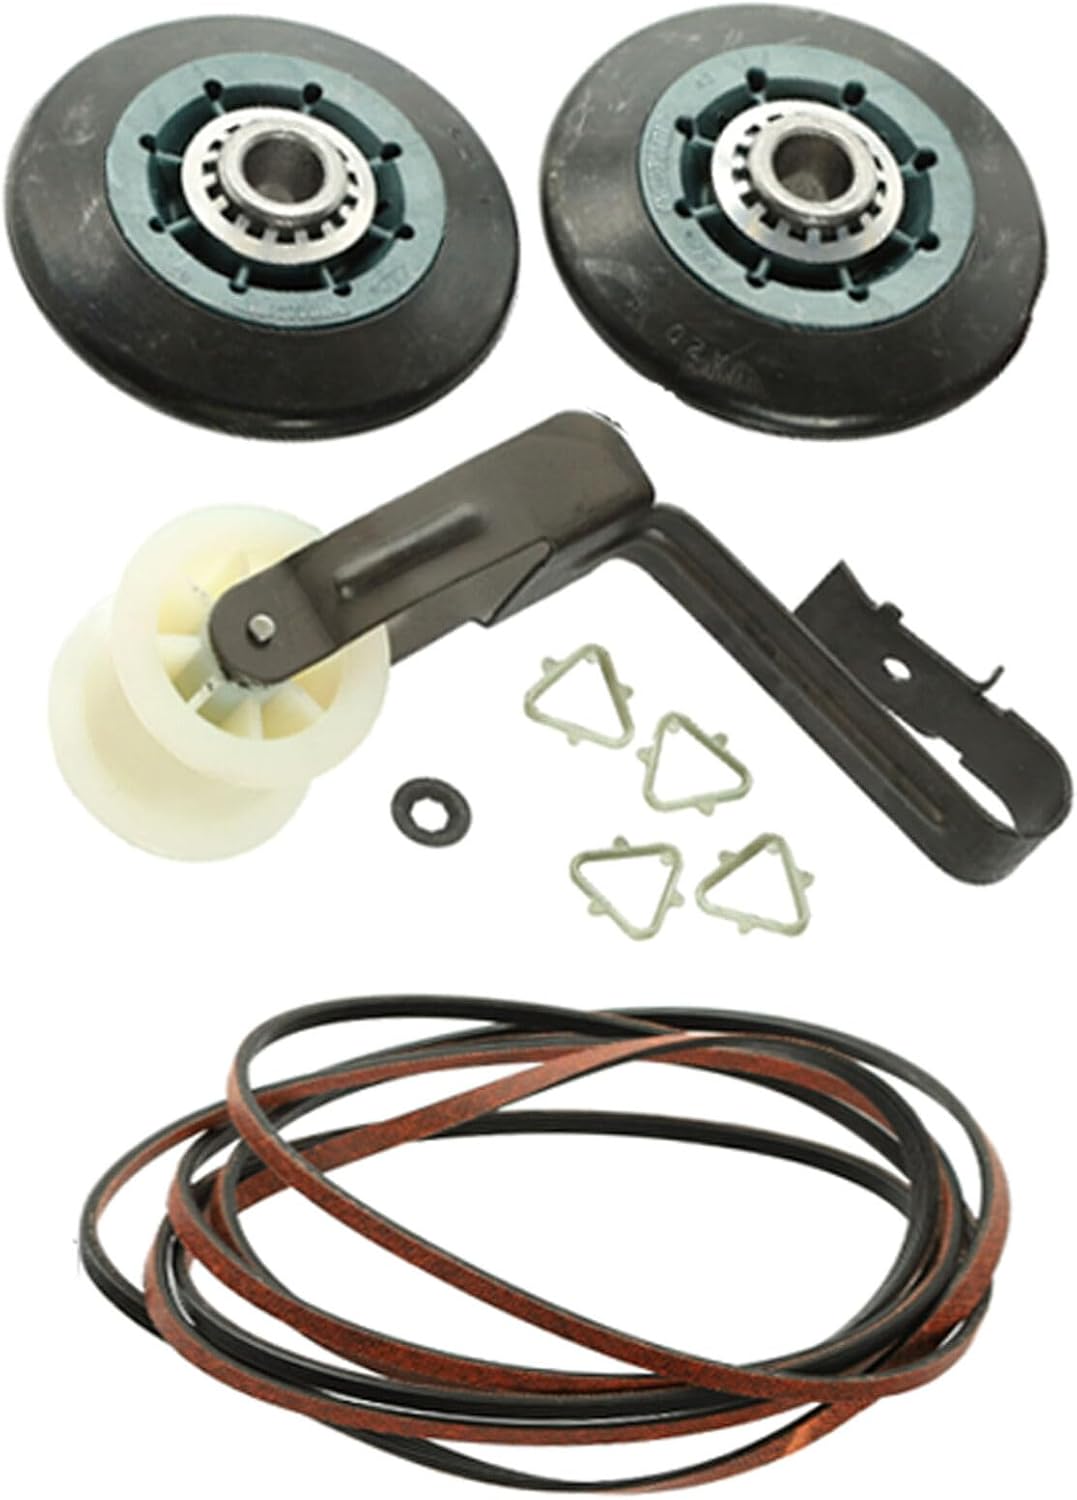
Image: The complete replacement kit, including two dryer rollers, a drive belt, a pulley assembly, and small fasteners.
Safety Information
- Always disconnect the dryer from its power source before attempting any repairs or maintenance. Failure to do so can result in electric shock or injury.
- Wear appropriate personal protective equipment, such as gloves, to prevent cuts or scrapes.
- If you are unsure about any step, consult a qualified appliance technician.
- Keep all small parts away from children.
Setup and Installation
This kit is intended for replacement of worn or broken dryer components. The installation process typically involves disassembling the dryer to access the drum, rollers, belt, and pulley system. Specific steps may vary slightly depending on your exact dryer configuration, but the general procedure is as follows:
- Disconnect Power: Unplug the dryer from the electrical outlet.
- Access Components: Carefully remove the dryer's top panel, front panel, and/or rear panel to gain access to the drum, rollers, drive belt, and idler pulley. Refer to your specific dryer model's service manual for detailed disassembly instructions.
- Remove Old Parts: Detach the old drive belt from the motor pulley and idler pulley. Remove the old rollers and the old idler pulley assembly. Note their original positions and orientation.
- Install New Rollers: Mount the new dryer rollers onto their respective shafts. Ensure they spin freely.
- Install New Pulley: Install the new idler pulley assembly in the correct position.
- Install New Belt: Route the new drive belt around the dryer drum, motor pulley, and idler pulley. Ensure the belt is properly tensioned by the idler pulley. The ribbed side of the belt typically faces the drum.
- Reassemble Dryer: Reattach all panels and secure them properly.
- Test Functionality: Plug the dryer back into the electrical outlet and run a short cycle to ensure proper operation and check for any unusual noises.
It is crucial to ensure all connections are secure and parts are correctly aligned before reassembling the dryer.
Operating Instructions
Once the replacement parts are correctly installed, your dryer should operate as intended. This kit does not alter the operational controls or cycles of your dryer. Continue to operate your dryer according to the manufacturer's original instructions.
- Listen for any unusual noises during the first few cycles after installation.
- Ensure the dryer drum tumbles smoothly and quietly.
Maintenance
Regular maintenance helps prolong the life of your dryer and its components.
- Lint Filter: Clean the lint filter before or after every load to maintain airflow and efficiency.
- Vent System: Periodically inspect and clean the dryer vent system to prevent lint buildup, which can restrict airflow and cause overheating.
- Component Inspection: If you notice any changes in dryer performance (e.g., unusual noises, reduced tumbling), consider inspecting the rollers, belt, and pulley for wear or damage.
Troubleshooting
If your dryer experiences issues after installing the kit, consider the following:
- Dryer Not Tumbling:
- Check if the drive belt is properly installed and tensioned around the drum and pulleys.
- Ensure the motor is functioning.
- Squealing or Grinding Noises:
- Inspect the rollers and their shafts for proper lubrication and free movement.
- Verify the idler pulley is installed correctly and spinning smoothly.
- Ensure no foreign objects are caught in the dryer mechanism.
- Dryer Overheating or No Heat:
- While this kit does not directly affect heating elements, a broken belt can prevent tumbling, leading to overheating if the heating element remains on.
- Check for proper ventilation and clear any lint blockages.
For persistent issues, it is recommended to consult a professional appliance repair technician.
Specifications
| Product Type | Dryer Roller, Belt, and Pulley Kit |
| Brand | Generic |
| Compatible Dryer Model | KitchenAid KEYS850JQ1 |
| Kit Part Number | pulpart#24111980 |
| Package Contents | 1 Set (includes rollers, belt, pulley, and fasteners) |
Warranty Information
Specific warranty details for this replacement part are not provided in the product information. Please refer to the seller's return policy or contact the seller directly for any warranty-related inquiries.
Customer Support
For technical assistance, installation questions, or concerns regarding this product, please contact the seller through the platform where the purchase was made. Provide your order details and a clear description of the issue for prompt support.
