1. Introduction
This manual provides detailed instructions for the safe and effective installation, operation, and maintenance of the Generic Replacement Part Kit for Kenmore Dryer Model 110.70222511. This kit includes essential components such as dryer drum rollers, a drive belt, and an idler pulley, designed to restore optimal performance to your dryer. Please read all instructions carefully before beginning any repair work.
2. Safety Information
- Disconnect Power: Always unplug the dryer from the electrical outlet before performing any service or maintenance to prevent electric shock.
- Gas Dryers: For gas dryers, also turn off the gas supply valve.
- Wear Protective Gear: Wear work gloves to protect hands from sharp edges and safety glasses to protect eyes from debris.
- Proper Tools: Use appropriate tools for the job to avoid damage to parts or injury.
- Professional Assistance: If you are unsure about any step, consult a qualified appliance technician.
3. Package Contents
Verify that all components listed below are present in your kit before starting the installation.
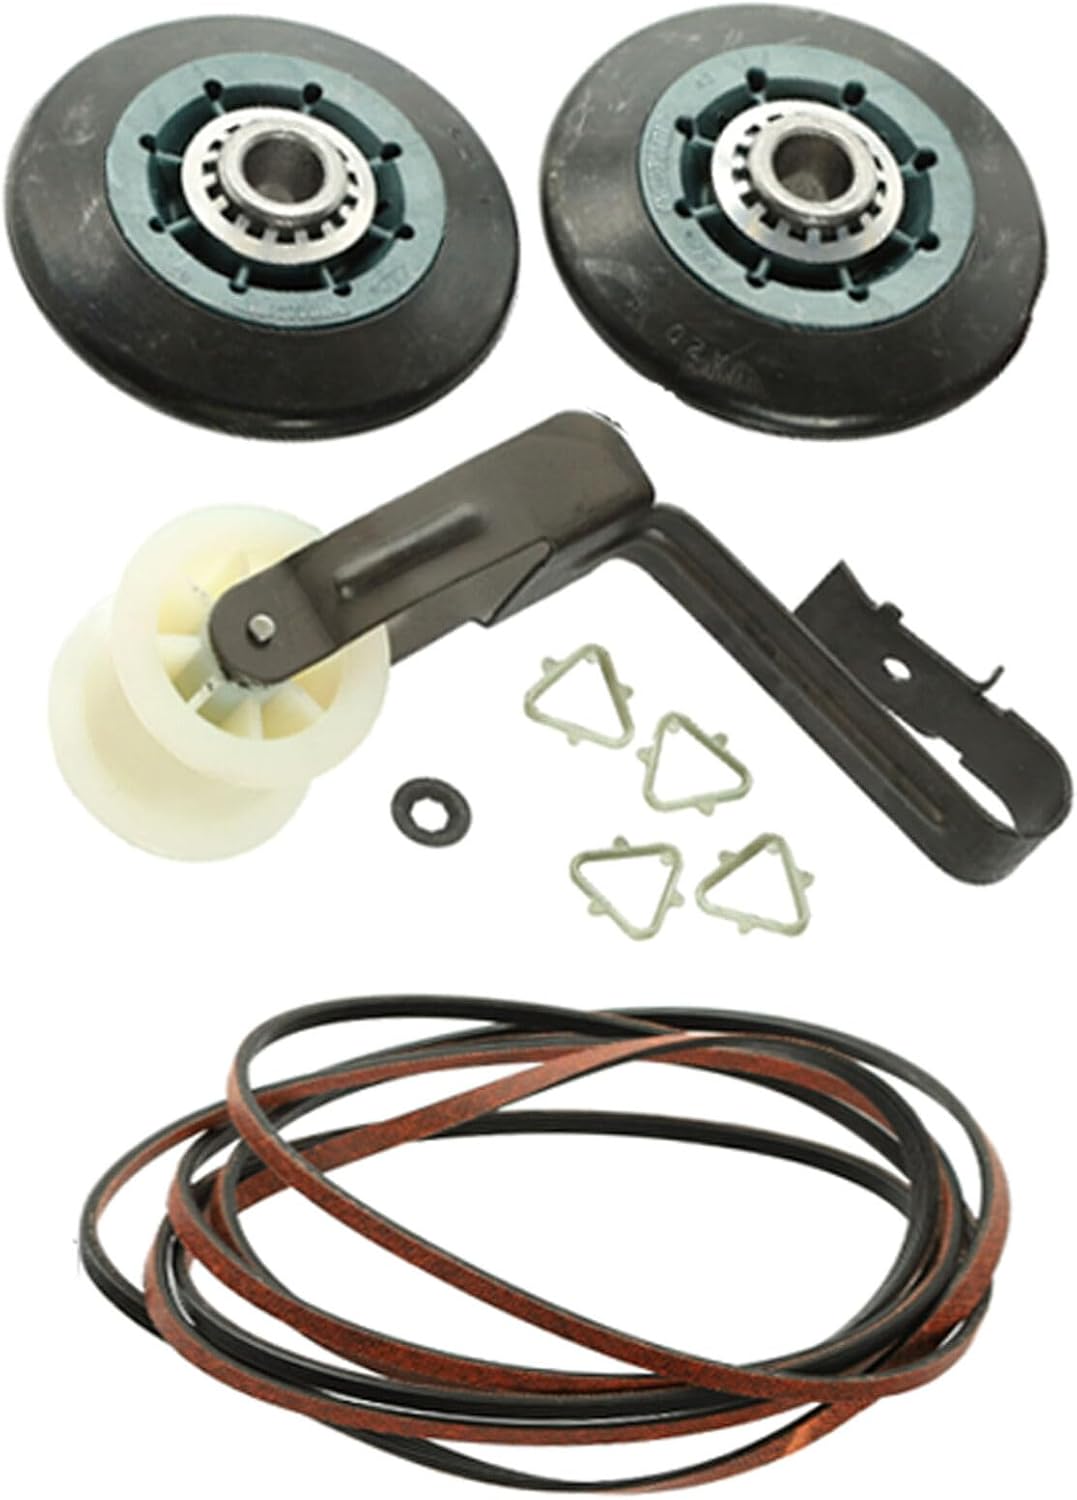
This image displays all components included in the replacement kit: two dryer drum rollers, one idler pulley assembly, a drive belt, and various small fasteners.
- Dryer Drum Rollers (2)
- Idler Pulley Assembly (1)
- Dryer Drive Belt (1)
- Assorted Fasteners/Washers (as applicable)
4. Setup and Installation
This section outlines the general steps for replacing the dryer components. Specific dryer models may vary slightly in disassembly and reassembly. Refer to your dryer's service manual for precise instructions if needed.
Tools Required:
- Screwdrivers (Phillips and Flathead)
- Nut Drivers or Socket Set
- Pliers
- Work Gloves
- Safety Glasses
Installation Steps:
- Prepare the Dryer: Disconnect the dryer from its power source and gas supply (if applicable). Pull the dryer away from the wall to access the rear.
- Access the Interior: Depending on your dryer model, you may need to remove the top panel, front panel, or rear panel to gain access to the drum and internal components. This typically involves removing screws and clips.
- Remove the Drive Belt: Locate the drive belt wrapped around the dryer drum and the motor pulley. Release the tension on the idler pulley to remove the old belt. Note the routing of the belt for reinstallation.
- Replace Drum Rollers: The drum rollers support the dryer drum. Remove the old rollers by detaching their mounting hardware. Install the new drum rollers, ensuring they are securely fastened.
- Replace Idler Pulley: Remove the old idler pulley assembly. Install the new idler pulley in the same position, ensuring it pivots freely and provides proper belt tension.
- Install New Drive Belt: Route the new drive belt around the dryer drum and the motor pulley, then over the idler pulley. Ensure the belt is centered on the drum and pulleys. The ribbed side of the belt typically faces the motor pulley.
- Reassemble the Dryer: Carefully reattach all panels, screws, and clips that were removed during disassembly. Ensure all connections are secure.
- Test the Dryer: Push the dryer back into place. Reconnect the power and gas supply. Run a short cycle (e.g., air fluff) to ensure the drum rotates smoothly and quietly, and the belt does not slip. Check for any unusual noises or vibrations.
5. Operating Instructions (Post-Installation Check)
After successful installation of the replacement parts, perform the following checks:
- Initial Cycle: Run an empty dryer cycle on a low heat or air fluff setting for 5-10 minutes. Listen for any abnormal sounds, such as squealing, grinding, or thumping.
- Drum Rotation: Observe the dryer drum's rotation. It should turn smoothly and consistently without hesitation.
- Heat Function: If applicable, confirm that the dryer heats up correctly during a heated cycle.
If any issues are detected, refer to the Troubleshooting section or re-check your installation steps.
6. Maintenance
Proper maintenance helps extend the life of your dryer and its components.
- Regular Cleaning: Periodically clean the lint filter before or after each load.
- Vent Cleaning: Ensure the dryer vent is clear of lint and obstructions at least once a year. A clogged vent can cause overheating and strain on components.
- Load Size: Avoid consistently overloading the dryer, as this can put excessive strain on the drive belt and drum rollers, leading to premature wear.
- Inspect Components: During other dryer maintenance (e.g., vent cleaning), visually inspect the rollers and belt for signs of wear, cracking, or damage.
7. Troubleshooting
If you encounter issues after installing the replacement kit, consider the following:
| Symptom | Possible Cause | Solution |
|---|---|---|
| Dryer drum does not turn | Drive belt improperly installed or broken | Check belt routing and tension. Ensure belt is not broken. |
| Squealing or grinding noise | New rollers or idler pulley not seated correctly, or old parts still present | Re-check roller and pulley installation. Ensure all old parts are removed. |
| Thumping noise | Drum rollers worn or improperly installed | Verify rollers are securely attached and rotating freely. |
| Dryer overheats or takes too long to dry | Clogged vent (not directly related to kit, but common issue) | Clean dryer vent thoroughly. |
8. Specifications
- Product Type: Dryer Rollers, Belt, and Pulley Replacement Kit
- Compatible Dryer Model: Kenmore 110.70222511
- Part Numbers: pulpart#24104890, pulpart#24110599
- Manufacturer: Generic
- Package Quantity: 1 Set
9. Warranty and Support
This replacement part kit is covered by a standard manufacturer's warranty against defects in materials and workmanship. For specific warranty details or technical support, please refer to the retailer or manufacturer's website where the product was purchased. Keep your proof of purchase for warranty claims.