
1. Introduction
This manual provides essential information for the installation, operation, and maintenance of your SZKAM 4CH 1080P DVR Wired CCTV Security System. This system is designed to provide reliable video surveillance for both indoor and outdoor environments, featuring 1080P high-resolution cameras, infrared night vision, motion detection, and remote access capabilities. A 500GB Hard Disk Drive (HDD) is included for continuous 24/7 recording.
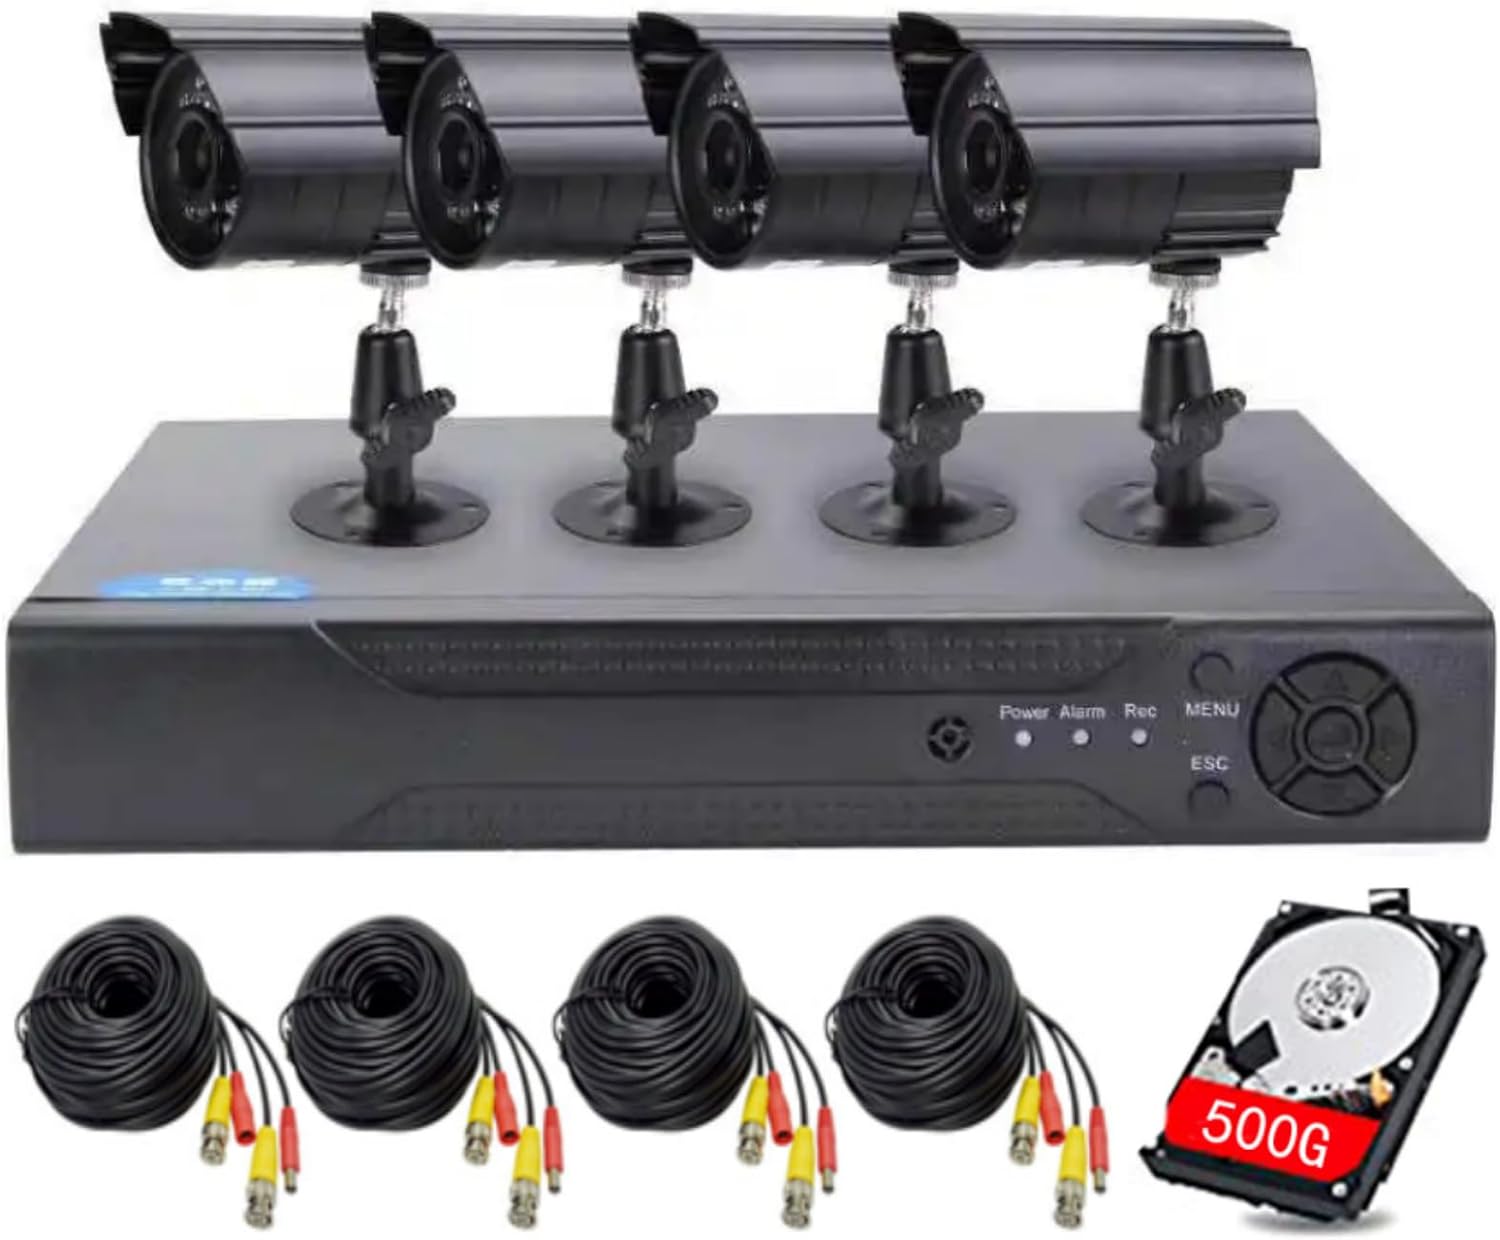
Figure 1.1: Overview of the SZKAM 4CH 1080P DVR Wired CCTV Security System components.
2. What's in the Box
Upon unpacking, please verify that all the following items are included:
- 1x 4-Channel 1080N DVR (with 500GB HDD pre-installed)
- 4x 1080P Outdoor Metal Surveillance Cameras
- 4x 60ft BNC Cables
- Power adapters for all cameras
- 1x User Manual
Video 2.1: Unboxing the security system components.
3. Setup Guide
Follow these steps to set up your SZKAM CCTV Security System:
3.1. Initial Connections
- Connect DVR Power: Plug the DVR's power adapter into the DC12V port on the back of the DVR, then into a power outlet.
- Connect DVR to Monitor: Use an HDMI or VGA cable to connect the DVR to a monitor or TV. Ensure the monitor is powered on and set to the correct input source.
- Connect Mouse: Plug the USB mouse into one of the USB ports on the DVR. This will allow you to navigate the DVR's interface.
- Connect Cameras to DVR: Attach one end of each 60ft BNC cable to the BNC video input ports (V1-V4) on the back of the DVR.
- Connect Cameras to Power: Connect the other end of each BNC cable to a camera. Use the provided power adapters and the 1-to-4 power splitter to supply power to all cameras. Plug the camera power adapters into a power strip.
- Connect DVR to Router (for Remote Access): Use an Ethernet cable to connect the LAN port on the DVR to your internet router. This is essential for remote viewing via the mobile app.
Video 3.1: Guide on connecting cameras to the DVR system.
Video 3.2: Visual guide for the 4-channel DVR and camera kit setup.
3.2. Hard Drive Installation (If Not Pre-installed)
Your system includes a 500GB HDD pre-installed. If for any reason you need to access or replace the HDD, follow these general steps:
- Unplug the DVR from power.
- Remove the top cover of the DVR by unscrewing the retaining screws.
- Connect the SATA power and data cables from the DVR to the corresponding ports on the HDD.
- Secure the HDD inside the DVR chassis using the provided screws.
- Replace the top cover and secure it with screws.
Video 3.3: Detailed review and demo of an 8-channel DVR, including HDD installation steps (similar process for 4-channel).
4. Operating Instructions
4.1. Initializing the System
Once all connections are made and the DVR is powered on, the system will initialize. Follow the on-screen prompts to set up basic configurations such as language, time zone, and password. It is highly recommended to set a strong password for security.
4.2. Remote Access (Mobile App)
To view your cameras remotely, download the designated mobile application (e.g., "TSEYE" or similar, as indicated in the DVR's on-screen wizard or manual) from your device's app store. Register an account, add your DVR device using its unique ID (usually found on the DVR or on-screen), and configure settings for live viewing and playback.
Video 4.1: Demonstrating remote mobile device online viewing.
4.3. Recording and Playback
The system is configured for 24/7 recording to the pre-installed 500GB HDD. You can customize recording schedules and modes (manual, schedule, motion detection) via the DVR's menu. To playback footage, navigate to the playback section in the DVR interface or mobile app, select the desired date and time, and view recorded events.

Figure 4.1: Illustrating real-time recording and playback on a monitor and mobile device.
4.4. Motion Detection
The system features motion detection capabilities. When motion is detected, the system can trigger recording, send email alerts, or push notifications to your mobile device. Configure motion detection zones and sensitivity settings through the DVR's menu to optimize performance and minimize false alarms.

Figure 4.2: Depicting motion detection triggering alerts to a mobile device.
4.5. Night Vision
The cameras are equipped with infrared (IR) night vision technology, allowing them to capture clear footage in low-light or complete darkness conditions up to 100 feet. The IR lights activate automatically when ambient light levels drop.

Figure 4.3: Example of night vision footage from the surveillance cameras.
5. Maintenance
Regular maintenance ensures optimal performance and longevity of your security system:
- Clean Cameras: Periodically clean the camera lenses and housing with a soft, damp cloth to remove dust, dirt, or cobwebs that may obstruct the view.
- Check Connections: Ensure all BNC, power, and Ethernet cables are securely connected and free from damage. Loose connections can lead to signal loss or intermittent operation.
- DVR Placement: Keep the DVR in a cool, dry, and well-ventilated area to prevent overheating. Avoid placing it near heat sources or in direct sunlight.
- Software Updates: Check for firmware updates for your DVR regularly through the manufacturer's website or the system's interface to ensure you have the latest features and security patches.
- Data Backup: Regularly back up important recorded footage to an external storage device if needed.
6. Troubleshooting
Here are solutions to common issues you might encounter:
- No Video Signal on Monitor:
- Check if the monitor is powered on and set to the correct input (HDMI/VGA).
- Ensure the HDMI/VGA cable is securely connected to both the DVR and the monitor.
- Verify the DVR's output resolution is compatible with your monitor. You may need to adjust the resolution in the DVR settings if the default is too high or low.
- Cameras Not Displaying Video:
- Check all BNC cable connections between cameras and DVR.
- Ensure cameras are receiving power. Check power adapters and the 1-to-4 power splitter. The cameras' IR lights should illuminate in dark conditions if powered correctly.
- If using long extension cables for power, ensure they are appropriate for the voltage and current requirements (12V DC).
- Remote Access Not Working:
- Verify the Ethernet cable is securely connected to both the DVR and the router.
- Ensure your router has an active internet connection.
- Check the network settings on the DVR to ensure it has obtained an IP address.
- Confirm the mobile app is correctly configured with the DVR's device ID and your network settings.
- "No Available Storage" Message:
- Although the system includes a 500GB HDD, ensure it is properly connected and formatted. Access the DVR's menu to check HDD status and format if necessary.
- If the HDD is not detected, check the SATA power and data cable connections inside the DVR.
7. Specifications
| Feature | Detail |
|---|---|
| Brand | SZKAM |
| Model Number | SZ4HAD2MBL |
| Connectivity Technology | Wired |
| Video Capture Resolution | 1080p |
| Number of Channels | 4 |
| Memory Storage Capacity | 500 GB (HDD Included) |
| Special Features | App Control, Night Vision, Smart Playback, Video Recording, Weatherproof |
| Power Source | Corded Electric |
| Operating System | APP remote |
| Compatible Devices | Laptops, Personal Computers, Smartphones, TV, Tablets |
| Low Light Technology | Night Vision |
| Night Vision Range | 100 Feet |
| Frame Rate | 30FPS |
| Recording Mode | Manual, Schedule |
| Total USB Ports | 2 |
| Video Input | BNC |
| Viewing Angle | 90 Degrees |
| Product Dimensions | 11.6 x 7.1 x 10.5 inches |
| Item Weight | 7.83 pounds |
8. Warranty and Support
For warranty information, technical support, or any inquiries regarding your SZKAM 4CH 1080P DVR Wired CCTV Security System, please refer to the contact details provided in the packaging or on the official SZKAM website. Keep your purchase receipt as proof of purchase for warranty claims.