
Introduction
This manual provides detailed instructions for the installation, operation, and maintenance of your NANU SHOP B75 Micro-ATX Motherboard, model DELTA-B75M2K. This motherboard is designed to offer reliable performance for your computing needs, supporting Intel 2nd and 3rd Generation processors.
Key Features:
- Superior Performance: Equipped with the Intel B75 Chipset, compatible with Intel Core i7, i5, i3, Pentium, and Celeron processors (2nd and 3rd generation), ensuring efficient operation for various tasks.
- Ample Memory Capacity: Supports up to 16GB of DDR3 memory across two slots, ideal for multitasking and responsive system performance.
- Modern Connectivity: Features 2 USB 3.0 ports, 4 USB 2.0 ports, 1 HDMI port, and 1 VGA port, providing versatile options for connecting peripherals and displays.
- Fast Storage: Includes 4 SATA ports, with support for SATA III, enabling higher data transfer speeds for both HDDs and SSDs.
- Compact and Functional Design: The Micro-ATX form factor, combined with high-durability components, makes it suitable for building compact yet powerful home or corporate PCs.
Setup and Installation
Before beginning installation, ensure your workspace is clean, well-lit, and static-free. Use an anti-static wrist strap to prevent damage to components.
1. Installing the CPU
Carefully open the CPU socket lever. Align the triangular mark on your Intel LGA 1155 processor with the corresponding mark on the socket. Gently place the CPU into the socket without forcing it. Close the lever to secure the CPU.

Image: LGA 1155 CPU socket with retention arm open.
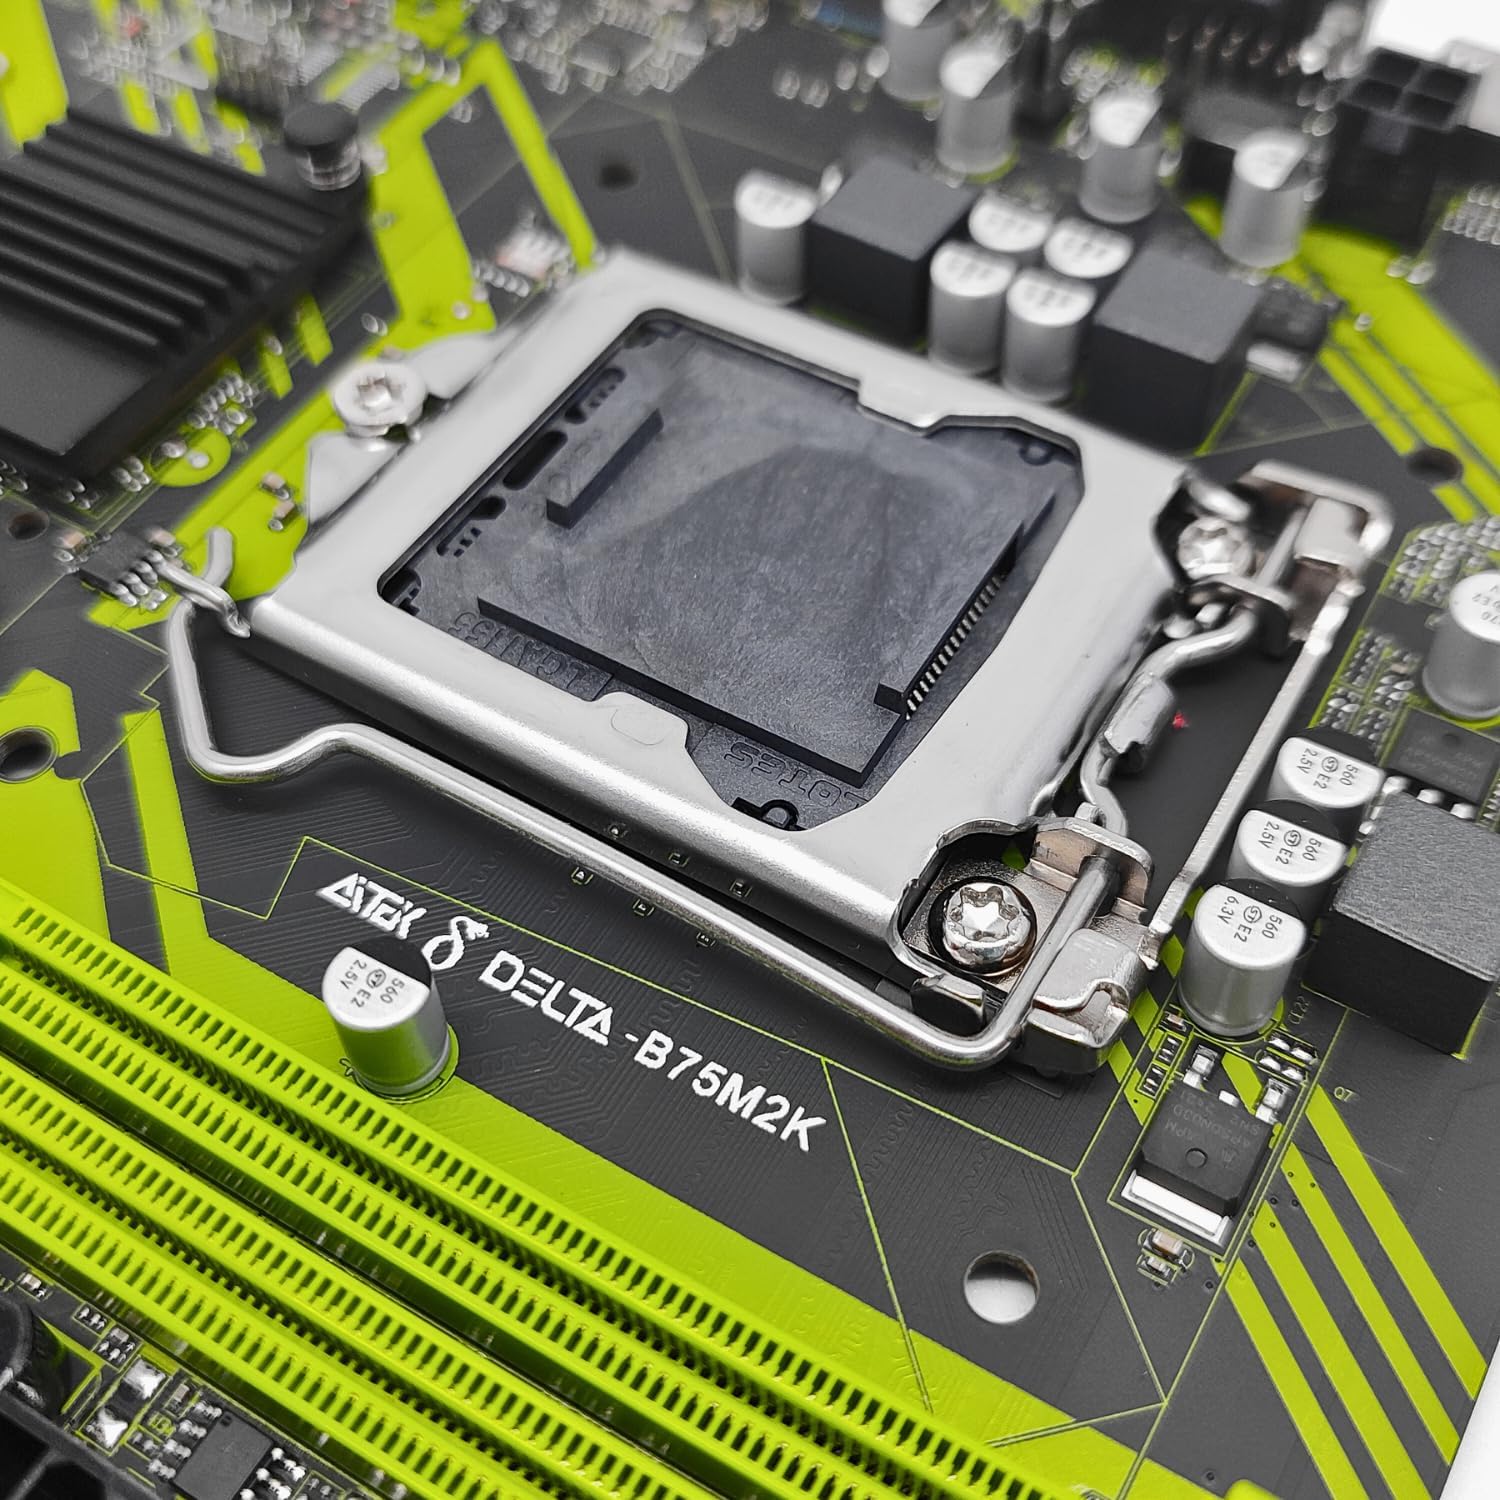
Image: LGA 1155 CPU socket with processor installed.
Apply a thin, even layer of thermal paste to the top of the CPU. Install the CPU cooler according to its manufacturer's instructions, ensuring it is securely fastened and making good contact with the CPU.
2. Installing RAM (DDR3 Memory)
Locate the two DDR3 memory slots on the motherboard. Open the clips at both ends of the memory slot. Align the notch on the DDR3 memory module with the key in the slot. Press down firmly on both ends of the memory module until the clips snap into place, securing the module.
3. Connecting Storage Devices (SATA)
Connect your SATA hard drives or SSDs to the SATA ports on the motherboard using SATA data cables. Ensure the power cables from your power supply are also connected to your storage devices.
4. Connecting Power Supply
Connect the 24-pin ATX power connector from your power supply to the main power socket on the motherboard. Also, connect the 4-pin CPU power connector (ATX 12V) to its designated socket near the CPU.

Image: 24-pin ATX power connector slot.
5. Connecting Front Panel and USB Ports
Connect the front panel headers (power button, reset button, HDD LED, power LED) to the corresponding pins on the motherboard. Refer to your PC case manual for specific pin assignments. Connect front panel USB 2.0 and USB 3.0 cables to the respective headers on the motherboard.

Image: Top-down view of the motherboard with various connectors.
6. Installing Expansion Cards (PCI Express)
Insert your graphics card or other PCI Express expansion cards into the appropriate PCIe slots. Ensure they are seated firmly and secured with the case's retention mechanism.
Operating Instructions
1. First Boot and BIOS Setup
After assembling all components, connect your monitor, keyboard, and mouse. Power on your system. During startup, repeatedly press the DEL or F2 key (common keys, may vary) to enter the BIOS/UEFI setup utility.
In the BIOS, you can configure boot order, system time, and other hardware settings. Ensure your storage device with the operating system is set as the primary boot device. Save changes and exit the BIOS to continue booting into your operating system.
2. Driver Installation
After installing your operating system, install the necessary drivers for the motherboard chipset, audio, LAN, and any other integrated components. These drivers are typically provided on a CD/DVD with the motherboard or can be downloaded from the manufacturer's website.
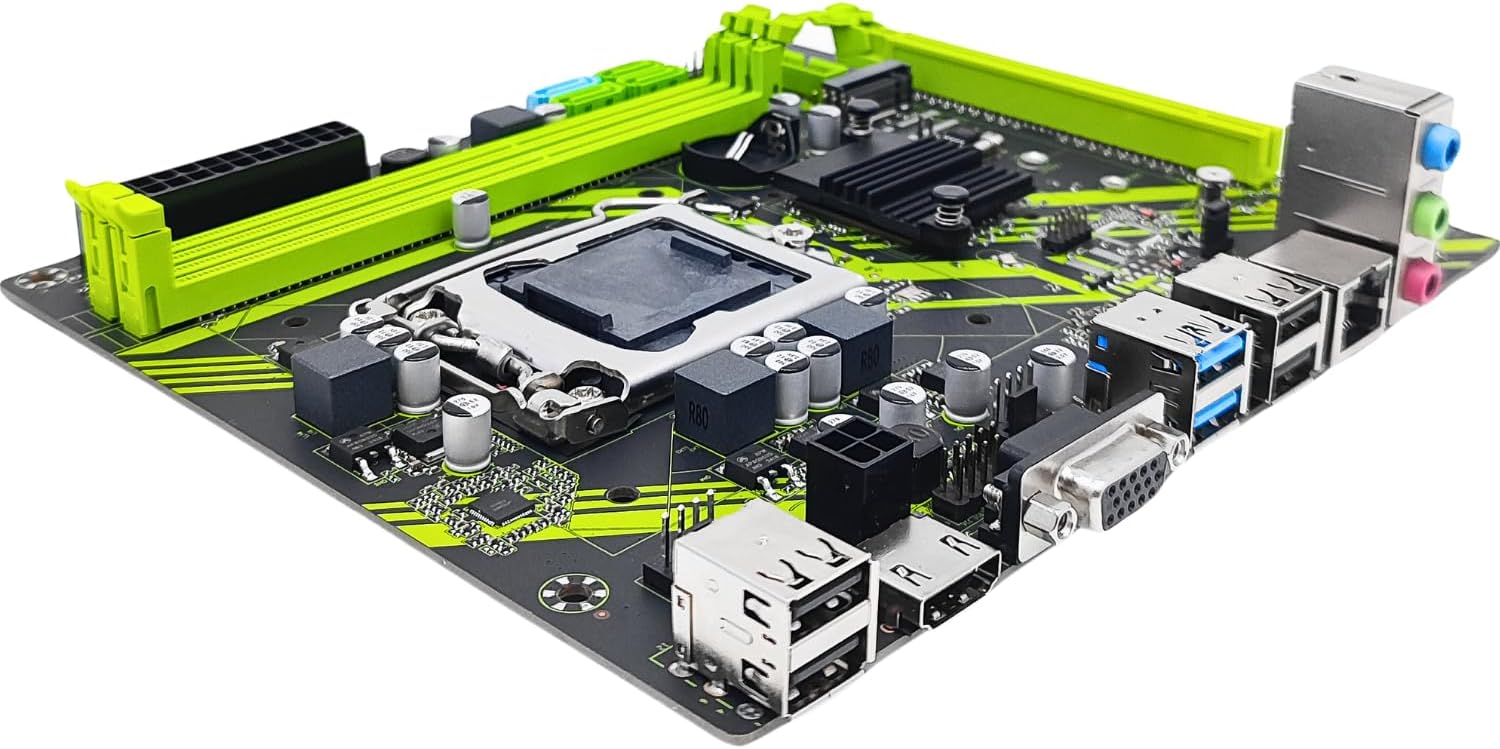
Image: Angled view of the motherboard, showing ports.

Image: Rear I/O panel with various connectivity options.
Maintenance
Proper maintenance ensures the longevity and stable performance of your motherboard and PC system.
- Regular Cleaning: Periodically clean dust from inside your PC case, especially around the CPU cooler, chipset heatsink, and fan vents. Use compressed air and a soft brush. Ensure the system is powered off and unplugged before cleaning.
- BIOS Updates: Check the NANU SHOP website for BIOS updates. BIOS updates can improve compatibility, stability, and performance. Follow the update instructions carefully to avoid damaging the motherboard.
- Driver Updates: Keep your motherboard drivers updated. Visit the NANU SHOP or Intel website for the latest chipset, audio, and LAN drivers.
- Cable Management: Ensure internal cables are neatly managed to improve airflow and prevent overheating.
Troubleshooting
This section addresses common issues you might encounter.
- No Power:
- Check if the power supply is connected correctly to the motherboard (24-pin ATX and 4-pin CPU).
- Ensure the power supply switch is in the ON position.
- Verify that the front panel power button cable is correctly connected to the motherboard header.
- Test the power supply with another system or a power supply tester.
- No Display:
- Ensure the monitor is connected to the correct video output (either integrated graphics or a dedicated graphics card).
- Check if the graphics card is properly seated in its PCIe slot and has adequate power connected.
- Reseat RAM modules. Try booting with only one RAM module installed.
- Clear CMOS (Complementary Metal-Oxide-Semiconductor) by removing the CMOS battery for a few minutes or using the clear CMOS jumper (refer to motherboard diagram).
- System Fails to Boot / OS Not Found:
- Verify that SATA data and power cables are securely connected to your storage devices.
- Check the boot order in the BIOS to ensure your operating system drive is prioritized.
- If installing a new OS, ensure the installation media (USB drive or DVD) is bootable and selected in the BIOS.
- Peripheral Not Recognized:
- Try connecting the peripheral to a different USB port.
- Ensure all necessary drivers for the peripheral are installed.
- Check BIOS settings for USB port enablement.
Specifications
| Brand | NANU SHOP |
| Model Number | DELTA-B75M2K |
| Chipset | Intel B75 |
| CPU Socket | LGA 1155 |
| Compatible Processors | Intel Core i7, i5, i3, Pentium, Celeron (2nd and 3rd Generation) |
| Memory Technology | DDR3 |
| Maximum Memory Capacity | 16 GB |
| Memory Slots | 2 |
| Storage Interface | 4 x SATA (including SATA III support) |
| Video Output | 1 x HDMI, 1 x VGA |
| USB Ports | 2 x USB 3.0, 4 x USB 2.0 (rear I/O) |
| Ethernet | 1 x LAN Port |
| Expansion Slots | PCI Express |
| Form Factor | Micro-ATX |
| Product Dimensions | 24 x 18 x 22 cm (Length x Width x Height, approximate) |
| Product Weight | 610 g |
Warranty Information
Warranty terms and conditions for the NANU SHOP B75 Micro-ATX Motherboard DELTA-B75M2K are provided by the seller at the time of purchase. Please retain your proof of purchase for any warranty claims. For specific details regarding warranty duration and coverage, please contact the retailer or NANU SHOP directly.
Customer Support
For technical assistance, troubleshooting beyond this manual, or inquiries regarding your NANU SHOP B75 Micro-ATX Motherboard, please contact your point of purchase or visit the official NANU SHOP website for support resources.
Official NANU SHOP Store: NANU SHOP on Amazon.com.br