1. Introduction
Welcome to the user manual for your Canal Toys Photo Creator Pop Colour Digital Camera. This compact and trendy digital camera is designed for children aged 8 and up, offering an intuitive and fun way to capture photos and videos. With its dual lenses, 2.4-inch LCD display, and various creative features, you can explore your environment and personalize your memories. Please read this manual carefully to ensure proper use and maintenance of your camera.
2. Safety Information
WARNING! Not suitable for children under 8 years of age. To be used under adult supervision.
- Keep out of reach of children under 8 years old.
- Improper use of power supply may cause electric shock.
- Read the instruction leaflet before first use.
- Remove unnecessary elements from the toy before giving it to your child (e.g., plastic fasteners).
- This toy contains rechargeable batteries that are not replaceable.
- Rechargeable batteries must only be charged under adult supervision.
- Do not dispose of the product with household chemical waste. Please use local recycling collection points provided.
- Product images are not contractual. Colors and details of contents may vary.
- Retain this information for future reference.
3. What's in the Box
Your Canal Toys Photo Creator Pop Colour Digital Camera package includes:
- 1 x Pop Colour Digital Camera (Yellow version)
- 1 x 8GB Micro SD Card
- 1 x Wrist Strap
- 1 x Sheet of Stickers
- 1 x USB-C Charging Cable
- 1 x User Manual

Image: All included accessories for the Photo Creator Pop Colour Digital Camera.
4. Setup
4.1 Charging the Camera
- Locate the USB-C charging port on your camera.
- Connect the provided USB-C cable to the camera and the other end to a compatible USB power source (e.g., computer, laptop, or USB wall adapter).
- The camera's indicator light will show charging status. Ensure the camera is fully charged before first use.
4.2 Inserting the Micro SD Card
- Locate the Micro SD card slot on the side of the camera.
- Gently insert the provided 8GB Micro SD card into the slot until it clicks into place. Ensure the card is inserted in the correct orientation.
- To remove, gently push the card until it clicks and ejects.
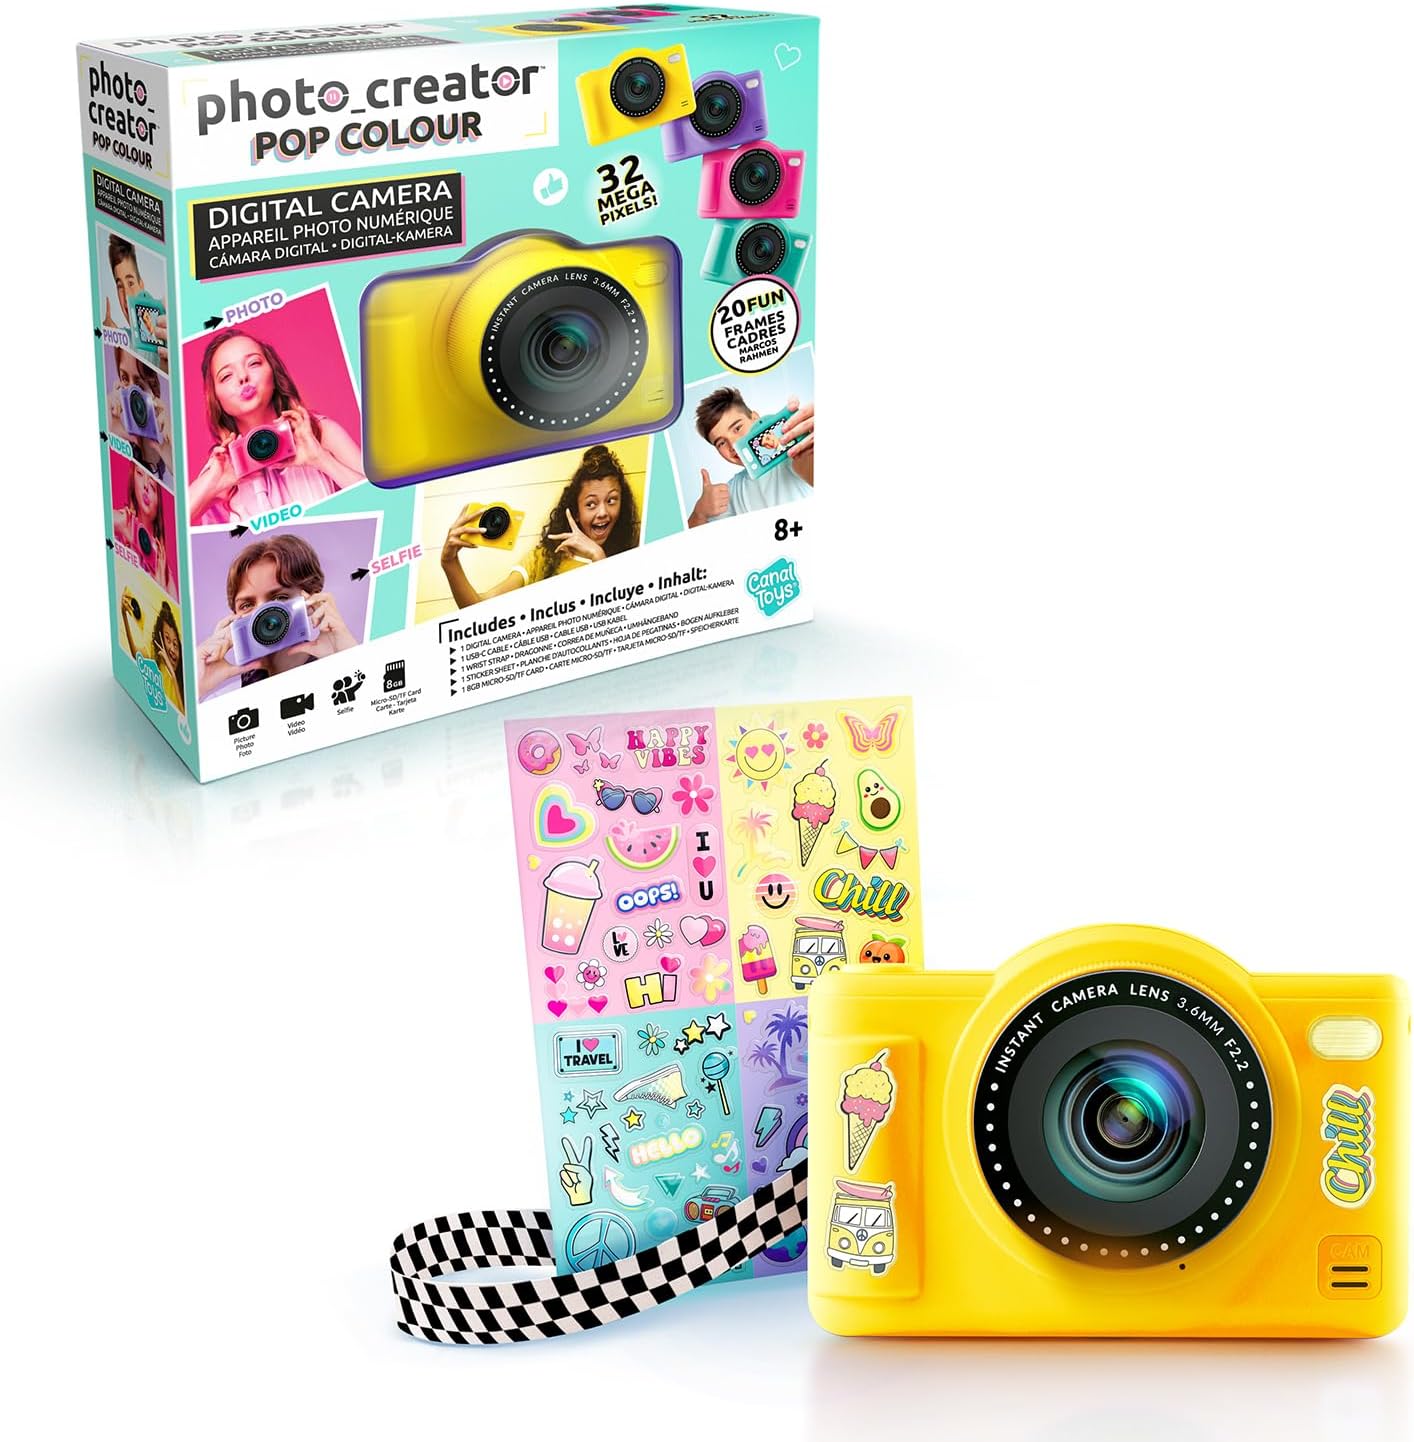
Image: Side view of the camera, highlighting the Micro SD card slot.
4.3 Attaching the Wrist Strap
- Thread the thin loop of the wrist strap through the strap attachment point on the camera.
- Pass the larger part of the strap through the loop and pull tight to secure it.
- This helps prevent accidental drops.
5. Operating Instructions
5.1 Power On/Off
Press and hold the power button (usually located on the top or side) to turn the camera on or off. The 2.4-inch LCD display will light up.
5.2 Taking Photos
- Point the camera at your subject.
- Use the navigation buttons to select photo mode on the display.
- Press the shutter button to capture a photo.

Image: Child using the camera to take a selfie.
5.3 Recording Videos
- Navigate to video mode using the camera's buttons.
- Press the shutter button once to start recording and again to stop.
- Videos are saved to the Micro SD card.
5.4 Selfie Mode and Dual Lenses
The camera features dual lenses, allowing for easy selfies. Switch to selfie mode to use the front-facing lens.
5.5 Applying Filters and Frames
Your camera includes 20 frames and 5 color filters. While in photo or video mode, use the navigation buttons to browse and apply these creative effects before or after capturing your content.

Image: Camera with stickers, which can be used to personalize the device.
5.6 Timer and Burst Mode
Access the camera settings to enable the timer function for delayed shots or burst mode for capturing multiple photos in quick succession.
5.7 Transferring Photos and Videos to a Computer
To transfer your media, connect the camera to a computer, laptop, or tablet using the USB-C cable. The camera should appear as a removable drive, allowing you to copy files.
Video: Demonstrates how to connect a mini digital camera to a PC and use it as a webcam. This process is similar for transferring files.
6. Maintenance
- Cleaning: Use a soft, dry cloth to clean the camera body and screen. Do not use liquid cleaners or solvents.
- Storage: Store the camera in a cool, dry place away from direct sunlight and extreme temperatures.
- Battery Care: To prolong battery life, avoid fully discharging the camera frequently. Charge it regularly, even if not in use for extended periods.
- SD Card: Periodically back up your photos and videos from the SD card to a computer to prevent data loss.
7. Troubleshooting
| Problem | Solution |
|---|---|
| Camera does not turn on. | Ensure the battery is charged. Connect the camera to a power source using the USB-C cable and try again. |
| Cannot take photos/videos. | Check if the Micro SD card is correctly inserted and has sufficient free space. The camera may also need charging. |
| Photos/videos are blurry. | Ensure the lens is clean. Hold the camera steady when taking pictures. Check lighting conditions. |
| Camera not recognized by computer. | Ensure the USB-C cable is securely connected to both the camera and the computer. Try a different USB port or restart your computer. |
8. Specifications
| Feature | Detail |
|---|---|
| Model Name | CLK 040 |
| Brand | Canal Toys |
| Resolution | 32 Megapixels (extrapolated) |
| Lenses | Dual (Front and Rear) |
| Display | 2.4-inch Color LCD |
| Creative Features | 20 Frames, 5 Color Filters |
| Modes | Timer, Burst Mode |
| Storage | Micro SD Card (8GB included) |
| Battery | Integrated Rechargeable Battery |
| Connectivity | USB-C (for charging and data transfer) |
| Compatibility | Computers, Laptops, Tablets with USB port |
| Product Dimensions | 10 x 3.8 x 6.8 cm |
| Product Weight | 200 grams |
9. Warranty & Support
For warranty information and customer support, please refer to the contact details provided on the product packaging or visit the official Canal Toys website. Keep your proof of purchase for any warranty claims.
For additional resources and product updates, you may visit the Canal Toys store: Canal Toys Store.
You can also scan the QR code found on the product packaging for more information: Product Information QR Code.