Introduction
Thank you for choosing the EDEDE OBD2 Code Reader Scanner. This professional automotive diagnostic tool is designed to help you quickly and efficiently identify and resolve issues with your vehicle's engine and emissions system. With its user-friendly interface and comprehensive functions, it empowers both DIY users and professionals to perform essential diagnostic tasks.
This manual provides detailed instructions on how to set up, operate, and maintain your OBD2 scanner, along with troubleshooting tips to ensure optimal performance.
Package Contents
- 1 x EDEDE OBD2 Code Reader Main Unit
- 1 x Quick Start Guide
Product Overview
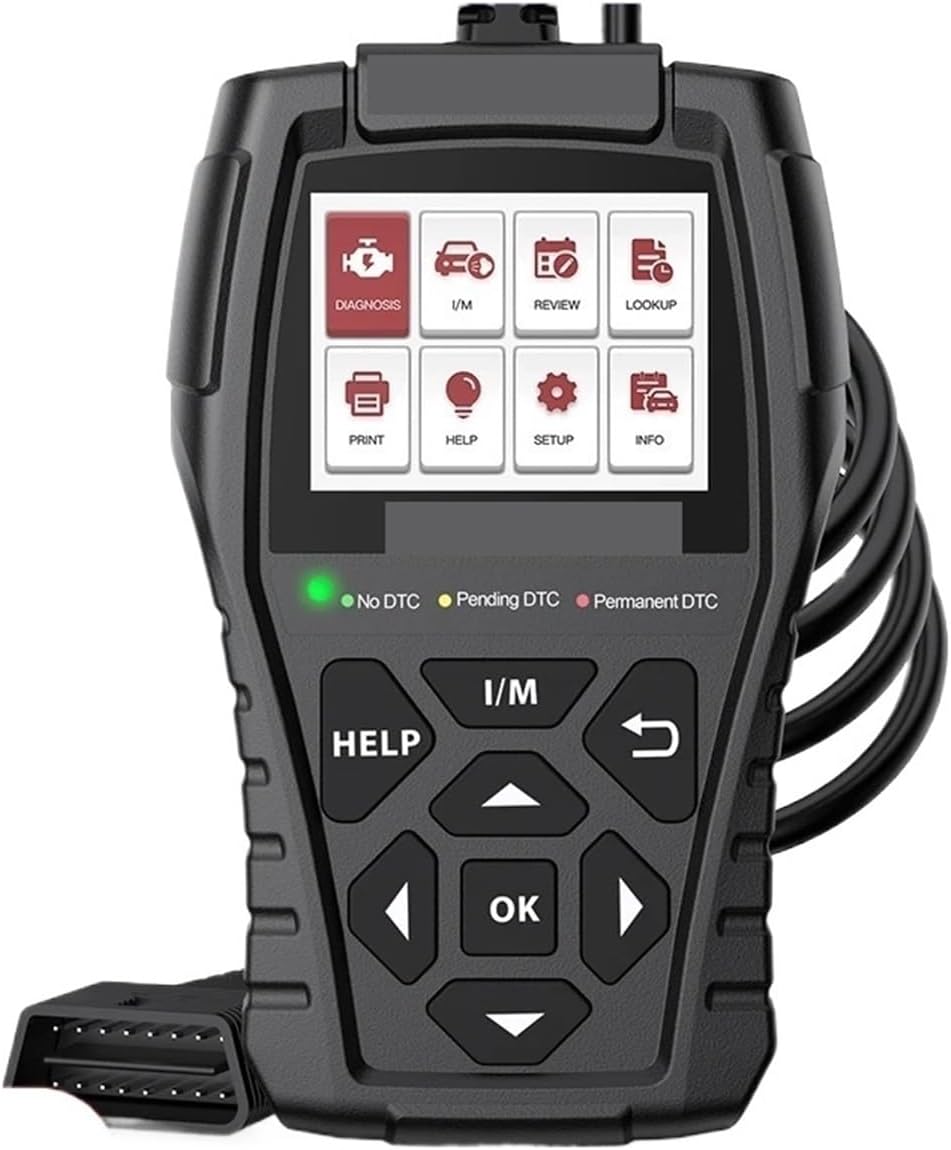
Figure 1: Front view of the EDEDE OBD2 Code Reader Scanner, showing the display screen, navigation buttons, and OBD-II connector cable.
The EDEDE OBD2 Code Reader features a compact, ergonomic design for comfortable handling. It includes a clear display screen and a 4-button keypad for easy navigation through menus and functions.
- Display Screen: Shows diagnostic data, menus, and results.
- Keypad: Consists of Up, Down, OK, and Return buttons for intuitive operation.
- OBD-II Connector: Standard 16-pin connector for connecting to your vehicle's OBD-II port.
Setup
- Locate the OBD-II Port: The OBD-II port is usually located under the dashboard on the driver's side of the vehicle. Refer to your vehicle's owner's manual if you cannot find it.
- Connect the Scanner: With the vehicle's ignition off, firmly plug the scanner's OBD-II connector into the vehicle's OBD-II port.
- Turn On Ignition: Turn the vehicle's ignition to the "ON" position (engine off). The scanner will automatically power on and establish communication with the vehicle's onboard computer.
Operating Instructions
The EDEDE OBD2 Code Reader offers a range of diagnostic functions accessible via its intuitive menu system. Use the Up/Down buttons to navigate and the OK button to select.

Figure 2: Main menu displaying various diagnostic functions available on the scanner.
Key Functions:
- Read Codes: Retrieves Diagnostic Trouble Codes (DTCs) from the vehicle's computer. These codes indicate specific issues detected by the vehicle.

Figure 3: Example of I/M Readiness and O2 Sensor Test results displayed on the scanner.
- Clear Codes: Erases DTCs from the vehicle's computer and turns off the Check Engine Light (MIL). Note: Clearing codes does not fix the underlying problem. Ensure the issue is resolved before clearing codes to prevent them from reappearing.

Figure 4: Illustration of turning off the Check Engine Light using the scanner.
- I/M Readiness (Smog Check): Checks the status of emission-related monitors to determine if the vehicle is ready for an emissions test. This helps ensure your vehicle passes inspection smoothly.

Figure 5: Detailed view of I/M Readiness data, indicating monitor status for emission tests.
- Live Data: Displays real-time data stream from the vehicle's sensors, such as engine RPM, vehicle speed, oxygen sensor readings, etc.
- O2 Sensor Test: Retrieves oxygen sensor monitor test results for the most recently performed tests.
- On-Board Monitor Test: Views the results of on-board diagnostic monitoring tests for specific components/systems. Useful after servicing or clearing the vehicle's control module memory.
- DTC Lookup: Provides definitions for Diagnostic Trouble Codes, helping you understand the meaning of the codes retrieved.
The device supports 8 languages for user convenience.
Troubleshooting
This section addresses common issues you might encounter and how to resolve them.

Figure 6: Visual guide to common car problems and how the DTC Guide assists in accurate diagnosis.
- Scanner Does Not Power On:
- Ensure the OBD-II connector is firmly plugged into the vehicle's port.
- Verify the vehicle's ignition is in the "ON" position (engine off).
- Check the vehicle's fuse for the OBD-II port (consult your vehicle's manual).
- Communication Error:
- Confirm the vehicle supports the OBD-II protocol (most vehicles manufactured after 1996 in the US, 2001 in EU for petrol, 2004 for diesel).
- Ensure the connection is secure.
- Try connecting to a different vehicle to rule out scanner malfunction.
- Check Engine Light Remains On After Clearing Codes:
- This indicates the underlying issue causing the code has not been resolved. Diagnose and repair the fault before attempting to clear codes again.
- Some codes may require multiple drive cycles to clear completely after a repair.
Maintenance
To ensure the longevity and optimal performance of your EDEDE OBD2 Code Reader:
- Keep the device clean by wiping it with a soft, dry cloth. Avoid using abrasive cleaners or solvents.
- Store the scanner in a dry, cool place away from direct sunlight and extreme temperatures.
- Do not drop the device or expose it to excessive shock.
- Keep the OBD-II connector free from dirt and debris.
Specifications
| Feature | Specification |
|---|---|
| Brand | EDEDE |
| Model Number | 321724064 |
| Operating Voltage | 9-18V (from vehicle OBD-II port) |
| Operating Temperature | 0°C - 50°C (32°F - 122°F) |
| Storage Temperature | -20°C - 70°C (-4°F - 158°F) |
| Dimensions (Length) | 150mm |
| Item Weight | 50 g |
| Supported Languages | 8 languages |
Warranty and Support
For warranty information, technical support, or any inquiries regarding your EDEDE OBD2 Code Reader Scanner, please contact the seller or manufacturer directly through the platform where you purchased the product. Please have your model number (321724064) and purchase details ready when contacting support.