TMEOIIPY Smart LED Bicycle Helmet Black
TMEOIIPY Smart LED Bicycle Helmet User Manual
Model: Black (Fits 22.8-24 inches / 58-61 cm)
1. Introduction
Thank you for choosing the TMEOIIPY Smart LED Bicycle Helmet. This helmet is designed to enhance your cycling safety and experience with its integrated LED display, turn signals, rear light, and customizable patterns controlled via a mobile application and remote. Please read this manual thoroughly before using the helmet to ensure proper setup, operation, and maintenance.
2. Safety Information
Your safety is paramount. This helmet is certified to CPSC and ASTM standards, providing a durable PC shell and shock-absorbing EPS foam for superior impact absorption. Always ensure the helmet fits snugly and is securely fastened before riding. Replace the helmet immediately if it sustains any impact, even if visible damage is not apparent.
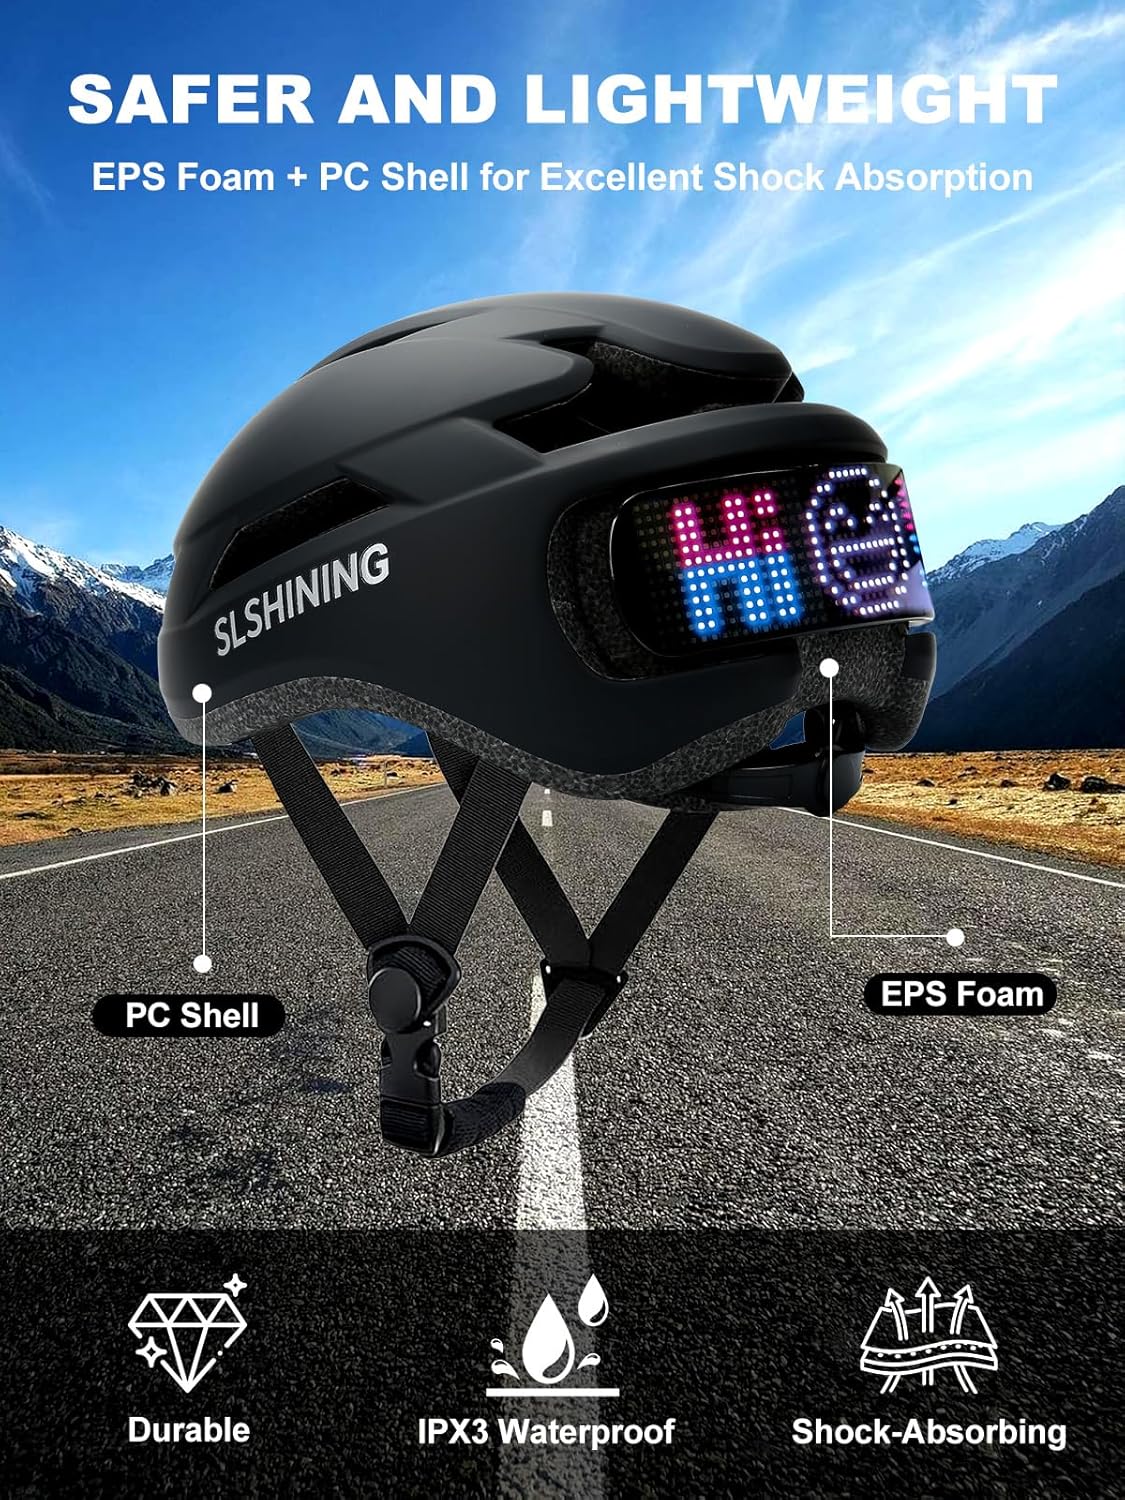
Image Description: This image displays a cutaway view of the helmet, highlighting its PC (Polycarbonate) shell and EPS (Expanded Polystyrene) foam layers, which are crucial for impact absorption. Icons below indicate its durability, IPX3 waterproof rating, and shock-absorbing capabilities.
3. Product Components
- TMEOIIPY Smart LED Bicycle Helmet
- Handlebar Remote Control
- USB Type-C Charging Cable
- User Manual (this document)
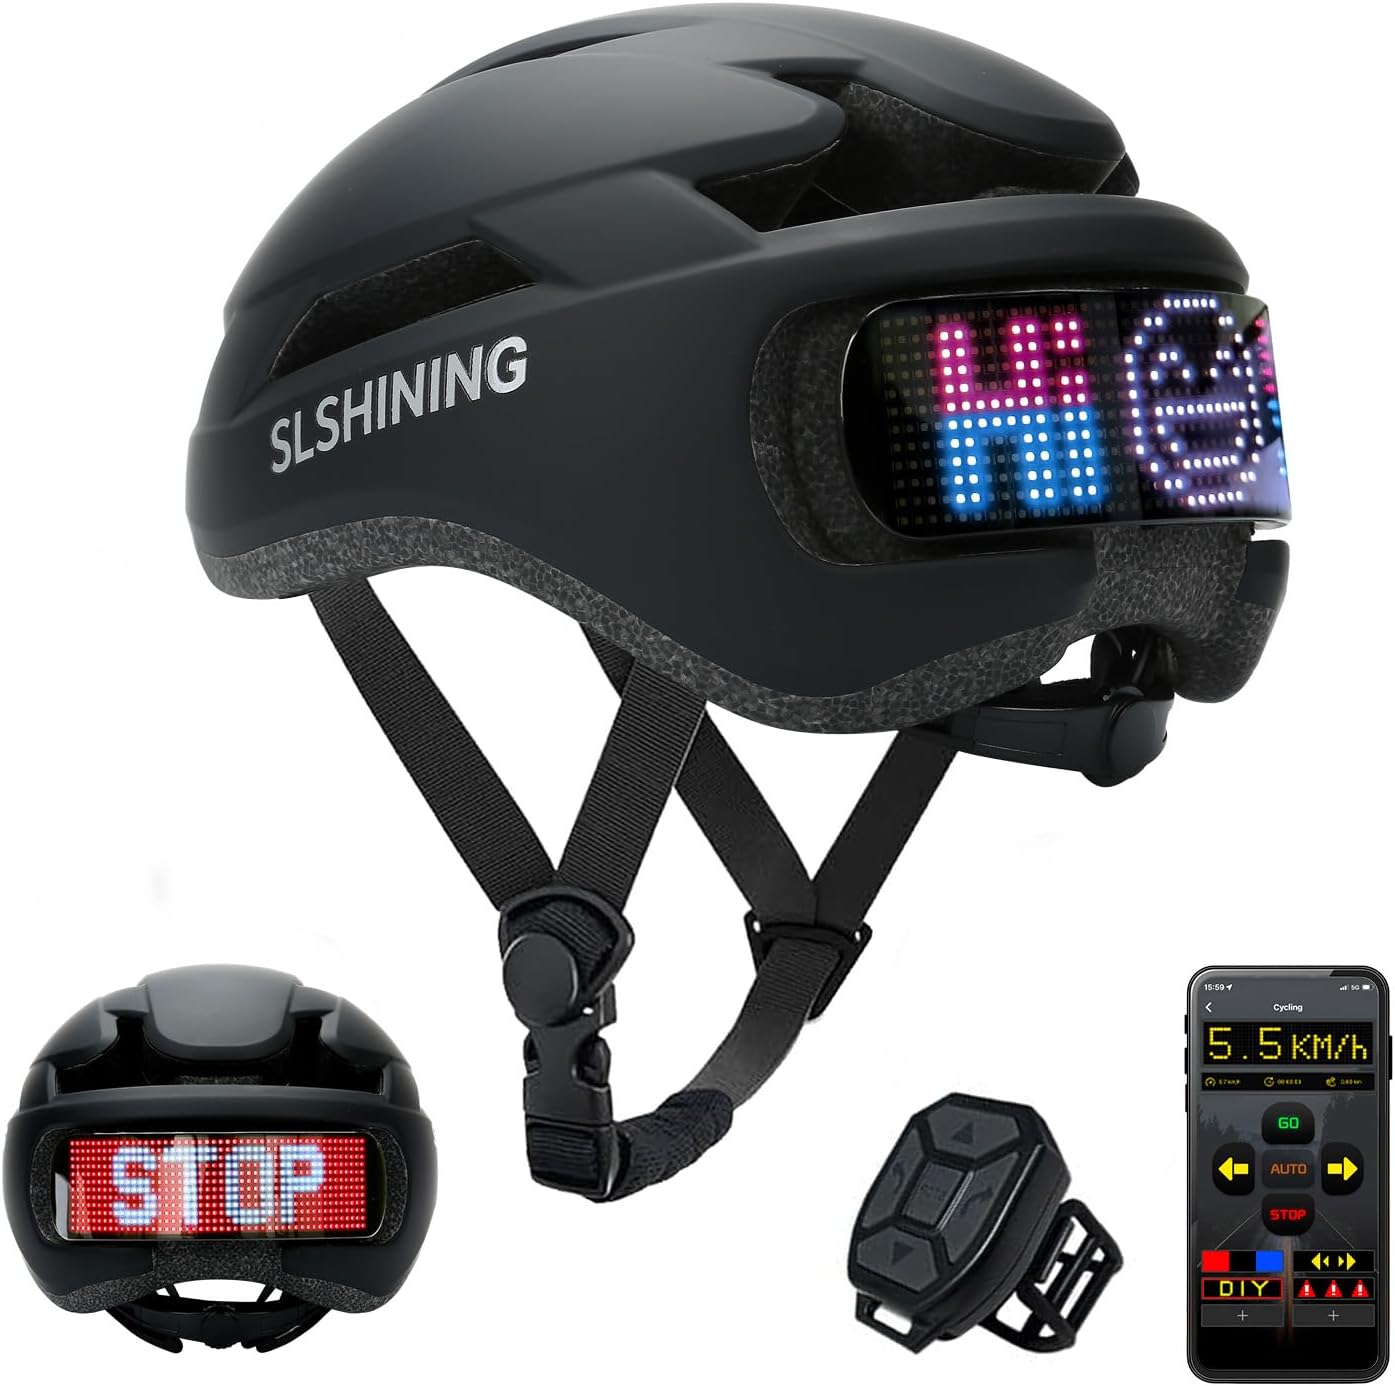
Image Description: A comprehensive view of the TMEOIIPY Smart LED Bicycle Helmet in black, showcasing its sleek design and the integrated LED display at the rear. Also pictured are the handlebar-mounted remote control and a smartphone screen displaying the companion app interface.
4. Setup
4.1 Charging the Helmet
Before first use, fully charge the helmet. Connect the provided USB Type-C charging cable to the helmet's charging port and a compatible USB power source. The 1500mAh battery typically requires about 4 hours for a full charge, providing over 12 hours of continuous display use.

Image Description: This graphic illustrates the helmet's battery features, emphasizing its 1500mAh capacity, rechargeability, 12-hour display time on a single charge, and the convenience of Type-C charging.
4.2 App Installation and Connection
- Download the "SHINING DISPLAY" app from your smartphone's app store (available on App Store for iOS and Google Play for Android).
- Ensure Bluetooth is enabled on your smartphone.
- Turn on the helmet's LED display.
- Open the "SHINING DISPLAY" app and follow the on-screen instructions to connect to your helmet via Bluetooth.
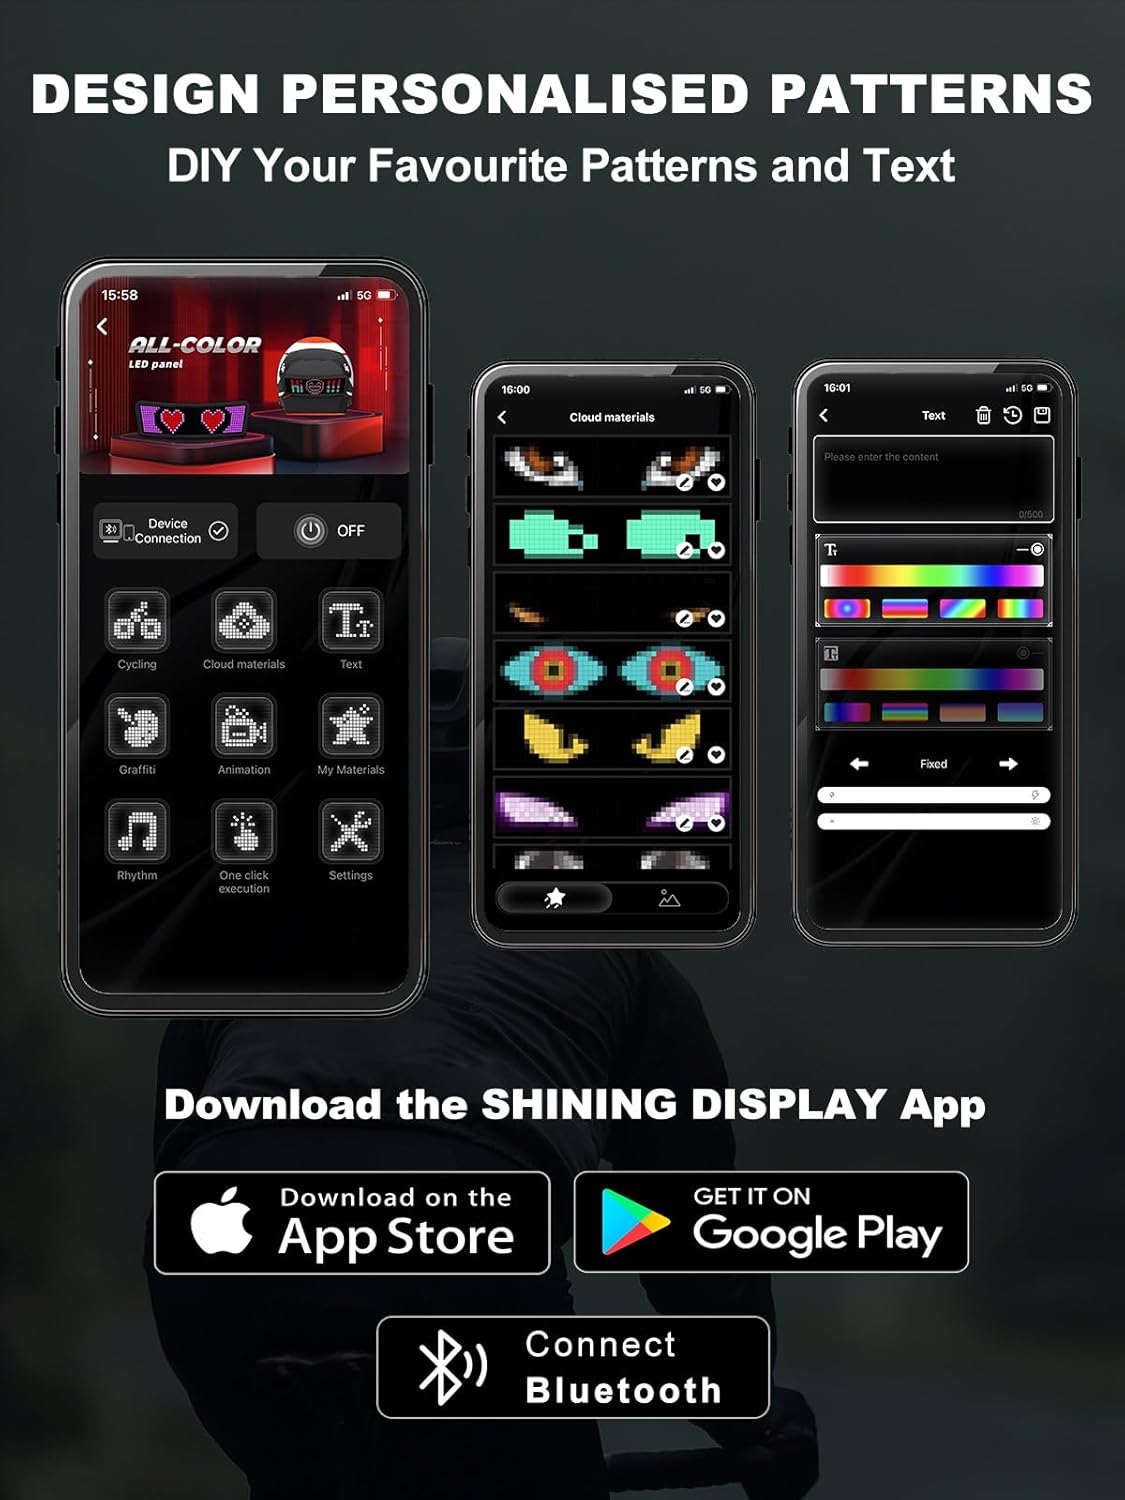
Image Description: This image displays multiple screenshots of the "SHINING DISPLAY" mobile application interface. It shows options for connecting to the device, selecting from various pre-set patterns, accessing cloud materials, and creating custom text or animated designs for the helmet's LED display.
4.3 Remote Pairing
The handlebar remote control is typically pre-paired with the helmet. If re-pairing is necessary, refer to the app's settings or the helmet's specific pairing mode instructions within the app.
5. Operating Instructions
5.1 LED Display Functions
The helmet's rear LED display provides crucial visual signals for enhanced safety:
- Turn Signals: Use the left and right buttons on the handlebar remote to activate corresponding turn signals on the LED display.
- Stop Signal: Press the 'STOP' button on the remote to display a clear stop signal, alerting vehicles behind you.
- DIY Patterns: Through the "SHINING DISPLAY" app, you can customize the LED display with preset patterns, upload your own designs, animations, or text messages.

Image Description: This image shows a cyclist from behind, wearing the TMEOIIPY helmet, demonstrating the various LED rear light functions. Insets highlight the DIY pattern capability, turn signals (left and right), and the prominent 'STOP' reminder display, along with a smartphone showing the speed display and control interface.
5.2 App Usage
The "SHINING DISPLAY" app is your primary interface for advanced customization:
- Preset Patterns: Browse and select from a variety of pre-loaded patterns and animations.
- DIY Design: Create and upload your own unique images or animations pixel by pixel.
- Text Input: Type custom messages to be displayed on the helmet's LED screen.
- Settings: Adjust brightness, display speed, and other helmet parameters.
5.3 Remote Control Usage
The handlebar-mountable remote provides quick access to essential signals:
- Left Turn Button: Activates the left turn signal.
- Right Turn Button: Activates the right turn signal.
- STOP Button: Activates the stop signal.

Image Description: This image provides detailed views of the helmet's features: an adjustable dial for head circumference, removable and washable inner padding, multiple air vents designed to reduce wind drag and increase airflow, and a close-up of the handlebar-mountable remote control.
6. Maintenance
6.1 Cleaning
- Helmet Shell: Wipe the exterior with a soft, damp cloth and mild soap. Avoid abrasive cleaners or solvents.
- Inner Padding: The inner padding is removable and washable. Hand wash with mild soap and water, then air dry completely before reinserting.
- LED Display: Gently wipe the LED screen with a soft, dry, lint-free cloth. Do not use liquids directly on the display.
6.2 Battery Care
- Charge the helmet regularly, even if not in frequent use, to maintain battery health.
- Avoid fully discharging the battery for extended periods.
- Store the helmet in a cool, dry place away from extreme temperatures.
6.3 Storage
Store the helmet in a dry, cool environment, away from direct sunlight and heat sources. Do not place heavy objects on top of the helmet.
7. Troubleshooting
- LED Display Not Working: Ensure the helmet is charged. Check if the helmet is powered on. If connected to the app, verify settings.
- App Connection Issues: Ensure Bluetooth is on and the helmet is powered on. Try restarting both the app and the helmet. Ensure no other devices are connected to the helmet.
- Remote Not Responding: Check if the remote's battery needs replacement (if applicable). Re-pair the remote with the helmet via the app if necessary.
- Helmet Not Fitting Comfortably: Adjust the side and chin straps. Use the adjustable dial at the rear of the helmet to fine-tune the fit for head circumferences between 22.8-24 inches (58-61 cm).
8. Specifications
| Feature | Description |
|---|---|
| Brand | TMEOIIPY |
| Color | Black |
| Age Range | Adult |
| Size | Large (Fits 22.8-24 inches / 58-61 cm Head Circumference) |
| Special Features | Adjustable Strap, Lightweight, Rear LED Light, DIY Display, App Control, Remote Control |
| Battery Capacity | 1500mAh |
| Charging Time | Approx. 4 hours |
| Display Time | Over 12 hours (continuous) |
| Ventilation | 8 Air Vents |
| Safety Certification | CPSC, ASTM Standards |
9. Warranty and Support
Warranty information for this product was not provided in the available data. For specific warranty details, technical support, or service inquiries, please contact the manufacturer, TMEOIIPY, directly through their official website or customer service channels.
Ask a question about this manual
Ask about setup, troubleshooting, compatibility, parts, safety, or missing instructions. Manuals+ will review the question and use this page’s manual context to help answer it.