1. Introduction
This manual provides comprehensive instructions for the safe and effective use of the VIHELM EZ9910 Digital Water Quality Tester. The EZ9910 is a multi-functional device designed to measure pH, Total Dissolved Solids (TDS), Electrical Conductivity (EC), Oxidation-Reduction Potential (ORP), and Temperature. Its IP67 waterproof rating ensures durability in various environments.
2. Product Overview
The VIHELM EZ9910 is a portable, pen-style digital tester featuring a clear LCD display with backlight for easy reading. It is equipped with a replaceable 5-in-1 sensor for accurate measurements across multiple parameters.
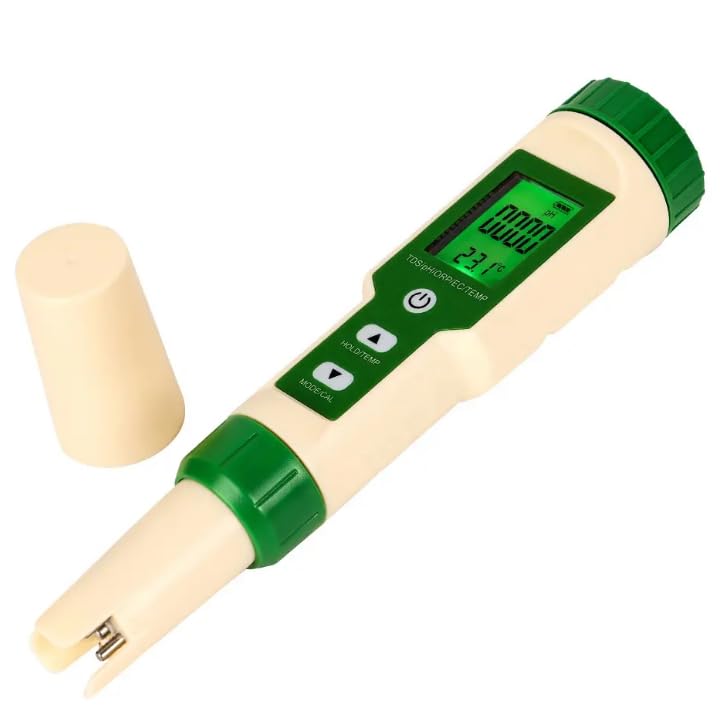
Figure 2.1: Front view of the VIHELM EZ9910 Digital Water Quality Tester, showing the display, control buttons, and sensor cap.
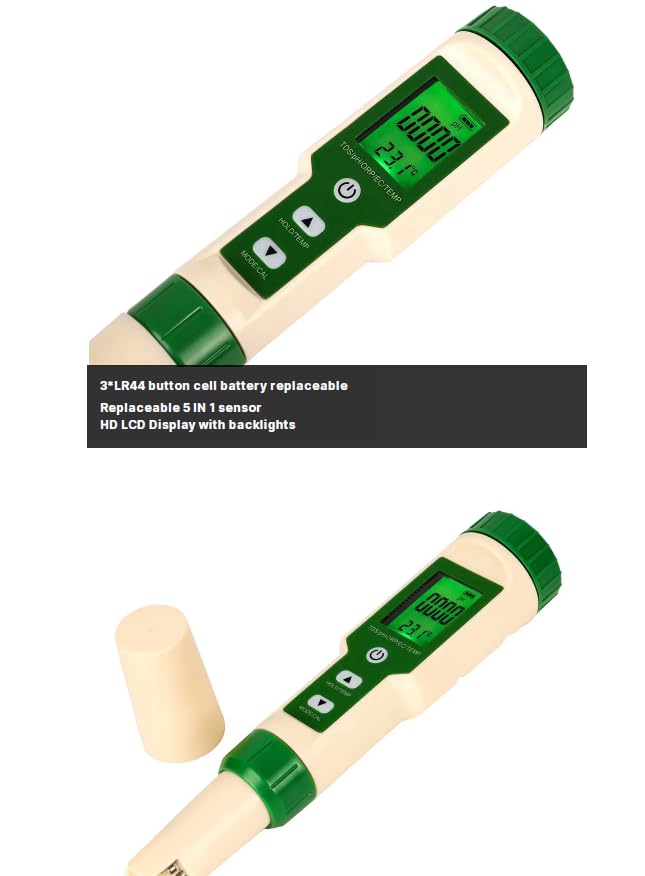
Figure 2.2: Close-up view of the EZ9910's LCD display and control buttons, including Power, HOLD/TEMP, and MODE/CAL.
3. Package Contents
Upon unpacking, please verify that all items listed below are present and undamaged:
- 1 x VIHELM EZ9910 Digital Water Quality Tester
- Calibration buffer powders (e.g., pH 6.86, pH 4.00, pH 9.18)
- User Manual
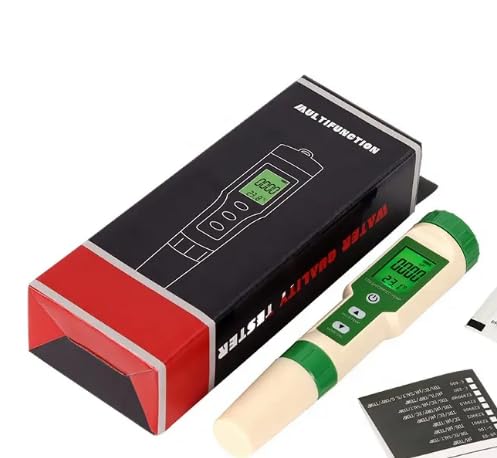
Figure 3.1: The EZ9910 tester alongside its packaging box and included calibration powders.
4. Specifications
The following table outlines the technical specifications and measurement ranges for the VIHELM EZ9910:
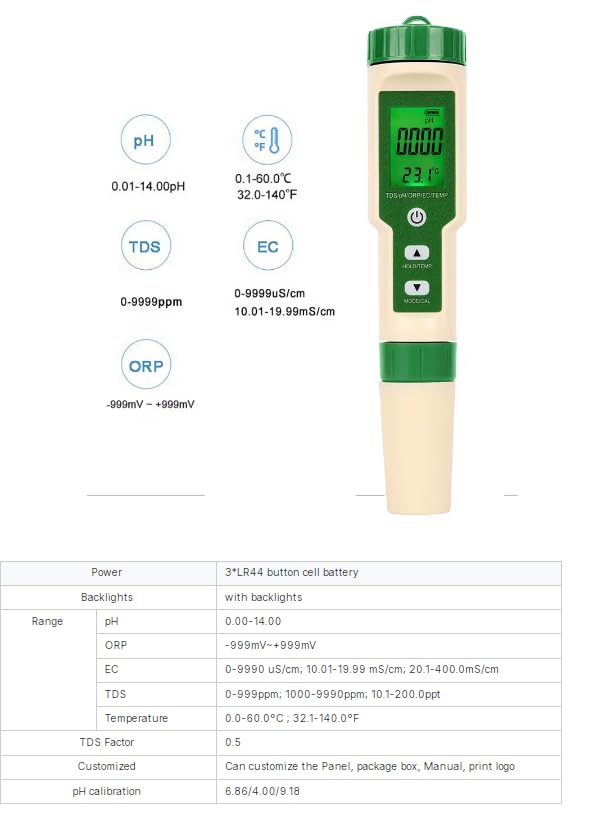
Figure 4.1: Detailed specifications including measurement ranges for pH, TDS, EC, ORP, and Temperature.
| Parameter | Range | Resolution | Accuracy |
|---|---|---|---|
| pH | 0.01 - 14.00 pH | 0.01 pH | ±0.05 pH |
| TDS | 0 - 9999 ppm; 10.1 - 200.0 ppt | 1 ppm (0-9999 ppm); 0.1 ppt (10.1-200.0 ppt) | ±2% F.S. |
| EC | 0 - 9999 µS/cm; 10.01 - 19.99 mS/cm; 20.1 - 400.0 mS/cm | 1 µS/cm (0-9999 µS/cm); 0.01 mS/cm (10.01-19.99 mS/cm); 0.1 mS/cm (20.1-400.0 mS/cm) | ±2% F.S. |
| ORP | -999 mV - +999 mV | 1 mV | ±2 mV |
| Temperature | 0.1 - 60.0 °C / 32.0 - 140.0 °F | 0.1 °C / 0.1 °F | ±0.5 °C |
| Power Supply | 3 x LR44 button cell batteries (replaceable) | ||
| Backlight | Yes | ||
| Waterproof Rating | IP67 | ||
5. Initial Setup
- Battery Installation: The device typically comes with batteries pre-installed. If not, open the battery compartment (usually at the top, under the green cap) and insert 3 LR44 button cell batteries, observing polarity.
- Remove Protective Cap: Carefully remove the protective cap from the bottom of the tester to expose the sensor electrodes.
- Rinse Sensor: Before first use, rinse the sensor with distilled water to remove any storage solution or residue. Gently blot dry with a clean, soft tissue.
6. Operating Instructions
6.1 Button Functions
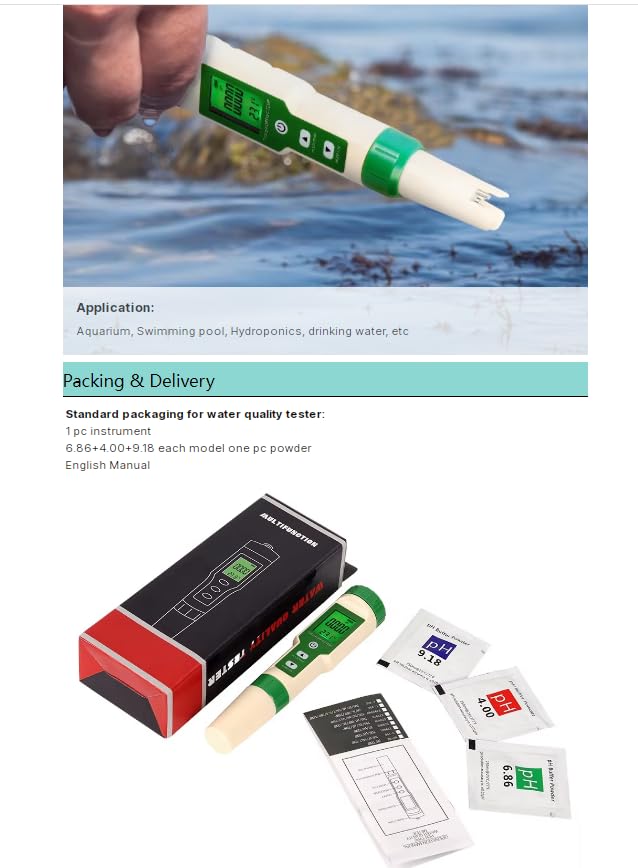
Figure 6.1: Diagram illustrating the functions of the ON/OFF, HOLD/TEMP, and MODE/CAL buttons.
- ON/OFF Button:
- Short press to turn the device ON or OFF.
- MODE/CAL Button:
- Short press to cycle through measurement modes (EC, TDS, pH, ORP).
- Long press to enter calibration mode for EC, TDS, pH, or ORP.
- HOLD/TEMP Button:
- Short press to lock the current reading on the display (HOLD function). Press again to release.
- Long press to switch between Celsius (°C) and Fahrenheit (°F) for temperature display.
6.2 Taking Measurements
- Turn on the tester by pressing the ON/OFF button.
- Immerse the electrode into the sample solution up to the immersion line. Ensure no air bubbles are trapped around the sensor.
- Gently stir the solution and wait for the reading to stabilize. The reading is stable when the value on the display stops fluctuating significantly.
- Short press the MODE/CAL button to select the desired measurement parameter (pH, EC, TDS, ORP).
- To hold the reading, short press the HOLD/TEMP button. The "HOLD" icon will appear on the display. Press again to release.
- After measurement, rinse the electrode with distilled water and replace the protective cap.
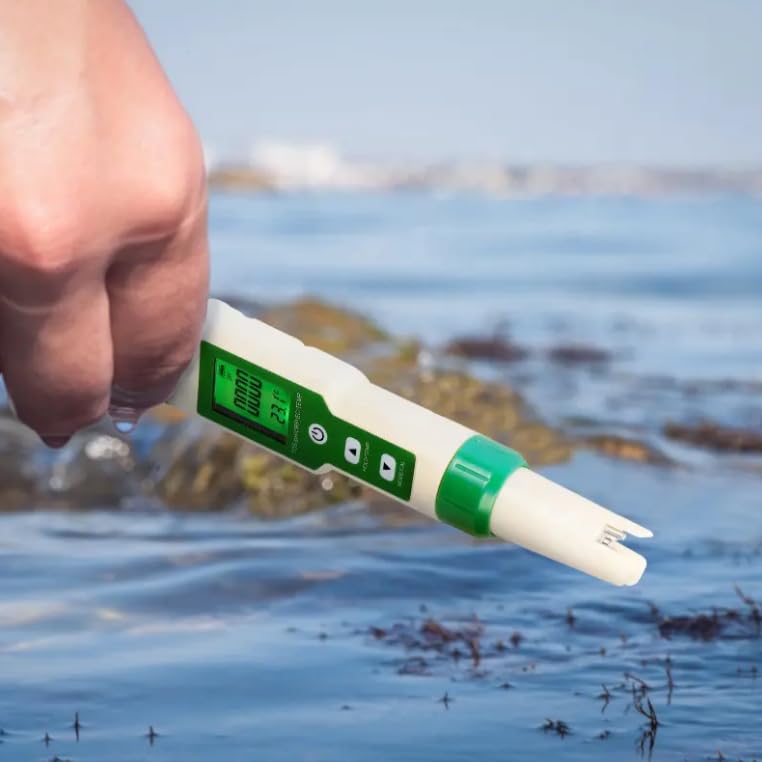
Figure 6.2: The EZ9910 tester immersed in water for measurement, demonstrating typical usage.
7. Calibration
Regular calibration ensures the accuracy of your EZ9910 tester. Calibration is recommended before first use, after prolonged storage, or if readings appear inconsistent.
7.1 pH Calibration
- Prepare pH 6.86, pH 4.00, and pH 9.18 buffer solutions.
- Turn on the tester and short press MODE/CAL to select pH mode.
- Long press MODE/CAL to enter pH calibration mode. The display will show "CAL" and the pH value will flash.
- Immerse the electrode into the pH 6.86 buffer solution. Wait for the reading to stabilize and automatically recognize the buffer. Once recognized, it will flash and then confirm.
- Rinse the electrode with distilled water.
- Immerse the electrode into the pH 4.00 buffer solution. Wait for stabilization and recognition.
- Rinse the electrode with distilled water.
- (Optional) For high pH measurements, immerse the electrode into the pH 9.18 buffer solution. Wait for stabilization and recognition.
- The tester will automatically exit calibration mode once completed.
7.2 EC/TDS Calibration
EC and TDS are typically calibrated together using a standard EC solution (e.g., 1413 µS/cm or 12.88 mS/cm).
- Prepare a standard EC calibration solution.
- Turn on the tester and short press MODE/CAL to select EC mode.
- Long press MODE/CAL to enter EC/TDS calibration mode. The display will show "CAL" and the EC/TDS value will flash.
- Immerse the electrode into the standard EC solution. Wait for the reading to stabilize and automatically recognize the buffer. Once recognized, it will flash and then confirm.
- The tester will automatically exit calibration mode once completed.
7.3 ORP Calibration
ORP calibration typically requires a specific ORP standard solution (e.g., 256 mV solution). Follow the same general steps as pH/EC calibration, using the appropriate ORP standard.
8. Maintenance
- Electrode Cleaning: Always rinse the electrode with distilled water after each use. If the electrode is dirty or has deposits, gently clean it with a soft brush and a mild detergent solution, then rinse thoroughly with distilled water.
- Storage: Store the electrode with its protective cap on, ideally with a few drops of electrode storage solution or pH 4 buffer solution inside the cap to keep the sensor moist. Never store dry.
- Battery Replacement: When the battery indicator on the display shows low power, replace the 3 LR44 button cell batteries. Ensure correct polarity.
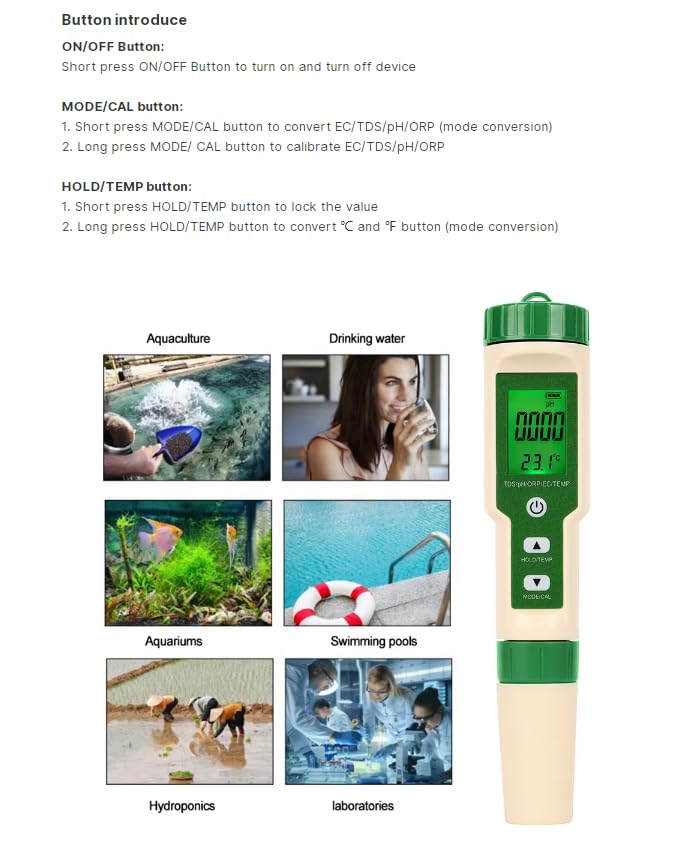
Figure 8.1: Image highlighting the replaceable LR44 button cell batteries and the 5-in-1 sensor.
9. Troubleshooting
| Problem | Possible Cause | Solution |
|---|---|---|
| Inaccurate readings | Uncalibrated sensor, dirty electrode, expired buffer solutions, air bubbles on sensor. | Calibrate the tester, clean the electrode, use fresh buffer solutions, ensure no air bubbles during measurement. |
| Display shows "Err" or abnormal values | Sensor damage, out of range measurement, low battery. | Check battery level and replace if low. Ensure sample is within measurement range. If problem persists, contact support. |
| Tester does not turn on | Dead batteries, incorrect battery installation. | Replace batteries, ensuring correct polarity. |
| Slow response time | Dry electrode, dirty electrode, old sensor. | Re-hydrate electrode in storage solution. Clean electrode. Consider sensor replacement if applicable. |
10. Applications
The VIHELM EZ9910 is suitable for a wide range of water quality testing applications, including but not limited to:
- Aquaculture (fish farming)
- Drinking water quality monitoring
- Aquariums and hydroponics
- Swimming pools and spas
- Laboratory testing
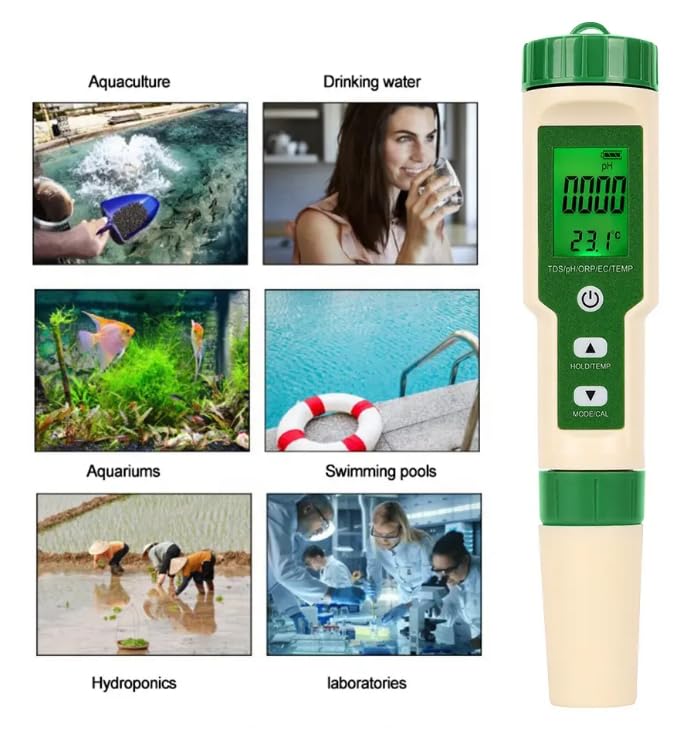
Figure 10.1: Visual representation of various applications for the EZ9910 water quality tester.
11. Warranty and Support
VIHELM products are manufactured to high-quality standards. For warranty information, technical support, or service inquiries, please refer to the contact information provided with your purchase or visit the official VIHELM website. Please retain your proof of purchase for warranty claims.
Note: The product was first available on December 1, 2024.