
1. Introduction
The Wonrabai Pico 2 W is an advanced microcontroller board designed for a wide range of embedded projects and applications. It features the official RP2350 chip, offering a unique dual-core and dual-architecture design with a dual-core Arm Cortex-M33 processor and a dual-core Hazard3 RISC-V processor, capable of running up to 150 MHz. This board integrates 2.4GHz 802.11n WiFi and Bluetooth 5.2 connectivity, making it suitable for IoT and wireless communication projects. It comes with color-coded pre-soldered headers for ease of use and includes a USB cable for convenient connectivity.
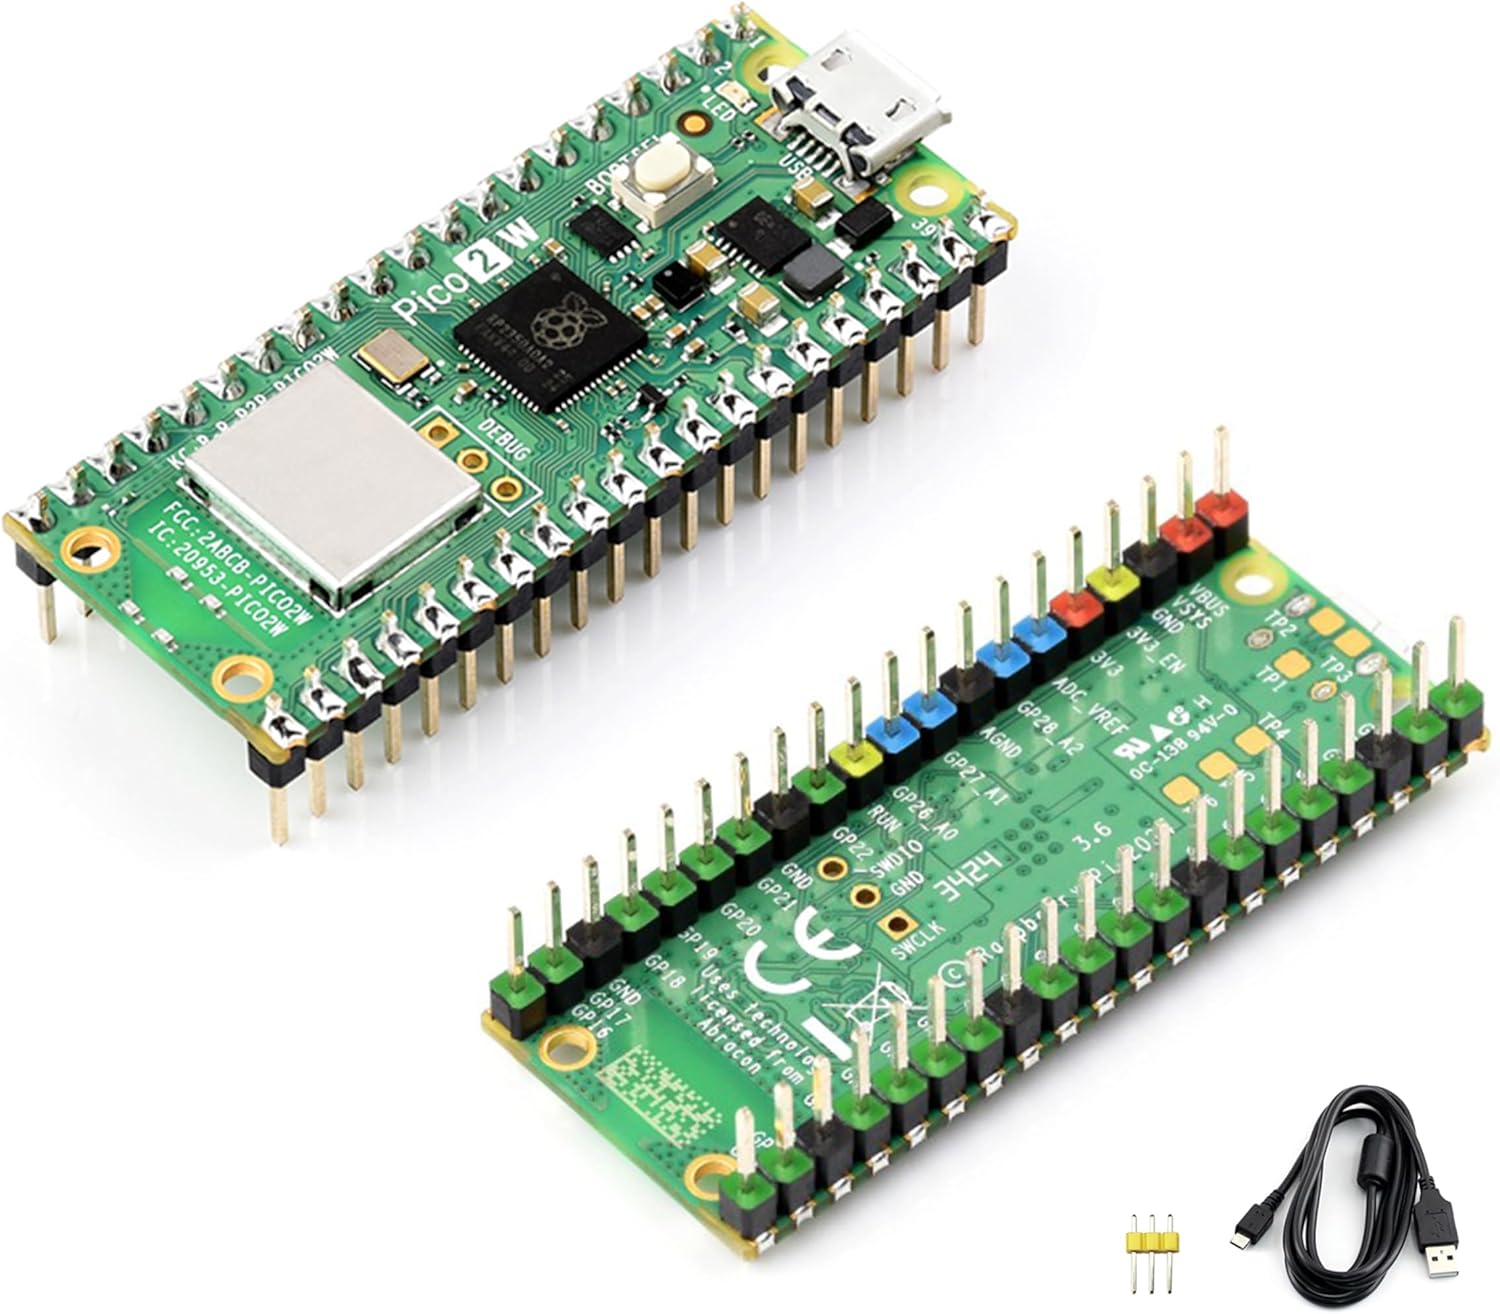
Image: The Wonrabai Pico 2 W microcontroller board, showcasing its compact design and pre-soldered headers, alongside a separate header strip and a USB cable.
2. Package Contents
Verify that all items listed below are present in your package:
- Pico 2 W with pre-soldered header (color-coded) x1
- 1*3PIN yellow pin header x1
- USB-A to micro USB cable (~1.2m) x1

Image: Visual representation of the package contents, clearly showing the Pico 2 W board, the additional 3-pin header, and the USB cable.
3. Product Features and Specifications
Key Features
- Latest RPi Pico 2 W Microcontroller Board with color-coded pre-soldered header.
- Upgraded hardware from Pico 2 with wireless communication, onboard antenna, 2.4GHz 802.11n WIFI and Bluetooth 5.2.
- Utilizes Official RP2350 Chip with a unique dual-core and dual-architecture design: dual-core Arm Cortex-M33 processor and dual-core Hazard3 RISC-V processor, flexible clock up to 150 MHz.
- 520KB of SRAM and 4MB of on-board Flash memory.
- Castellated module for direct soldering to carrier boards.
- USB 1.1 with device and host support.
- Low-power sleep and dormant modes.
- Drag-and-drop programming using mass storage over USB.
- 26 x multi-function GPIO pins.
- 2 x SPI, 2 x I2C, 2 x UART, 3 x 12-bit ADC, 16 x controllable PWM channels.
- Integrated temperature sensor.
- 12 x Programmable I/O (PIO) state machines for custom peripheral support.
Technical Specifications
| Specification | Value |
|---|---|
| Processor | RP2350 (Dual-core Arm Cortex-M33, Dual-core Hazard3 RISC-V) |
| Clock Speed | Up to 150 MHz |
| SRAM | 520KB |
| Flash Memory | 4MB |
| Wireless Connectivity | 2.4GHz 802.11n WiFi, Bluetooth 5.2 |
| USB | USB 1.1 (Device and Host) |
| GPIO Pins | 26 multi-function |
| Peripherals | 2x SPI, 2x I2C, 2x UART, 3x ADC (12-bit), 16x PWM, 12x PIO state machines |
| Onboard Chip | Infineon CYW43439 (Wireless) |
| Item Weight | 2.11 ounces |
| Package Dimensions | 4.21 x 3.19 x 1.26 inches |
Pico Series Comparison

Image: A detailed comparison table highlighting the differences and advancements across the Raspberry Pi Pico series, including the Pico 2 W, Pico 2, and original Pico.
4. Initial Setup
Connecting the Board
To begin using your Wonrabai Pico 2 W, connect it to your computer using the provided USB-A to micro USB cable. The board will typically appear as a mass storage device, allowing for drag-and-drop programming.
Firmware Installation (MicroPython)
For MicroPython development, you will need to flash the appropriate firmware (.uf2 file) onto your Pico 2 W. Follow these steps:
- Download the latest MicroPython .uf2 firmware file for the Pico 2 W from the official Raspberry Pi website or a trusted source.
- Press and hold the BOOTSEL button on the Pico 2 W board.
- While holding BOOTSEL, connect the Pico 2 W to your computer using the USB cable.
- Release the BOOTSEL button once the board is connected. Your computer should recognize it as a removable drive named 'RPI-RP2'.
- Drag and drop the downloaded .uf2 firmware file onto the 'RPI-RP2' drive.
- The board will automatically reboot, and the 'RPI-RP2' drive will disappear. The Pico 2 W is now ready for MicroPython programming.
5. Operating the Pico 2 W
Programming Environments
The Pico 2 W supports various programming environments:
- MicroPython: A full implementation of the Python 3 programming language optimized for embedded hardware. Integrated Development Environments (IDEs) like Thonny are recommended for ease of use.
- C/C++ SDK: The official Raspberry Pi C/C++ Software Development Kit provides comprehensive tools for more advanced development.
Basic Programming Example (MicroPython)
After flashing MicroPython firmware, you can use an IDE like Thonny to write and upload code. A simple example involves controlling a GPIO pin:
from machine import Pin
import time

led = Pin(0, Pin.OUT) # Assuming an LED is connected to GPIO 0

while True:
    led.value(1) # Turn on LED
    time.sleep(1) # Wait for 1 second
    led.value(0) # Turn off LED
    time.sleep(1) # Wait for 1 second
This code will toggle an LED connected to GPIO pin 0 on and off every second.

Image: Overview of software development support for the Pico 2 W, including C/C++ SDK and MicroPython, alongside its dual-core architecture and wireless features.
6. GPIO Pinout Diagram
The Wonrabai Pico 2 W features 26 multi-function GPIO pins. The pre-soldered headers are color-coded to assist in identifying pin functions, making connections easier for development and integration. Refer to the diagram below for a detailed pinout.

Image: Comprehensive pinout diagram of the Pico 2 W, illustrating the function of each of the 26 multi-function GPIO pins, including power, ground, communication interfaces, and analog/digital capabilities.
7. Physical Dimensions
Understanding the physical dimensions of the Pico 2 W is crucial for integration into custom projects and enclosures. All measurements are provided in millimeters (mm).

Image: Technical drawing detailing the precise outline dimensions of the Pico 2 W board, with measurements in millimeters for length, width, and component heights.
8. Troubleshooting
This section addresses common issues you might encounter with your Pico 2 W board.
- Board Not Recognized by Computer:
- Ensure the USB cable is securely connected to both the board and the computer.
- Try a different USB port or cable.
- Verify that you are holding the BOOTSEL button correctly during connection for firmware flashing.
- Firmware Flashing Fails:
- Confirm that you are using the correct .uf2 file for the Pico 2 W.
- Ensure the 'RPI-RP2' drive is visible before dragging the .uf2 file.
- Reboot your computer and try again.
- Code Not Running:
- Check your code for syntax errors.
- Ensure the correct firmware (e.g., MicroPython) is installed.
- Verify that your IDE (e.g., Thonny) is connected to the correct COM port for the Pico 2 W.
- Double-check your circuit connections if external components are involved.
- Wireless Connectivity Issues:
- Ensure your code correctly initializes and connects to WiFi or Bluetooth.
- Check for proper antenna placement if applicable (though the Pico W has an onboard antenna).
- Verify network credentials (SSID, password) are correct.
9. Warranty and Support
For specific warranty information, please refer to the documentation provided at the time of purchase or contact Wonrabai customer support. Additional technical resources, community forums, and detailed documentation for the Raspberry Pi Pico series, including the RP2350 chip, are widely available online through official Raspberry Pi channels and community websites.