1. Introduction
Thank you for choosing the PRPYVPEY CH2810A Intelligent Battery Charger. This device is designed to provide efficient and reliable charging for 12V and 24V batteries commonly used in diesel generator sets. This manual provides essential information for the safe and effective operation, installation, and maintenance of your battery charger.
2. Safety Information
Please read all safety instructions carefully before operating the charger. Failure to follow these instructions may result in electric shock, fire, or serious injury.
- Electrical Safety: Ensure the charger is connected to a grounded power outlet. Do not operate the charger with damaged cords or plugs.
- Ventilation: Operate the charger in a well-ventilated area. Do not cover the charger during operation.
- Battery Type: This charger is designed for 12V and 24V lead-acid batteries. Do not attempt to charge other battery types.
- Flammable Materials: Keep the charger away from flammable liquids, gases, or materials. Batteries can produce explosive gases.
- Children and Pets: Keep the charger out of reach of children and pets.
- Disconnection: Always disconnect the AC power before connecting or disconnecting battery terminals.
3. Product Overview
The PRPYVPEY CH2810A is an intelligent battery charger featuring automatic voltage detection (12V/24V) and a 10A charging current. It is housed in a durable metal casing with clearly labeled input and output terminals.
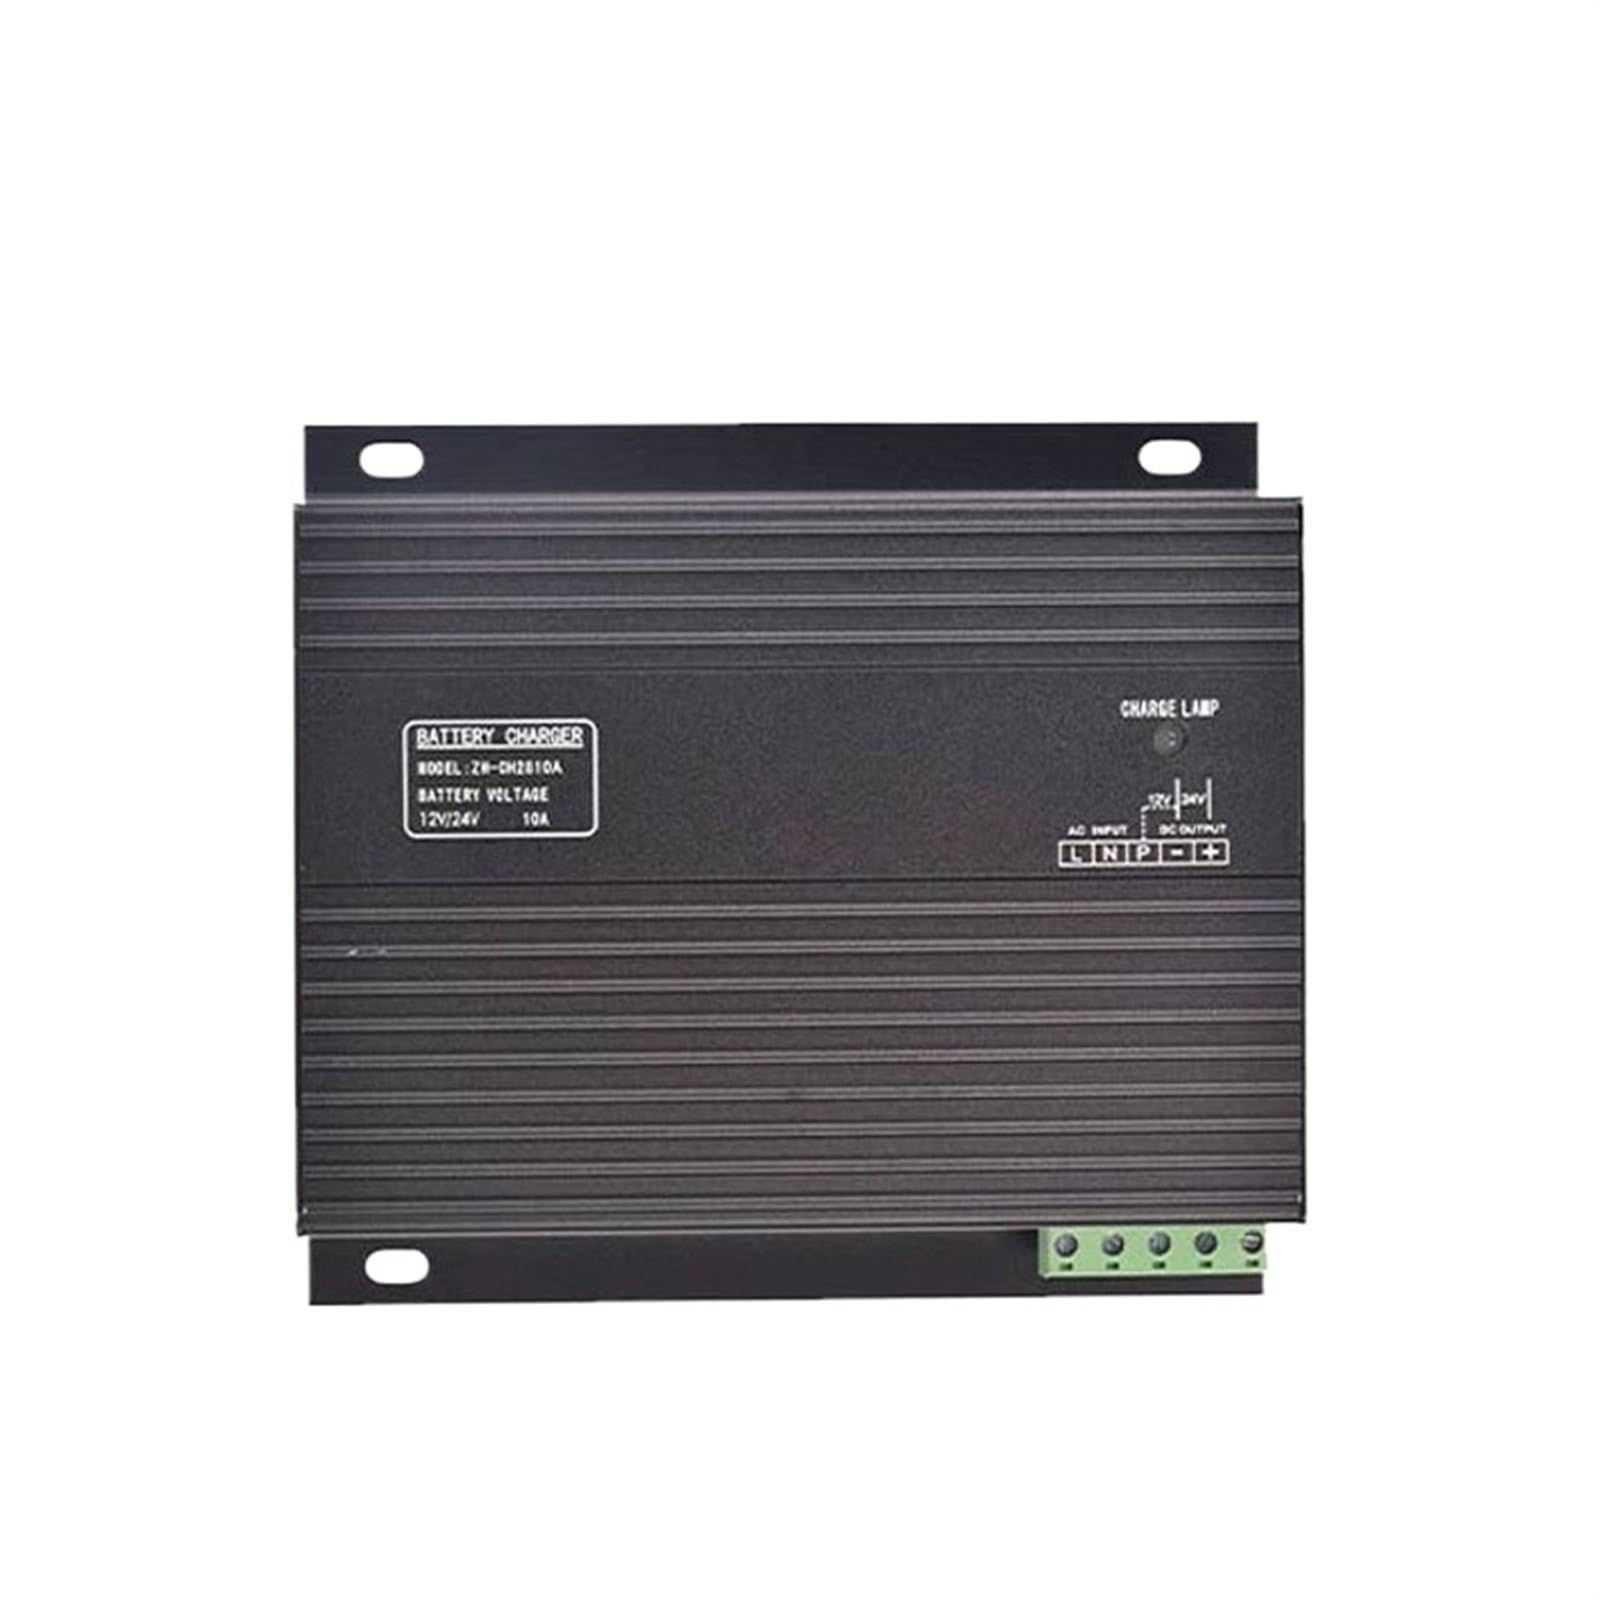
Figure 3.1: PRPYVPEY CH2810A Intelligent Battery Charger. This image shows the overall design of the charger, including the cooling fins and the terminal block for connections.
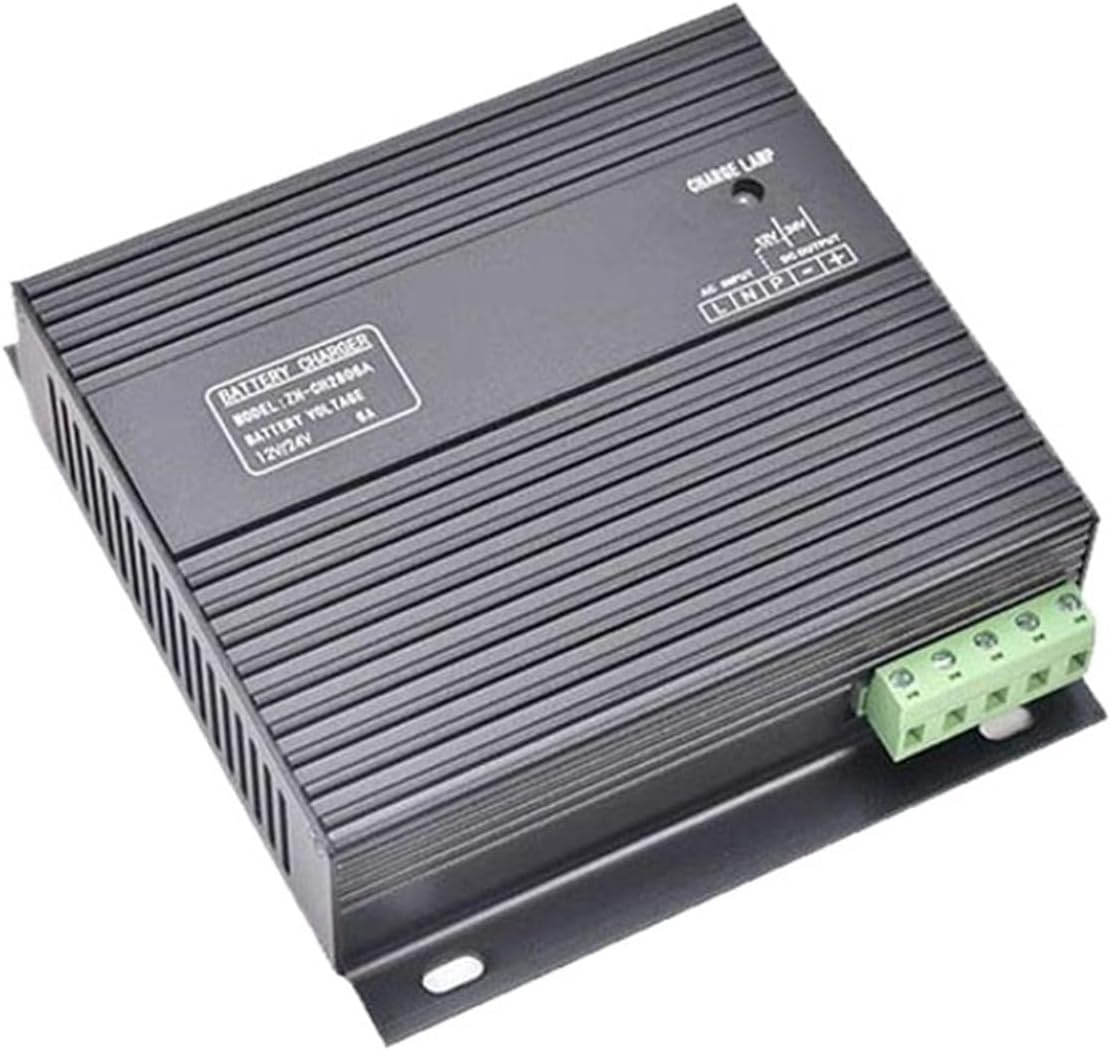
Figure 3.2: Charger Control Panel and Terminals. This view highlights the 'CHARGE LAMP' indicator, 'AC INPUT' terminals (L, N), and 'DC OUTPUT' terminals (+, -) for battery connection.
Key Features:
- Automatic 12V/24V voltage detection.
- 10A charging current (for CH2810A model).
- Compact and durable design.
- LED charge indicator.
4. Setup and Installation
Follow these steps for proper installation of the battery charger:
- Mounting: Securely mount the charger in a dry, well-ventilated area, away from direct sunlight, heat sources, and moisture. Use appropriate screws for the mounting holes provided on the charger's base.
- Battery Connection:
- Ensure the AC power is disconnected from the charger.
- Connect the positive (+) terminal of the battery to the '+' terminal on the charger's DC OUTPUT.
- Connect the negative (-) terminal of the battery to the '-' terminal on the charger's DC OUTPUT.
- Ensure all connections are tight and secure.
- AC Power Connection:
- Connect the Live (L) wire from your AC power source to the 'L' terminal on the charger's AC INPUT.
- Connect the Neutral (N) wire from your AC power source to the 'N' terminal on the charger's AC INPUT.
- Connect the Ground (PE) wire to the designated ground terminal if available, or ensure the charger's casing is properly grounded.
- Ensure all AC connections are secure and comply with local electrical codes.

Figure 4.1: Wiring Terminals. This image provides a clear view of the screw terminals for connecting AC power (L, N) and battery (DC OUTPUT +, -).
5. Operating Instructions
Once the charger is properly installed and connected, follow these steps to begin charging:
- Verify Connections: Double-check all battery and AC power connections to ensure they are correct and secure.
- Apply AC Power: Connect the charger's AC input to a suitable power source. The charger will automatically detect the battery voltage (12V or 24V).
- Charging Indicator: The 'CHARGE LAMP' LED indicator on the charger will illuminate to show that charging is in progress.
- Charging Completion: The charger will automatically stop charging when the battery reaches full capacity. The 'CHARGE LAMP' may change color or turn off depending on the specific model's indicator design (refer to product label for details).
- Disconnecting: To disconnect, first remove the AC power, then disconnect the battery terminals.
6. Maintenance
Regular maintenance ensures optimal performance and longevity of your battery charger.
- Cleaning: Keep the charger clean and free from dust and debris. Use a dry, soft cloth for cleaning. Do not use liquid cleaners.
- Ventilation: Ensure the ventilation openings are not blocked to prevent overheating.
- Cable Inspection: Periodically inspect all cables and connections for signs of wear, damage, or corrosion. Replace any damaged components immediately.
- Storage: When not in use, store the charger in a cool, dry place.
7. Troubleshooting
If you encounter issues with your charger, refer to the following troubleshooting guide:
| Problem | Possible Cause | Solution |
|---|---|---|
| Charger not turning on / No 'CHARGE LAMP' | No AC power; Loose connections; Faulty power outlet. | Check AC power supply; Ensure all connections are secure; Test power outlet with another device. |
| Battery not charging | Incorrect battery connection; Battery deeply discharged or faulty; Charger fault. | Verify battery polarity (+ to +, - to -); Check battery voltage (if too low, charger may not initiate); Consult a professional if battery or charger is suspected faulty. |
| Charger overheating | Poor ventilation; Overload. | Ensure charger is in a well-ventilated area; Clear any obstructions from vents; Ensure battery capacity is within charger's limits. |
If the problem persists after following these steps, please contact customer support.
8. Specifications
| Feature | Specification |
|---|---|
| Model | ZH-CH2810A |
| Input Voltage | AC (Not specified, typical 110-240V) |
| Output Voltage | 12V / 24V (Automatic Detection) |
| Charging Current | 10A |
| Package Dimensions | 1.18 x 0.79 x 0.39 inches |
| Item Weight | 1.76 ounces |
| Manufacturer | PRPYVPEY |
9. Warranty and Support
For warranty information and technical support, please refer to the documentation provided with your purchase or contact PRPYVPEY customer service through the retailer where the product was purchased. Keep your purchase receipt as proof of purchase.