1. Introduction
This manual provides essential information for the proper setup, operation, and maintenance of your Qotom Q1052X Mini PC. The Qotom Q1052X is a fanless industrial mini PC featuring an Intel Core i5-8265U processor, designed for reliable performance in various computing environments. Please read these instructions carefully before using the device.
2. Product Overview
The Qotom Q1052X is a compact and robust fanless mini PC. Its design prioritizes durability and silent operation, making it suitable for industrial, commercial, and home office applications. It features a comprehensive set of ports for connectivity and display output.
2.1 External Views and Ports
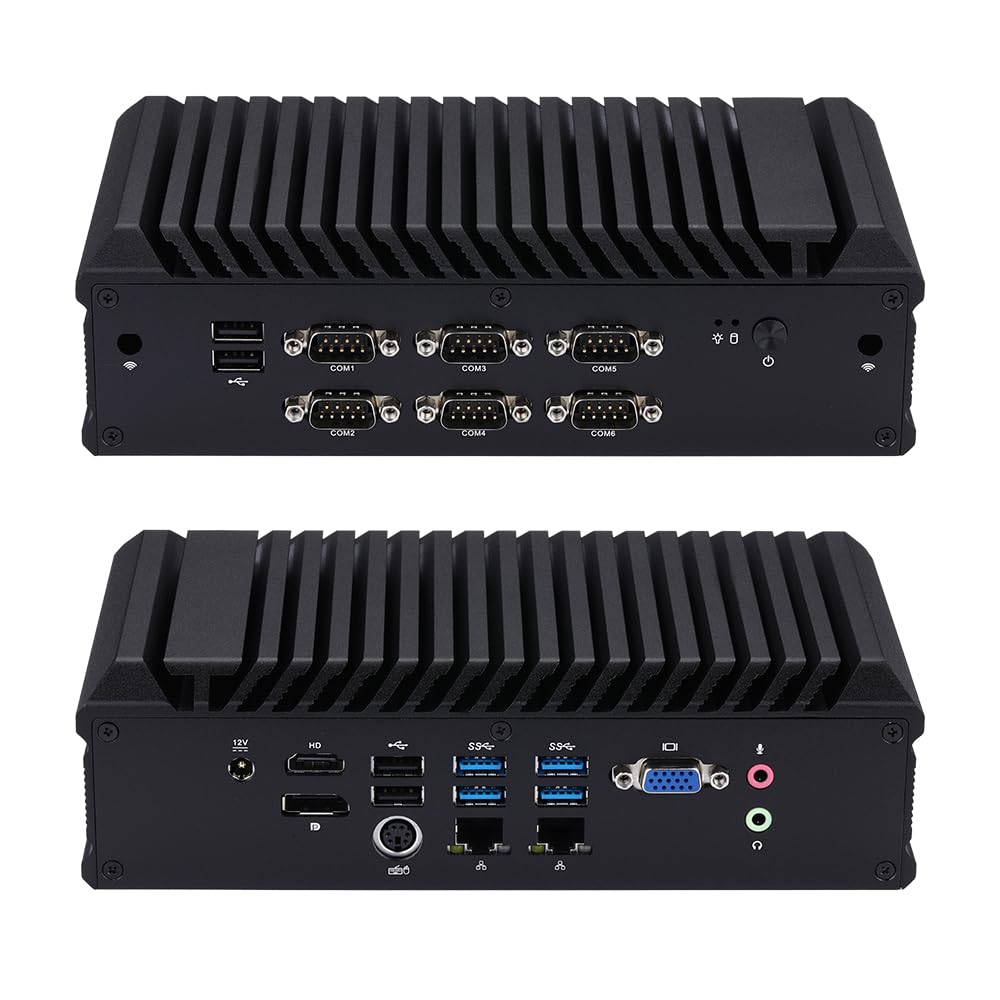
Figure 1: Front and Rear Panels of the Qotom Q1052X Mini PC. The front panel includes USB ports and six COM ports. The rear panel features the power input, HD, DP, VGA, USB 3.0, LAN, and audio ports.
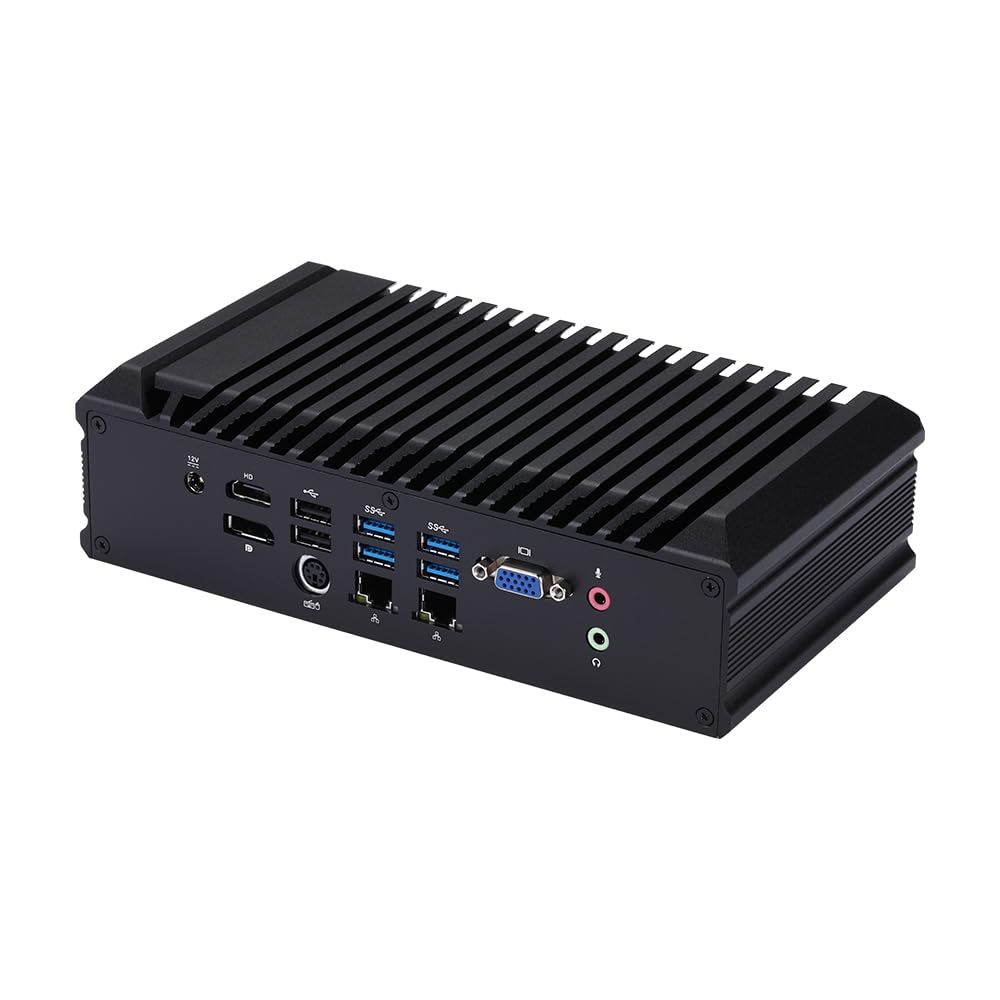
Figure 2: Side View of the Qotom Q1052X Mini PC, showing the DC 12V power input, HD 1.4 port, DisplayPort (DP), four USB 3.0 ports, two Gigabit LAN ports, VGA port, and audio jacks (microphone and line out).
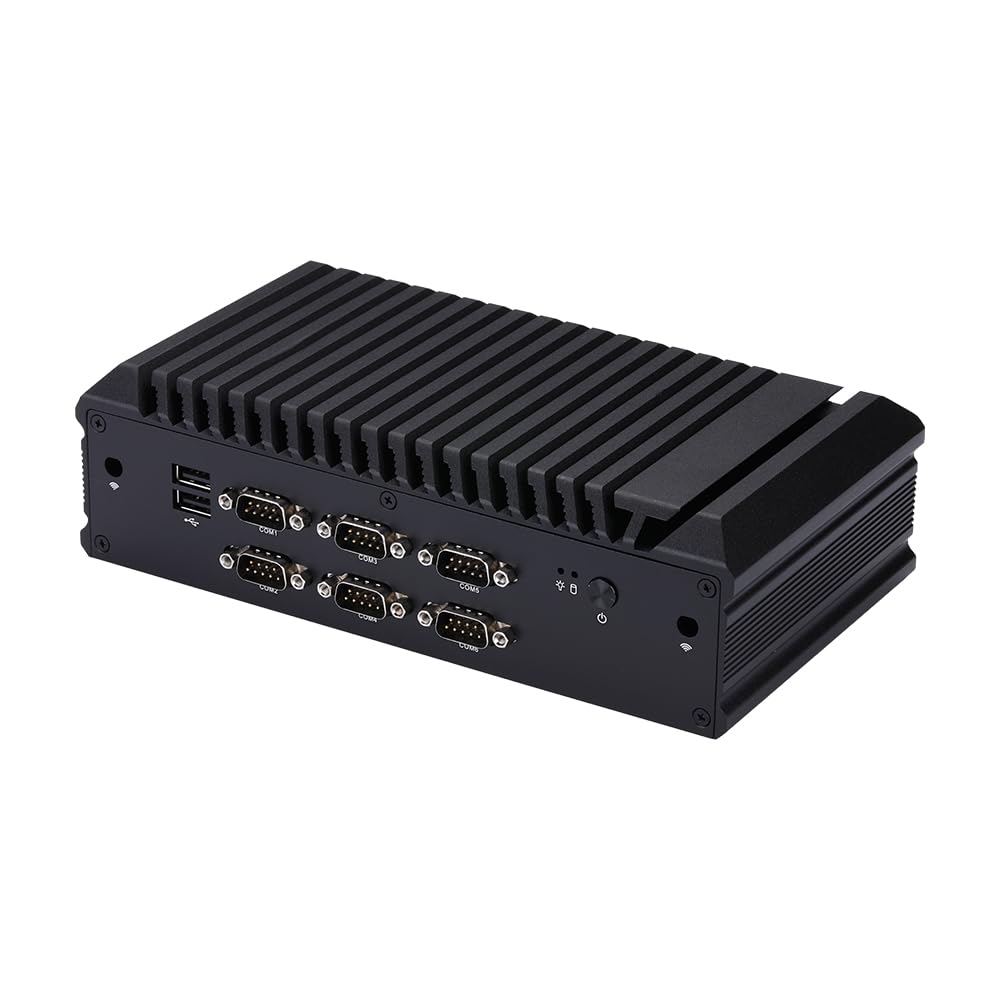
Figure 3: Opposite Side View of the Qotom Q1052X Mini PC, displaying four USB 2.0 ports and six RS232/RS485 COM ports (COM1-COM6).
2.2 Internal Components

Figure 4: Internal Motherboard Layout. Key components include the 1x DDR4 SO-DIMM Memory Slot, M.2 Key for WiFi, Mini PCIe for 3G/4G Module, SIM Socket, and M.2 N Key for SSD.
3. Setup Instructions
3.1 Unpacking and Inspection
- Carefully remove the Mini PC and all accessories from the packaging.
- Inspect the device for any signs of physical damage. If damage is found, contact your vendor immediately.
- Ensure all listed accessories are present.
3.2 Connecting Peripherals
- Display: Connect your monitor(s) to the HD, DisplayPort (DP), or VGA ports. The device supports up to three displays simultaneously.
- USB Devices: Connect your keyboard, mouse, and other USB peripherals to the available USB 2.0 or USB 3.0 ports.
- Network: Connect an Ethernet cable from your router or network switch to one of the LAN ports.
- Audio: Connect speakers or headphones to the Line Out jack, and a microphone to the Mic In jack if needed.
- Serial Devices: Connect industrial or legacy devices to the COM ports (COM1-COM6) as required.
3.3 Power Connection
- Connect the provided power adapter to the DC 12V input port on the rear panel of the Mini PC.
- Plug the power adapter into a suitable electrical outlet.
3.4 Operating System Installation (if required)
The device may come with an inactive version of Windows 10 for testing purposes. For full functionality, you may need to install your preferred operating system. The Qotom Q1052X supports Windows 10, Windows 11, Linux, and other compatible operating systems.
- Prepare a bootable USB drive with your desired operating system installer.
- Insert the USB drive into an available USB port.
- Power on the device and access the BIOS/UEFI settings (usually by pressing Del or F2 during boot) to set the boot order to your USB drive.
- Follow the on-screen instructions to install the operating system.
- Install necessary drivers, which can typically be found on the manufacturer's website or provided with the OS.
3.5 Storage Expansion
The Qotom Q1052X includes an M.2 NVME SSD. You can expand storage by adding a 2.5-inch SATA SSD or HDD internally. Refer to Figure 4 for internal component locations if you plan to perform this upgrade.
4. Operating Instructions
4.1 Powering On and Off
- Power On: Press the power button located on the front panel. The power indicator light will illuminate.
- Power Off: For normal shutdown, use the operating system's shutdown function. For a forced shutdown, press and hold the power button for approximately 5 seconds.
4.2 Display Configuration
The Mini PC supports multiple display outputs and 4K resolution. You can connect up to three monitors simultaneously using the HD, DisplayPort, and VGA interfaces.
- Single Display: Connect your monitor to any available display port.
- Multiple Displays: Connect additional monitors to the remaining display ports. Configure display settings (extend, duplicate, or single display) within your operating system's display settings.
- 4K Resolution: The HD port supports 4096x2304@24Hz, and the DisplayPort supports 4096x2304@60Hz. Ensure your monitor and cables support these resolutions.
4.3 Network Connectivity
Connect to a wired network using the Gigabit LAN ports. Ensure your network cables are securely connected to the Mini PC and your network infrastructure.
5. Maintenance
The Qotom Q1052X features a fanless design, which significantly reduces dust accumulation and the need for frequent internal cleaning. However, general maintenance practices are recommended to ensure longevity and optimal performance.
- External Cleaning: Periodically wipe the exterior of the device with a soft, dry cloth. Avoid using liquid cleaners directly on the device.
- Software Updates: Regularly update your operating system, drivers, and applications to ensure security and performance.
- Storage Management: Monitor your storage usage and periodically clean unnecessary files to maintain system responsiveness.
- Environmental Conditions: Operate the Mini PC within recommended temperature and humidity ranges to prevent overheating or moisture damage.
6. Troubleshooting
If you encounter issues with your Qotom Q1052X Mini PC, refer to the following common troubleshooting steps:
- No Power:
- Ensure the power adapter is securely connected to both the Mini PC and a working electrical outlet.
- Verify the power outlet is functional by testing it with another device.
- Check the power adapter for any visible damage.
- No Display Output:
- Confirm that the monitor is powered on and correctly connected to the Mini PC's display port (HD, DP, or VGA).
- Try connecting to a different display port or using a different monitor/cable to isolate the issue.
- Ensure the correct input source is selected on your monitor.
- Operating System Issues:
- If the operating system is not booting or is unstable, consider reinstalling it as described in Section 3.4.
- Check for corrupted files or driver conflicts.
- Network Connectivity Problems:
- Verify that the Ethernet cable is properly connected to both the Mini PC and the network device (router/switch).
- Check the network status lights on the LAN ports; they should be active.
- Ensure your network settings within the operating system are correctly configured.
7. Specifications
| Feature | Specification |
|---|---|
| Processor | Intel Core i5-8265U (Quad Core, 1.6 GHz up to 3.9 GHz, 6M Cache, 15W TDP) |
| Graphics | Intel UHD Graphics |
| RAM | 4 GB DDR4 SODIMM (expandable) |
| Storage | 128 GB M.2 NVME SSD (expandable with 2.5-inch SATA SSD/HDD) |
| Display Outputs | 1x HD 1.4 (4096x2304@24Hz), 1x DisplayPort (4096x2304@60Hz), 1x VGA (Supports 3 displays simultaneously) |
| USB Ports | 4x USB 3.0, 4x USB 2.0 |
| Serial Ports | 6x COM (RS232/RS485) |
| Network | 2x Gigabit LAN |
| Audio | Mic In, Line Out |
| Operating System Support | Windows 10/11, Linux |
| Dimensions (L x W x H) | 221 x 121 x 62 mm (8.7 x 4.76 x 2.44 inches) |
| Weight | Approximately 5.5 pounds |
| Power Source | DC 12V |
| Cooling | Fanless Design |
8. Warranty and Support
8.1 Warranty Information
Please refer to the warranty card included with your product or contact your point of purchase for specific warranty terms and conditions. Qotom products typically come with a standard manufacturer's warranty covering defects in materials and workmanship.
8.2 Technical Support
For technical assistance, troubleshooting beyond this manual, or service inquiries, please contact Qotom customer support through their official website or the contact information provided with your purchase. When contacting support, please have your product model (Q1052X) and purchase details ready.