1. Introduction
The Audizio Avola is a comprehensive audio system designed to provide a wide range of listening options. It integrates Internet Radio, DAB+, FM radio, a CD player, and Bluetooth connectivity into a single, elegant unit. This manual will guide you through the setup, operation, and maintenance of your Avola system, ensuring you can fully utilize its features for an optimal audio experience.
2. Safety Instructions
- Power Supply: Use only the provided power adapter. Ensure the voltage matches the requirements of your region.
- Water and Moisture: Do not expose the unit to rain, moisture, or liquids. Avoid placing objects filled with liquids, such as vases, on the unit.
- Ventilation: Ensure adequate ventilation around the unit. Do not block ventilation openings.
- Heat Sources: Keep the unit away from heat sources such as radiators, heat registers, stoves, or other apparatus that produce heat.
- Cleaning: Disconnect the unit from the power supply before cleaning. Use a soft, dry cloth. Do not use liquid cleaners or aerosol cleaners.
- Servicing: Do not attempt to service the unit yourself. Refer all servicing to qualified service personnel.
- CD Player: Do not insert foreign objects into the CD tray. Handle CDs by their edges to avoid scratches.
3. Package Contents
Verify that all items are present in the packaging:
- 1x Audizio Avola Internet Radio
- 1x Remote Control
- 1x Power Adapter
- 1x User Manual (Quick Start Guide)

Image: Audizio Avola unit shown with its remote control and power adapter.
4. Product Overview
4.1 Front Panel

Image: Front view of the Audizio Avola with the CD tray closed.
The front panel features the main display, control buttons, a CD tray, and input ports.
- Display: Color display for navigation and information.
- Control Buttons: MENU, INFO, REC/DEL, PRESET/REPEAT, STANDBY, I/R, Play/Pause, Stop, Skip/Fast Forward/Rewind.
- CD Tray: For inserting audio CDs.
- TUNE/SELECT Knob: Rotate to navigate menus, press to select.
- VOLUME Knob: Adjusts the audio output level.
- USB Port: For connecting USB storage devices.
- SD Card Slot: For inserting SD memory cards.
- AUX Input: 3.5mm jack for external audio sources.
- Headphone Jack: 3.5mm jack for private listening.

Image: Close-up of the Audizio Avola front panel showing USB, SD, AUX, and headphone ports.
4.2 Rear Panel

Image: Rear view of the Audizio Avola, highlighting the antenna and connection ports.
The rear panel houses essential connections:
- Telescopic Antenna: For DAB+ and FM radio reception. Extend fully for best signal.
- LINE OUT (RCA): For connecting to external amplifiers or speakers.
- DC 9V 2A Power Input: For connecting the power adapter.
5. Setup
5.1 Power Connection
- Connect the power adapter to the DC 9V 2A input on the rear of the Avola unit.
- Plug the power adapter into a suitable wall outlet.
- The unit will enter standby mode. Press the STANDBY button on the unit or remote control to power on.
5.2 Antenna Setup
For optimal DAB+ and FM radio reception, fully extend the telescopic antenna located on the rear panel. Adjust its position for the best signal quality.
5.3 Initial Setup (WLAN Connection)
To access Internet Radio features, the Avola must be connected to a Wi-Fi network.
- Upon first power-on, the unit may prompt you to set up the network connection. If not, press MENU, navigate to 'System Settings' and then 'Network'.
- Select 'Wi-Fi Network' and choose 'Scan' to find available networks.
- Select your Wi-Fi network from the list.
- Enter your Wi-Fi password using the TUNE/SELECT knob to navigate characters and press to confirm each character.
- Once connected, the display will show a Wi-Fi icon.
6. Operating Modes
6.1 Internet Radio
Access thousands of radio stations worldwide via your Wi-Fi connection.
- Press the MENU button and select 'Internet Radio'.
- You can browse stations by location, genre, or search for specific stations.
- Use the TUNE/SELECT knob to navigate and select.
- To save a station as a preset, press and hold the PRESET/REPEAT button until the preset menu appears, then select a preset number.

Image: The Audizio Avola display showing the Internet Radio interface.
6.2 DAB+ Radio
Digital Audio Broadcasting Plus offers high-quality digital radio.
- Press the MENU button and select 'DAB Radio'.
- The unit will automatically scan for available DAB+ stations.
- Use the TUNE/SELECT knob to browse and select stations.
- Save presets as described for Internet Radio.
6.3 FM Radio
Listen to traditional analog FM radio broadcasts.
- Press the MENU button and select 'FM Radio'.
- Use the TUNE/SELECT knob to manually tune or press and hold to auto-scan for stations.
- Save presets as described for Internet Radio.
6.4 CD Player
Play your favorite audio CDs.
- Press the MENU button and select 'CD Player'.
- Press the 'Open' button next to the CD tray to open it.
- Carefully place an audio CD onto the tray with the label side facing up.
- Press the 'Open' button again to close the tray. The unit will begin playing the CD automatically.
- Use the Play/Pause, Stop, and Skip buttons for playback control.
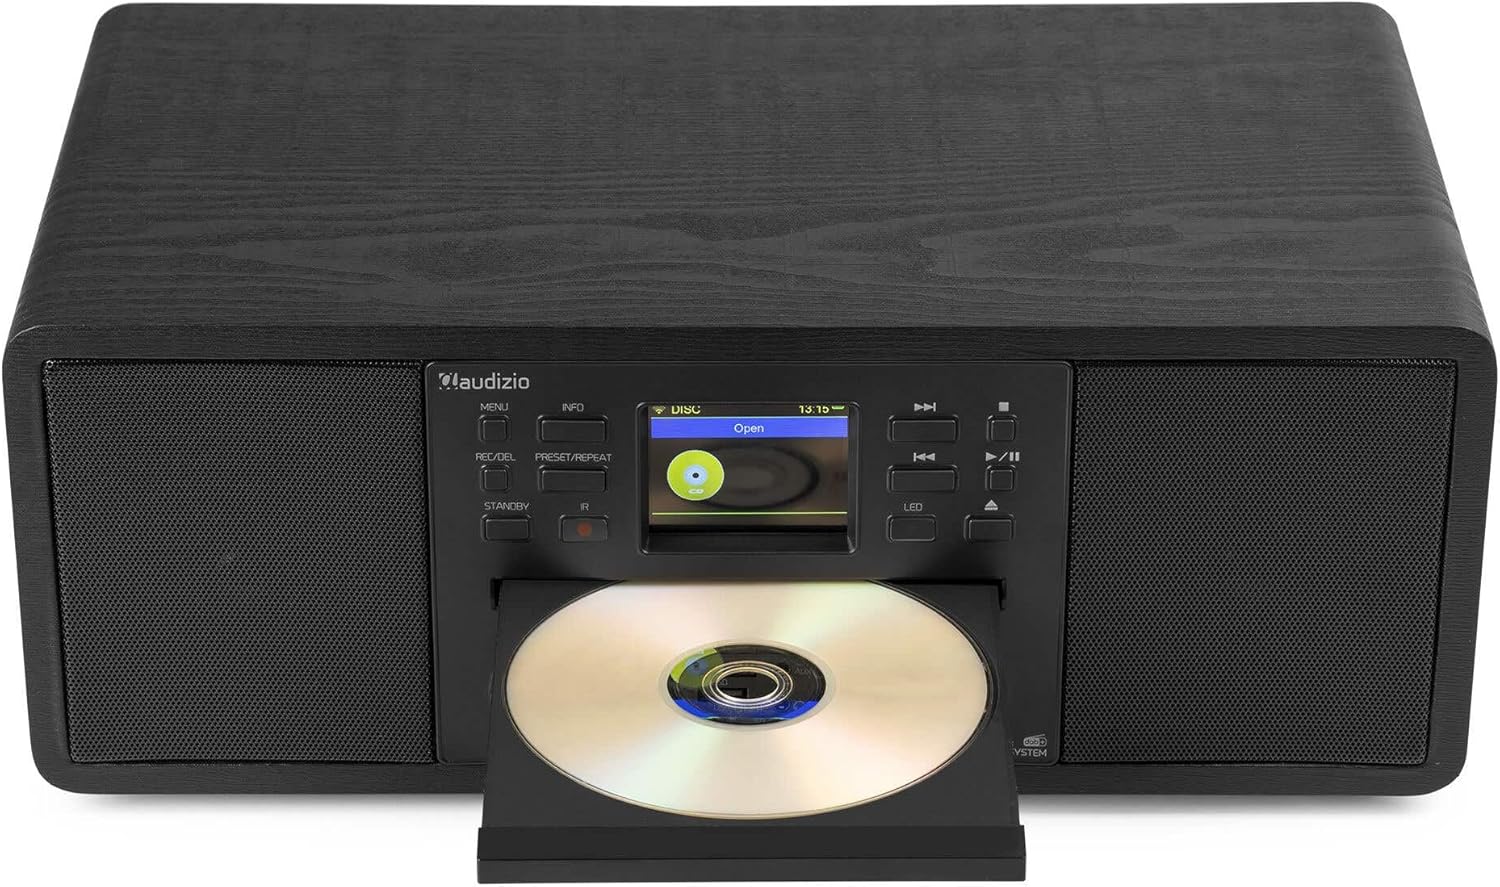
Image: The Audizio Avola with its CD tray open, ready for disc insertion.
6.5 Bluetooth Connectivity
Stream audio wirelessly from your smartphone, tablet, or other Bluetooth-enabled devices.
- Press the MENU button and select 'Bluetooth'.
- The Avola will enter pairing mode and become discoverable.
- On your Bluetooth device, search for 'Audizio Avola' in the Bluetooth settings and select it to pair.
- Once connected, the display will show 'BT Connected'. You can now play audio from your device through the Avola.

Image: The Audizio Avola display indicating a successful Bluetooth connection.
6.6 USB/SD Playback
Play audio files from USB drives or SD cards.
- Insert a USB drive into the USB port or an SD card into the SD card slot on the front panel.
- Press the MENU button and select 'USB' or 'SD' (the unit may automatically switch to the correct mode).
- Navigate through your files and folders using the TUNE/SELECT knob.
- Press the TUNE/SELECT knob to play a selected track.
7. Maintenance
- Cleaning the Unit: Use a soft, dry, lint-free cloth to clean the exterior of the unit. Do not use abrasive cleaners, waxes, or solvents.
- CD Lens Cleaning: If CD playback becomes erratic, use a commercially available CD lens cleaner disc to clean the laser lens.
- Storage: If storing the unit for an extended period, disconnect it from the power supply and store it in a cool, dry place.
8. Troubleshooting
| Problem | Possible Cause | Solution |
|---|---|---|
| No power | Power adapter not connected or faulty outlet. | Check power connections. Try a different outlet. |
| No sound | Volume too low, mute activated, or incorrect source selected. | Increase volume. Check if mute is active. Ensure correct input source is selected. |
| Internet Radio not connecting | Incorrect Wi-Fi password, weak signal, or network issue. | Re-enter Wi-Fi password. Move unit closer to router. Check router status. |
| DAB+/FM reception poor | Antenna not extended or poor signal area. | Fully extend and adjust the telescopic antenna. Try repositioning the unit. |
| CD not playing | CD inserted incorrectly, dirty/scratched CD, or unsupported format. | Ensure CD is inserted label-side up. Clean or replace CD. Verify CD format (supports CD-DA, MP3). |
| Bluetooth not pairing | Device not in pairing mode, or Avola not discoverable. | Ensure both devices are in pairing mode. Check Bluetooth settings on your device. |
9. Specifications
| Feature | Specification |
|---|---|
| Model Name | Avola |
| Item Number | 102.292 |
| Dimensions (LxWxH) | 45.8 x 25.8 x 19.7 cm |
| Weight | 4 kg |
| Power Input | 220 Volt (via power adapter) |
| Speaker Output Power (Max) | 60 Watt |
| Audio Output Mode | Stereo |
| Supported Audio Formats | CD-DA, MP3 |
| Connectivity Technology | WLAN, Bluetooth, AUX, RCA |
| Compatible Devices | MP3 Player, PC, Smartphone, Tablet |
| Color | Black |
10. Warranty and Support
Audizio products are designed and manufactured to the highest standards. In the unlikely event of a problem with your product, please contact your retailer for assistance. Keep your proof of purchase for warranty claims. For further support or inquiries, please refer to the official Audizio website or contact their customer service.