Product Overview
This manual provides detailed instructions for the assembly, installation, operation, and maintenance of your Fredbeck 36x84 Frosted Glass Barn Door. This sliding door features a brown finish, aluminum frame, and frosted tempered glass panels, designed for interior use.
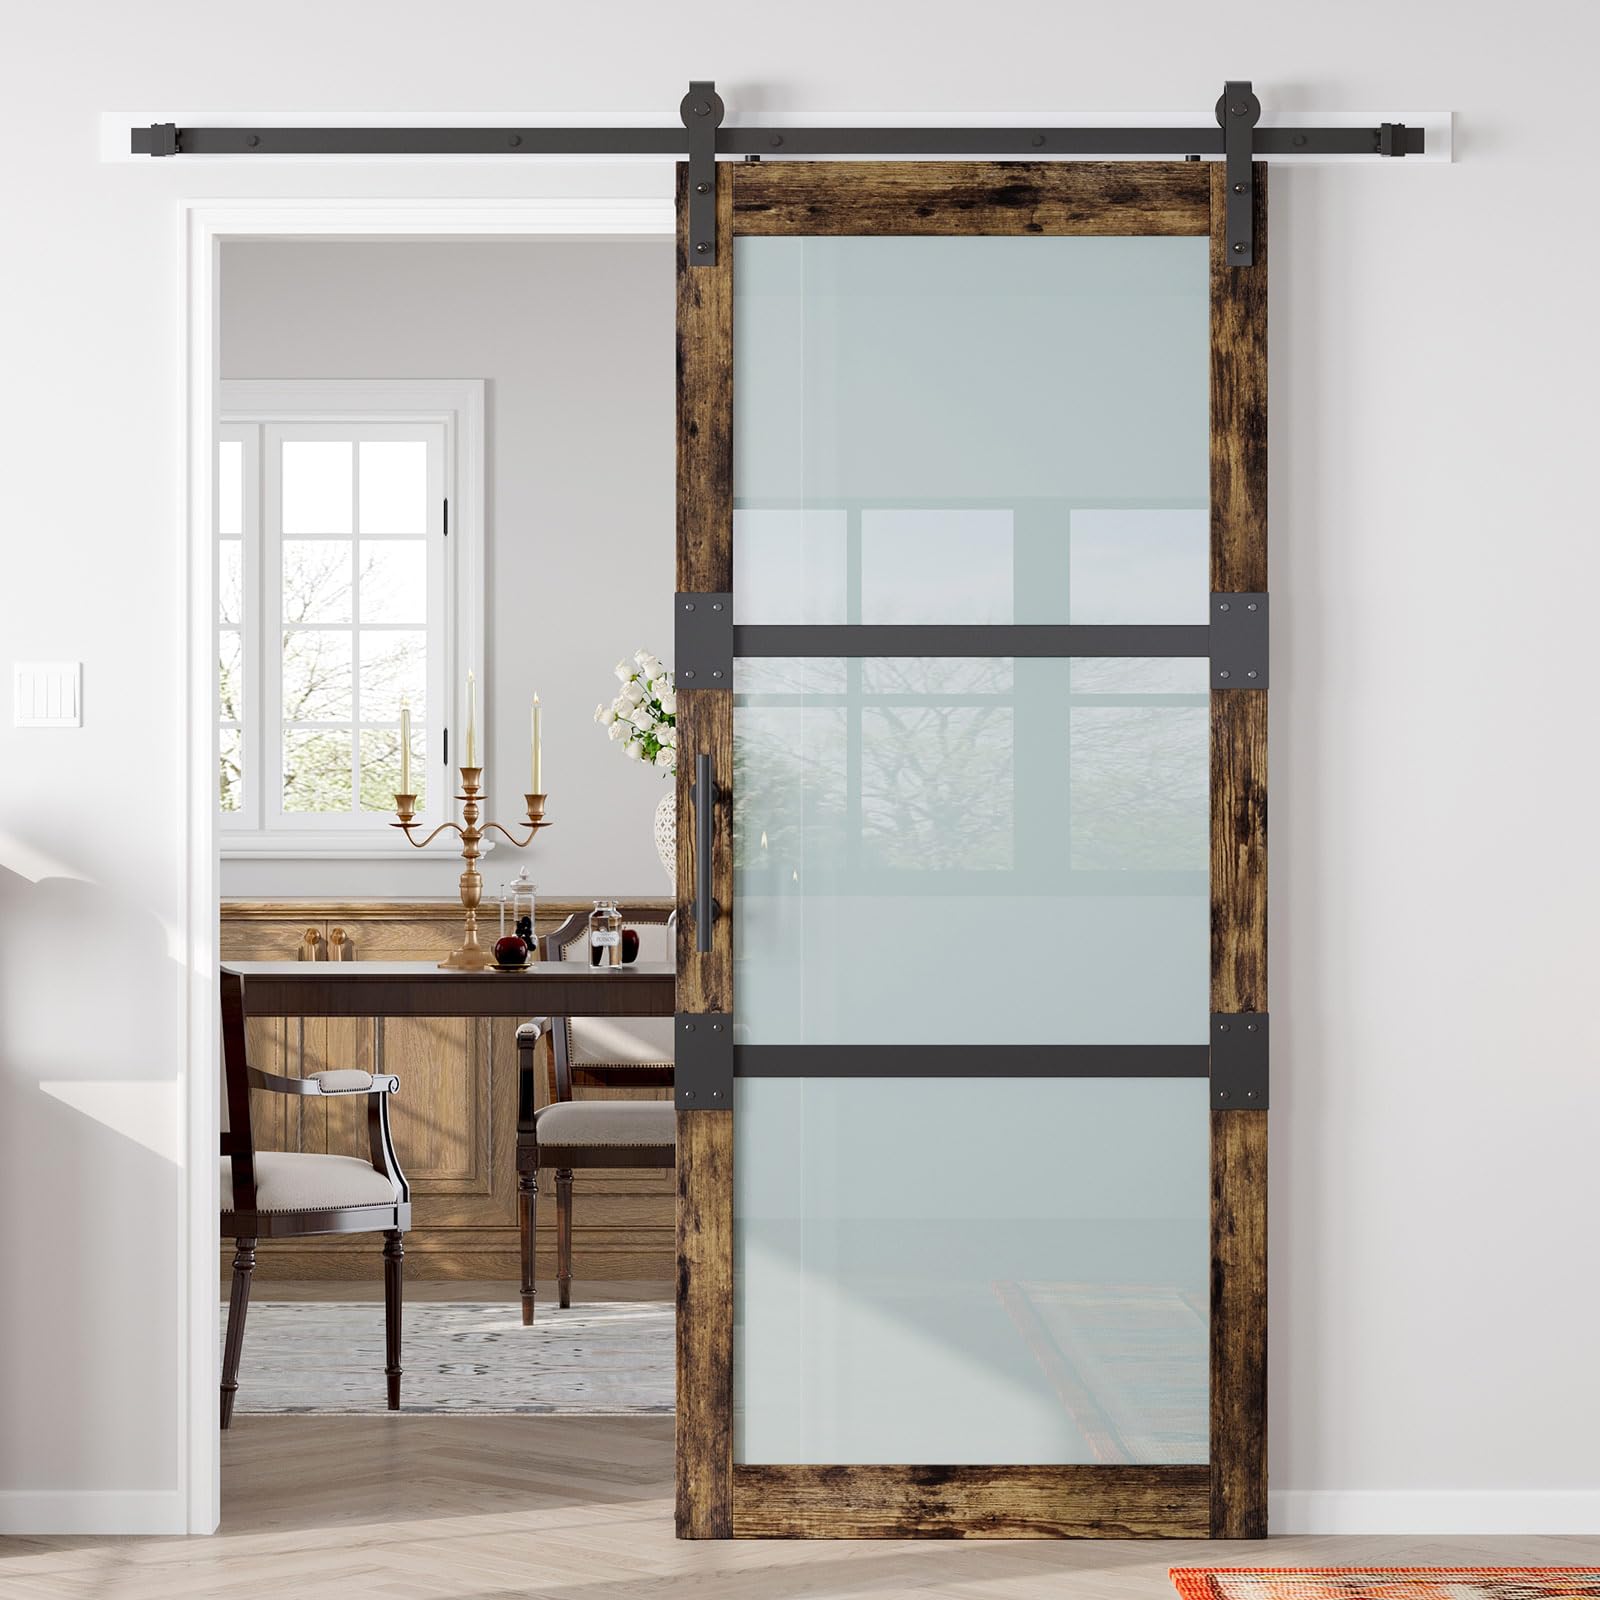
Image: Fredbeck 36x84 Frosted Glass Barn Door with aluminum frame and frosted glass, installed in a modern living room setting.
Package Contents
Verify all components are present before beginning assembly. The package includes:
- Barn Door Panels (3-panels)
- Frosted Glass Panels (3 pieces)
- Aluminum Frame components
- 6.6ft Barn Door Track
- Two-sided Handle
- Floor Guide
- Rollers and connecting pieces
- All necessary Screws and Corks
- Detailed Instruction Manual (this document)

Image: Detailed diagram illustrating all components included in the Fredbeck barn door package, such as sliding track, glass panels, aluminum rails, connecting pieces, handle, floor guide, rollers, and door panels.
Specifications
| Feature | Detail |
|---|---|
| Brand | FREDBECK |
| Model Number | MB-CPS-18HA2-36 |
| Dimensions | 36 x 84 inches (Door Slab) |
| Track Length | 79 inches (6.6 ft) for 36x84 door |
| Material | Aluminum Frame, Frosted Tempered Glass, PVC Coating |
| Color | Brown |
| Item Weight | 52 Pounds |
| Assembly Required | Yes |
| Clearance Needed Above Door | 5-1/8 inches |

Image: Measurement guide for Fredbeck barn door, detailing door size, track length, fit opening, glass thickness, and door thickness, along with required clearance above the door.
Setup and Installation
Carefully follow these steps for proper assembly and installation. It is recommended that two people perform the installation.
- Prepare Door Panels: Assemble the individual door panels according to the provided diagrams. Ensure all screws are tightened securely. Pay attention to the orientation of components as indicated in the instructions.
- Install Glass Panels: Carefully insert the frosted glass panels into the designated slots within the door frame. Secure them using the anti-collision bars and screws as shown in the diagrams. Ensure the screws and nuts are turned in opposite directions simultaneously for a secure fit.
- Assemble Door Slab: Connect the assembled door panels and glass sections to form the complete door slab.
- Install Rollers: Attach the J-shape rollers to the top edge of the door slab.
- Install Handle: Mount the two-sided handle to the door slab at the desired height.
- Mount Track: Securely mount the 6.6ft sliding track above the door opening. Ensure there is at least 5-1/8 inches of clearance above the door. If installing on drywall, consider adding a wooden header board for increased stability.
- Hang Door: Carefully lift and hang the assembled door slab onto the track rollers.
- Install Floor Guide: Position and install the T-shape floor guide to prevent the door from swinging out.

Image: Visual guide detailing the seven steps of the installation process, from assembling door panels and glass to mounting the track and handle.
For detailed diagrams and specific screw placements, refer to the included printed manual or the visual guide above.
Operating Instructions
To operate your Fredbeck barn door, simply grasp the handle and slide the door along the track. The rollers are designed for smooth and quiet operation. Ensure the floor guide is properly installed to maintain door stability during opening and closing.
- Opening: Gently pull the door along the track until it reaches the desired open position.
- Closing: Push the door along the track until it fully covers the doorway.
- Avoid forcing the door if it encounters resistance. Check for obstructions or alignment issues if movement is not smooth.
Maintenance
Regular maintenance will ensure the longevity and smooth operation of your barn door.
- Cleaning the Door Surface: The PVC-coated door surface is waterproof and scratch-resistant. Clean with a soft, damp cloth and mild detergent. Avoid abrasive cleaners or harsh chemicals.
- Cleaning Glass Panels: Use standard glass cleaner and a soft cloth for the frosted tempered glass panels.
- Track and Rollers: Periodically inspect the sliding track and rollers for any debris or dust. Clean the track with a dry cloth. If rollers become stiff, a small amount of silicone-based lubricant can be applied to the roller bearings (avoid applying to the track surface itself).
- Hardware Inspection: Annually check all screws and fasteners for tightness. Retighten if necessary to ensure the door remains secure.

Image: Illustration highlighting the scratch-proof and waterproof properties of the door, showing water splashing on the surface.
Troubleshooting
| Problem | Possible Cause | Solution |
|---|---|---|
| Door does not slide smoothly. | Debris in track, loose rollers, misaligned track. | Clean the track. Check roller attachment. Verify track is level and securely mounted. |
| Door wobbles or feels unstable. | Loose fasteners, improper floor guide installation, insufficient wall support. | Ensure all assembly screws are tight. Re-check floor guide position. If wall support is an issue, consider reinforcing the wall or adding a header board. |
| Glass panels are loose. | Anti-collision bars or screws not tightened. | Tighten the screws securing the anti-collision bars. Ensure they are turned in opposite directions simultaneously for optimal grip. |
| Missing or incorrect parts. | Packaging error. | Refer to the "Package Contents" section and contact customer support immediately with your model number and purchase details. |
Warranty and Support
For any issues or inquiries regarding your Fredbeck barn door, please contact our customer support. While specific warranty details are not provided in this document, we are committed to assisting with product-related concerns.
Contact Support: If you encounter any problems when you receive or use the product, please feel free to contact us through the retailer's platform or the official Fredbeck website for assistance.


