Introduction
This manual provides detailed instructions for the NBCP Wireless Gaming Controller. Designed for versatility, this controller is compatible with Nintendo Switch, Switch Lite, Switch OLED, PC, Android, and iOS devices. It features advanced functionalities such as a 6-axis gyro sensor, customizable macro buttons, adjustable dual vibration, and a TURBO continuous fire function to enhance your gaming experience.
Product Overview
Familiarize yourself with the controller's layout and key features.

Figure 1: Controller Layout. This image displays the front view of the NBCP Wireless Gaming Controller, highlighting key components such as the Home button, Screenshot button, Turbo button, Crystal buttons (A, B, X, Y), Rockers (analog sticks), Cross Key (D-pad), RGB lighting, and LED light effects.
Key Features:
- One-Click Start: Convenient function for immediate gameplay.
- 6-Axis Gyro Sensor: Detects precise movements for intuitive control in action and racing games.
- Rear Macro Buttons (ML/MR): Customizable buttons for complex operations.
- Wireless Bluetooth Connection: Provides a comfortable, cable-free gaming experience.
- TURBO Continuous Fire Function: Automatically fires continuously by pressing a specific button.
- Adjustable Dual Vibration: 4-stage HD vibration for immersive feedback.
- 7-Color RGB Lighting: Customizable lighting effects for personalized aesthetics.
- 1000Hz Polling Rate: Ensures responsive input.
- Drift Repair: Built-in functionality to address stick drift.
Setup and Connection
1. Initial Charging
Before first use, fully charge the controller. Connect the controller to a USB power source using the provided USB-C cable.
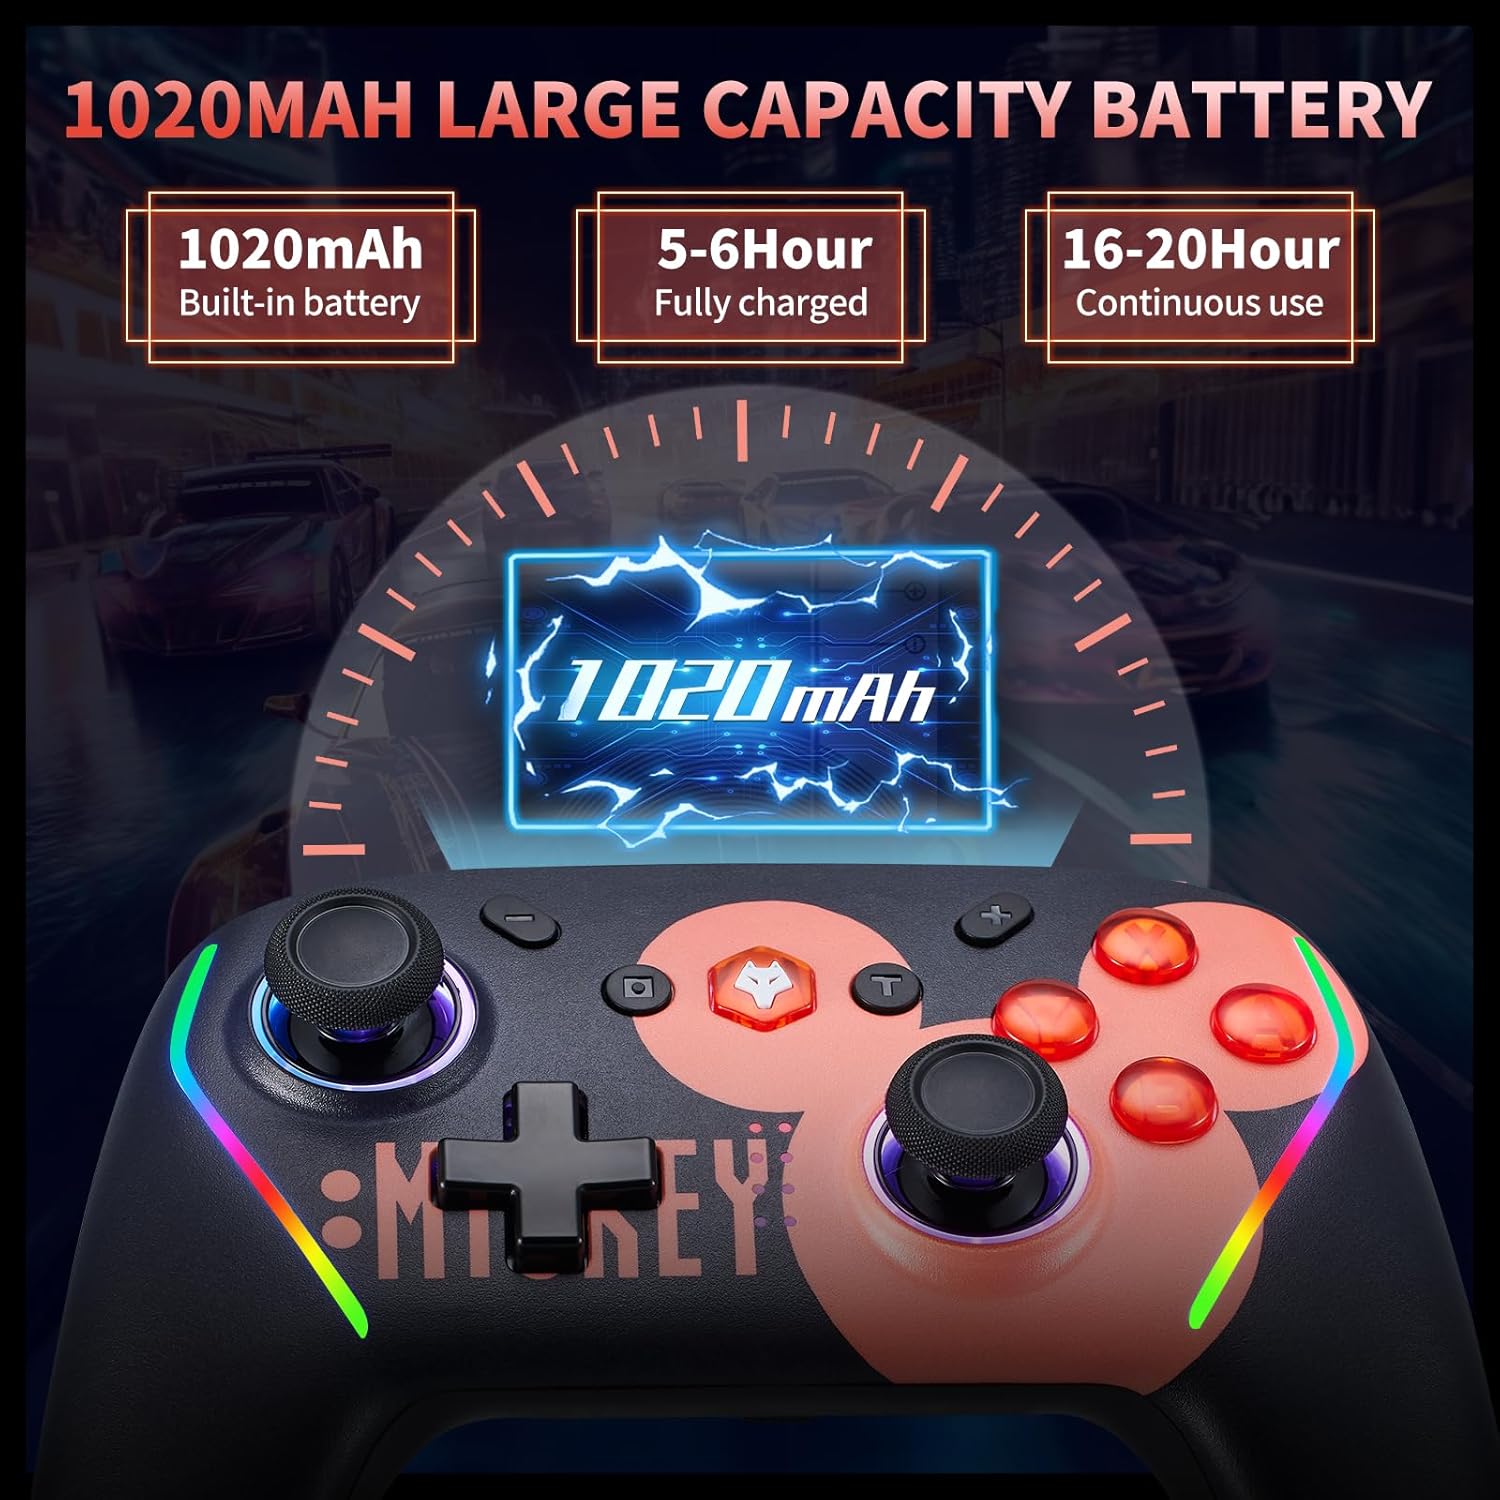
Figure 2: Battery Information. The controller features a 1020mAh built-in battery, requiring 5-6 hours for a full charge and providing 16-20 hours of continuous use.
2. Connecting to Nintendo Switch/Lite/OLED
- On your Nintendo Switch console, go to the HOME Menu.
- Select 'Controllers' > 'Change Grip/Order'.
- Press and hold the Home button on the NBCP controller for a few seconds until the LED indicators start flashing.
- Once connected, the LED indicator(s) on the controller will light up solid.
- One-Click Wake Up: After initial pairing, you can wake up your Switch console by pressing the Home button on the controller.

Figure 3: Compatibility and Wake-Up Feature. This image illustrates the controller's compatibility with Nintendo Switch, Switch Lite, and Switch OLED models, along with the convenient one-click wake-up function.
3. Connecting to PC (Wired/Wireless)
- Wired: Connect the controller to your PC using a USB-C cable. The PC should automatically detect and install the necessary drivers.
- Wireless (Bluetooth): Ensure your PC has Bluetooth enabled. Go to Bluetooth settings, search for new devices, and select 'NBCP Controller' to pair.
4. Connecting to Android & iOS Devices
Ensure Bluetooth is enabled on your Android or iOS device. Search for new Bluetooth devices and select 'NBCP Controller' to pair.
Operating Instructions
1. Macro Programming (ML/MR Buttons)
The ML and MR buttons on the back of the controller can be programmed to perform various combinations of actions. You can assign single buttons (A, B, X, Y, L, R, L2, R2) or directional inputs (up/down/left/right) to these macro buttons.

Figure 4: Macro Programming. This image illustrates the location of the ML and MR macro buttons on the back of the controller and indicates that they can be programmed with various button combinations.

Figure 5: Back Button Functionality. This image provides a detailed explanation of how to program the M1/M2 (ML/MR) buttons, allowing up to 16 instructions in a single program.
2. TURBO Continuous Fire Function
Activate the TURBO function to automatically repeat button presses, useful for shooting and action games. The controller supports three serial transmission speeds.

Figure 6: TURBO Firing Function. This image demonstrates the three-stage TURBO firing function, allowing users to set speeds of 5, 12, or 20 shots per second to reduce hand fatigue.

Figure 7: Automatic Serial Transmission. This image further details the automatic serial transmission function and its three adjustable speeds.
3. Adjustable Dual Vibration
The controller features 4-stage HD vibration, which can be adjusted to enhance immersion in games.

Figure 8: HD Vibration. This image illustrates the 4-stage adjustable HD vibration, ranging from 0% to 100%, providing tactile feedback for an immersive gaming experience.
4. 6-Axis Gyro Sensor
The integrated 6-axis gyro sensor allows for precise motion control, enabling accurate aiming and directional recognition in compatible games.

Figure 9: 6-Axis Gyroscope. This image visually explains how the 6-axis gyroscope recognizes multi-directional changes, allowing for quick and accurate aiming and enhanced visual interaction within games.
5. RGB Lighting
The controller features 7-color RGB lighting. Specific instructions for changing the lighting effects may be available through the companion application or a button combination (refer to the app section below).
6. Companion Application
An application may be available for customizing controller settings, including key mapping, macro settings, and system updates. Please refer to the product packaging or manufacturer's website for details on downloading and using the app.

Figure 10: Application Settings. This image shows a mobile application interface where users can potentially adjust key mappings, macro settings, and update the controller's firmware.
Maintenance
1. Battery Care
The controller includes a 1020mAh rechargeable battery. To maximize battery life:
- Avoid fully discharging the battery frequently.
- Charge the controller using a standard USB power source.
- If the controller will not be used for an extended period, charge it to about 50% before storing.

Figure 11: Removable Battery. This image highlights the removable battery design, which can extend the service life of the controller by allowing battery replacement.
2. Cleaning
Use a soft, dry cloth to clean the controller. Do not use harsh chemicals or abrasive materials, as these can damage the surface.
3. Storage
Store the controller in a cool, dry place away from direct sunlight and extreme temperatures. Avoid placing heavy objects on the controller.
Troubleshooting
- Controller not connecting: Ensure the controller is charged. Re-attempt the pairing process as described in the 'Setup and Connection' section. For PC, check Bluetooth drivers.
- Buttons not responding: Check if the controller is properly connected. If issues persist, try resetting the controller (refer to manufacturer's instructions for reset procedure, often a small pinhole button).
- Stick Drift: The controller includes drift repair functionality. If experiencing stick drift, consult the companion app or manufacturer's support for recalibration instructions.
- Battery not charging: Ensure the USB-C cable and power source are working correctly. Try a different cable or charging port.
- TURBO function not working: Ensure the TURBO function is activated correctly and the desired button is assigned.
Specifications
| Model | Wireless Gaming Controller |
| Compatibility | Nintendo Switch/Lite/OLED, PC, Android, iOS |
| Connectivity | Bluetooth 5.0, Wired (USB-C) |
| Battery Capacity | 1020mAh |
| Charging Time | Approx. 5-6 hours |
| Continuous Use Time | Approx. 16-20 hours |
| Gyro Sensor | 6-Axis Gyro |
| Vibration | Adjustable Dual HD Vibration (4-stage) |
| RGB Lighting | 7-Color |
| Polling Rate | 1000Hz |
| Dimensions | 6.73 x 4.69 x 3.19 inches |
| Weight | 11.7 ounces |
Warranty and Support
For warranty information or technical support, please refer to the product packaging or contact the seller/manufacturer directly. Keep your purchase receipt for warranty claims.


