Kitstorack shoerack-01
Kitstorack 5-Tier Shoe Rack Organizer Instruction Manual
Model: shoerack-01
Introduction
Thank you for choosing the Kitstorack 5-Tier Shoe Rack Organizer. This manual provides essential information for the safe assembly, operation, and maintenance of your new shoe rack. Please read these instructions carefully before assembly and retain them for future reference.
Safety Information
WARNING: Failure to follow these safety instructions may result in injury or damage to the product.
- Always follow the provided assembly instructions precisely.
- Do not exceed the maximum weight limit of 150 lbs (68 kg) for the entire shoe rack. Distribute weight evenly across shelves.
- If wall-mounting, ensure the wall material can safely support the weight of the rack and its contents. Use the included safety kit for anti-tipping installation, especially in households with children or pets.
- Keep small parts away from children during assembly to prevent choking hazards.
- Do not stand or climb on the shoe rack.
- Place the shoe rack on a flat, stable, and level surface.
Package Contents
Before beginning assembly, verify that all parts listed below are present and undamaged. If any parts are missing or damaged, please contact customer support.
- Metal Frame Components (various sizes)
- Wooden Top Panel
- Fabric Shelves (3 pieces)
- Fabric Drawers (2 pieces)
- Adjustable Feet (4 pieces)
- Anti-Tipping Kit (wall anchor, strap, screws)
- Assembly Hardware (screws, Allen wrench)
- Instruction Manual

Assembly Instructions
Assembly is estimated to take approximately 15 minutes. It is recommended to assemble the unit on a soft, clean surface to prevent scratches.
- Unpack and Identify Parts: Carefully remove all components from the packaging. Lay them out and compare them against the package contents list to ensure everything is present.
- Assemble the Base Frame: Attach the bottom metal frame sections using the provided screws and Allen wrench. Ensure all connections are secure.
- Install Adjustable Feet: Screw the adjustable feet into the bottom of the base frame. These can be adjusted later to level the rack.
- Attach Side Frames: Connect the vertical side metal frames to the base.
- Insert Fabric Shelves: Slide the fabric shelves into the designated slots on the metal frame. Ensure they are taut and properly seated. The shelves are designed to be removable for custom storage.
- Attach Top Wooden Panel: Secure the wooden top panel to the top of the metal frame using the appropriate screws.
- Insert Fabric Drawers: Place the two fabric drawers into their compartments beneath the wooden top.
- Install Anti-Tipping Kit (Optional but Recommended): For added stability, especially in homes with children or pets, attach the anti-tipping strap to the back of the shoe rack and secure it to a wall stud using the provided hardware.


Video: Official product video demonstrating the assembly and features of the Kitstorack Shoe Rack. This video is provided by the seller, Kitstorack.
Operating Instructions
The Kitstorack 5-Tier Shoe Rack is designed for organizing footwear and small accessories in various living spaces.
- Shoe Storage: Place shoes on the fabric shelves. Each tier can hold approximately 4 pairs of women's shoes or 3 pairs of men's shoes.
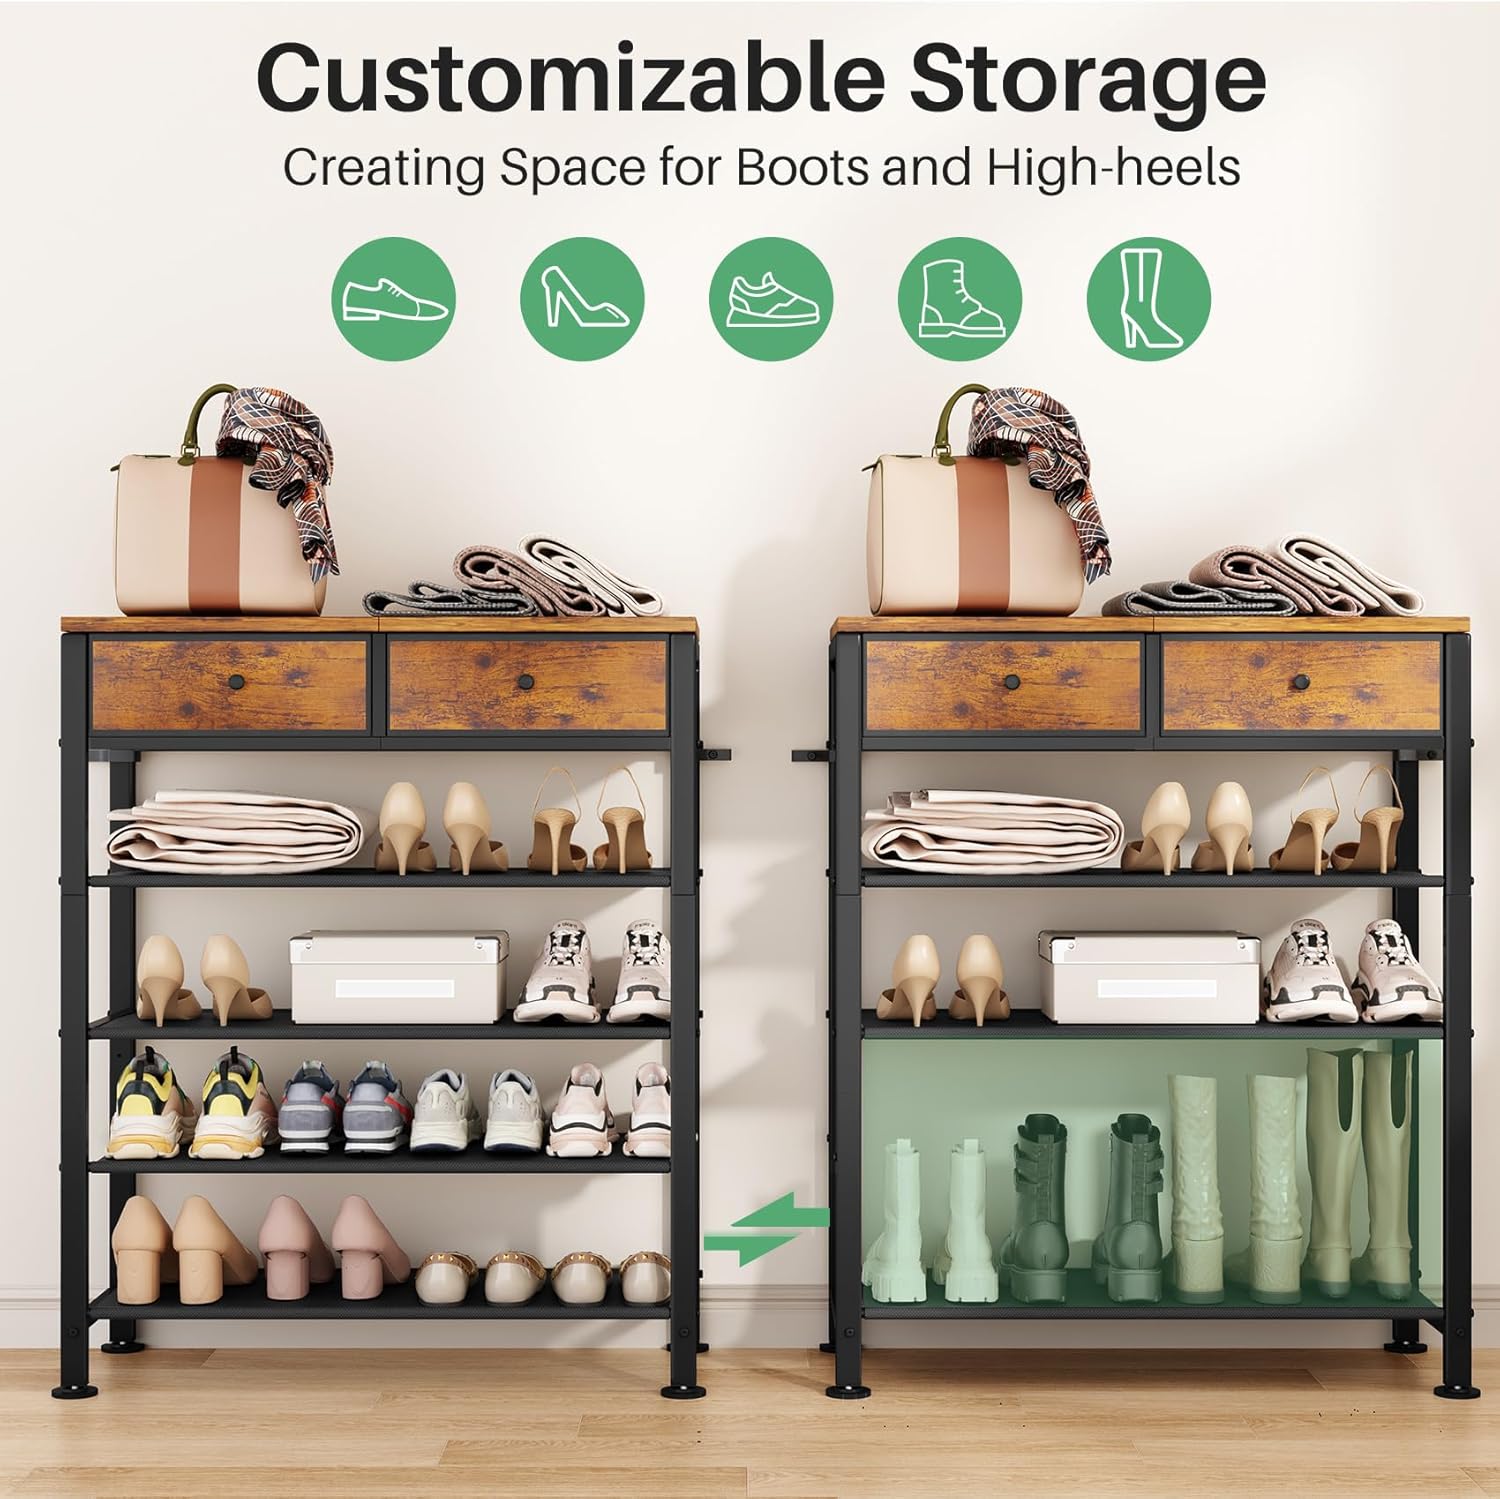
- Customizable Shelf Height: The fabric shelves can be removed to create taller spaces for boots, high heels, or other larger items. Simply unhook the fabric from the frame to remove a shelf.
- Drawer Usage: Utilize the two fabric drawers for storing small items such as socks, shoe care products, keys, or other entryway essentials.
- Top Surface: The wooden top provides a stable surface for decorative items, bags, or other frequently accessed belongings.
- Leveling: Adjust the screw-in feet at the bottom of the rack to ensure it remains stable and level on uneven floors.


Maintenance
Regular maintenance will help prolong the life and appearance of your Kitstorack shoe rack.
- Cleaning the Frame: Wipe the metal frame with a soft, damp cloth. Avoid abrasive cleaners that may damage the powder-coated finish.
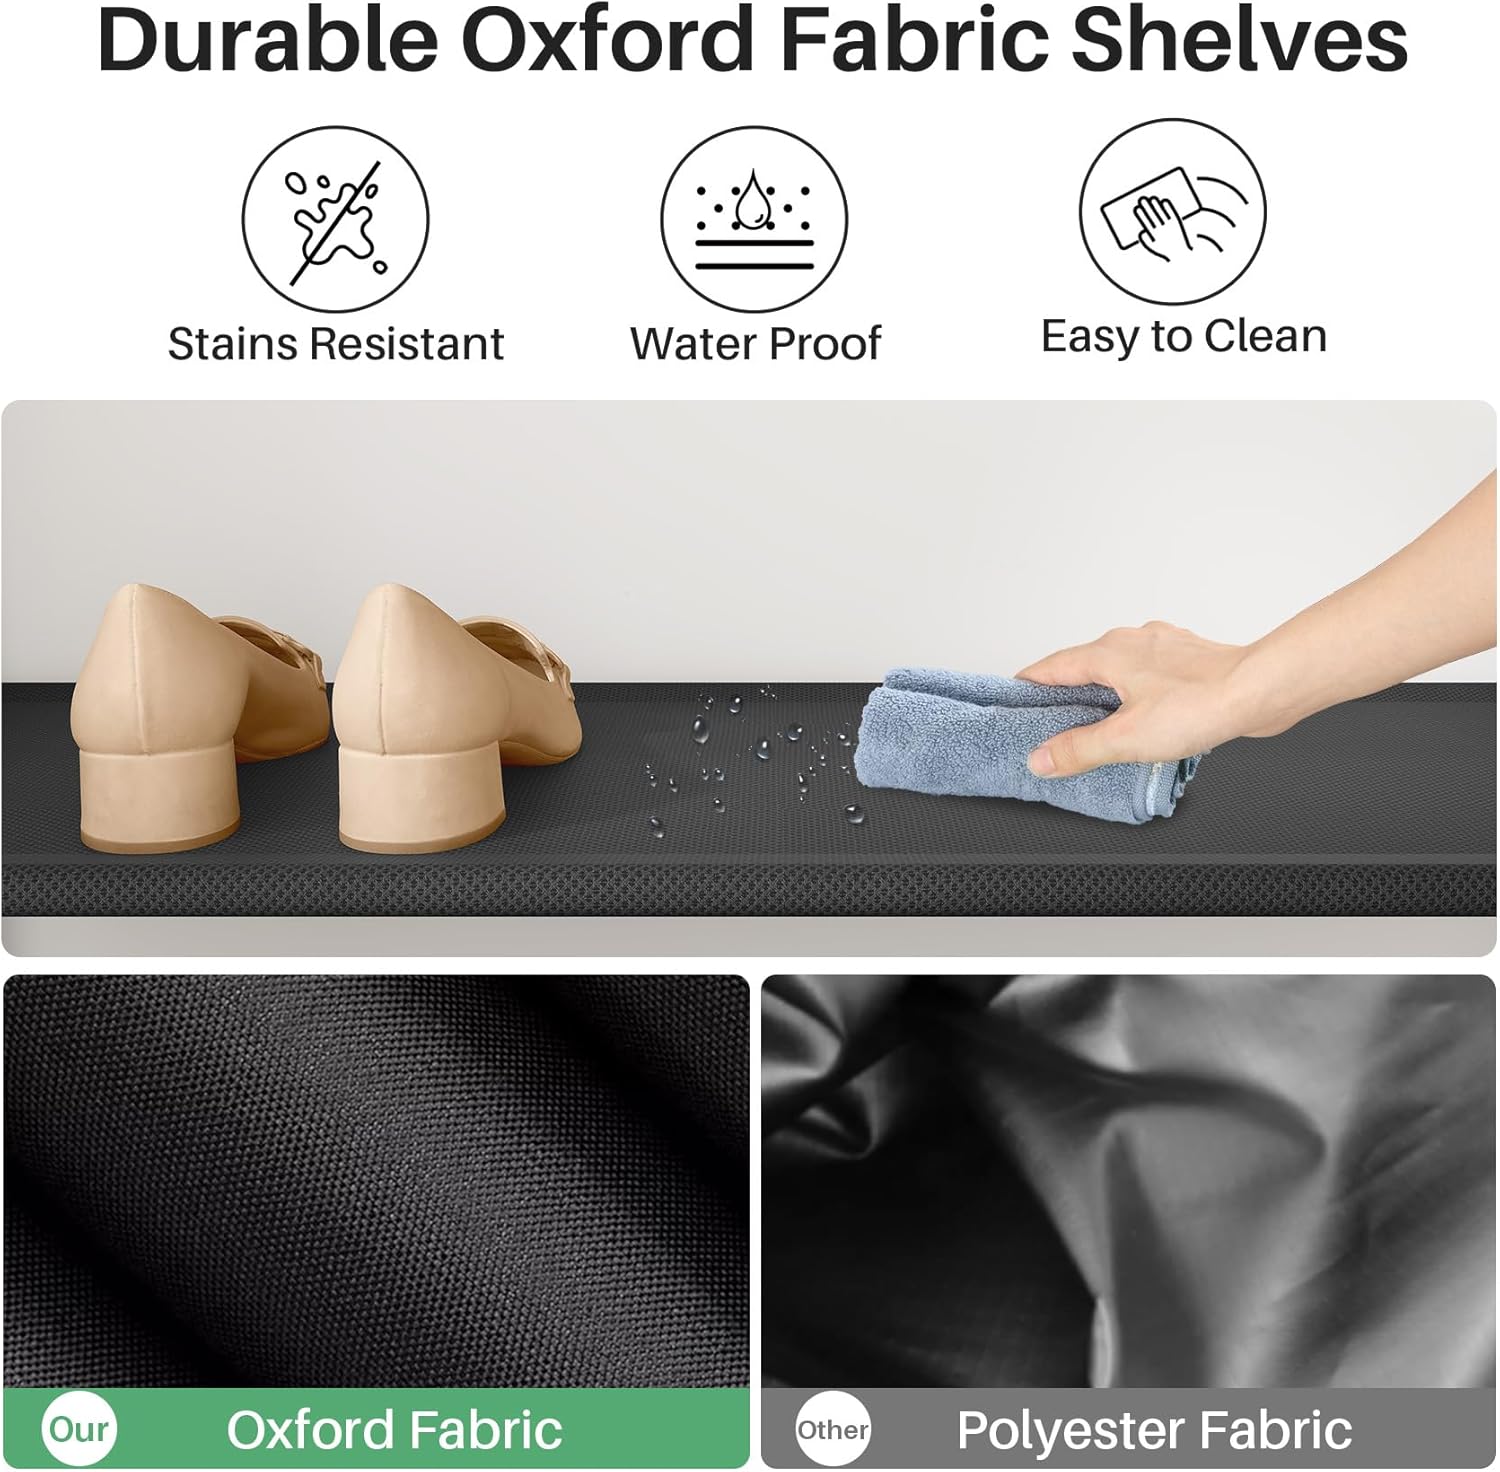
- Cleaning Fabric Shelves and Drawers: The Oxford fabric is waterproof and stain-resistant. For spills or dirt, wipe with a damp cloth and mild soap if necessary. Allow to air dry completely. Do not machine wash.
- Wooden Top Care: Wipe the wooden top with a dry or slightly damp cloth. Avoid prolonged exposure to moisture or direct sunlight to prevent warping or discoloration.
- Periodic Check: Periodically check all screws and connections to ensure they remain tight. Retighten if necessary.

Troubleshooting
| Problem | Possible Cause | Solution |
|---|---|---|
| Rack is wobbly or unstable. | Uneven floor; loose connections; weight not evenly distributed. | Adjust the leveling feet at the bottom. Ensure all screws are tightened. Redistribute items on shelves. Install the anti-tipping kit. |
| Parts do not align during assembly. | Incorrect orientation of parts; screws overtightened prematurely. | Review the assembly diagram and ensure parts are oriented correctly. Loosen screws slightly, align parts, then tighten gradually. |
| Fabric shelves sag. | Overloaded shelf; fabric not properly seated. | Reduce weight on the shelf. Ensure the fabric is securely hooked into the frame on all sides. |
| Missing parts. | Packaging error. | Contact Kitstorack customer support with your purchase details. |
Specifications
| Feature | Detail |
|---|---|
| Brand | Kitstorack |
| Model Name | shoerack-01 |
| Size | 5-Tier |
| Product Dimensions (D x W x H) | 11"D x 28.3"W x 36.2"H |
| Item Weight | 14 Pounds (6.35 kg) |
| Weight Limit | 150 Pounds (68 kg) |
| Number of Shelves | 5 (3 fabric shelves, 2 drawers, 1 wooden top) |
| Materials | Powder-coated steel frame, Wood top, Oxford fabric shelves/drawers |
| Color | Rustic Brown (wood), Black (frame/fabric) |
| Assembly Required | Yes |
| Special Features | Adjustable feet, Anti-tipping kit included, Removable fabric shelves, Fabric drawers |

Warranty and Support
Kitstorack is committed to providing quality products. For any questions, concerns, or to report missing/damaged parts, please contact our customer support team. While specific warranty details are not provided in this manual, please refer to your purchase documentation or the retailer's website for warranty information.
For additional support and product information, visit the official Kitstorack store: Kitstorack Store on Amazon
Ask a question about this manual
Ask about setup, troubleshooting, compatibility, parts, safety, or missing instructions. Manuals+ will review the question and use this page’s manual context to help answer it.