EFFORTWAY BC-250 PRO
EFFORTWAY 25A Smart Battery Charger User Manual
Model: BC-250 PRO
1. Product Overview
The EFFORTWAY 25A Smart Battery Charger is a versatile and intelligent device designed for charging and maintaining various types of 12V and 24V batteries. It features a 6-stage charging process, trickle charge mode, and multiple protection functions to ensure safe and efficient battery management. This manual provides detailed instructions for its proper use and care.


Key Features:
- Applicable Battery Types: Charges 12V LiFePO4 batteries and 12V/24V Lead-Acid batteries (WET/MF/EFB/GEL/AGM) with capacities from 15AH to 250AH.
- Variable Charging Current: Offers 12V(5A, 10A, 25A) and 24V(5A, 10A, 12A) charging options.
- 6-Stage Charging Process: Ensures safer and more efficient charging, automatically transitioning to trickle/float mode.
- Multi-functional: Functions as a charger, maintainer, trickle charger, desulfator, and reconditioner.
- Automatic Identification: Automatically detects 12V/24V batteries.
- Repair Mode: Effective for sulfated, undervoltage, and long-term idle batteries, including 0V start capability.
- Intelligent LCD Display: Shows current, voltage, battery type, capacity, and charging mode.
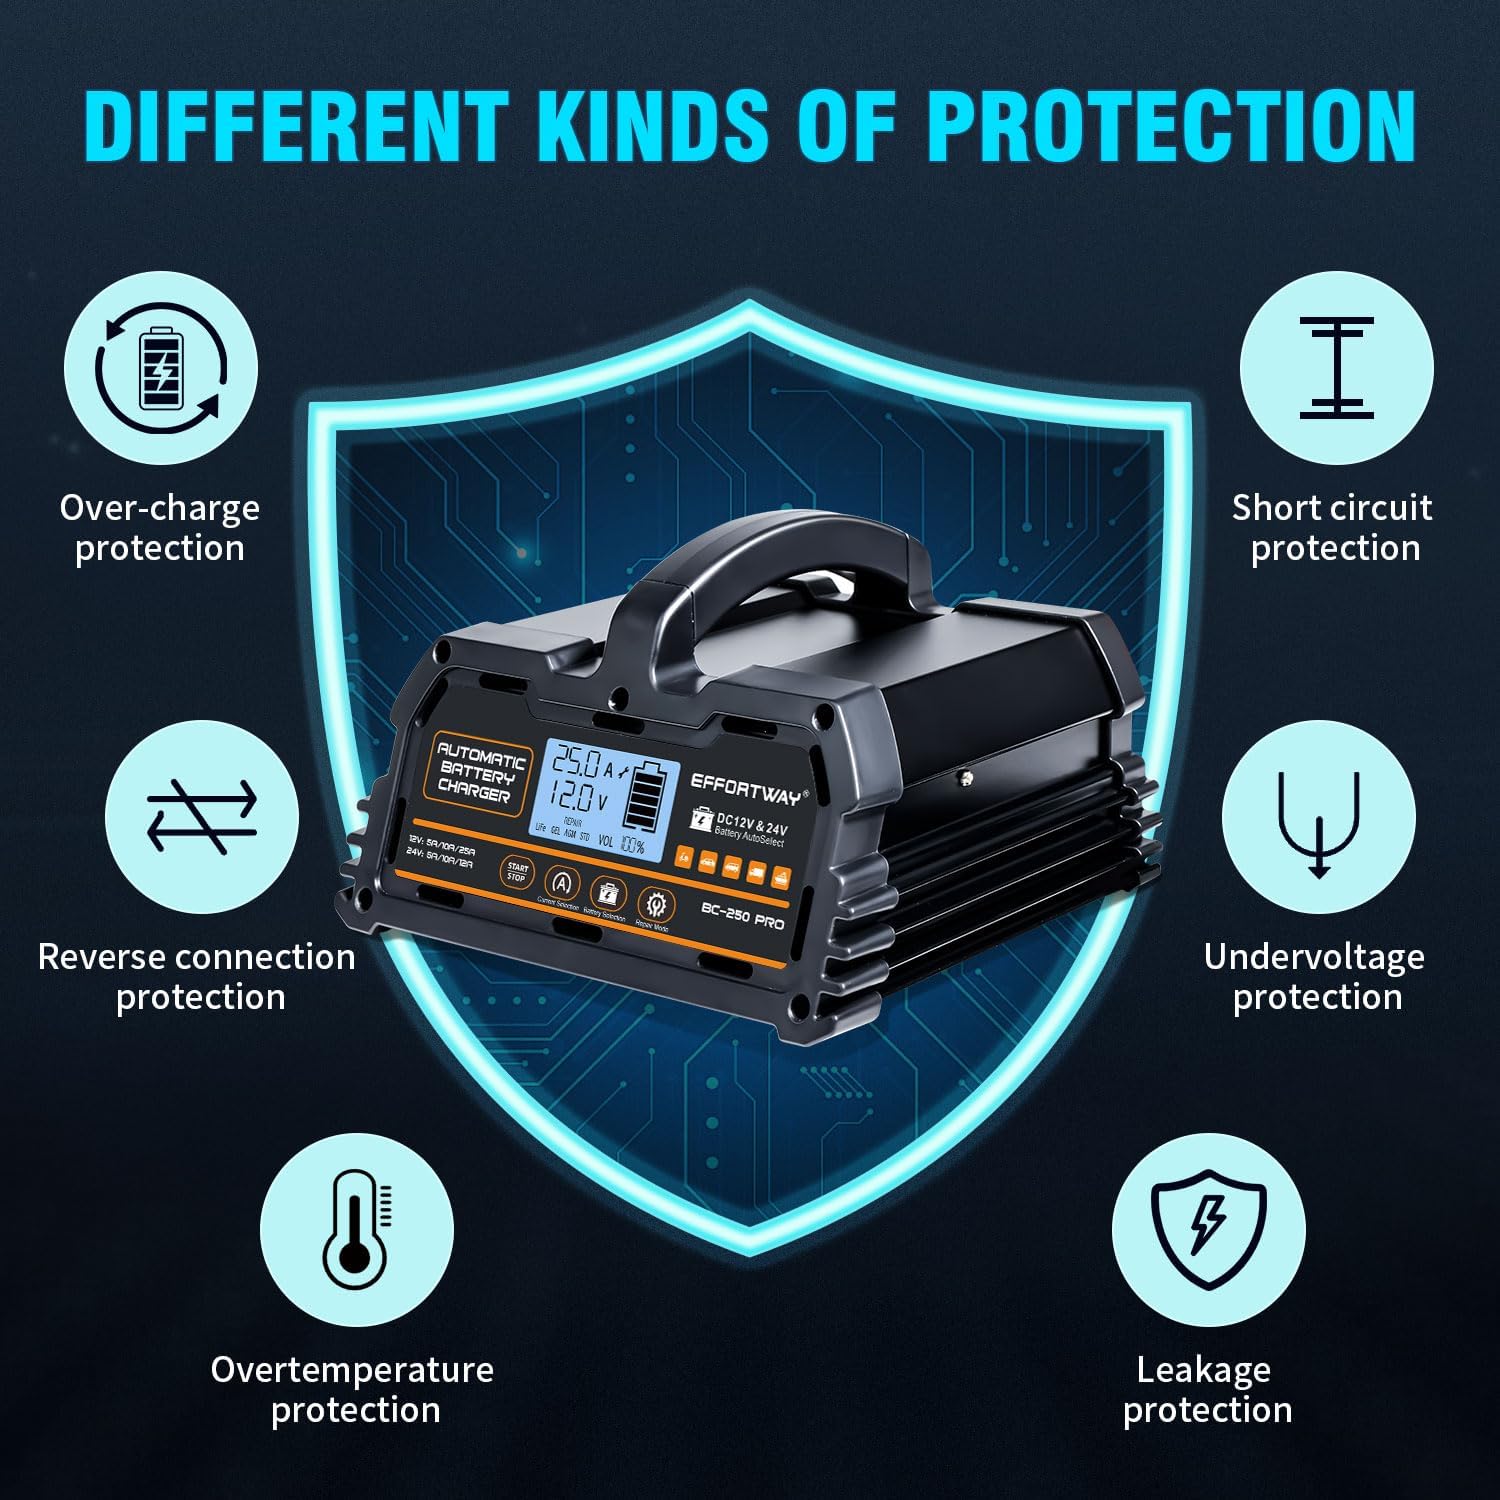
- Comprehensive Protection: Includes short circuit, reverse connection, low voltage, over-charge, over-temperature, and leakage protection.
2. Important Safety Information
Please read and understand all safety warnings and instructions before operating this battery charger. Failure to follow these instructions may result in electric shock, fire, or serious injury.
- Ventilation: Operate the charger in a well-ventilated area. Do not block cooling vents.
- Eye and Face Protection: Always wear safety glasses and protective clothing when working with batteries.
- Flammable Materials: Keep sparks, flames, and smoking materials away from batteries and the charger. Batteries produce explosive gases.
- Disconnect Power: Always disconnect the AC power supply before making or breaking connections to the battery.
- Proper Connections: Ensure correct polarity. Connect the red (+) clamp to the positive terminal and the black (-) clamp to the negative terminal.
- Indoor Use: This charger is designed for indoor use. Do not expose to rain or excessive moisture.
- Children and Pets: Keep the charger and batteries out of reach of children and pets.
- Damaged Equipment: Do not operate the charger if it has been dropped, damaged, or is not functioning properly.
3. Product Components and Display
Familiarize yourself with the charger's physical components and the intelligent LCD display.
Front Panel and Controls:

- LCD Display: Shows real-time charging status, including voltage, current, battery type, battery capacity percentage, and selected mode.
- START/STOP Button: Initiates or terminates the charging process.
- Current Selection Button: Cycles through available charging current options (e.g., 5A, 10A, 25A for 12V).
- Battery Selection Button: Selects the battery type (e.g., LiFePO4, Lead-Acid).
- Repair Mode Button: Activates the battery repair function.
Rear Panel:
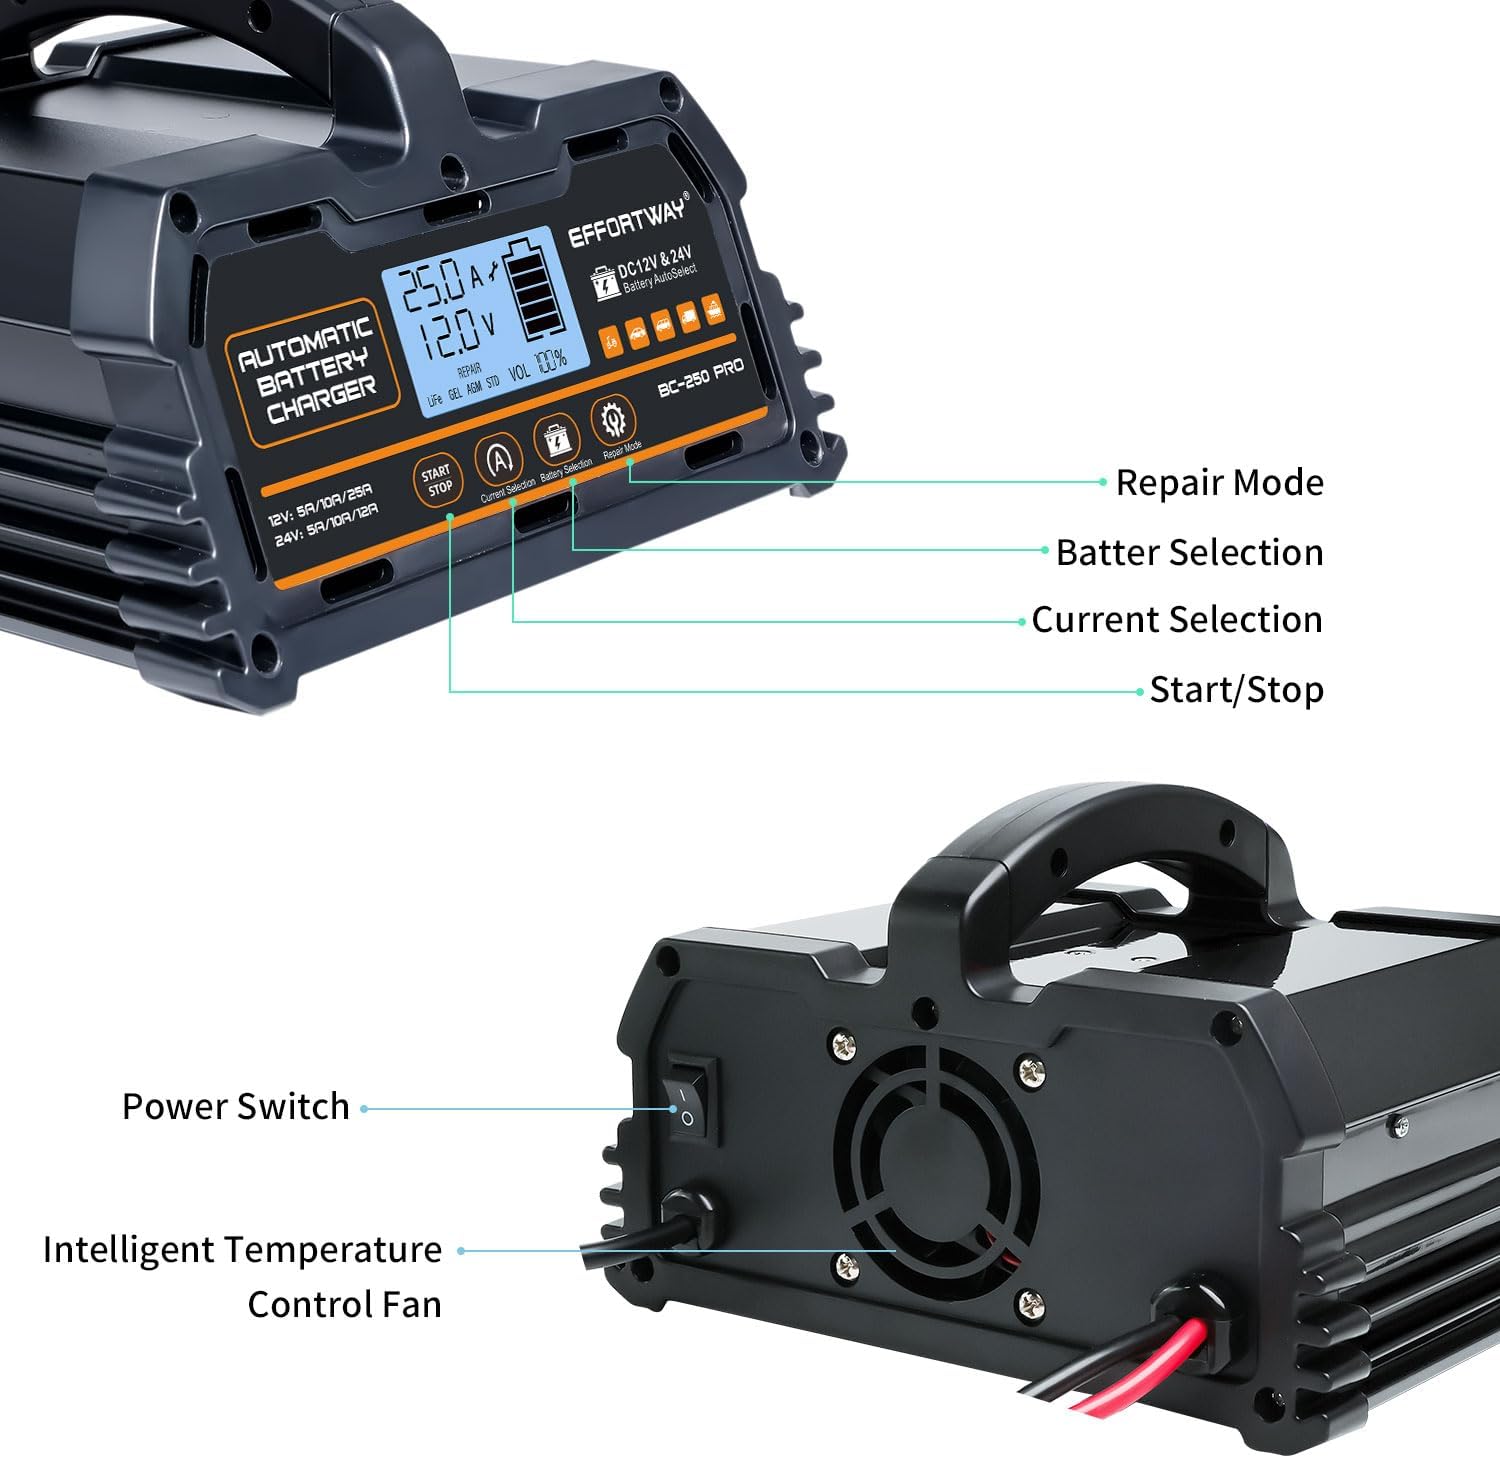
- Power Switch: Turns the charger on or off.
- Intelligent Temperature Control Fan: Automatically activates to cool the unit during operation, preventing overheating.
4. Applicable Battery Types
This charger is compatible with a wide range of 12V and 24V batteries. Ensure you select the correct battery type on the charger for optimal performance and safety.
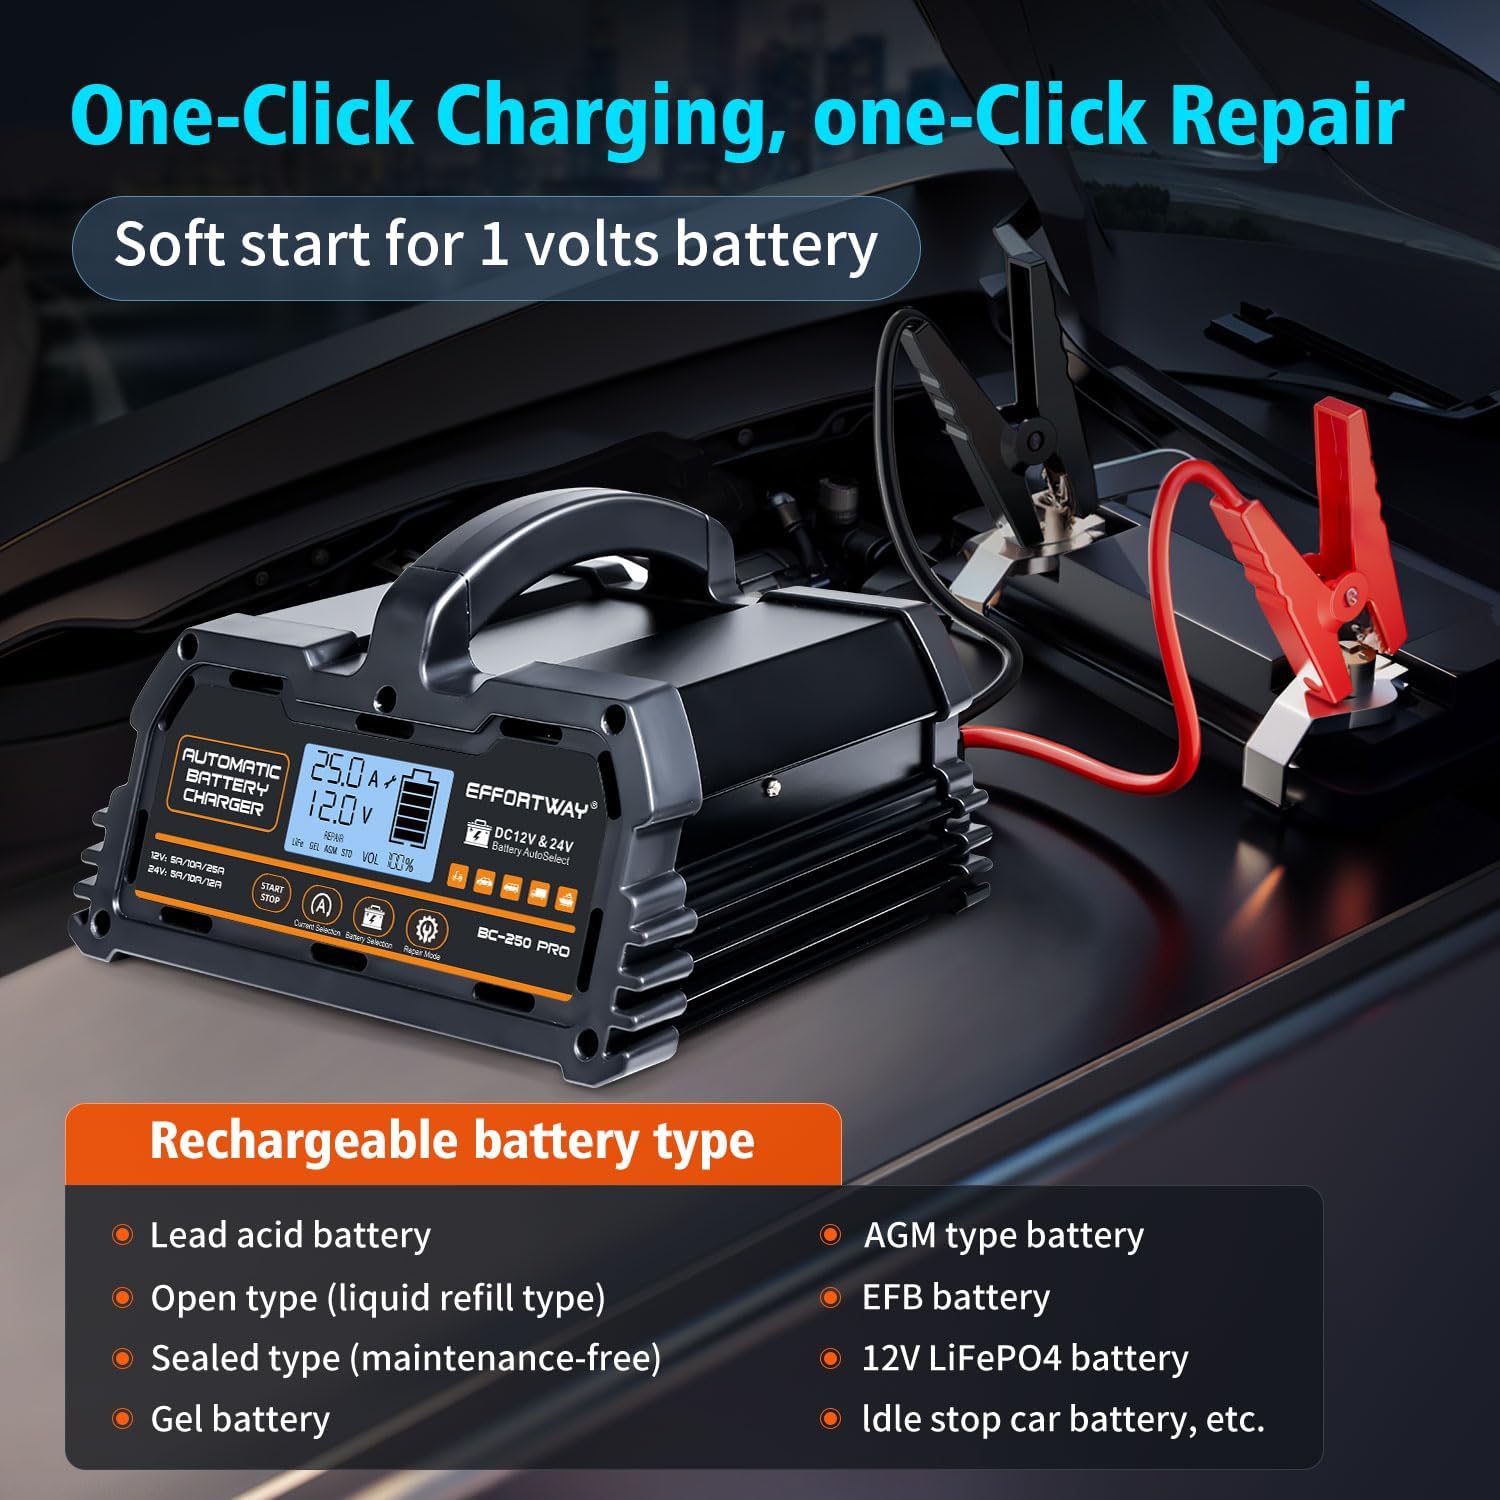
- 12V LiFePO4 Battery: Lithium Iron Phosphate batteries.
- 12V/24V Lead-Acid Batteries:
- WET (Flooded)
- MF (Maintenance-Free)
- EFB (Enhanced Flooded Battery)
- GEL (Gel Cell)
- AGM (Absorbed Glass Mat)
- Battery Capacity: Suitable for batteries with capacities ranging from 15AH to 250AH.
Note: This charger is not suitable for lithium batteries other than 12V LiFePO4, and 24V LiFePO4 batteries are prohibited.
5. Setup and Connection
Follow these steps to properly connect the charger to your battery.
- Prepare the Battery: Ensure the battery terminals are clean and free of corrosion. If charging a lead-acid battery, ensure proper ventilation.
- Connect Red Clamp: Connect the red (+) positive clamp of the charger to the positive (+) terminal of the battery.
- Connect Black Clamp: Connect the black (-) negative clamp of the charger to the negative (-) terminal of the battery.
- Connect to Power: Plug the charger's AC power cord into a standard electrical outlet. The charger will power on and display the current battery voltage.
- Verify Connection: The LCD display should show the battery voltage and indicate a proper connection. If an error message appears, check your connections.

6. Operating Instructions
Once connected, follow these steps to operate the charger and select the appropriate charging mode.
Automatic Battery Recognition:
The charger automatically identifies 12V or 24V lead-acid batteries. For 12V LiFePO4 batteries, manual selection is required.
Selecting Battery Type:
- Press the Battery Selection button to cycle through available battery types (e.g., STD, AGM, GEL, LiFePO4). Select the type that matches your battery.
Selecting Charging Current:
- Press the Current Selection button to choose the desired charging current. Available options are:
- 12V: 5A, 10A, 25A
- 24V: 5A, 10A, 12A
Starting and Stopping Charge:
- After selecting the battery type and current, press the START/STOP button to begin charging.
- The LCD display will show the charging progress, including current voltage and percentage.
- To stop charging at any time, press the START/STOP button again.
6-Stage Smart Charging Process:
The charger employs an advanced 6-stage charging process for optimal battery health and longevity:
- Desulfation: High-frequency pulse charge to break down lead sulfate.
- Soft Start: Gradually introduces current to protect the battery.
- Bulk Charge: Charges the battery to approximately 80% capacity at maximum current.
- Absorption Charge: Charges the battery to 100% at a decreasing current.
- Analysis: Checks battery condition.
- Float/Trickle Charge: Maintains the battery at full charge with a small, constant current, preventing overcharging.
Repair Mode:
The repair mode is designed to recondition sulfated, undervoltage, or long-term idle batteries.
- To activate, ensure the charger is connected to the battery, then press the Repair Mode button.
- The charger will attempt to restore the battery's capacity. This process can take several hours.
- 0V Start: If the battery voltage is 0V, the repair mode can be used to initiate charging.

Temperature Adaptive Charging:
The charger automatically adjusts the charging voltage based on ambient temperature to prevent overcharging or undercharging.

7. Maintenance
Proper maintenance ensures the longevity and optimal performance of your battery charger.
- Cleaning: Disconnect the charger from power and battery. Wipe the casing with a soft, dry cloth. Do not use harsh chemicals or abrasives.
- Cable Inspection: Regularly inspect the charging cables and clamps for any signs of damage, fraying, or corrosion. Replace if necessary.
- Storage: Store the charger in a cool, dry place when not in use. Keep it away from direct sunlight, moisture, and extreme temperatures.
- Ventilation: Ensure the cooling fan and vents are free from dust and debris to maintain proper airflow.
8. Troubleshooting
If you encounter issues with your charger, refer to the table below for common problems and solutions.
| Problem | Possible Cause | Solution |
|---|---|---|
| Charger does not turn on. | No power from outlet; loose power cord. | Check power outlet; ensure power cord is securely plugged in. |
| Charger displays error code or 'Err'. | Reverse polarity connection; short circuit; battery fault. | Check battery clamp connections for correct polarity; inspect cables for damage; test battery condition. |
| Battery not charging or charging slowly. | Incorrect battery type selected; battery capacity too large; severely discharged battery. | Ensure correct battery type is selected; verify battery capacity is within charger's range; try Repair Mode for deeply discharged batteries. |
| Charger gets hot during operation. | Normal operation; blocked ventilation. | Some heat is normal. Ensure cooling fan is not blocked and charger is in a well-ventilated area. If excessively hot, disconnect and allow to cool. |
| Repair mode not working. | Battery is beyond repair; incorrect mode selection. | Not all batteries can be fully restored. Ensure battery type is compatible with repair mode. |
9. Technical Specifications
Detailed specifications for the EFFORTWAY 25A Smart Battery Charger.
| Specification | Value |
|---|---|
| Model | BC-250 PRO |
| Input Voltage | AC 100-240V, 50/60Hz |
| Output Voltage | 12V / 24V DC |
| Charging Current (12V) | 5A, 10A, 25A |
| Charging Current (24V) | 5A, 10A, 12A |
| Applicable Battery Capacity | 15AH - 250AH |
| Applicable Battery Types | 12V LiFePO4, 12V/24V Lead-Acid (WET/MF/EFB/GEL/AGM) |
| Product Dimensions | 6.69 x 7.68 x 4.72 inches (17.0 x 19.5 x 12.0 cm) |
| Item Weight | 3.64 pounds (1.65 kg) |
| Manufacturer | EFFORTWAY |
| Country of Origin | China |

10. Warranty and Support
For warranty information or technical support, please refer to the product packaging or contact EFFORTWAY customer service directly. Contact details are typically provided with your purchase or on the manufacturer's official website.
Please retain your proof of purchase for any warranty claims.
Ask a question about this manual
Ask about setup, troubleshooting, compatibility, parts, safety, or missing instructions. Manuals+ will review the question and use this page’s manual context to help answer it.