ETURBEV GM816
GM816 Digital Anemometer User Manual
Brand: ETURBEV | Model: GM816
1. Product Overview
The ETURBEV GM816 Digital Anemometer is a compact, portable device designed for accurate measurement of wind speed and temperature. Its pocket-sized design and clear LCD display make it ideal for various applications, including outdoor sports, environmental monitoring, and industrial use.

Figure 1: GM816 Digital Anemometer - Front View
This image displays the front of the GM816 Digital Anemometer, highlighting its compact form factor, the wind impeller at the top, the LCD screen in the middle, and the 'MODE' and 'SET' buttons below the impeller.
Key Features:
- Measures wind speed up to 30 m/s.
- Measures ambient temperature.
- Clear LCD display for easy reading.
- Data Hold function to freeze current readings.
- Compact and portable pocket-sized design.
2. Setup
2.1 Battery Installation
The GM816 Anemometer is powered by a CR2032 3V lithium cell battery. Ensure the battery is installed correctly before first use.
- Locate the battery compartment cover on the back of the device.
- Use a small coin or screwdriver to gently twist the cover counter-clockwise to open.
- Insert the CR2032 battery with the positive (+) side facing upwards.
- Replace the battery compartment cover and twist clockwise to secure it.

Figure 2: GM816 Digital Anemometer - Back View with Battery Compartment
This image shows both the front and back of the GM816 Digital Anemometer. The back view clearly indicates the circular battery compartment for a CR2032 lithium cell.
3. Operating Instructions
3.1 Power On/Off
- To power on the device, press the MODE button briefly.
- To power off the device, press and hold the MODE button for approximately 3 seconds until the display turns off. The device also features an auto-off function after 14 minutes of inactivity to conserve battery.
3.2 Unit Selection
You can switch between different units for wind speed and temperature measurements.
- Wind Speed Units: With the device powered on, briefly press the SET button to cycle through wind speed units: m/s (meters per second), km/h (kilometers per hour), ft/min (feet per minute), knots, and mph (miles per hour).
- Temperature Units: To switch between Celsius (°C) and Fahrenheit (°F), press and hold the MODE and SET buttons simultaneously for approximately 3 seconds.
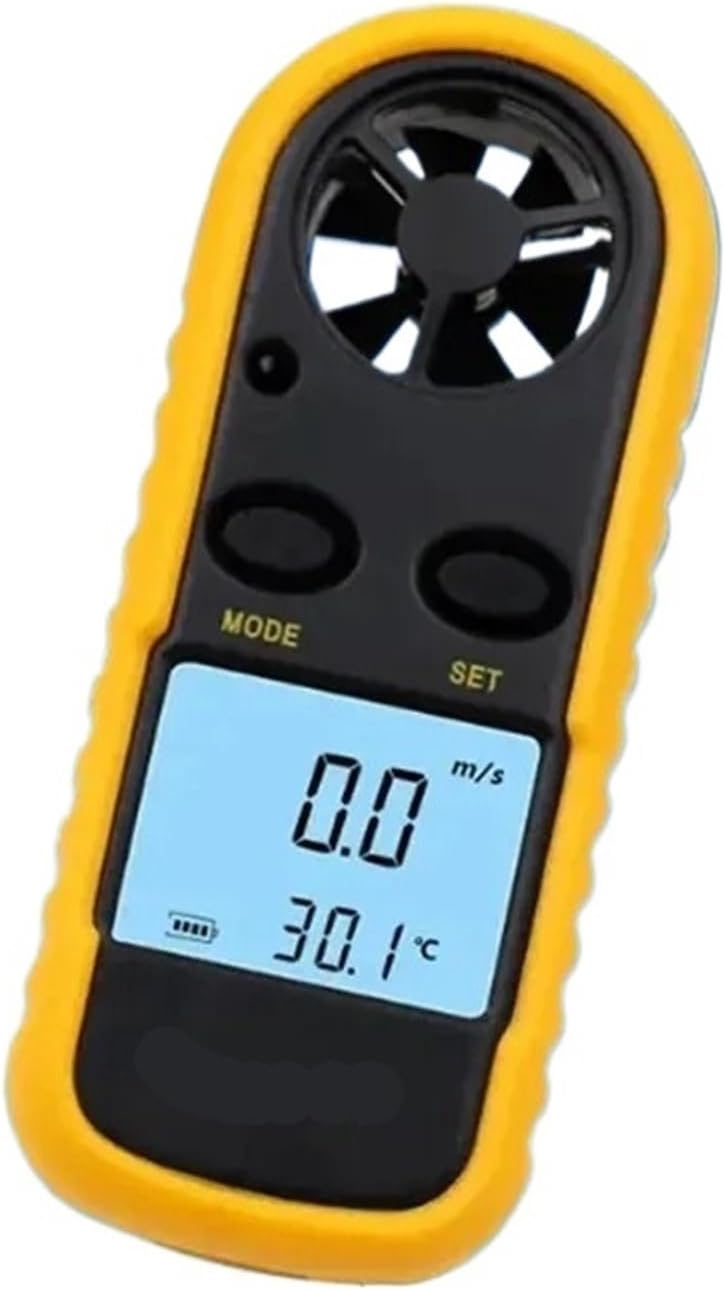
Figure 3: Anemometer Display with Readings
This image provides a close-up view of the GM816's LCD screen, displaying a wind speed of 6.5 m/s and a temperature of 23.1 °C, along with a battery indicator and a Beaufort scale bar graph.
3.3 Taking Measurements
Once powered on, the device will immediately begin displaying real-time wind speed and temperature readings. Ensure the impeller (fan) at the top of the device is exposed to the wind flow for accurate measurements.
- Hold the device upright, allowing wind to pass through the impeller.
- The wind speed will be displayed prominently on the LCD screen.
- The temperature will be displayed below the wind speed.
3.4 Data Hold Function
To freeze the current readings on the display:
- Briefly press the MODE button while the device is displaying readings. The "HOLD" icon will appear on the screen.
- To exit Data Hold mode and resume real-time measurements, briefly press the MODE button again.
4. Maintenance
4.1 Cleaning
- Wipe the device with a soft, dry cloth.
- Do not use abrasive cleaners or solvents, as they may damage the casing or display.
- Keep the impeller free from dust and debris to ensure accurate readings. Use a soft brush or compressed air if necessary, but avoid touching the impeller blades directly.
4.2 Battery Replacement
When the battery indicator on the LCD shows low power, replace the CR2032 battery following the instructions in Section 2.1. Remove the battery if the device will not be used for an extended period to prevent leakage.
4.3 Storage
Store the anemometer in a cool, dry place, away from direct sunlight and extreme temperatures. Keep it in its original packaging or a protective case to prevent damage.
5. Troubleshooting
| Problem | Possible Cause | Solution |
|---|---|---|
| No display / Device won't turn on | Dead or incorrectly installed battery. | Check battery installation. Replace with a new CR2032 battery. |
| Inaccurate wind speed readings | Impeller obstructed or damaged; incorrect unit selected. | Ensure impeller is clean and spins freely. Verify correct wind speed unit (m/s, km/h, etc.). |
| Inaccurate temperature readings | Sensor obstructed; device not acclimatized to environment; incorrect unit selected. | Ensure temperature sensor area is clear. Allow device to stabilize in the environment. Verify correct temperature unit (°C or °F). |
| Display flickering or unstable | Low battery. | Replace the CR2032 battery. |
6. Specifications
| Parameter | Value |
|---|---|
| Model | GM816 |
| Max Wind Speed | 30 m/s |
| Power Source | 1 x CR2032 3V Lithium Battery |
| Item Weight | 1.76 ounces (50 Grams) |
| Manufacturer | ETURBEV |
7. Warranty and Support
7.1 Warranty Information
Specific warranty details for the ETURBEV GM816 Digital Anemometer are typically provided by the seller or manufacturer at the time of purchase. Please refer to your purchase documentation or contact the retailer directly for information regarding warranty coverage, terms, and conditions.
7.2 Customer Support
For technical assistance, troubleshooting beyond this manual, or inquiries regarding your product, please contact the manufacturer, ETURBEV, or your point of purchase. Keep your purchase receipt and product model number (GM816) ready when seeking support.
Ask a question about this manual
Ask about setup, troubleshooting, compatibility, parts, safety, or missing instructions. Manuals+ will review the question and use this page’s manual context to help answer it.