Introduction
This manual provides essential instructions for the safe and efficient operation and maintenance of your KlrSwp 1822 Handheld Cordless Pool Vacuum. Please read this manual thoroughly before use and retain it for future reference.
Product Overview and Components
The KlrSwp 1822 is a cordless, water-activated pool and spa vacuum designed for cleaning small debris from various water bodies.
Key Features:
- Water-Activated Automatic Activation: Automatically turns on when submerged, preventing dry-running. The integrated LED light enhances underwater visibility.
- Powerful Suction: Efficiently removes small insects, silt, pollen, and leaves.
- Fast Charging: 2-hour charge provides up to 90 minutes of runtime.
- Telescopic Pole: Adjustable length up to 65 inches for extended reach.
- Multiple Brush Heads: Includes triangular, flat, and slim brushes for versatile cleaning of various surfaces and hard-to-reach areas.
- Easy-to-Clean Filter: Features a 0.32L large capacity stainless steel filter for simple debris disposal.
Package Contents:
- KlrSwp 1822 Vacuum Unit
- Telescopic Pole (multi-section)
- Triangular Brush Head
- Flat Vacuum Head
- Slim Brush Head
- USB Charging Cable
- Stainless Steel Filter (0.32L capacity)
- Rubber Block (for charging port waterproofing)
- Instruction Manual

Figure 1: KlrSwp 1822 Handheld Cordless Pool Vacuum and included accessories.
Setup and Assembly
- Charge the Battery: Connect the USB charging cable to the vacuum unit and a suitable power source. Ensure the rubber block is securely in place to waterproof the charging port during use. A full charge takes approximately 2 hours.
- Assemble the Telescopic Pole: Connect the pole sections by aligning the pins and holes until they click into place. Adjust the length as needed for your pool or spa depth. The maximum reach is 65 inches.
- Attach the Desired Brush Head: Select the appropriate brush head (triangular for general floor cleaning, flat for corners, slim for stairs) and securely attach it to the vacuum unit.
- Insert Filter: Ensure the 0.32L stainless steel filter is correctly inserted into the transparent debris collection chamber.
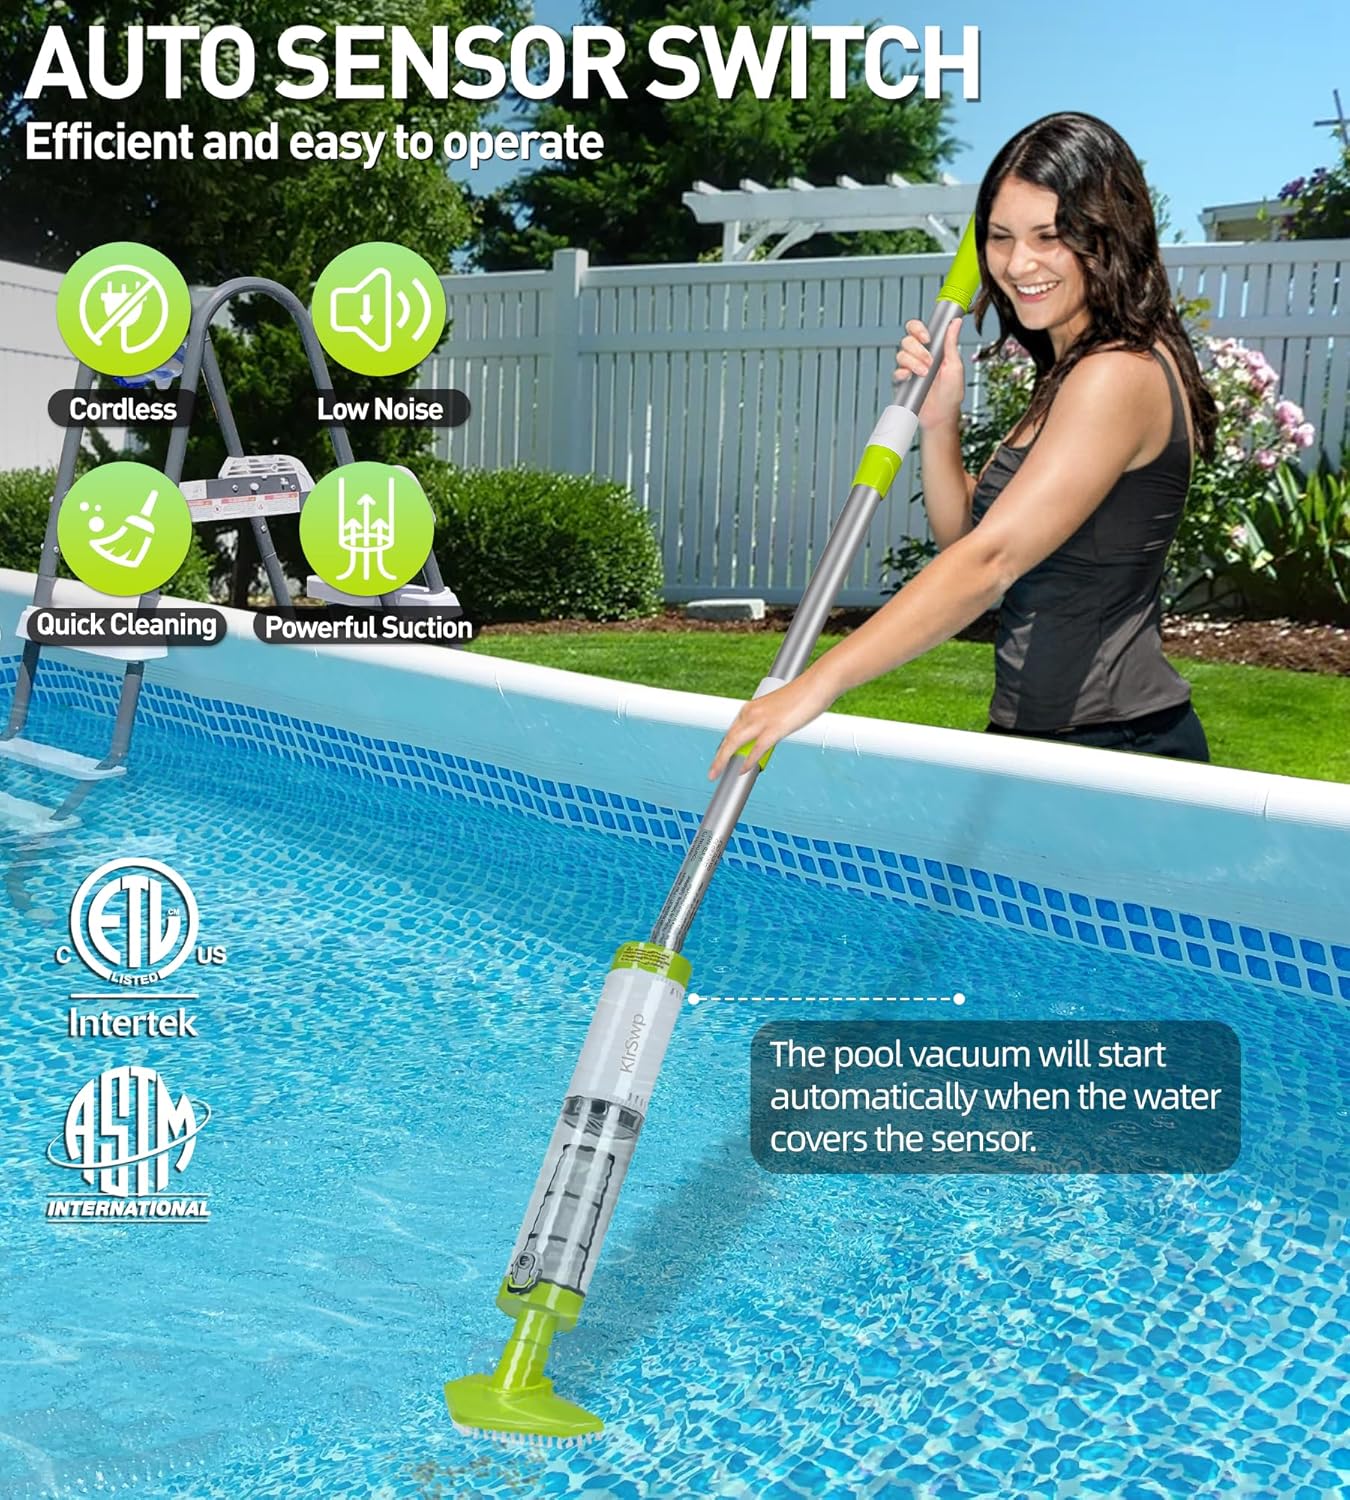
Figure 2: Assembly of the KlrSwp 1822 telescopic pole and vacuum head.

Figure 3: Demonstrating the adjustable length of the telescopic pole for flexible cleaning.
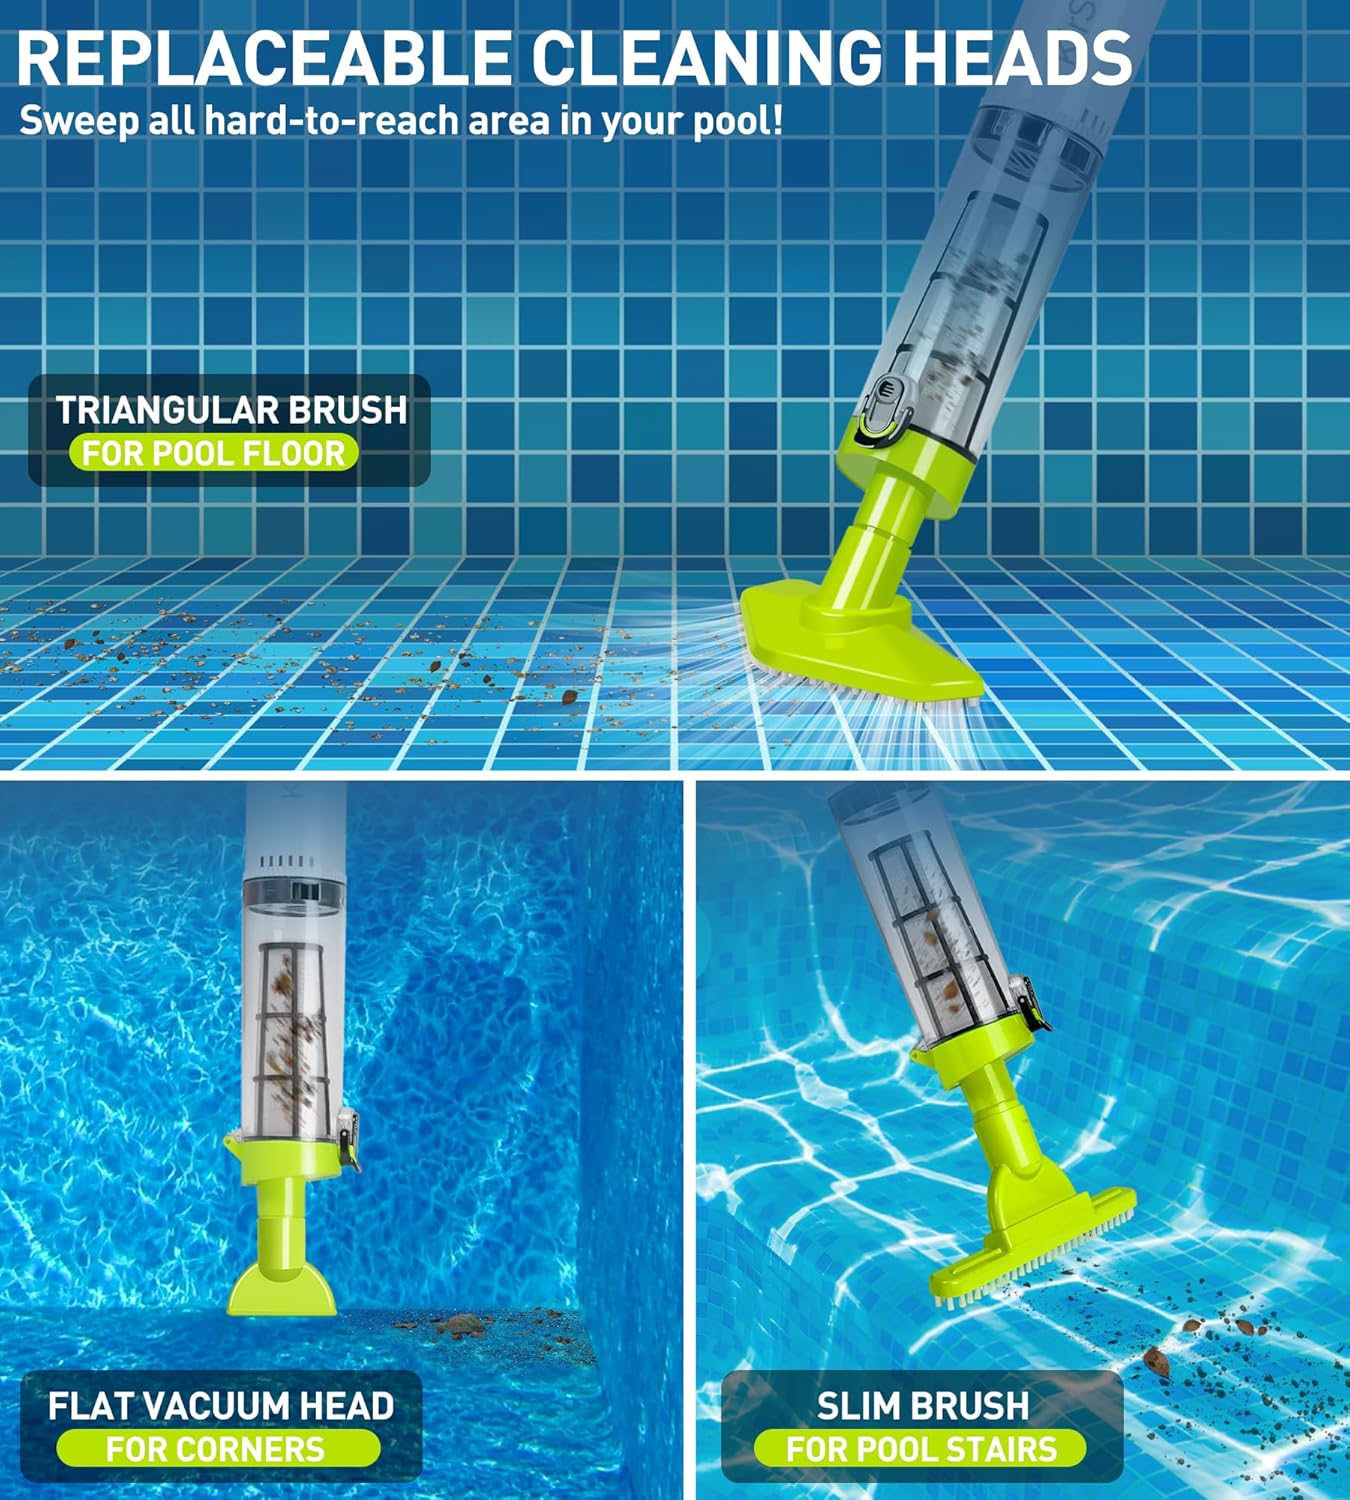
Figure 4: The three interchangeable cleaning heads for various cleaning tasks.
Operating Instructions
- Activation: The vacuum is equipped with a water sensor and will automatically activate and illuminate its LED light once submerged in water. No manual power button is required for activation.
- Submersion Depth: For proper operation, immerse the motor in water deeper than 1.65 feet.
- Cleaning Technique: Gently guide the vacuum along the bottom and sides of your pool or spa. The powerful suction will dislodge and collect debris. The integrated LED light enhances visibility in darker areas.
- Runtime: The vacuum provides up to 90 minutes of continuous cleaning on a single full charge.
- Deactivation: The vacuum will automatically deactivate when removed from water.

Figure 5: The KlrSwp 1822 vacuum in a pool, demonstrating its water-activated automatic start.

Figure 6: Underwater view of the vacuum effectively collecting debris from the pool floor.
Official Product Video:
Video 1: Demonstration of the KlrSwp 1822 Handheld Cordless Pool Vacuum in use, showcasing its powerful suction and ease of operation for cleaning pool debris.
Maintenance
- Emptying the Filter: After each use, remove the debris collection chamber and the stainless steel filter. Discard collected debris.
- Cleaning the Filter: Rinse the filter thoroughly with clean water until all debris is removed. The filter is reusable.
- Cleaning the Unit: Wipe down the exterior of the vacuum unit with a soft, damp cloth.
- Storage: Store the disassembled or assembled vacuum in a cool, dry place away from direct sunlight.

Figure 7: Steps for easy removal and cleaning of the stainless steel filter.
Troubleshooting
Common Issues and Solutions:
- Vacuum not activating: Ensure the motor is submerged in water deeper than 1.65 feet. Check battery charge level.
- Reduced suction: Check if the filter is clogged with debris and clean it. Ensure the brush head is securely attached.
- Short runtime: Fully charge the battery for 2 hours. Battery life may decrease over time with repeated use.
- LED light not working: Check battery charge. If the issue persists, contact customer support.
For further assistance, please refer to the warranty and support information.
Specifications
- Model Number: 1822
- Product Dimensions: 3.15 x 3.15 x 65 inches (fully extended)
- Item Weight: 3.89 pounds
- Battery: 1 Lithium Polymer battery (included)
- Charging Time: Approximately 2 hours
- Running Time: Up to 90 minutes
- Filter Capacity: 0.32L
- Minimum Water Depth for Operation: 1.65 feet
Note: Specifications are subject to change without prior notice.
Warranty and Support
KlrSwp offers customer support for any issues or questions you may have regarding your Handheld Cordless Pool Vacuum. Please refer to the product packaging or the official KlrSwp website for detailed warranty information and contact methods.
For service inquiries, please retain your proof of purchase.