Important Safety Information
Please read all instructions carefully before installation and use. Keep this manual for future reference.
- Handle the mirror with care to avoid breakage. Tempered glass is designed to shatter into small, less harmful pieces if broken, but proper handling is essential.
- Ensure proper mounting to prevent accidents. The mirror must be securely fastened to a structurally sound wall.
- All electrical connections should be performed by a qualified electrician in accordance with local electrical codes.
- Do not expose the mirror to excessive moisture or direct water spray beyond normal bathroom use.
- Keep children away from the mirror during installation and ensure they do not tamper with the electrical components.
Product Features
- Backlit + Front Lit LED Strips: Integrated LED lighting provides both ambient backlighting and direct front lighting for optimal illumination.
- Dimmable Brightness: Adjust the light intensity to your preference.
- 3 Color Temperature Modes: Choose between warm light (3000K), natural light (4000K), and white light (6000K) to suit different needs and moods.
- Smart Anti-Fog Function: Automatically activates with the light and turns off after one hour to maintain a clear reflection.
- Intelligent Memory Function: Retains your last brightness and color temperature settings.
- Tempered Glass: Constructed with explosion-proof, shatter-proof tempered glass for enhanced safety and durability.
- Multiple Installation Methods: Can be hung vertically or horizontally.

Image: The Koonmi 30x36 LED Bathroom Mirror showcasing its illuminated design.
Setup & Installation
Unpacking
- Carefully remove the mirror from its reinforced packaging.
- Inspect the mirror for any signs of damage. Contact customer support immediately if any damage is found.
- Ensure all installation accessories (Z-type brackets, screws, anchors) and the instruction manual are present.
Mounting Options
The mirror can be installed in either a vertical or horizontal orientation.
- Vertical Installation: Position the mirror with the 30-inch side as the width and the 36-inch side as the height.
- Horizontal Installation: Position the mirror with the 36-inch side as the width and the 30-inch side as the height.
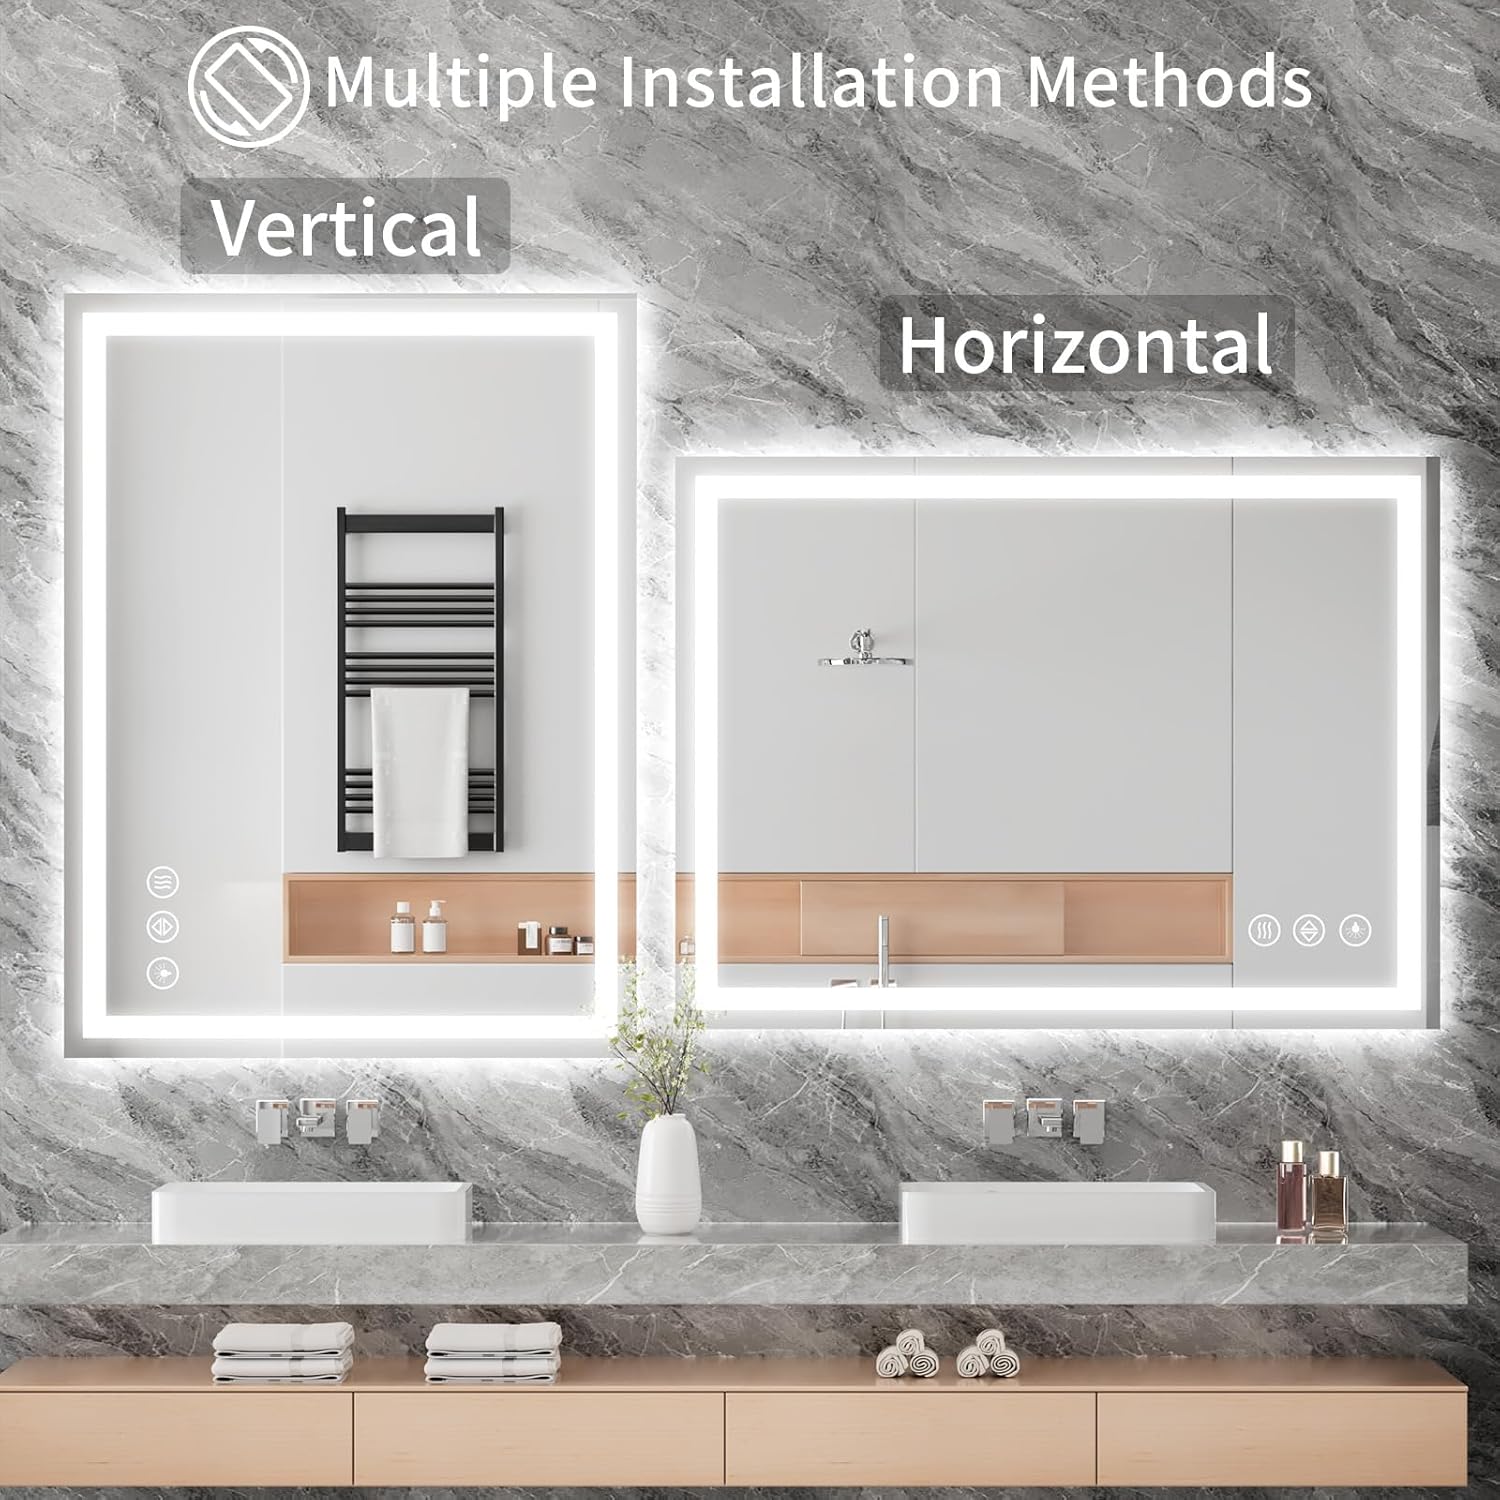
Image: Visual guide for vertical and horizontal mounting of the mirror.
Installation Steps
- Prepare the Wall: Choose the desired mounting location. Ensure the wall surface is clean and dry.
- Marking: Use a pencil and a level to mark the positions for the Z-type brackets according to the chosen orientation (vertical or horizontal) and the mirror's dimensions. Refer to the included template or measure carefully.
- Drilling: Drill pilot holes at the marked positions. For drywall, insert the provided anchors. For wood studs, drill directly.
- Attach Brackets: Securely fasten the Z-type brackets to the wall using the provided screws. Ensure they are level and firmly attached.
- Electrical Connection: Determine whether to plug the mirror into an outlet or hardwire it.
- Plug-in Option: Connect the mirror's power cord directly to a standard electrical outlet.
- Hardwire Option: For a seamless look, the mirror can be hardwired directly into your home's electrical system. This requires professional installation by a qualified electrician to ensure safety and compliance with electrical codes. Ensure the power is OFF at the circuit breaker before attempting any hardwiring.
- Hang the Mirror: Carefully lift the mirror and align the grooves on the back of the mirror with the installed Z-type brackets. Gently lower the mirror until it is securely seated on the brackets.
- Final Check: Verify that the mirror is stable and level.
Video: This video demonstrates the sturdy and easy installation process of the Koonmi LED Bathroom Mirror, including mounting and electrical connection options.

Image: Illustration of connecting the mirror to either a standard outlet or hardwiring it into the electrical system.
Operating Instructions
The mirror features touch-sensitive controls integrated into the glass surface.
Power On/Off
- To Turn On: Short press the power button (usually indicated by a circle icon). The mirror will illuminate with the last used settings due to the memory function.
- To Turn Off: Short press the power button again.
Adjusting Brightness (Dimmable)
- When the light is on, long press the power button. The brightness will cycle through its range (10% to 100%). Release the button when the desired brightness is reached.

Image: Demonstration of long-pressing the light button to adjust the mirror's brightness.
Changing Color Temperature
- With the light on, short press the color temperature button (often indicated by a sun or color palette icon). Each press will cycle through the three available color modes: warm light (3000K), natural light (4000K), and white light (6000K).

Image: Visual representation of the three color temperature options available on the mirror.
Anti-Fog Function
- To Activate: Short press the anti-fog button (usually indicated by a wavy lines icon). The defogging function will turn on automatically.
- Automatic Shut-off: The anti-fog function will automatically turn off after one hour of operation.
- To Deactivate Manually: Short press the anti-fog button again.

Image: Comparison of the mirror with anti-fog off (foggy) and anti-fog on (clear).
Memory Function
- The mirror is equipped with an intelligent memory function that remembers your last brightness and color temperature settings when the mirror is turned off and then back on.

Image: The memory function ensures your preferred light settings are retained.
Maintenance
Cleaning the Mirror
- Use a soft, lint-free cloth and a non-abrasive glass cleaner.
- Spray the cleaner onto the cloth, not directly onto the mirror, to prevent liquid from seeping into the electrical components.
- Wipe the mirror surface gently until clean and streak-free.
- Avoid using harsh chemicals, abrasive cleaners, or scouring pads, as these can damage the mirror surface or the LED components.
General Care
- Regularly check the mounting hardware to ensure the mirror remains securely attached to the wall.
- Do not hang heavy objects on the mirror or apply excessive pressure to its surface.
- If the mirror is not functioning correctly, refer to the troubleshooting section or contact customer support. Do not attempt to repair electrical components yourself.
Troubleshooting
| Problem | Possible Cause | Solution |
|---|---|---|
| Mirror lights do not turn on. | No power supply; loose connection; faulty switch. | Check if the mirror is properly plugged in or hardwired. Verify the circuit breaker is on. Ensure all connections are secure. |
| Anti-fog function not working. | Function not activated; power issue. | Ensure the anti-fog button is pressed. Check for power supply to the mirror. |
| Lights are flickering or dim. | Unstable power supply; LED strip issue. | Check power source stability. If problem persists, contact customer support. |
| Touch controls are unresponsive. | Wet surface; temporary glitch. | Ensure the mirror surface is dry. Try turning off and on the main power to reset. |
Product Specifications
| Feature | Detail |
|---|---|
| Brand | Koonmi |
| Model Number | LEDZJWH |
| Product Dimensions | 36"L x 30"W |
| Item Weight | 19.23 pounds (8.74 Kilograms) |
| Material | Tempered Glass |
| Room Type | Bathroom |
| Shape | Rectangular |
| Mounting Type | Wall Mount |
| Light Features | Backlit + Front Lighted, Dimmable Brightness, 3 Color Modes (3000K, 4000K, 6000K) |
| Smart Features | Fogless (Anti-Fog), Memory Function |
| Assembly Required | No |
Warranty and Support
Koonmi is committed to providing high-quality products and excellent customer service.
- Warranty Information: For specific warranty details, please refer to the warranty card included with your product or visit the official Koonmi website.
- Customer Support: If you have any questions, concerns, or require assistance with your Koonmi LED Bathroom Mirror, please contact our professional after-sales team. Contact information can be found on our website or on the product packaging.
