Ecosen B0DP43112K
Ecosen 12V Cordless Electric Screwdriver/Drill User Manual
Model: B0DP43112K
Brand: Ecosen
1. Introduction
Thank you for choosing the Ecosen 12V Cordless Electric Screwdriver/Drill. This versatile tool is designed for various drilling and fastening tasks around your home or workshop. Please read this manual carefully before operating the tool to ensure safe and efficient use. Keep this manual for future reference.
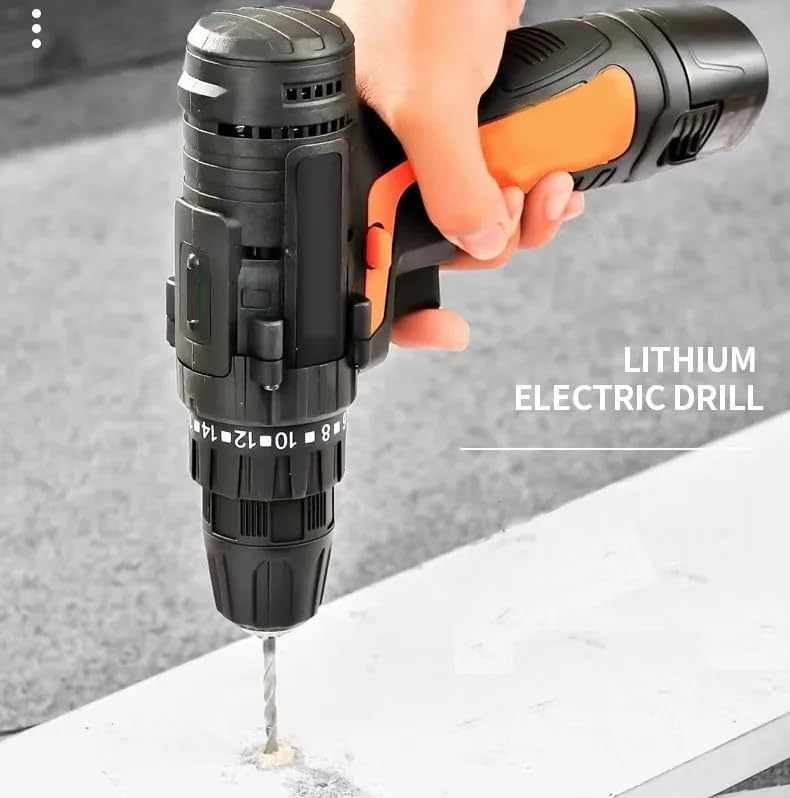
Figure 1.1: The Ecosen 12V Cordless Electric Screwdriver/Drill in action, demonstrating its use for drilling.
2. Important Safety Instructions
Always follow basic safety precautions when using electric tools to reduce the risk of fire, electric shock, and personal injury.
- Work Area Safety: Keep your work area clean and well-lit. Cluttered or dark areas invite accidents. Do not operate power tools in explosive atmospheres, such as in the presence of flammable liquids, gases, or dust.
- Electrical Safety: Avoid body contact with earthed or grounded surfaces. Do not expose power tools to rain or wet conditions.
- Personal Safety: Always wear eye protection. Use hearing protection when operating for extended periods. Dress properly; avoid loose clothing or jewelry.
- Tool Use and Care: Do not force the power tool. Use the correct power tool for your application. Disconnect the battery pack from the power tool before making any adjustments, changing accessories, or storing power tools.
- Battery Pack Use and Care: Recharge only with the charger specified by the manufacturer. Do not use battery packs with any other power tools.
3. Package Contents
Carefully unpack all items and ensure you have received the following:

Figure 3.1: Ecosen 12V Cordless Electric Screwdriver/Drill with included accessories.
The package typically includes:
- Ecosen 12V Cordless Electric Screwdriver/Drill
- 12V Lithium-Ion Battery Pack
- Battery Charger
- Flexible Shaft Extension
- Assorted Screwdriver Bits (Phillips, Flathead, Torx, Hex)
- Assorted Socket Bits
- Bit Holder
4. Product Features and Components
Familiarize yourself with the parts of your Ecosen 12V Cordless Electric Screwdriver/Drill:

Figure 4.1: Key components of the Ecosen 12V Cordless Electric Screwdriver/Drill.
- 1. Two-Speed Adjustment: Switch between low and high speeds.
- 2. Gear Adjustment: For different applications.
- 3. Heat Sink: Helps dissipate heat during operation.
- 4. Forward/Reverse Switch: Controls rotation direction.
- 5. Pressure Variable Speed Trigger: Controls drilling/driving speed.
- 6. LED Light: Illuminates the work area.
- 7. Anti-slip Handle: Provides a secure grip.
- 8. Battery Removal Button: For detaching the battery.
- 9. Lithium-Ion Battery: Power source for the tool.
5. Setup
5.1 Charging the Battery
The battery pack is not fully charged at the time of purchase. It is recommended to fully charge the battery before first use.
- Connect the charger to a standard power outlet.
- Slide the battery pack onto the charger until it clicks into place.
- The indicator light on the charger will show the charging status (refer to charger manual for specific light indications).
- Once fully charged, disconnect the battery from the charger.
Note: Always use the original Ecosen charger provided with your tool.
5.2 Installing/Removing the Battery Pack
- To Install: Align the battery pack with the base of the tool and slide it in until it clicks securely into place.
- To Remove: Press the battery removal button (8) and slide the battery pack out.
5.3 Installing/Removing Drill Bits or Screwdriver Bits
The Ecosen drill features a keyless chuck for quick and easy bit changes.

Figure 5.1: Two-step process for installing a drill bit.
- Step 1: Rotate the chuck counter-clockwise to open the jaws.
- Step 2: Insert the desired drill bit or screwdriver bit into the chuck. Rotate the chuck clockwise to tighten the jaws securely around the bit. Ensure the bit is centered and firmly gripped.
To Remove: Rotate the chuck counter-clockwise to loosen the jaws and pull the bit out.
6. Operating Instructions
6.1 Forward/Reverse Rotation
The forward/reverse switch (4) controls the direction of rotation. This is essential for driving screws in or out, and for drilling.

Figure 6.1: Forward (clockwise) and Reverse (counter-clockwise) rotation.
- Push the switch to the left for forward (clockwise) rotation, used for drilling and driving screws.
- Push the switch to the right for reverse (counter-clockwise) rotation, used for removing screws or freeing a jammed drill bit.
- When the switch is in the center position, the trigger is locked to prevent accidental starting.
6.2 Variable Speed Control
The pressure variable speed trigger (5) allows you to control the drilling/driving speed. The harder you press the trigger, the faster the tool operates.
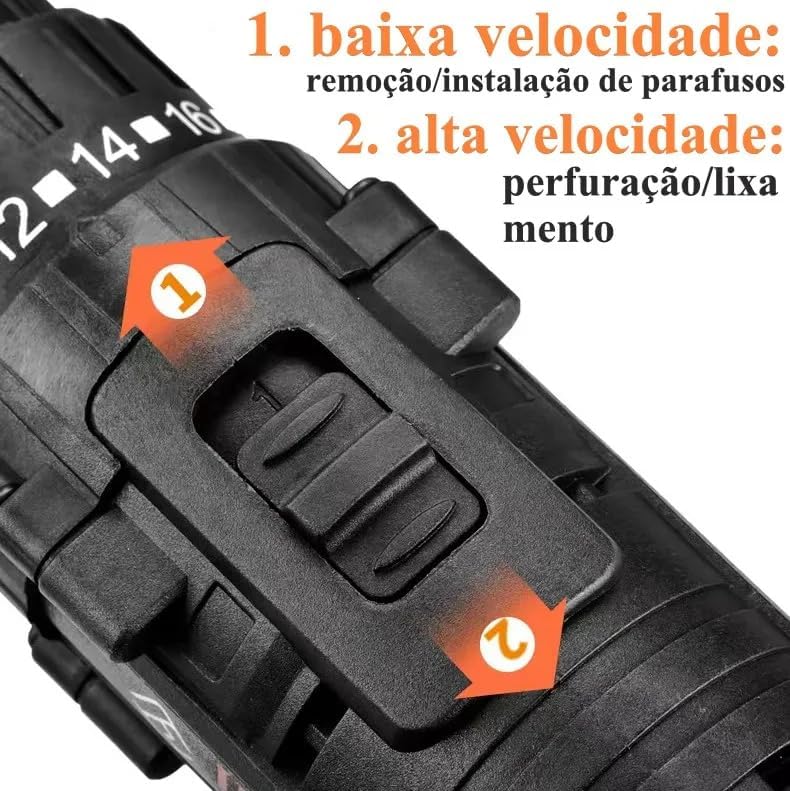
Figure 6.2: Speed adjustment switch.
Use the two-speed adjustment switch (1) on top of the drill for general speed ranges:
- 1. Low Speed: Ideal for screw removal/installation and applications requiring higher torque.
- 2. High Speed: Suitable for drilling/sanding and applications requiring faster rotation.
6.3 Torque Adjustment
The torque adjustment collar allows you to set the amount of rotational force before the clutch disengages. This prevents over-driving screws or damaging the workpiece.

Figure 6.3: Torque settings for various materials.
The Ecosen drill offers 9 torque settings plus a drill mode:
- Settings 2-4: For small screws and soft materials like ABS plastic.
- Settings 6-10: For medium screws and materials like wood.
- Settings 12-14: For larger screws and harder materials like ceramic.
- Settings 16-18: For heavy-duty fastening and drilling into metal.
- Drill Mode (Drill icon): For drilling applications where the clutch does not engage, providing maximum torque.
Rotate the torque collar to select the desired setting. Start with a lower setting and increase if the screw is not driving fully or if the drill stalls.
6.4 LED Work Light
The integrated LED light (6) illuminates your work area when the trigger is pressed, providing better visibility in dimly lit spaces.
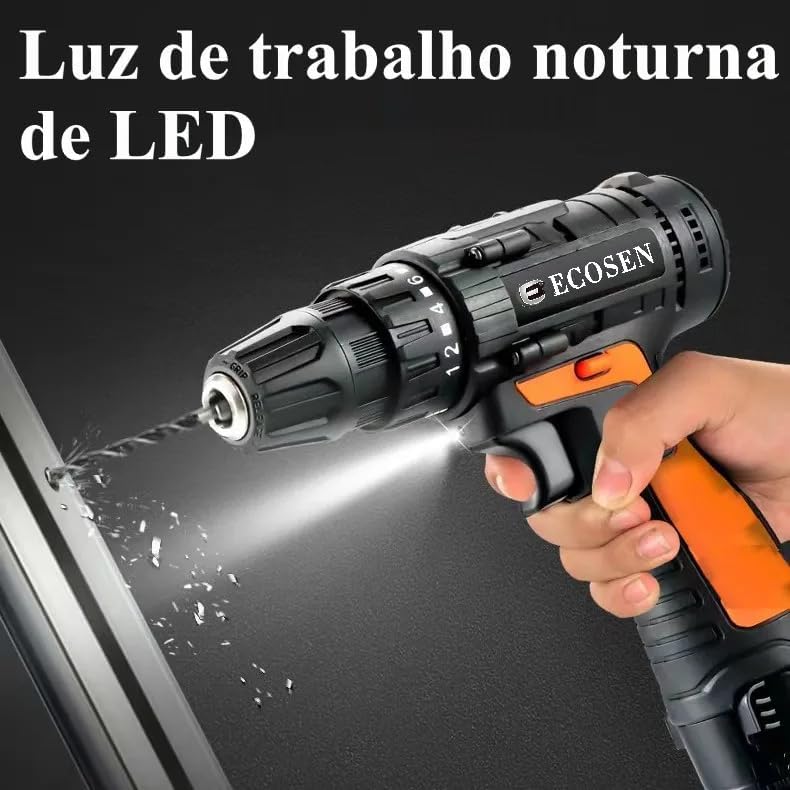
Figure 6.4: LED work light in action.
7. Maintenance
Regular maintenance ensures the longevity and optimal performance of your tool.
- Cleaning: Keep the tool's ventilation openings clean and free of debris. Use a soft, damp cloth to wipe down the exterior. Do not use harsh chemicals or abrasive cleaners.
- Battery Care: Store batteries in a cool, dry place away from direct sunlight. Do not store fully discharged batteries for extended periods.
- Bit Storage: Store drill bits and accessories in a dry place to prevent rust.
- Inspection: Periodically inspect the power cord of the charger for damage. If damaged, have it repaired by a qualified professional.
8. Troubleshooting
If you encounter issues with your Ecosen drill, refer to the following common problems and solutions:
| Problem | Possible Cause | Solution |
|---|---|---|
| Tool does not start. | Battery not charged or not properly installed. Forward/reverse switch in center (locked) position. | Ensure battery is fully charged and securely installed. Move forward/reverse switch to either forward or reverse position. |
| Tool lacks power or stops during use. | Battery is low. Overload protection activated. | Recharge the battery. Reduce pressure on the tool; allow it to cool down if it has been used continuously. |
| Bit slips in chuck. | Chuck not tightened sufficiently. Bit shank is dirty or damaged. | Tighten the chuck firmly. Clean or replace the bit. |
| Screws are stripped or over-driven. | Torque setting is too high. | Adjust the torque collar to a lower setting. |
If the problem persists after trying these solutions, please contact customer support.
9. Specifications
| Feature | Detail |
|---|---|
| Brand | Ecosen |
| Model | B0DP43112K |
| Power Source | Battery Powered (12V Lithium-Ion) |
| Material | Plastic |
| Torque Settings | 9 + Drill Mode |
| Speed Settings | 2 (Low/High) |
| Special Features | LED Work Light, Variable Speed Trigger, Forward/Reverse Switch |
10. Warranty and Support
For warranty information or technical support, please refer to the warranty card included with your product or contact the retailer where you purchased the Ecosen 12V Cordless Electric Screwdriver/Drill. Please have your model number (B0DP43112K) and purchase date ready when contacting support.
no relevant documents
Ask a question about this manual
Ask about setup, troubleshooting, compatibility, parts, safety, or missing instructions. Manuals+ will review the question and use this page’s manual context to help answer it.