1. Introduction
This manual provides comprehensive instructions for the installation, operation, and maintenance of the DS-2CE5AD3T-AVPIT3ZF TurboHD 2MP Outdoor Ultra-Low Light Dome Analog Camera. This camera is designed to deliver high-definition analog video output, leveraging TurboHD technology for transmission over existing coaxial cables. It features advanced night vision capabilities and a versatile motorized varifocal lens, making it suitable for a wide range of surveillance applications.
Please read this manual thoroughly before using the product to ensure proper setup and optimal performance.
2. Product Features
- 2MP High-Definition Output: Provides clear and detailed video resolution.
- TurboHD Technology: Transmits HD analog signals over coaxial cable, simplifying upgrades.
- EXIR 2.0 Night Vision: Offers an infrared range of up to 230 feet (70 meters) for reliable surveillance in low-light conditions.
- Motorized Varifocal Lens: Adjustable 2.7 mm to 13.5 mm lens with 4.8x optical zoom for flexible viewing angles and precise focus.
- True 120 dB Wide Dynamic Range (WDR): Ensures optimal image quality in scenes with strong contrast.
- Outdoor Usage: Designed for robust performance in outdoor environments.
- AC Power Source: Ensures reliable operation and energy efficiency.
- CMOS Sensor: Delivers superior HD video quality with lower power consumption.
3. Package Contents
Verify that all items are present and in good condition upon opening the package:
- DS-2CE5AD3T-AVPIT3ZF Dome Camera (1 unit)
4. Product Overview
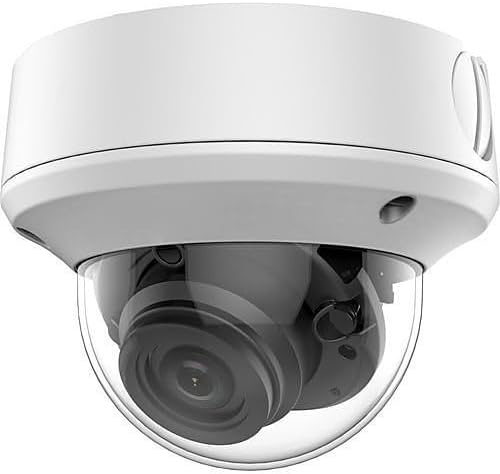
Figure 1: DS-2CE5AD3T-AVPIT3ZF TurboHD 2MP Outdoor Ultra-Low Light Dome Analog Camera. This image displays the white dome camera with its clear protective cover revealing the internal lens assembly.
5. Setup
5.1 Mounting Considerations
The DS-2CE5AD3T-AVPIT3ZF camera is designed for outdoor usage and is typically installed via ceiling mount. Ensure the mounting surface is sturdy enough to support the camera's weight and provides a clear field of view for surveillance.
5.2 Power Connection
Connect the camera to a reliable AC power source. Ensure the power supply meets the camera's voltage and current requirements for stable operation.
5.3 Connectivity
This camera utilizes wired connectivity, specifically Ethernet, and is compatible with Digital Video Recorders (DVRs). Connect the camera's video output to your DVR using appropriate coaxial cabling. Ensure all connections are secure to prevent signal loss.
6. Operating Instructions
6.1 Adjusting the Varifocal Lens
The camera features a motorized varifocal lens (2.7 mm to 13.5 mm) with 4.8x optical zoom. This allows for remote adjustment of the focal length and zoom level to achieve the desired field of view. Refer to your DVR or control system's interface for instructions on how to remotely adjust the lens settings.
6.2 Night Vision Operation
The camera automatically switches to infrared (IR) night vision mode in low-light conditions, utilizing EXIR 2.0 technology. This provides clear black-and-white images up to 230 feet (70 meters). Ensure no obstructions block the IR illuminators for optimal night vision performance.
6.3 Wide Dynamic Range (WDR)
The camera's True 120 dB WDR feature automatically adjusts image exposure to capture details in both very bright and very dark areas of a scene simultaneously. This is particularly useful in environments with strong backlighting or significant variations in light intensity.
6.4 Video Recording
The camera records in Full HD (2MP) resolution. Video output is typically in AVI format. Ensure your connected DVR is configured to record and store video footage according to your surveillance requirements.
7. Maintenance
- Regular Cleaning: Periodically clean the camera's dome and lens with a soft, damp cloth to remove dust, dirt, or smudges that may affect image quality. Avoid abrasive cleaners.
- Cable Inspection: Routinely check all cables and connections for wear, damage, or loose fittings, especially in outdoor installations.
- Firmware Updates: Check the manufacturer's website for any available firmware updates to ensure optimal performance and security. Follow the provided instructions carefully for any update procedures.
- Environmental Checks: Ensure the camera's mounting remains secure and that it is not exposed to extreme environmental conditions beyond its operating specifications.
8. Troubleshooting
| Problem | Possible Cause | Solution |
|---|---|---|
| No power to camera | Loose power connection; faulty power adapter; no power from outlet. | Check power cable connection. Test power adapter. Verify outlet has power. |
| No video signal | Loose video cable; incorrect DVR input; faulty cable. | Ensure video cable is securely connected to camera and DVR. Verify correct DVR input channel. Test with a different cable if possible. |
| Poor image quality (blurry, dark, distorted) | Dirty lens/dome; incorrect lens focus; insufficient lighting; WDR not optimized. | Clean the camera lens and dome. Adjust the motorized varifocal lens focus. Ensure adequate lighting or rely on IR night vision. Check WDR settings on DVR. |
| Night vision not working | IR illuminators blocked; camera not switching to IR mode. | Remove any obstructions in front of the IR illuminators. Check camera settings on DVR to ensure auto-switch to IR is enabled. |
9. Specifications
| Feature | Specification |
|---|---|
| Model Name | HX-OD5D3AVZF |
| Indoor/Outdoor Usage | Outdoor |
| Video Capture Resolution | 2MP |
| Lens Type | Motorized Varifocal (2.7-13.5mm) |
| Night Vision Range | Up to 230 feet (70 meters) |
| Wide Dynamic Range (WDR) | 120 dB True WDR |
| Connectivity Technology | Wired (Ethernet) |
| Compatible Devices | Digital Video Recorder |
| Mounting Type | Ceiling Mount |
| Power Source | Battery Powered (Note: Feature bullets indicate AC power source for reliable operation) |
| Video Capture Format | AVI |
| Product Dimensions (L x W x H) | 6 x 6 x 6 inches |
| Manufacturer | Hikvision |
10. Warranty and Support
For information regarding warranty coverage, technical support, or service, please contact the product manufacturer, Hikvision, or your authorized reseller. Keep your purchase receipt as proof of purchase for warranty claims.


