1. Introduction
Thank you for choosing the Sweet taize WiFi Endoscope Inspection Camera. This device is designed for visual inspection in hard-to-reach areas, offering high-definition imaging and wireless connectivity to your smartphone or tablet. Please read this manual thoroughly before operating the device to ensure proper use and to maximize its lifespan.
2. Safety Information
- Do not attempt to disassemble or modify the device. This may cause damage and void the warranty.
- Keep the device away from extreme temperatures, direct sunlight, and corrosive liquids.
- Ensure the camera lens is clean before and after use to maintain optimal image quality.
- The camera probe is waterproof (IP67), but the main WiFi module is not. Do not immerse the WiFi module in water.
- Use only the provided or recommended charging accessories.
- This device is not intended for medical use.
3. Package Contents
Please check the package to ensure all items are present:
- WiFi Endoscope Inspection Camera (1200P Soft Cable 5m)
- USB Charging Cable
- User Manual
- Accessories: Magnet, Hook, Side Mirror

Figure 3.1: Included accessories: Magnet, Hook, and Side Mirror, designed to attach to the endoscope camera head.
4. Product Overview
The Sweet taize WiFi Endoscope features an 8mm diameter camera lens with 8 adjustable LED lights, connected to a flexible 5-meter soft cable. The WiFi module transmits the 1200P HD video feed wirelessly to your compatible device.

Figure 4.1: Exploded view of the camera head, illustrating the 8 LEDs and 1200P Full HD imaging sensor for clear details.
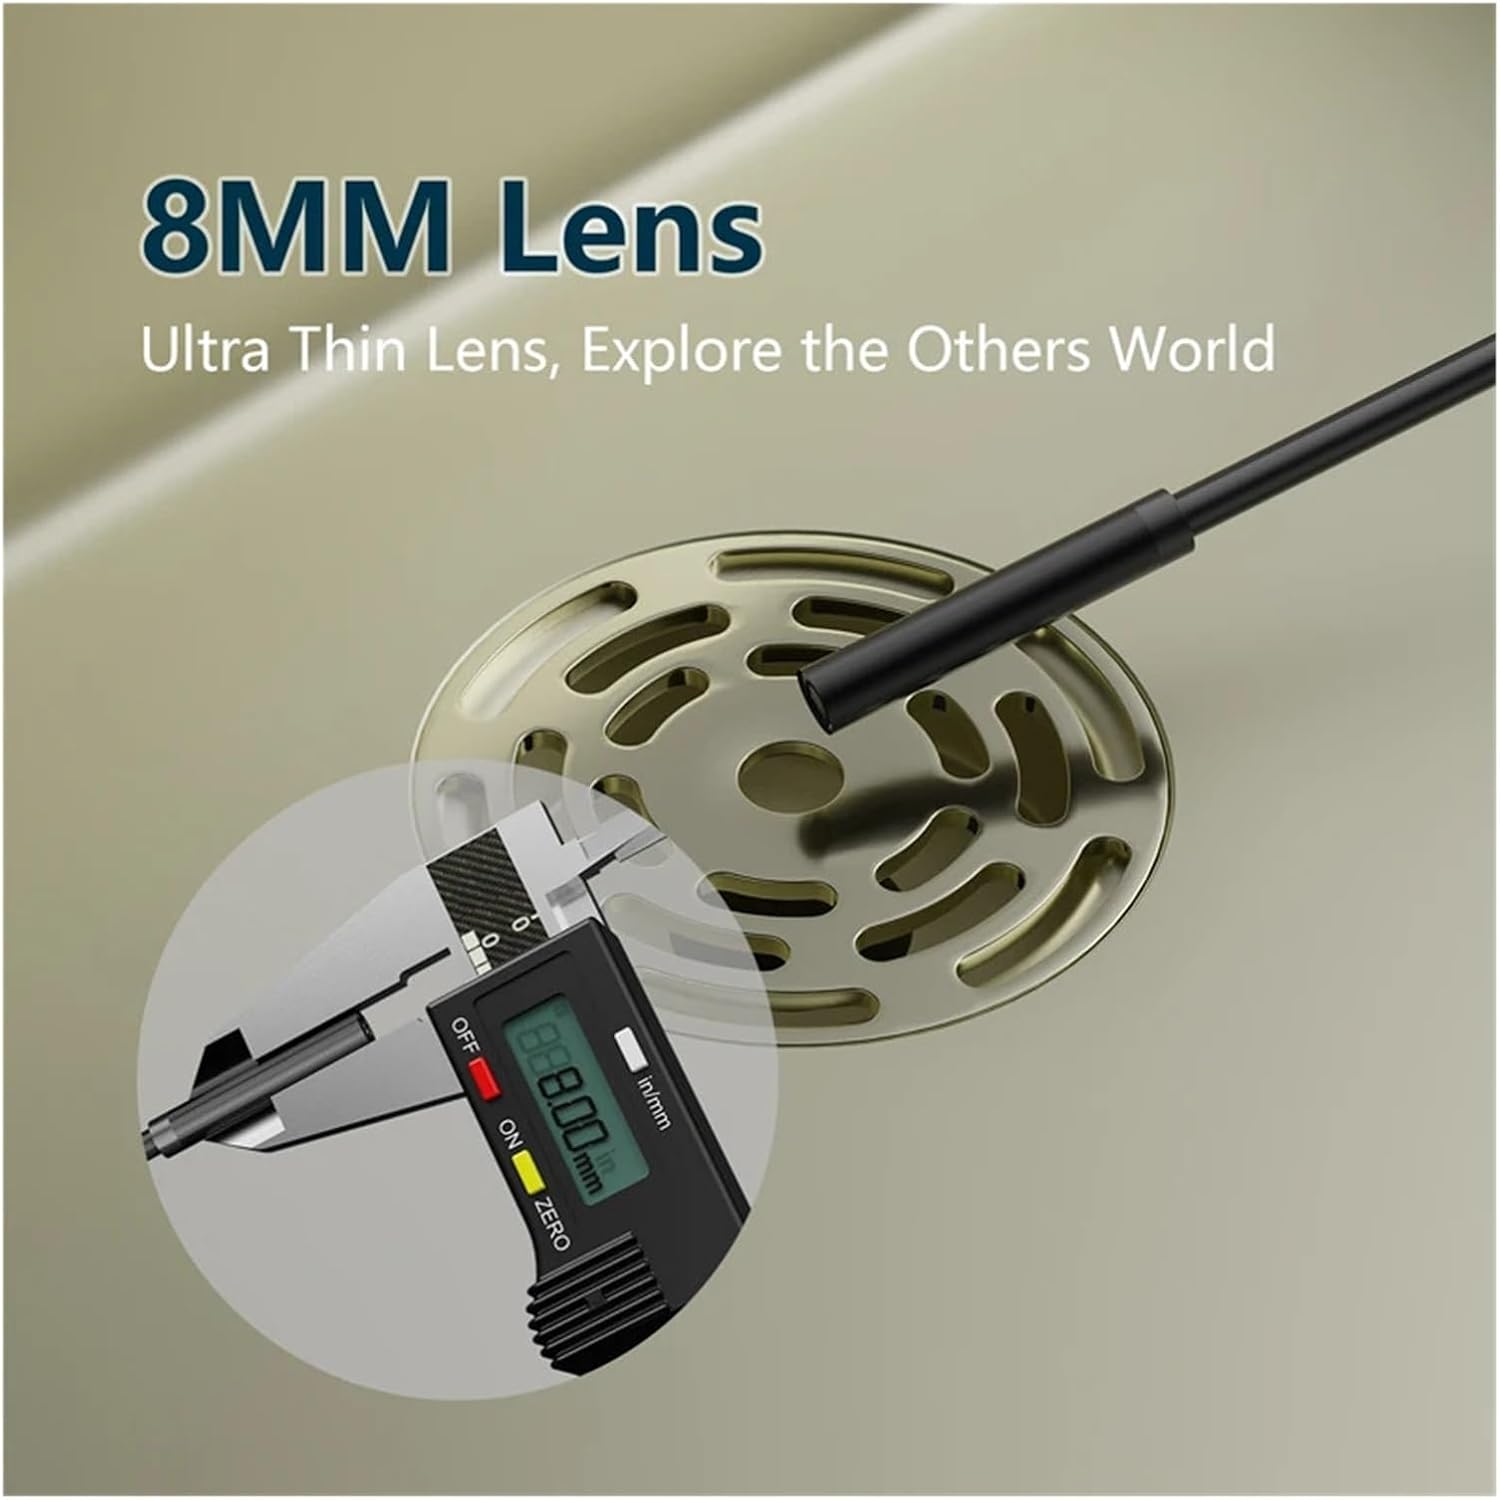
Figure 4.2: The 8mm ultra-thin lens, suitable for exploring narrow spaces, shown with a digital caliper indicating its diameter.
5. Setup
5.1 Charging the Device
Before first use, fully charge the WiFi module using the provided USB cable and a standard 5V/1A USB power adapter (not included). The charging indicator light will show the charging status.
5.2 App Installation
Search for the recommended companion app (e.g., 'WiFi View', 'HD WiFi Camera', or similar as indicated in the packaging) on your smartphone's app store (Google Play Store for Android, Apple App Store for iOS) and install it. This app is necessary to view the camera feed and control functions.
5.3 Connecting to Your Smartphone/Tablet
- Press and hold the power button on the WiFi module to turn it on. A blue indicator light will illuminate.
- On your smartphone or tablet, go to your WiFi settings.
- Locate and connect to the WiFi network named 'YPC_xxxxxx' or similar (refer to the label on the WiFi module for the exact name). The password is usually '12345678' or '88888888'.
- Once connected, open the installed endoscope app. The camera feed should appear on your screen.

Figure 5.1: The WiFi module connects wirelessly to smartphones, PCs, or tablets for live viewing.
5.4 Attaching Accessories
The magnet, hook, and side mirror accessories can be attached to the camera head for specific tasks. Gently slide them onto the camera lens housing until secure.
6. Operating Instructions
6.1 Powering On/Off
- To Power On: Press and hold the power button on the WiFi module until the indicator light turns blue.
- To Power Off: Press and hold the power button again until the indicator light turns off.
6.2 Adjusting LED Brightness
A roller or button on the WiFi module allows you to adjust the brightness of the 8 LED lights on the camera head. Rotate the roller or press the button to increase or decrease illumination as needed for clear visibility in dark environments.
6.3 Capturing Photos and Videos
Within the companion app, you will find options to capture still images and record videos. These files are typically saved directly to your smartphone's gallery or the app's dedicated storage folder.
6.4 Optimal Viewing Distance
For the clearest image, position the camera lens between 5cm and 10cm (approximately 2 to 4 inches) from the object you are inspecting. The lens does not support auto-focus.

Figure 6.1: The recommended focal length for sharp images is between 5cm and 10cm from the object.
7. Maintenance
7.1 Cleaning the Lens
After each use, especially in dirty or wet environments, gently wipe the camera lens with a soft, dry cloth. For stubborn dirt, a slightly damp cloth can be used, followed by a dry wipe. Do not use abrasive cleaners or solvents.
7.2 Storage
Store the endoscope in a cool, dry place, away from direct sunlight and out of reach of children. Avoid bending the cable sharply to prevent internal damage.
8. Troubleshooting
| Problem | Possible Cause | Solution |
|---|---|---|
| No image on screen | WiFi module not powered on; Not connected to WiFi; App not open or malfunctioning. | Ensure WiFi module is on. Connect to the correct WiFi network. Restart the app or your smartphone. |
| Image is blurry | Camera lens is dirty; Object is outside optimal focal length (5-10cm). | Clean the camera lens. Adjust the distance between the camera and the object. |
| WiFi connection unstable | Low battery; Interference from other WiFi networks. | Charge the WiFi module. Move away from other strong WiFi signals. |
| LED lights not working | Brightness not adjusted; Device malfunction. | Adjust the LED brightness roller/button. If still not working, contact support. |
9. Specifications
- Camera Diameter: 8mm
- Resolution: 1200P HD
- Cable Type: Soft Cable
- Cable Length: 5 meters
- Best Resolution Distance: 5cm - 10cm
- Waterproof Rating: IP67 (for camera probe only)
- LED Lights: 8 White LEDs, adjustable brightness
- Connectivity: WiFi (compatible with all smartphones)
- Power Source: Built-in rechargeable battery (via USB)
10. Warranty and Support
This product comes with a standard manufacturer's warranty. For warranty claims, technical support, or any questions regarding the operation of your Sweet taize WiFi Endoscope Inspection Camera, please contact the seller or manufacturer directly through your purchase platform. Please have your purchase details and model information ready when contacting support.