1. Introduction
This manual provides essential instructions for the safe and effective operation, maintenance, and troubleshooting of your Sweet taize 3.9mm 4-Way Articulating WiFi Endoscope Inspection Camera. Please read this manual thoroughly before using the device to ensure optimal performance and longevity.
The Sweet taize endoscope is designed for detailed visual inspection in hard-to-reach areas, featuring a 3.9mm diameter probe with 4-way articulation, WiFi connectivity, and a 5-inch IPS LCD display. It is suitable for applications in automotive, manufacturing, construction, and other industrial inspection fields.
2. Product Overview
The Sweet taize endoscope system consists of a main handheld unit with an integrated display and controls, and a flexible probe with a camera lens and LED illumination.

Figure 2.1: The Sweet taize endoscope inspection camera, showing the main handheld unit with its integrated screen and the flexible probe connected.
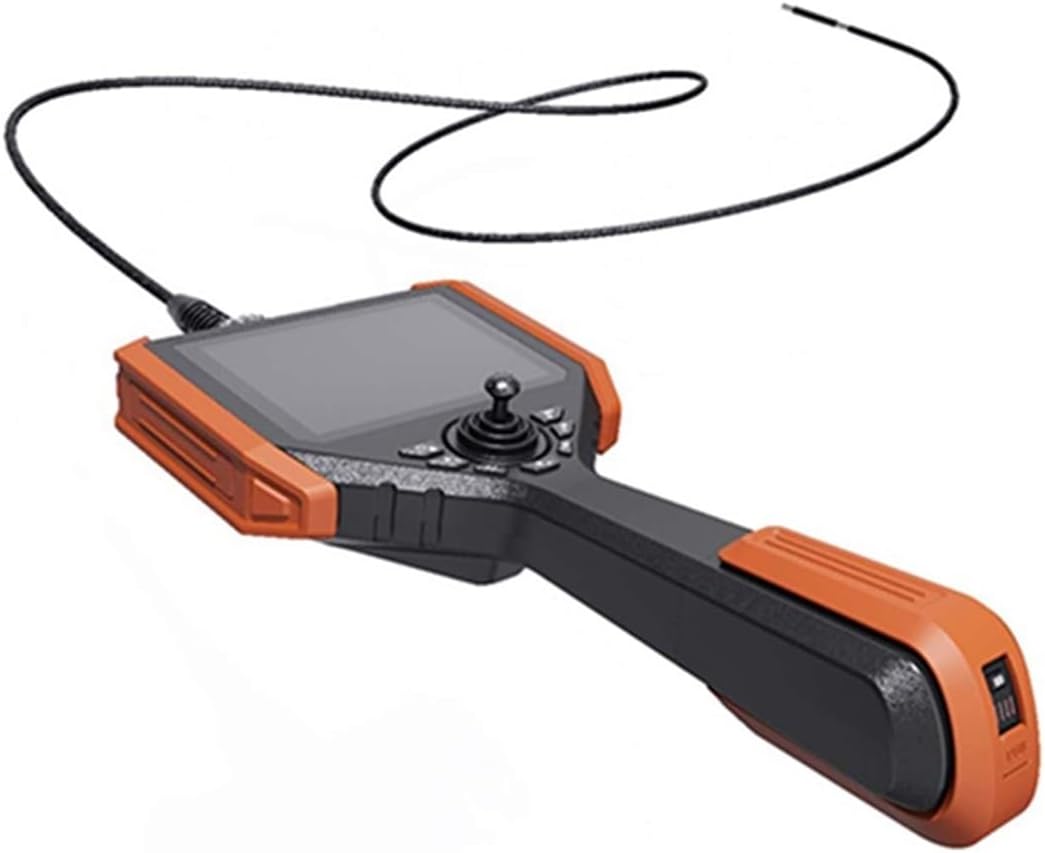
Figure 2.2: Side view of the endoscope's main unit, highlighting the ergonomic handle and the joystick for probe articulation control.

Figure 2.3: Close-up of the endoscope's display screen, illustrating an inspection view with overlaid digital readings for angle and temperature, indicating advanced measurement capabilities.
3. Setup
3.1 Unpacking
Carefully remove all components from the packaging. Verify that all items are present:
- Main Endoscope Unit with Integrated Display
- Flexible Articulating Probe (3.9mm diameter, 2m length)
- USB Charging Cable
- User Manual (this document)
3.2 Charging the Device
Before first use, fully charge the endoscope's internal battery. Connect the provided USB charging cable to the charging port on the main unit and to a standard USB power adapter (not included) or a computer USB port. The charging indicator will illuminate during charging and turn off or change color when fully charged. The device can be used while charging.
3.3 Attaching the Probe
Align the connector of the flexible probe with the corresponding port on the main endoscope unit. Gently push and twist until it is securely fastened. Ensure a firm connection to prevent signal loss during operation.
3.4 Powering On/Off
- To Power On: Press and hold the Power button (usually located on the main unit's control panel) for a few seconds until the display screen illuminates.
- To Power Off: Press and hold the Power button again until the display turns off.
4. Operating Instructions
4.1 Basic Operation and Navigation
Once powered on, the live camera feed from the probe will appear on the 5-inch IPS LCD display. Use the navigation buttons (up, down, left, right) and the OK/Menu button on the control panel to navigate through menus and select options.
4.2 Articulation Control
The 3.9mm probe features 4-way articulation, allowing the camera tip to bend in multiple directions. Use the integrated joystick on the main unit to precisely control the bending angle of the probe tip. This enables navigation around obstacles and provides various viewing angles within confined spaces.

Figure 4.1: Illustration of the probe's 360-degree full rotation function and the clarity of the 5-inch HD display screen during an inspection.
4.3 Image and Video Capture
The endoscope is equipped with a 720P MP camera for capturing high-quality images and videos.
- To Take a Photo: Press the dedicated Photo button (often marked with a camera icon) to capture a still image of the current view. Images are saved in JPG format.
- To Record Video: Press the dedicated Video button (often marked with a video camera icon) to start recording. Press it again to stop recording. Videos are saved in MP4 format.
- Storage: Captured images and videos are stored on the internal 32GB storage.

Figure 4.2: Details of the 720P MP camera's capabilities for clear inspection and information regarding the device's ultra-long life battery, rechargeable via USB.
4.4 WiFi Connectivity
The device supports WiFi wireless transmission. To use this feature:
- Access the WiFi settings through the device's menu.
- Enable WiFi and note the network name (SSID) and password displayed on the screen.
- On your smartphone or tablet, connect to the endoscope's WiFi network.
- Open the compatible application (refer to product packaging or manufacturer's website for app details) to view the live feed and control functions remotely.
4.5 Display Functions
The 5-inch IPS LCD display offers several image control functions:
- Freeze: Pause the live image to examine details.
- Zoom: Magnify the image for closer inspection.
- Photo/Video Playback: Review captured images and videos directly on the screen.
- Flip: Rotate or mirror the image for correct orientation.
- Analogue Ruler Function: Utilize on-screen measurement tools for approximate sizing.
5. Maintenance
5.1 Cleaning
- Probe: After each use, especially in dirty or oily environments, gently wipe the probe and camera lens with a soft, damp cloth. For stubborn residue, use a mild, non-abrasive cleaning solution. Ensure the probe is dry before storage.
- Main Unit: Wipe the main unit and display screen with a dry, soft cloth. Avoid using liquid cleaners directly on the screen or control panel.
- Do not immerse the main unit in water. The probe may be water-resistant, but always refer to specific product ratings.
5.2 Storage
Store the endoscope in a cool, dry place, away from direct sunlight and extreme temperatures. Keep it in its original packaging or a protective case to prevent damage to the probe and display. Ensure the battery is partially charged (around 50%) before long-term storage to maintain battery health.
6. Troubleshooting
- Device Does Not Power On:
- Ensure the battery is charged. Connect to a power source using the USB cable.
- Press and hold the Power button for at least 5 seconds.
- No Image on Display:
- Verify the probe is securely connected to the main unit.
- Check if the camera lens is obstructed or dirty.
- Restart the device.
- Articulation Not Responding:
- Ensure the probe is not bent beyond its physical limits or obstructed.
- Check for any debris in the articulation mechanism.
- Restart the device.
- WiFi Connection Issues:
- Ensure WiFi is enabled on the endoscope and your smart device.
- Confirm you are connecting to the correct network name (SSID).
- Ensure the compatible application is installed and updated on your smart device.
- Poor Image Quality:
- Clean the camera lens.
- Adjust the LED illumination brightness.
- Ensure the object is within the depth of field (8mm-150mm).
7. Specifications
- Outer Diameter: 3.9mm
- Length of Insert Tube: 2m
- View Angle: 120°
- Depth of Field: 8mm - 150mm
- Fiber Lighting: 360° full rotation function, Rear LED illumination
- Bending Angle: 100°
- Display Screen: 5' IPS LCD wide angle Display Screen
- File Storage Capacity: 32GB
- Video Output: HDMI video output interface
- Image/Video Format: JPG/MP4
- System Operating Temperature: -10 ℃ ~ 50 ℃ (low temperature without preheating)
- Probe Operating Temperature: -20 ℃ ~ 70 ℃
- Storage Temperature: -20 ℃ ~ 60 ℃ (non-condensing)
- Camera Resolution: 720P MP
- Connectivity: WiFi wireless transmission
- Power Supply: USB power supply, charged use directly
8. Support Information
For further assistance, technical support, or warranty inquiries, please refer to the contact information provided with your purchase documentation or visit the official Sweet taize website. Please have your product model number (B0DP2RXDW3) and purchase date ready when contacting support.