
1. Important Safety Information
Please read and understand all safety instructions before assembling or using the HOOBRO WG96HX01 Shoe Bench. Failure to follow these instructions may result in injury or damage to the product.
- Weight Limits: Do not exceed the maximum static load capacity of 136 kg (300 lbs) on the top seat. Each internal shelf has a maximum static load capacity of 15 kg (33 lbs).
- Assembly: Assemble the bench strictly according to the provided instructions. Ensure all parts are securely fastened before use.
- Placement: Position the product away from water, fire, high-temperature, and humid environments to prevent damage and ensure longevity.
- Stability: Do not stand on the bench. Ensure the bench is placed on a flat, stable surface.
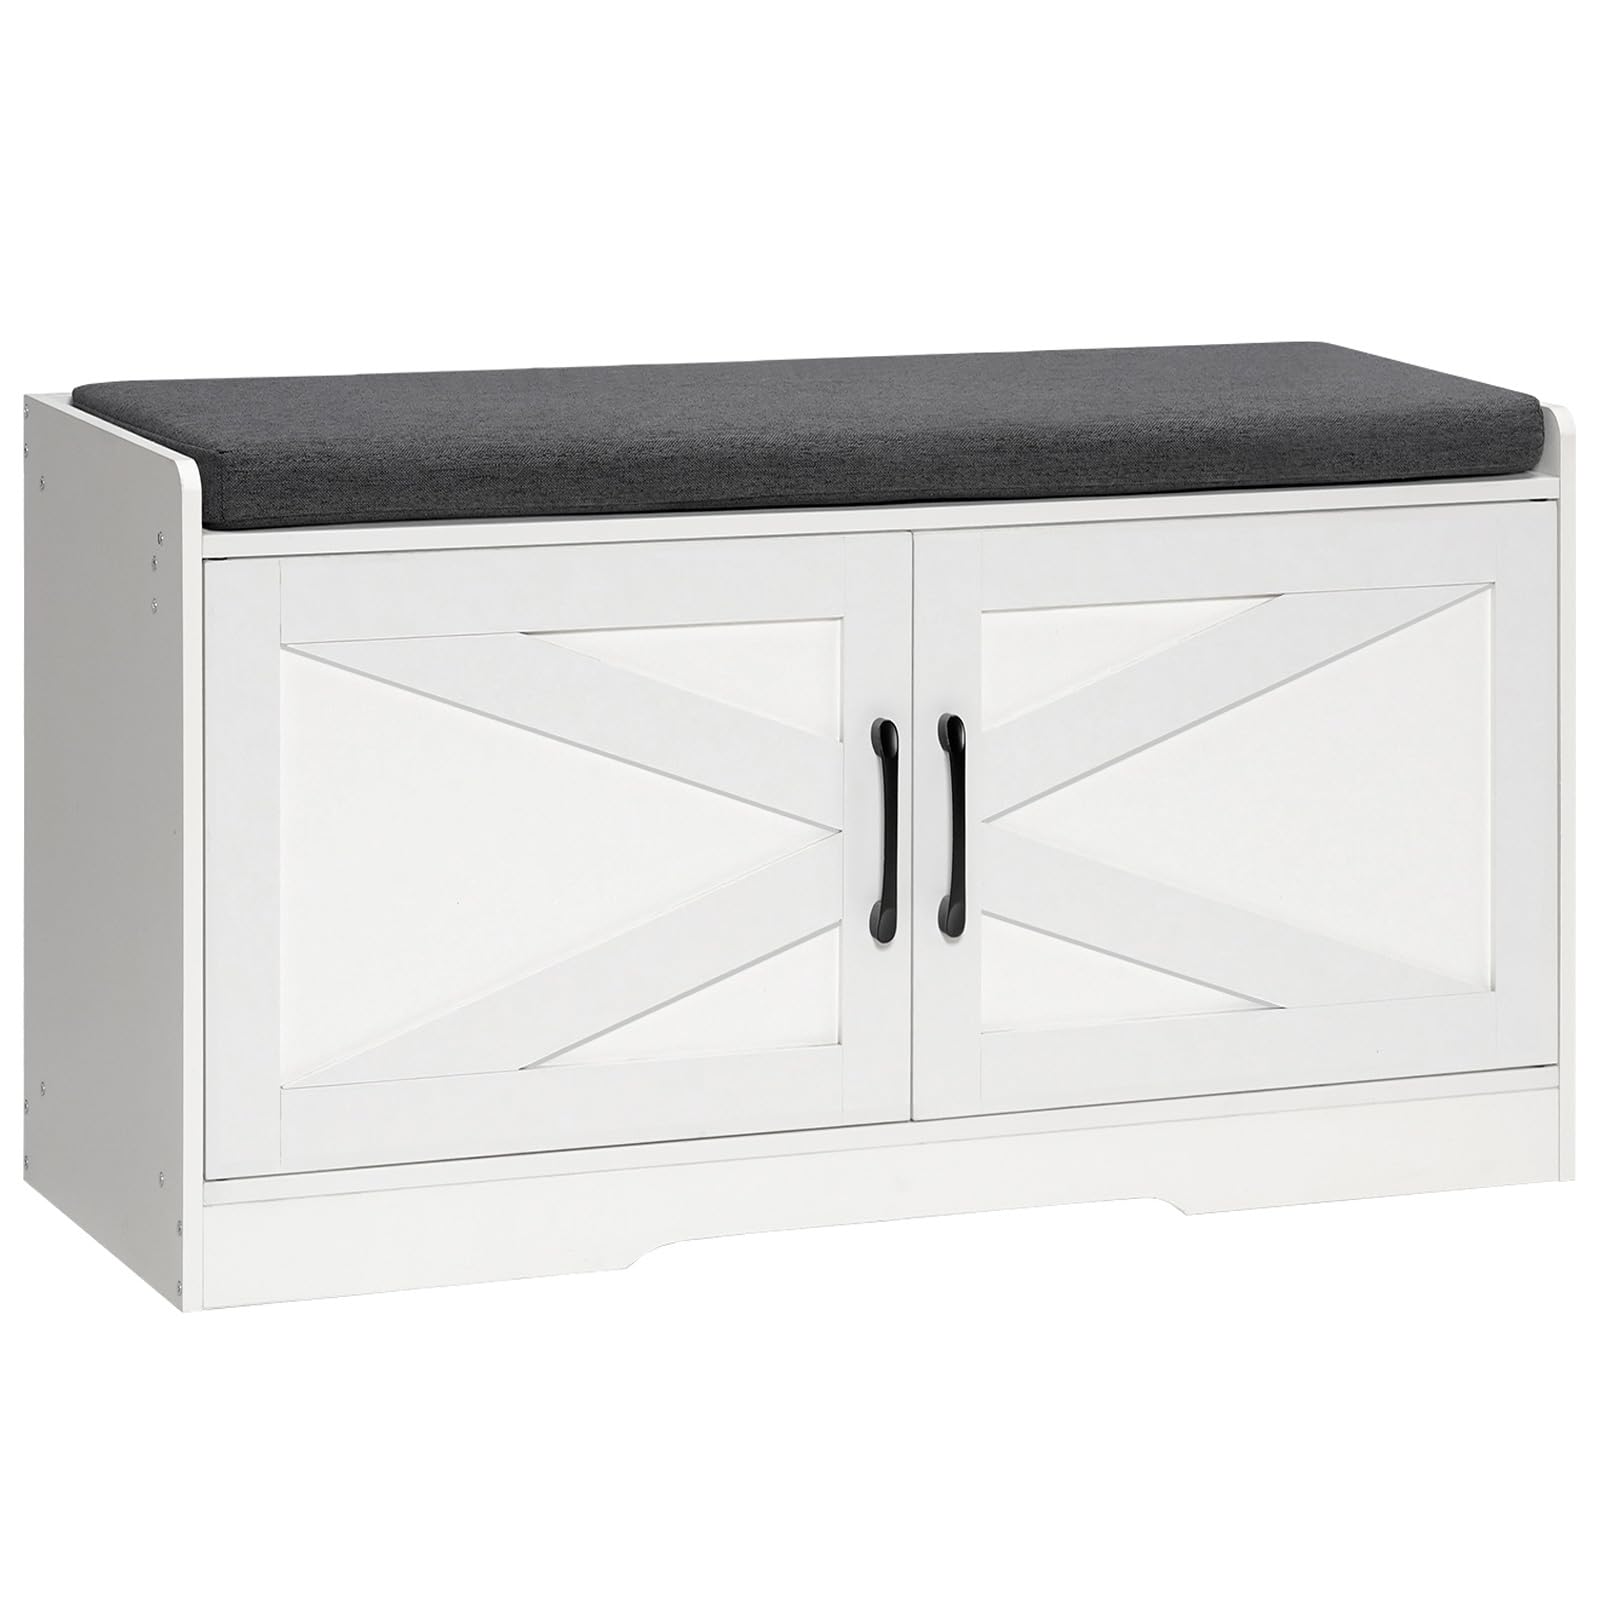
2. Product Overview
The HOOBRO WG96HX01 Shoe Bench is a versatile storage solution designed for entryways, hallways, and bedrooms. It features a comfortable padded seat, two internal storage compartments with barn-style doors, and adjustable shelves to accommodate various footwear sizes.
Key Features:
- Padded Seat: Cushioned with sponge and covered in linen fabric for comfort. The cushion is removable and cleanable via a zipper and hook-and-loop fasteners.
- Ample Storage: Two internal compartments with doors protect shoes from dust.
- Adjustable Shelves: Each compartment includes an adjustable shelf with three height settings, allowing storage for up to 8 pairs of shoes.
- Durable Construction: Made from high-quality particleboard, ensuring stability and long-term use.
- Stylish Design: White finish with black metal handles and framed cabinet doors, suitable for various home decors.


3. Package Contents
Before beginning assembly, please verify that all components listed below are present and undamaged. If any parts are missing or damaged, please contact customer support.
- 1 x HOOBRO WG96HX01 Shoe Bench (main frame components)
- 1 x Accessory Kit (screws, dowels, hinges, handles, shelf pins, magnetic catches)
- 1 x Instruction Manual (this document)
4. Setup and Assembly Instructions
Each part of the shoe bench is labeled for easy identification. Follow the illustrated instructions provided in the accessory kit for a straightforward assembly process. The necessary tools are included.
General Assembly Steps:
- Unpack and Identify: Carefully unpack all components and lay them out. Identify each part using the labels and the assembly diagram.
- Assemble Frame: Connect the side panels, bottom panel, and back panel using the provided hardware (dowels, screws). Ensure all connections are tight.
- Install Shelves: Insert the shelf support pins into the desired height holes within the compartments. Place the adjustable shelves onto the pins.
- Attach Doors: Secure the barn-style doors to the frame using the hinges. Ensure doors open and close smoothly.
- Install Handles and Magnetic Catches: Attach the black metal handles to the doors. Install the magnetic catches to ensure the doors remain closed.
- Place Cushion: Position the padded cushion on top of the bench. The hook-and-loop fasteners on the cushion will secure it to the bench top.
Note: If you encounter difficulty with the magnetic door catches, ensure they are aligned correctly. Refer to the detailed diagrams in the included assembly guide.

5. Operating Instructions
Using the Shoe Storage:
- Opening Doors: Gently pull the black metal handles to open the barn-style doors.
- Adjusting Shelves: To change shelf height, remove any items from the shelf. Lift the shelf, remove the four shelf support pins, reposition them into the desired holes (three height settings available), and then place the shelf back onto the pins.
- Storing Footwear: Place shoes neatly on the shelves. The bench can store up to 8 pairs of shoes, depending on their size and style.
Using the Padded Seat:
- The padded seat provides a comfortable surface for sitting while changing shoes.
- Ensure the cushion is properly secured with the hook-and-loop fasteners before sitting.
6. Maintenance
Regular maintenance will help preserve the appearance and functionality of your HOOBRO shoe bench.
- Cleaning the Frame: Wipe the particleboard surfaces with a soft, damp cloth. Avoid abrasive cleaners or harsh chemicals.
- Cushion Care: The linen cushion cover is removable via a zipper. It can be spot cleaned with a mild detergent or hand washed. Allow to air dry completely before reattaching.
- Hardware Check: Periodically check all screws and fasteners to ensure they remain tight. Tighten if necessary.
- Environmental Conditions: Continue to keep the bench away from direct sunlight, excessive moisture, and extreme temperatures to prevent warping or discoloration.
7. Troubleshooting
If you encounter any issues with your shoe bench, refer to the following common solutions:
| Problem | Possible Cause | Solution |
|---|---|---|
| Doors do not close properly or remain open. | Magnetic catches are misaligned or loose. | Adjust the position of the magnetic catches on the frame and door. Ensure they meet squarely. Tighten screws if loose. |
| Bench feels wobbly or unstable. | Screws or fasteners are loose; uneven floor surface. | Check and tighten all assembly screws. Move the bench to a flat, level surface. |
| Cushion slides off the bench. | Hook-and-loop fasteners are not engaged or are dirty. | Press the cushion firmly onto the bench top to engage the fasteners. Clean any debris from the fasteners. |
8. Specifications
Detailed specifications for the HOOBRO WG96HX01 Shoe Bench:
| Feature | Detail |
|---|---|
| Model Number | WG96HX01 |
| Color | White + Grey |
| Material | Particleboard, Linen, Sponge |
| Product Dimensions (L x W x H) | 95 x 34.5 x 45 cm (37.4 x 13.6 x 17.7 inches) |
| Seat Height | 45 cm (17.7 inches) |
| Item Weight | 16.69 kg (36.8 lbs) |
| Max. Static Load Capacity (Top) | 136 kg (300 lbs) |
| Max. Static Load Capacity (Each Shelf) | 15 kg (33 lbs) |
| Storage Capacity | Up to 8 pairs of shoes |
9. Warranty and Support
HOOBRO is committed to providing quality products. For any questions regarding assembly, missing parts, or product issues, please contact HOOBRO customer support. Please retain your purchase receipt for any warranty claims. Specific warranty details may vary by region and retailer.

