1. Introduction
This manual provides detailed instructions for the safe and effective operation of your LIBODD Smart Auto Battery Tester, model ET2201. This device is designed to accurately test 12V and 24V automotive lead-acid batteries, offering comprehensive analysis of battery voltage, internal resistance, discharge current, starting performance, and generator charging performance.
Please read this manual thoroughly before using the device to ensure proper function and to prevent damage to the tester or the vehicle's battery system.
2. Product Overview
2.1 Key Features
- 12V/24V Battery Compatibility: Automatically identifies and supports both 12.0V and 24.0V activated lead-acid batteries.
- Multiple Test Functions (ET2201): Includes battery test (voltage, internal resistance, discharge current), start test (discharge performance), and load test (generator performance).
- Color LCD Display: Features a 3.2-inch large color LCD screen for clear display of test results, status, and an analogue bargraph indicating battery lifespan.
- Enhanced Protection: Incorporates input overvoltage protection, reverse polarity connection protection, high voltage connection protection, and poor contact detection for test clips.
- Non-Damaging Continuous Testing: Utilizes a low-frequency signal for testing, preventing damage to the battery during continuous checks of status and discharging ability.
- Illumination Lamp Function: Built-in lamp to illuminate the engine compartment, aiding operation in dark or complex environments.
- Durable Construction: Housing made of TPR materials for comfortable grip and comprehensive protection. Copper wire clamps ensure reliable connection over 10,000 occlusion tests.
2.2 Components
The LIBODD Smart Auto Battery Tester ET2201 consists of the main tester unit with an integrated display and two attached copper wire clamps (red for positive, black for negative).
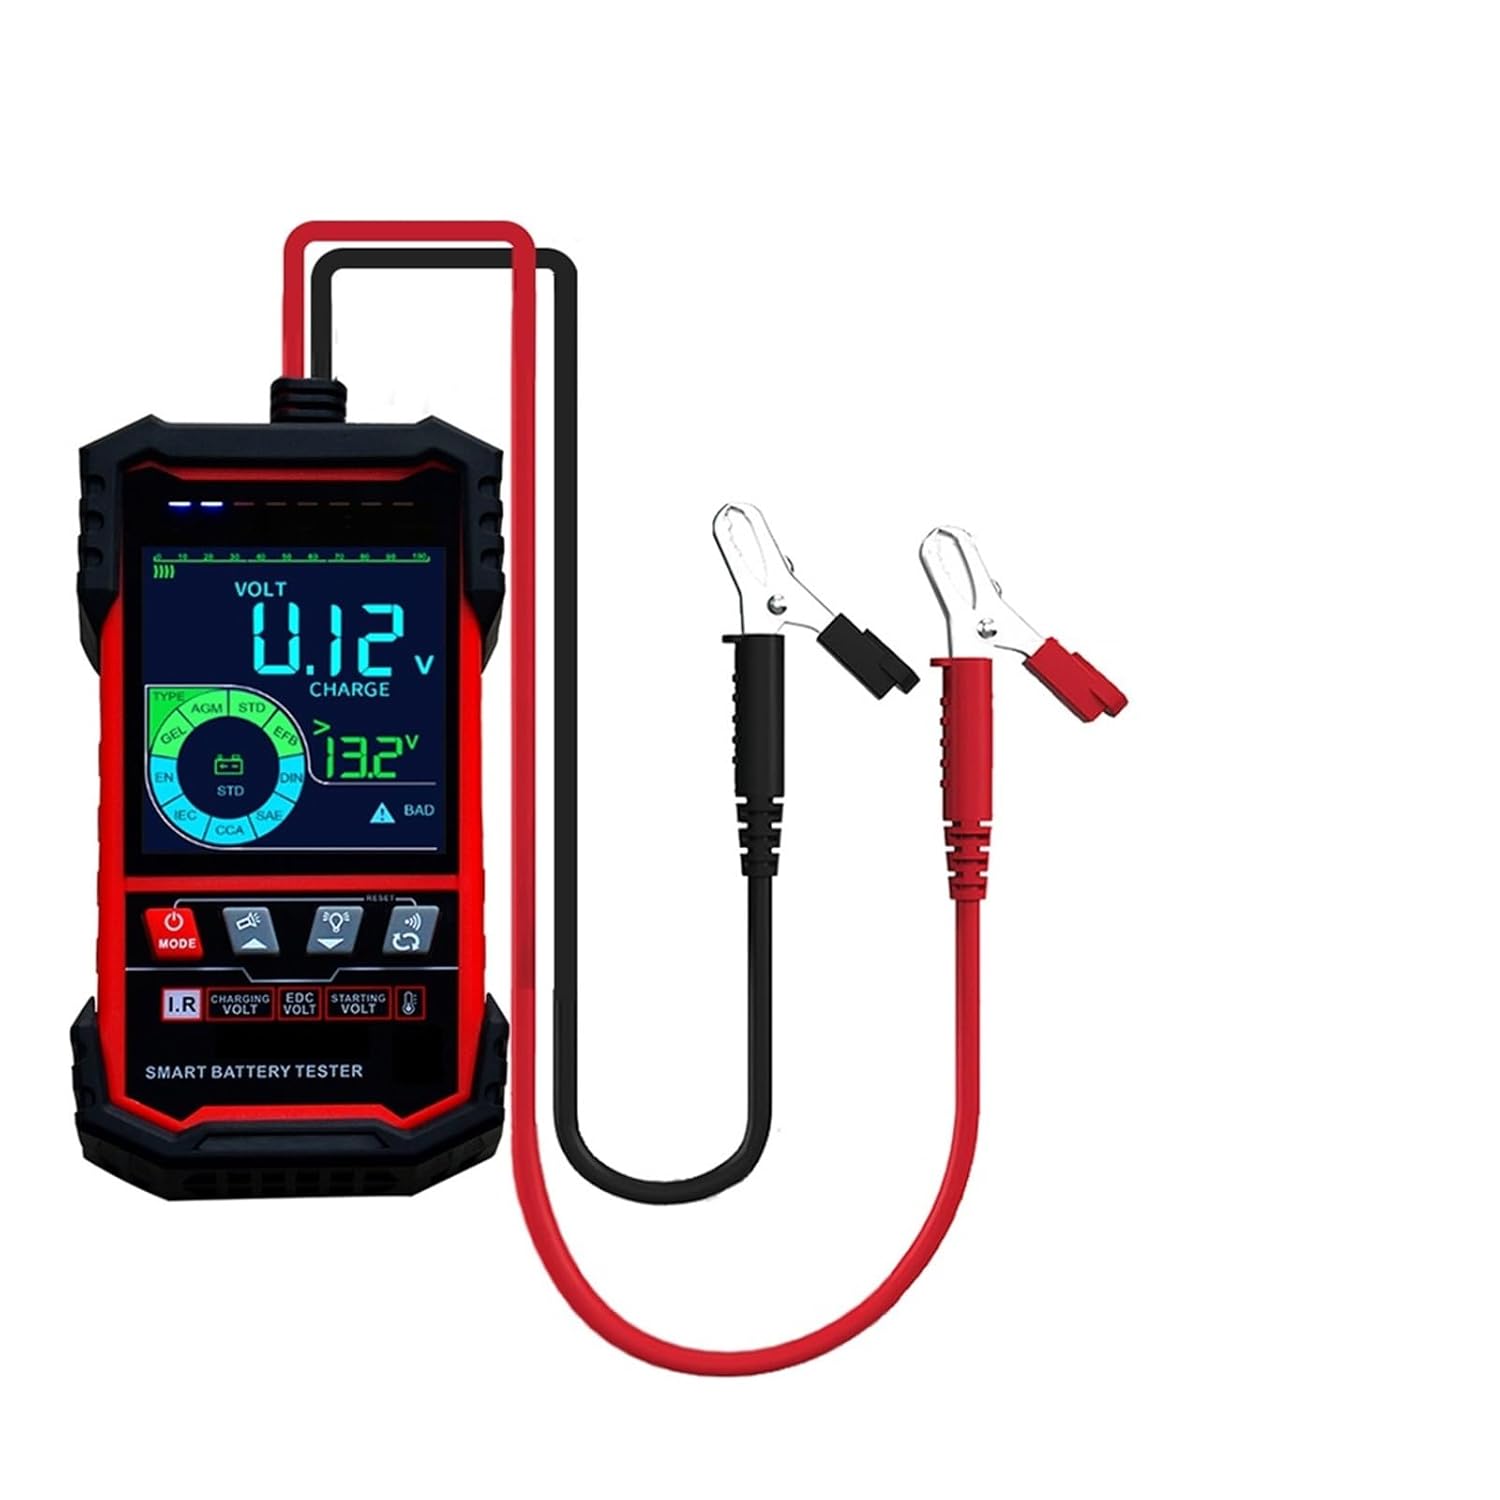
Figure 1: LIBODD Smart Auto Battery Tester ET2201. This image shows the main unit of the battery tester with its integrated color display and the attached red (positive) and black (negative) copper clamps.

Figure 2: Tester Display and Compatibility. This image highlights the 3.2-inch color screen of the ET2201, indicating its 12V/24V compatibility and smart battery testing capabilities.
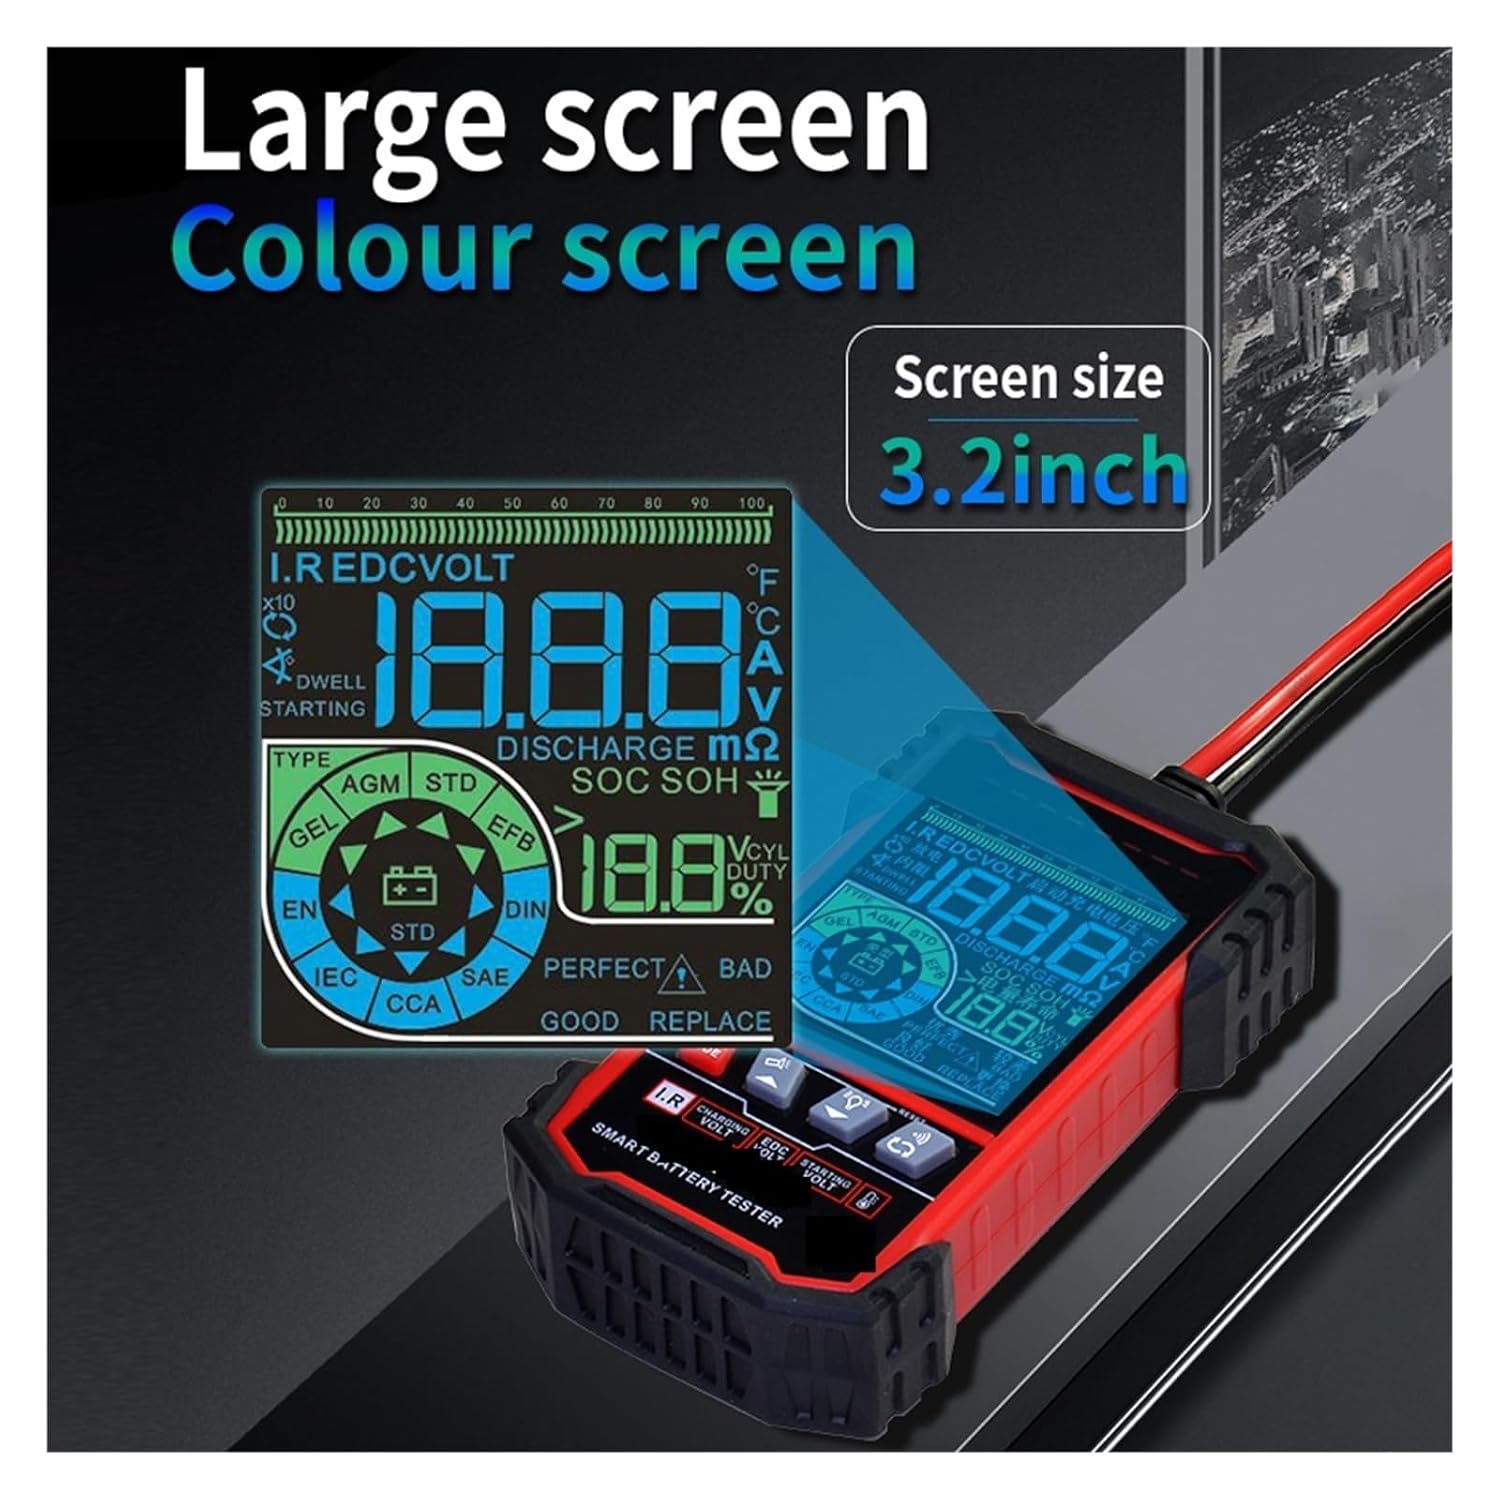
Figure 3: Large Color Screen. This image provides another view of the ET2201's 3.2-inch large color screen, emphasizing its clarity and detailed information display.
2.3 ET2202 Model Specific Features (Not applicable to ET2201)
Please note that the ET2202 model includes additional features such as temperature testing and charging capacity testing. These functions are not available on the ET2201 model described in this manual.

Figure 4: Temperature Function (ET2202 Only). This image illustrates the temperature measurement capability, which is exclusive to the ET2202 model, shown measuring engine temperature.
3. Setup and Safety
3.1 Safety Precautions
- Always wear appropriate personal protective equipment, such as safety glasses, when working with automotive batteries.
- Ensure the vehicle's ignition is off before connecting or disconnecting the battery tester.
- Avoid touching battery terminals with bare hands or metal objects.
- Do not operate the tester in damp conditions or near flammable liquids or gases.
- The tester is designed with input overvoltage and reverse polarity protection. However, always ensure correct polarity connection to prevent potential damage.
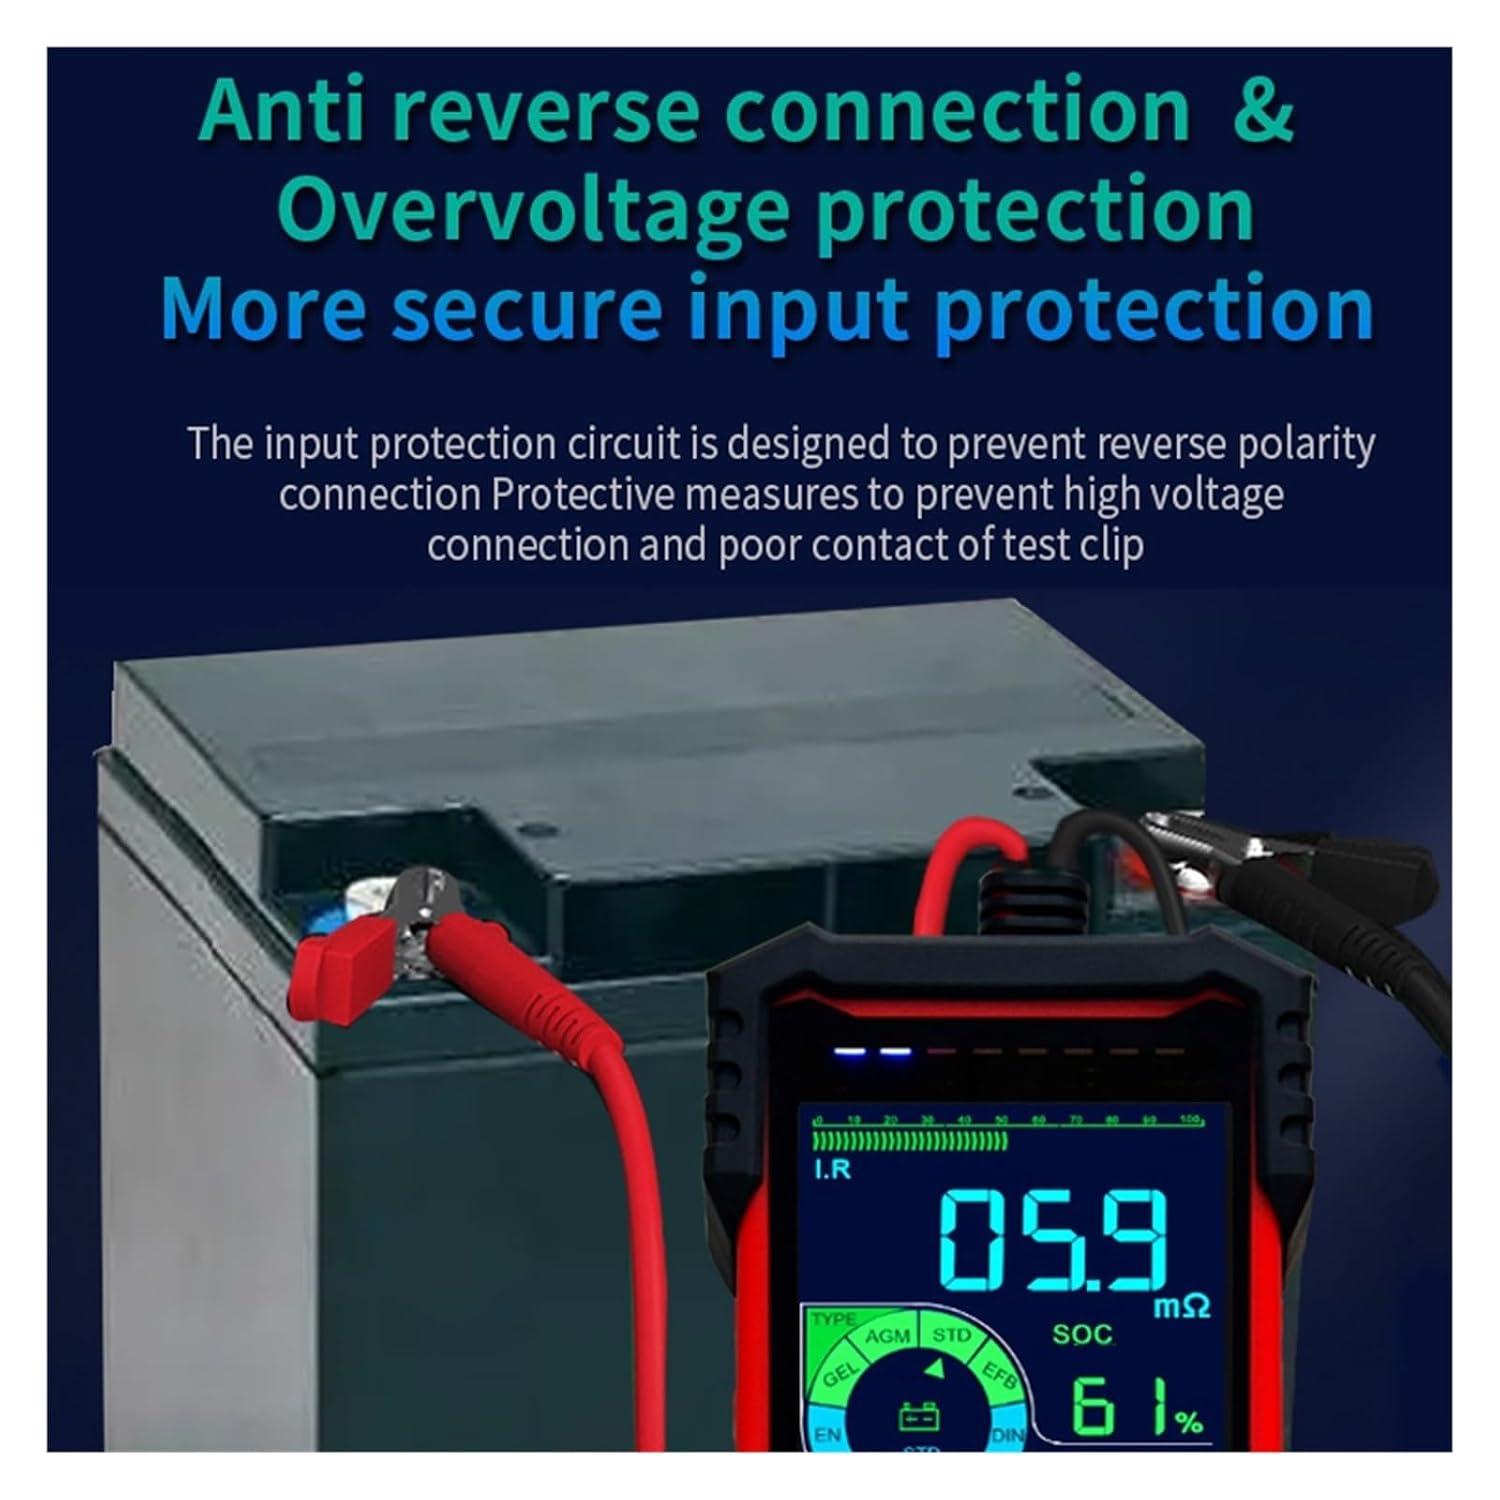
Figure 5: Protection Features. This image demonstrates the tester connected to a battery, highlighting its anti-reverse connection and overvoltage protection features for secure input.
3.2 Connecting the Tester
- Ensure the battery terminals are clean and free of corrosion.
- Connect the red positive (+) clamp to the positive terminal of the battery.
- Connect the black negative (-) clamp to the negative terminal of the battery.
- The tester will power on automatically once correctly connected.
- The tester allows connection to batteries while they are still in the car, eliminating the need to remove the battery for testing.
4. Operating Instructions
After connecting the tester, the device will automatically identify whether it is connected to a 12V or 24V battery. Use the navigation buttons on the tester to select the desired test function.
4.1 Battery Test
This function assesses the overall health of the battery.
- From the main menu, select 'Battery Test'.
- The tester will display the battery voltage, internal resistance, and discharge current.
- An analogue bargraph will indicate the battery's estimated lifespan.
- A higher CCA (Cold Cranking Amps) value generally indicates lower internal resistance and better battery health.
4.2 Start Test
This test evaluates the battery's ability to provide sufficient power for engine starting.
- Select 'Start Test' from the menu.
- Follow the on-screen prompts, which may instruct you to start the vehicle's engine.
- The tester will analyze the discharge performance during cranking.
4.3 Load Test
This function assesses the performance of the vehicle's generator (alternator) under load.
- Select 'Load Test' from the menu.
- Follow the on-screen instructions, which may involve running the engine and activating various electrical loads (e.g., headlights, fan).
- The tester will evaluate the generator's output and charging stability.
4.4 Illumination Lamp
The built-in illumination lamp can be activated to provide light in dark working conditions. Refer to the tester's interface for the specific button or menu option to toggle the lamp.
5. Maintenance
- Cleaning: Wipe the tester's casing with a soft, dry cloth. Do not use abrasive cleaners or solvents.
- Storage: Store the tester in a cool, dry place away from direct sunlight and extreme temperatures.
- Clamps: Keep the copper clamps clean and free of debris to ensure good electrical contact.
- Cable Care: Avoid sharp bends or kinks in the cables to prevent internal wire damage.
6. Troubleshooting
- Tester does not power on: Ensure the clamps are securely connected to the correct battery terminals (red to positive, black to negative). Check for poor contact or corroded battery terminals.
- Inaccurate readings: Verify that the battery terminals are clean. Ensure the clamps have a firm, stable connection.
- Error message displayed: Refer to the on-screen error code or message for specific guidance. Common errors may relate to connection issues or battery voltage outside the operating range.
- Screen is dim or flickering: This may indicate a low battery voltage from the vehicle. Ensure the vehicle battery has sufficient charge to power the tester.
7. Specifications
| Specification | Detail |
|---|---|
| Model | ET2201 |
| Battery Support | 12.0V/24.0V activated lead-acid battery |
| Internal Resistance Measurement | Supported |
| Discharge Current Measurement | Supported |
| Lifespan Analysis | Supported |
| Electric Quantity Detection | Supported |
| Starting Ability Test | Supported |
| Battery Quality Assessment | Supported |
| Illumination Function | Supported |
| Car Starting Test | Supported |
| Vehicle Load Measurement | Supported |
| Capacity Range | -250AH |
| Test Method | Four-wire Kelvin test |
| Power Supply | Storage battery power supply / Vehicle power supply |
| Screen Size | 55 * 57mm (2.17 * 2.24in) |
| Protections | White backlight, overvoltage protection, reverse input protection |
| Materials | TPR+plastics+metal |
| Item Weight | 50 Grams |
| Manufacturer | LIBODD |
8. Warranty and Support
Warranty information for the LIBODD Smart Auto Battery Tester ET2201 is not explicitly provided within the product details. For specific warranty terms, return policies, or technical support, please refer to the retailer or manufacturer's official website, or contact their customer service directly.
Always retain your proof of purchase for any warranty claims or support inquiries.