1. Introduction
This manual provides detailed instructions for the installation, operation, and maintenance of your PAPAGO G500 Dash Cam. The G500 is a dual-channel dash camera designed to record both front and rear views of your vehicle in high definition, offering enhanced safety and evidence recording capabilities. Please read this manual thoroughly before using the device to ensure proper functionality and to maximize its features.

Image: The PAPAGO G500 Dash Cam system, including the main front unit, a compact rear camera, and a smartphone displaying the companion application.
2. Package Contents
Please verify that all items listed below are included in your package. If any items are missing or damaged, contact customer support.
- PAPAGO G500 Dash Cam (Main Unit)
- Rear Camera
- Car Charger (11.4 ft cable)
- 64GB SD Memory Card
- Crowbar (for cable routing)
- Installation Tool
- User Manual
- Warranty Card
- Electrostatic Film for 3M Mount (2pcs)
- TF Adapter
- 3M Adhesive Stickers (2pcs)

Image: A visual representation of all components included in the PAPAGO G500 Dash Cam package, such as the main camera, rear camera, car charger, SD card, and mounting accessories.
3. Product Overview
The PAPAGO G500 Dash Cam features a compact design with a front-facing camera and a separate rear camera for comprehensive vehicle coverage. The main unit includes a display screen, control buttons, and ports for power and the rear camera connection. The front camera records in 4K UHD, while the rear camera records in 1080P Full HD.
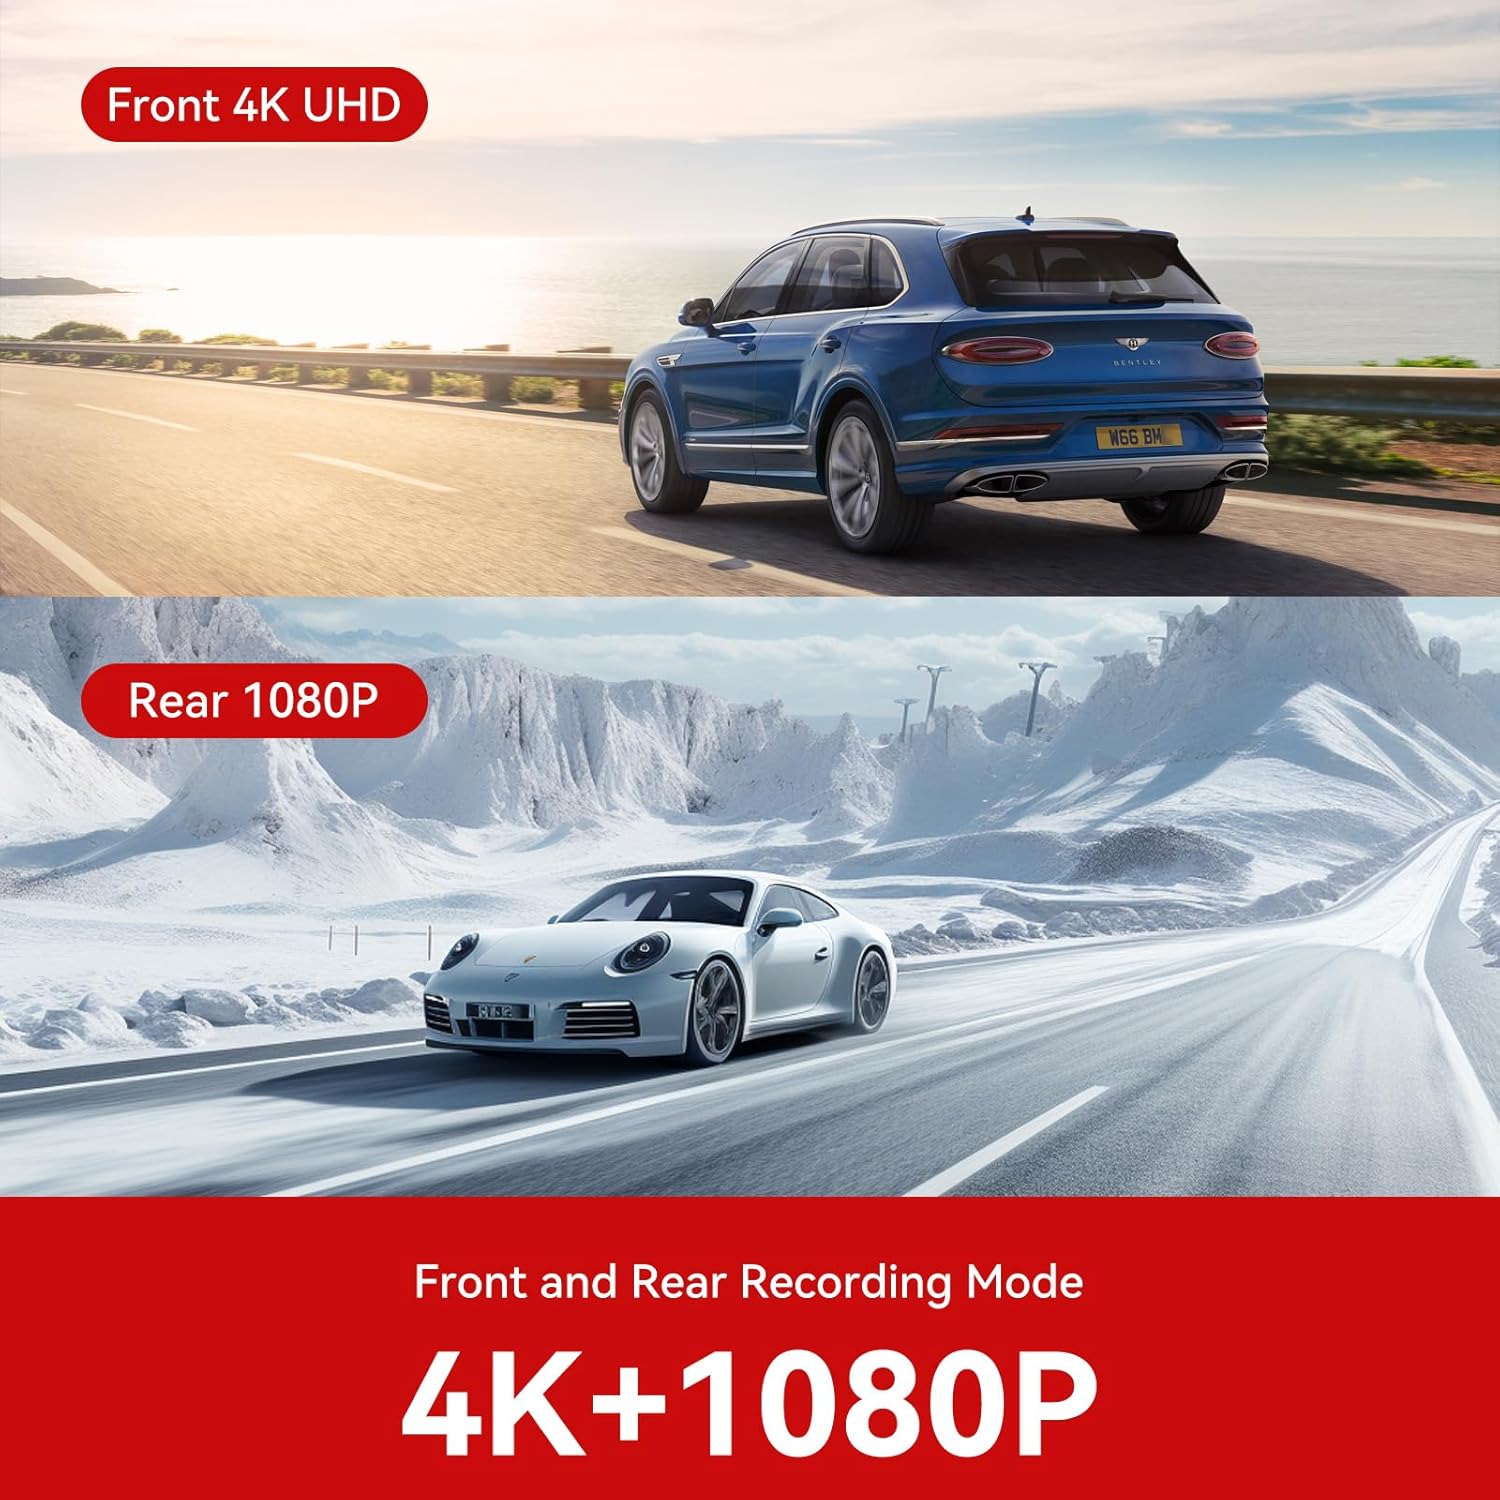
Image: Illustration showing the front camera recording in 4K UHD and the rear camera recording in 1080P, highlighting the dual recording capability.
Key Components:
- Front Camera Lens: F1.5 aperture, 6-glass lens, 170-degree wide angle.
- Rear Camera Lens: F1.8 aperture, 6-glass lens, 140-degree wide angle.
- Display Screen: For live view, playback, and menu navigation.
- Mounting Bracket: For secure attachment to the windshield.
- Power Port: USB Type-C for car charger connection.
- Rear Camera Port: For connecting the rear camera cable.
- MicroSD Card Slot: For memory card insertion.
4. Setup and Installation
Follow these steps for proper installation of your PAPAGO G500 Dash Cam.
4.1 Mounting the Front Camera
- Clean the windshield area where you intend to mount the dash cam. Ensure it is free of dust and grease.
- Apply the electrostatic film to the chosen area on the windshield. This helps protect your windshield and makes removal easier.
- Attach the 3M adhesive sticker to the dash cam mount, then firmly press the mount onto the electrostatic film.
- Adjust the camera angle to ensure a clear view of the road ahead.
4.2 Installing the Rear Camera
- Choose a suitable location on your rear windshield, typically at the top center, to ensure a clear view.
- Clean the area and attach the rear camera using its adhesive.
- Route the rear camera cable to the front main unit. Use the provided crowbar to tuck the cable neatly along the headliner and A-pillar trim.
- Connect the rear camera cable to the designated port on the main dash cam unit.
4.3 Power Connection
- Insert the 64GB SD card into the MicroSD card slot on the main unit.
- Connect the car charger to the main unit's power port.
- Plug the other end of the car charger into your vehicle's cigarette lighter socket.
- The dash cam will automatically power on and begin recording when your vehicle starts.

Image: An illustration demonstrating the recommended installation positions for the front and rear dash cameras, along with the cable routing path for the car charger and rear camera cable.
5. Basic Operation
5.1 Power On/Off
- Automatic: The dash cam powers on and off automatically with your vehicle's ignition.
- Manual: Press and hold the power button to manually turn the device on or off.
5.2 Loop Recording
The G500 records video in continuous loops (1, 3, or 5-minute segments). When the memory card is full, the oldest unprotected files are automatically overwritten by new recordings. This ensures continuous recording without manual intervention.

Image: A visual representation of the dash cam's endless loop recording feature, showing older video segments being overwritten as new footage is captured.
5.3 G-Sensor Emergency Lock
The built-in G-sensor detects sudden impacts or rapid acceleration/deceleration. In such events, the current video segment is automatically locked and saved to a protected folder, preventing it from being overwritten by loop recording. This ensures critical incident footage is preserved.

Image: Depiction of the G-Sensor Emergency Lock feature, illustrating how the dash cam automatically records and locks video during a collision or impact, both on the road and during parking.
6. Advanced Features
6.1 Wi-Fi & App Control
The G500 features built-in 5GHz Wi-Fi, allowing you to connect your smartphone via the PAPAGO! APP. Through the app, you can:
- View real-time video footage.
- Play back recorded videos.
- Download videos directly to your phone.
- Access GPS data (speed, location).
- Adjust dash cam settings.
The app provides a convenient way to manage your recordings without needing to remove the SD card.
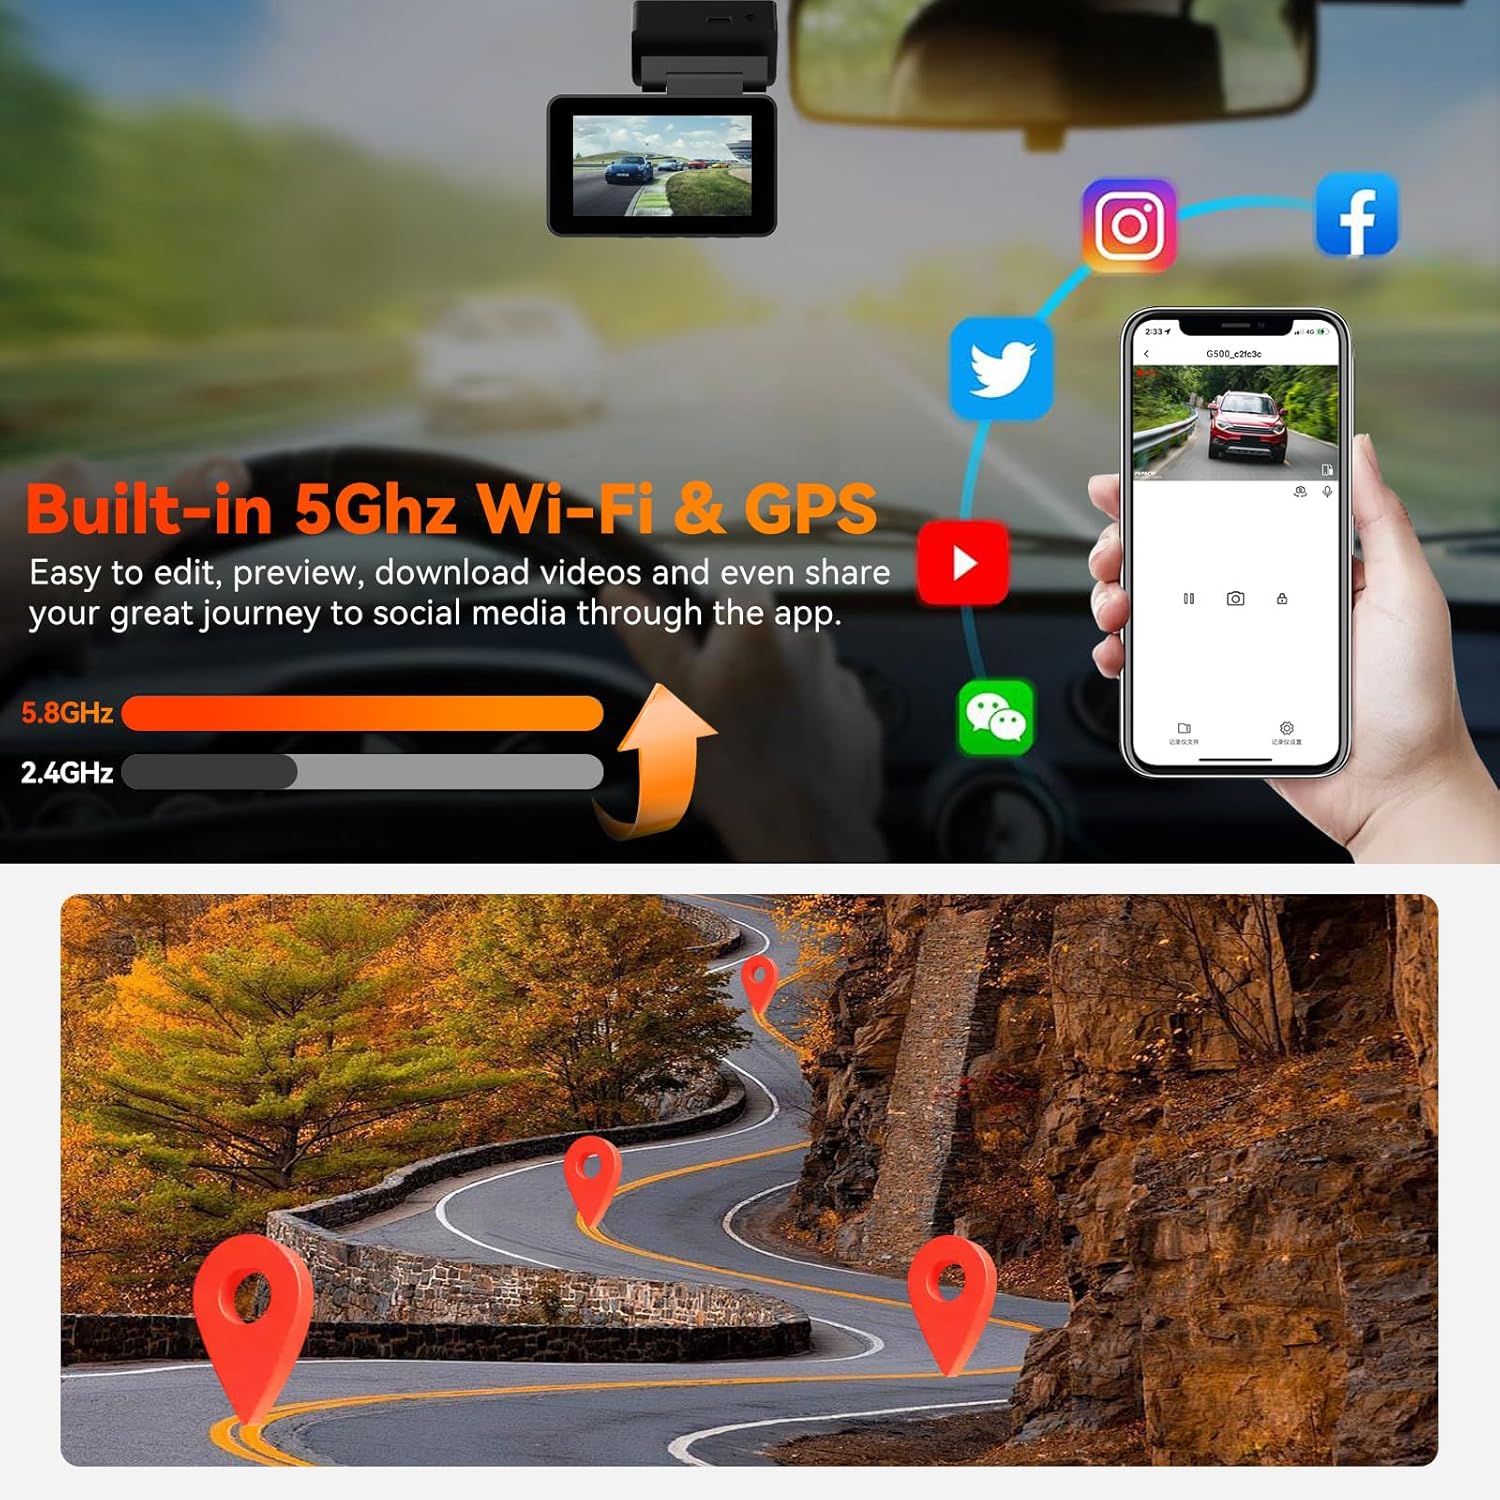
Image: A smartphone displaying the PAPAGO! app interface, connected to the dash cam via 5GHz Wi-Fi, with GPS tracking shown on a map and options for sharing to social media.
6.2 Voice Control
Control your dash cam hands-free using voice commands. This feature enhances safety by allowing you to manage the device without taking your hands off the wheel.
- "Turn on/off WiFi"
- "Take photo"
- "Turn on/off screen"
- "Turn on/off audio"
- "Start/stop recording"
- "Lock the video" (for emergency situations)

Image: An illustration of the Smart Voice Control feature, showing a driver using voice commands to interact with the dash cam, such as turning on the screen, taking a photo, or locking a video.
6.3 Night Vision
Equipped with a high-performance STARVIS sensor and large aperture lenses (F1.4 front, F1.8 rear), the G500 provides clear video footage even in low-light conditions. Four infrared (IR) LED lights facing the car cabin ensure accurate capture of driver and passenger activity in complete darkness, making it suitable for ride-share drivers.

Image: A car driving at night, illustrating the dash cam's superior night vision capabilities, which provide clear and detailed recordings in dark environments.
6.4 24-Hour Parking Mode
The G500 offers two parking surveillance modes to protect your vehicle when parked:
- Low Bitrate Recording: Continuously records at a lower quality to maximize recording duration and save memory card space.
- Motion/Collision Detection: Automatically initiates recording when motion is detected around the vehicle or if an impact occurs.
For continuous 24-hour parking mode functionality, the dash cam must be connected to a hardwire kit (sold separately, ASIN B0DBQD6WWQ) or an external battery to provide constant power.

Image: An illustration depicting the 24-hour parking monitor feature, showing a protective shield icon over parked cars and a clock indicating continuous surveillance, with examples of collision detection.
7. Maintenance
7.1 Super Capacitor
The G500 is powered by a super capacitor instead of traditional lithium-ion batteries. This design offers several advantages:
- Heat Resistance: Withstands extreme temperatures from 14°F to 158°F (-10°C to 70°C), preventing overheating and ensuring reliability in various climates.
- Extended Lifespan: Super capacitors generally have a longer operational life compared to lithium-ion batteries.
- Safety: Reduces risks associated with battery swelling or explosion in high temperatures.

Image: An infographic highlighting the benefits of a super capacitor, including durability, heat resistance, cold resistance, and environmental friendliness, with car images in various climates.
7.2 General Care
- Regularly format the MicroSD card (monthly recommended) to maintain optimal performance and prevent data corruption. Back up important files before formatting.
- Keep the camera lenses clean using a soft, lint-free cloth. Avoid abrasive materials.
- Ensure the dash cam is securely mounted to prevent vibrations from affecting video quality.
8. Troubleshooting
If you encounter issues with your PAPAGO G500 Dash Cam, refer to the following common problems and solutions:
| Problem | Possible Cause | Solution |
|---|---|---|
| Dash cam does not power on. | No power, faulty car charger, loose connection. | Check car charger connection to both the dash cam and the vehicle's power outlet. Ensure the vehicle's power outlet is functional. Try a different power source if available. |
| Wi-Fi connection issues. | Incorrect password, out of range, app malfunction. | Ensure you are within 25ft of the dash cam. Verify the Wi-Fi password. Restart both the dash cam and your smartphone. Reinstall the PAPAGO! APP if necessary. |
| Rear camera keeps falling or losing connection. | Improper adhesive, loose cable connection. | Ensure the mounting surface is clean and dry before applying adhesive. Press firmly for sufficient adhesion. Check that the rear camera cable is securely plugged into both the rear camera and the main unit. |
| Video footage is blurry or unclear. | Dirty lens, protective film still on, vibrations. | Clean the camera lenses with a soft cloth. Remove any protective film from the lenses. Ensure the dash cam is securely mounted and not vibrating excessively. |
| Memory card full/recording stops. | Loop recording off, too many locked files, faulty SD card. | Ensure loop recording is enabled in settings. Manually delete unnecessary locked files. Format the SD card. If issues persist, try a new high-endurance MicroSD card. |
If these solutions do not resolve your issue, please contact PAPAGO! customer support for further assistance.
9. Specifications
Detailed technical specifications for the PAPAGO G500 Dash Cam:
| Feature | Specification |
|---|---|
| Model Name | G500 |
| Front Video Resolution | 4K (3840x2160P) |
| Rear Video Resolution | 1080P (Full HD) |
| Front Lens Aperture | F1.5 |
| Rear Lens Aperture | F1.8 |
| Front Wide Angle | 170 degrees |
| Rear Wide Angle | 140 degrees |
| Sensor | STARVIS Sensor |
| Connectivity | 5GHz Wi-Fi, Built-in GPS |
| Special Features | Voice Control, Night Vision, WDR, G-Sensor, 24H Parking Mode |
| Storage | Supports MicroSD card (64GB included) |
| Power Source | Super Capacitor |
| Operating Temperature | 14°F to 158°F (-10°C to 70°C) |
| Product Dimensions | 1.37"D x 2.99"W x 1.7"H |
| Item Weight | 1.28 pounds |
| Mounting Type | Windshield Mount |
10. Warranty and Support
Your PAPAGO G500 Dash Cam comes with an 18-month warranty from the date of purchase. This warranty covers manufacturing defects and ensures your product functions as intended.
For technical assistance, troubleshooting, or warranty claims, please contact PAPAGO! customer support. Our team is available to provide support via email, with responses typically within 24 hours.
Additionally, the product is eligible for firmware updates to introduce continuous improvements and new features. Check the official PAPAGO! website or app for the latest updates.
For more information or to explore other PAPAGO! products, visit the PAPAGO! Official Store.