1. Introduction
This manual provides essential information for the safe and effective installation, operation, and maintenance of your Tiskgg 25.6" Tall Fireproof Wall Safe, Model 65EN-WALL. Please read these instructions thoroughly before use and retain them for future reference.
The Tiskgg wall safe is designed to provide secure storage for valuables such as money, jewelry, documents, and passports. It features heavy-duty steel construction, a fireproof design, and an electronic combination lock with emergency key access. The safe is specifically designed for flush mounting between standard 16-inch on-center wall studs, allowing for discreet concealment.
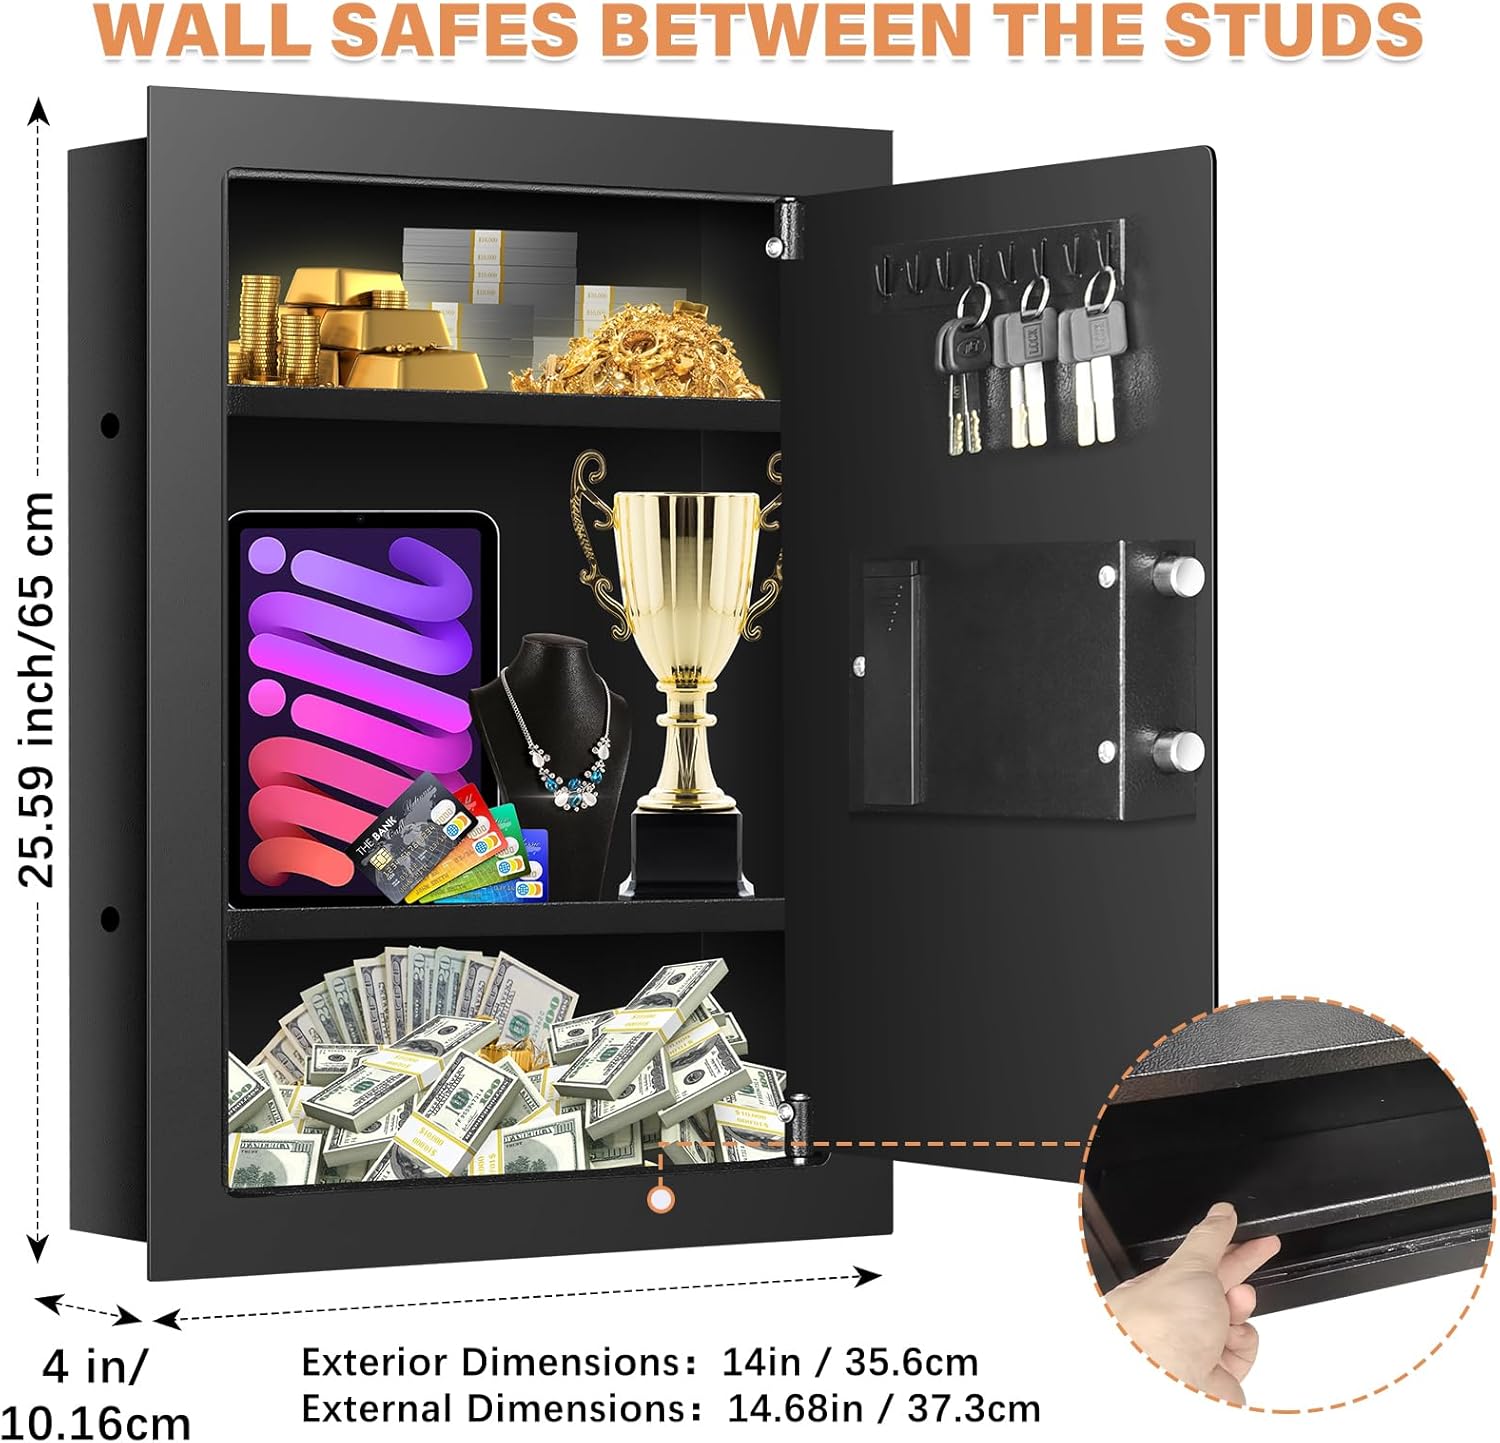
Image 1.1: Overview of the Tiskgg 25.6" Tall Fireproof Wall Safe, showing its interior capacity and key dimensions. Exterior Dimensions: 25.59 inches (H) x 14 inches (W) x 4 inches (D).
2. Safety Information
- Always keep the emergency keys in a secure location away from the safe and its contents. Do not store them inside the safe.
- Ensure the safe is installed correctly and securely to wall studs using appropriate mounting hardware to prevent unauthorized removal.
- Do not expose the safe to extreme temperatures or direct water, as it is not water-resistant.
- Regularly check the battery level of the electronic lock and replace batteries as needed to avoid lockouts.
- Keep the combination confidential and do not share it with unauthorized individuals.
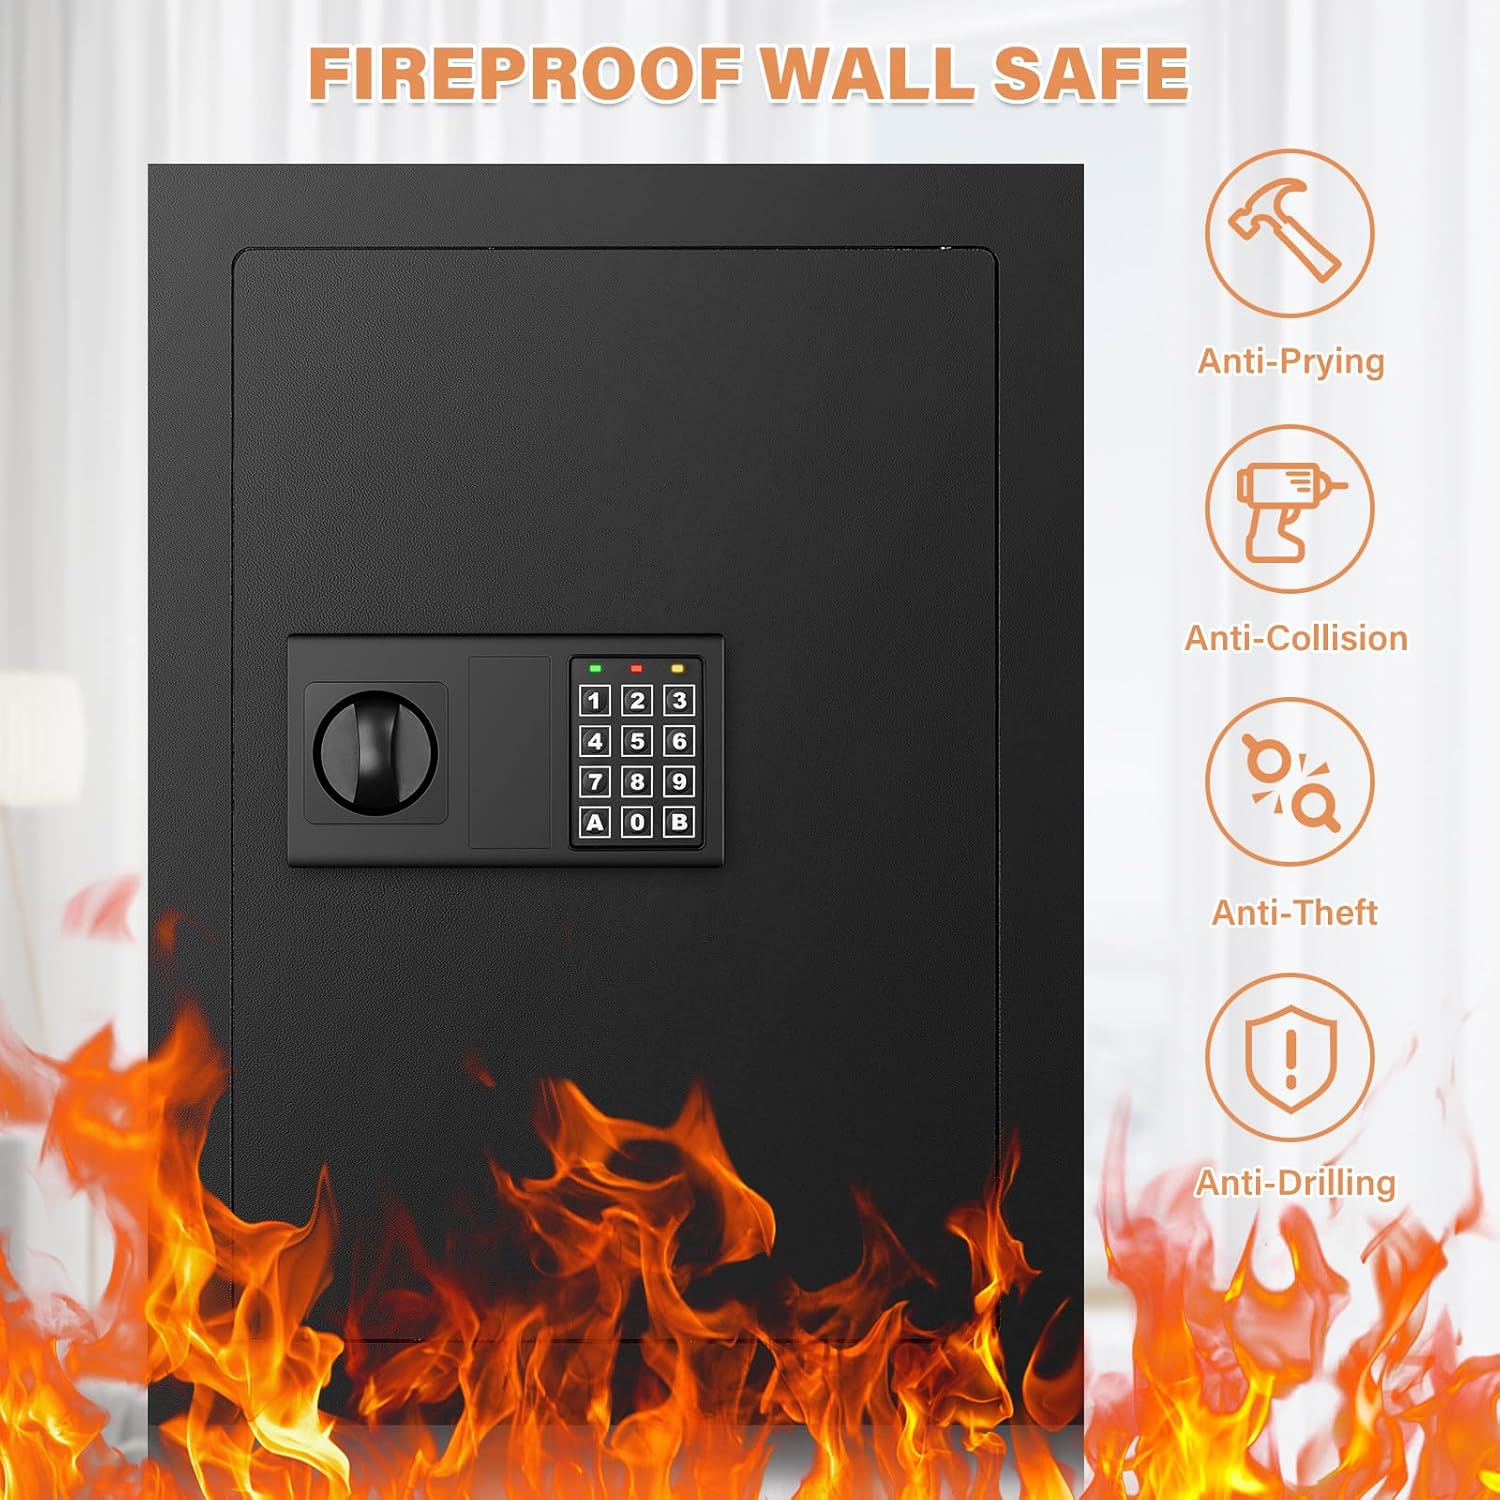
Image 2.1: The fireproof design of the Tiskgg wall safe, highlighting its resistance to prying, collision, drilling, and theft.
3. Package Contents
Verify that all components are present before proceeding with installation:
- Tiskgg 25.6" Tall Fireproof Wall Safe
- Emergency Keys (2)
- Mounting Hardware (Expansion bolts)
- Instruction Manual
4. Specifications
| Brand | Tiskgg |
| Model Number | 65EN-WALL |
| Exterior Dimensions (H x W x D) | 25.6" x 14.57" x 3.94" (65cm x 37cm x 10cm) |
| Chamber Depth | 3 Inches |
| Lock Type | Electronic Combination Lock |
| Material | Alloy Steel |
| Color | Black |
| Mounting Type | Wall Mount (Between 16" on-center studs) |
| Item Weight | 14.47 Kilograms |
| Special Features | Anti-Theft, Combination Lock, Removable Shelf, Hidden Compartment |
| Water Resistance Level | Not Water Resistant |
5. Setup and Installation
5.1 Locating Installation Area
- Identify a suitable wall location with standard 16-inch on-center wall studs. The safe is designed to fit precisely between these studs.
- Use a stud finder to accurately locate the center of two adjacent studs. Mark the outline of the safe's body on the drywall, ensuring it aligns with the stud centers.
- Consider the desired concealment method, such as behind a framed picture or mirror.
5.2 Preparing the Wall Opening
- Carefully cut the marked opening in the drywall using a drywall saw or utility knife. Ensure the cut is precise and slightly larger than the safe's body but smaller than its flange, allowing for a flush fit.
- Remove any insulation or obstructions within the wall cavity where the safe will be placed.
5.3 Securing the Safe
- Open the safe door and remove any internal shelves to provide clear access to the mounting holes.
- Carefully slide the safe into the prepared wall opening. The front flange of the safe should sit flush against the wall surface.
- Using the pre-drilled holes on the sides of the safe, drill pilot holes into the wall studs.
- Secure the safe to the wall studs using the provided expansion bolts. Ensure all bolts are tightened firmly to prevent any movement of the safe.
- Replace the internal shelves.
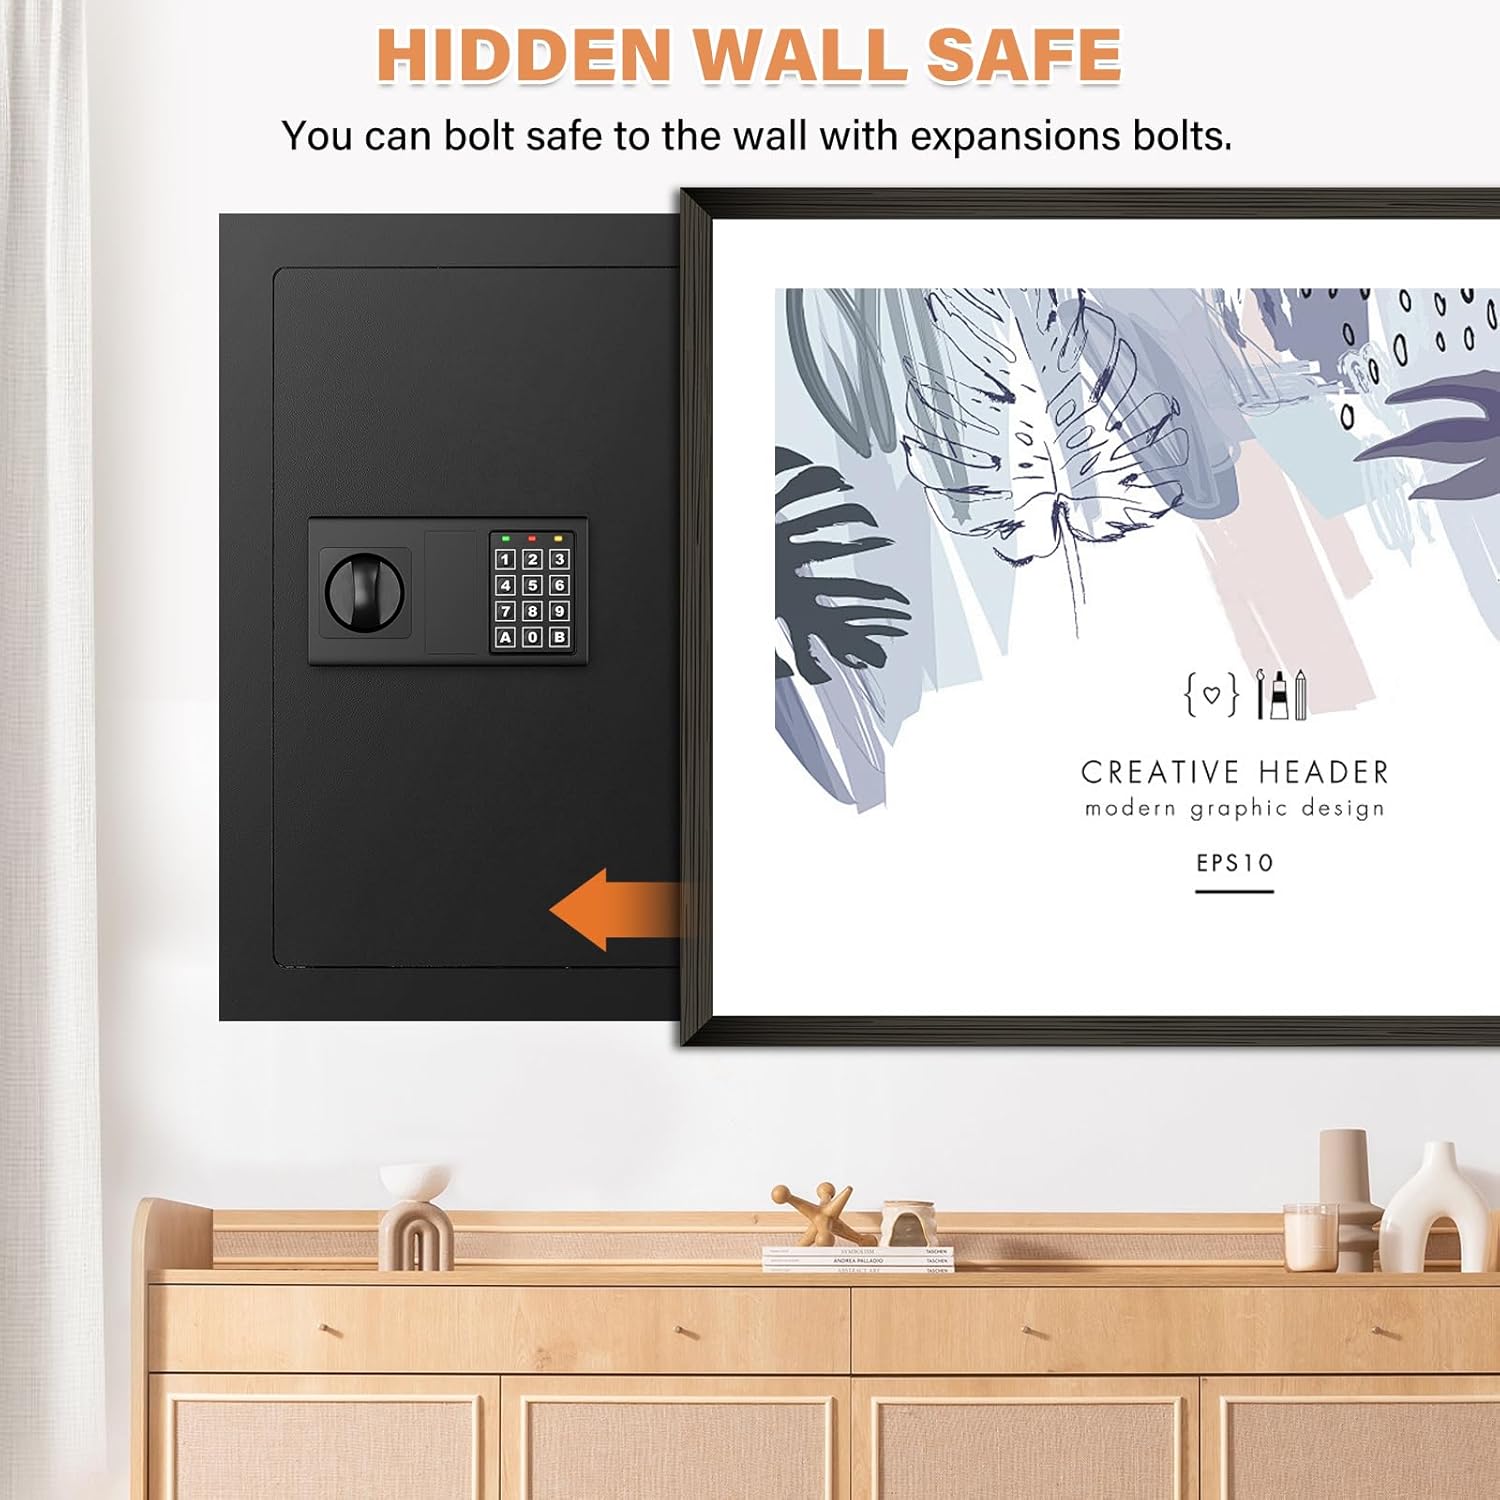
Image 5.1: The Tiskgg wall safe discreetly installed behind a framed picture, demonstrating its hidden mounting capability.
6. Operating the Safe
6.1 Initial Opening with Emergency Key
Upon first receiving the safe, use the emergency key to open it:
- Locate the emergency keyhole, typically concealed behind a small badge or cover on the electronic keypad.
- Insert the emergency key and turn it clockwise.
- Simultaneously turn the knob on the safe door clockwise to open the safe.
- Once open, remove the emergency key and store it in a safe, separate location.
6.2 Installing Batteries
The electronic lock requires batteries (typically AA, not included) for operation:
- Open the safe door.
- Locate the battery compartment on the inside of the door panel.
- Insert the required number of fresh batteries, ensuring correct polarity.
- Close the battery compartment.
6.3 Setting/Changing the Combination
With the safe door open and batteries installed:
- Press the red reset button located on the inside of the safe door (often near the hinge or battery compartment). You will hear a beep.
- On the keypad, enter your desired new combination (typically 3-8 digits).
- Press the '#' or 'B' button to confirm. The safe will beep to confirm the new combination is set.
- Important: Test the new combination several times with the door open before closing it.
6.4 Opening with Combination
- Enter your personal combination on the keypad.
- Press the '#' or 'B' button. The safe will beep, and the green light will illuminate, indicating the lock is disengaged.
- Within 5 seconds, turn the knob clockwise to open the safe door.
6.5 Locking the Safe
Close the safe door and turn the knob counter-clockwise until it is securely locked. The safe will automatically engage the deadbolts.

Image 6.1: Detailed view of the electronic combination lock, illustrating both password entry and emergency key usage for opening the safe.
7. Internal Features
7.1 Removable Shelves
The safe includes multiple removable shelves, allowing you to customize the internal storage space according to your needs. To remove or adjust a shelf, simply lift it from its supports and reposition it as desired.
7.2 Hidden Compartment (False Bottom)
A discreet false bottom provides an additional hidden compartment for extra security. This area is ideal for small, highly valuable items you wish to keep extra secure.
7.3 Key Hooks
Integrated key hooks on the inside of the door provide a convenient location to store spare keys or other small items.
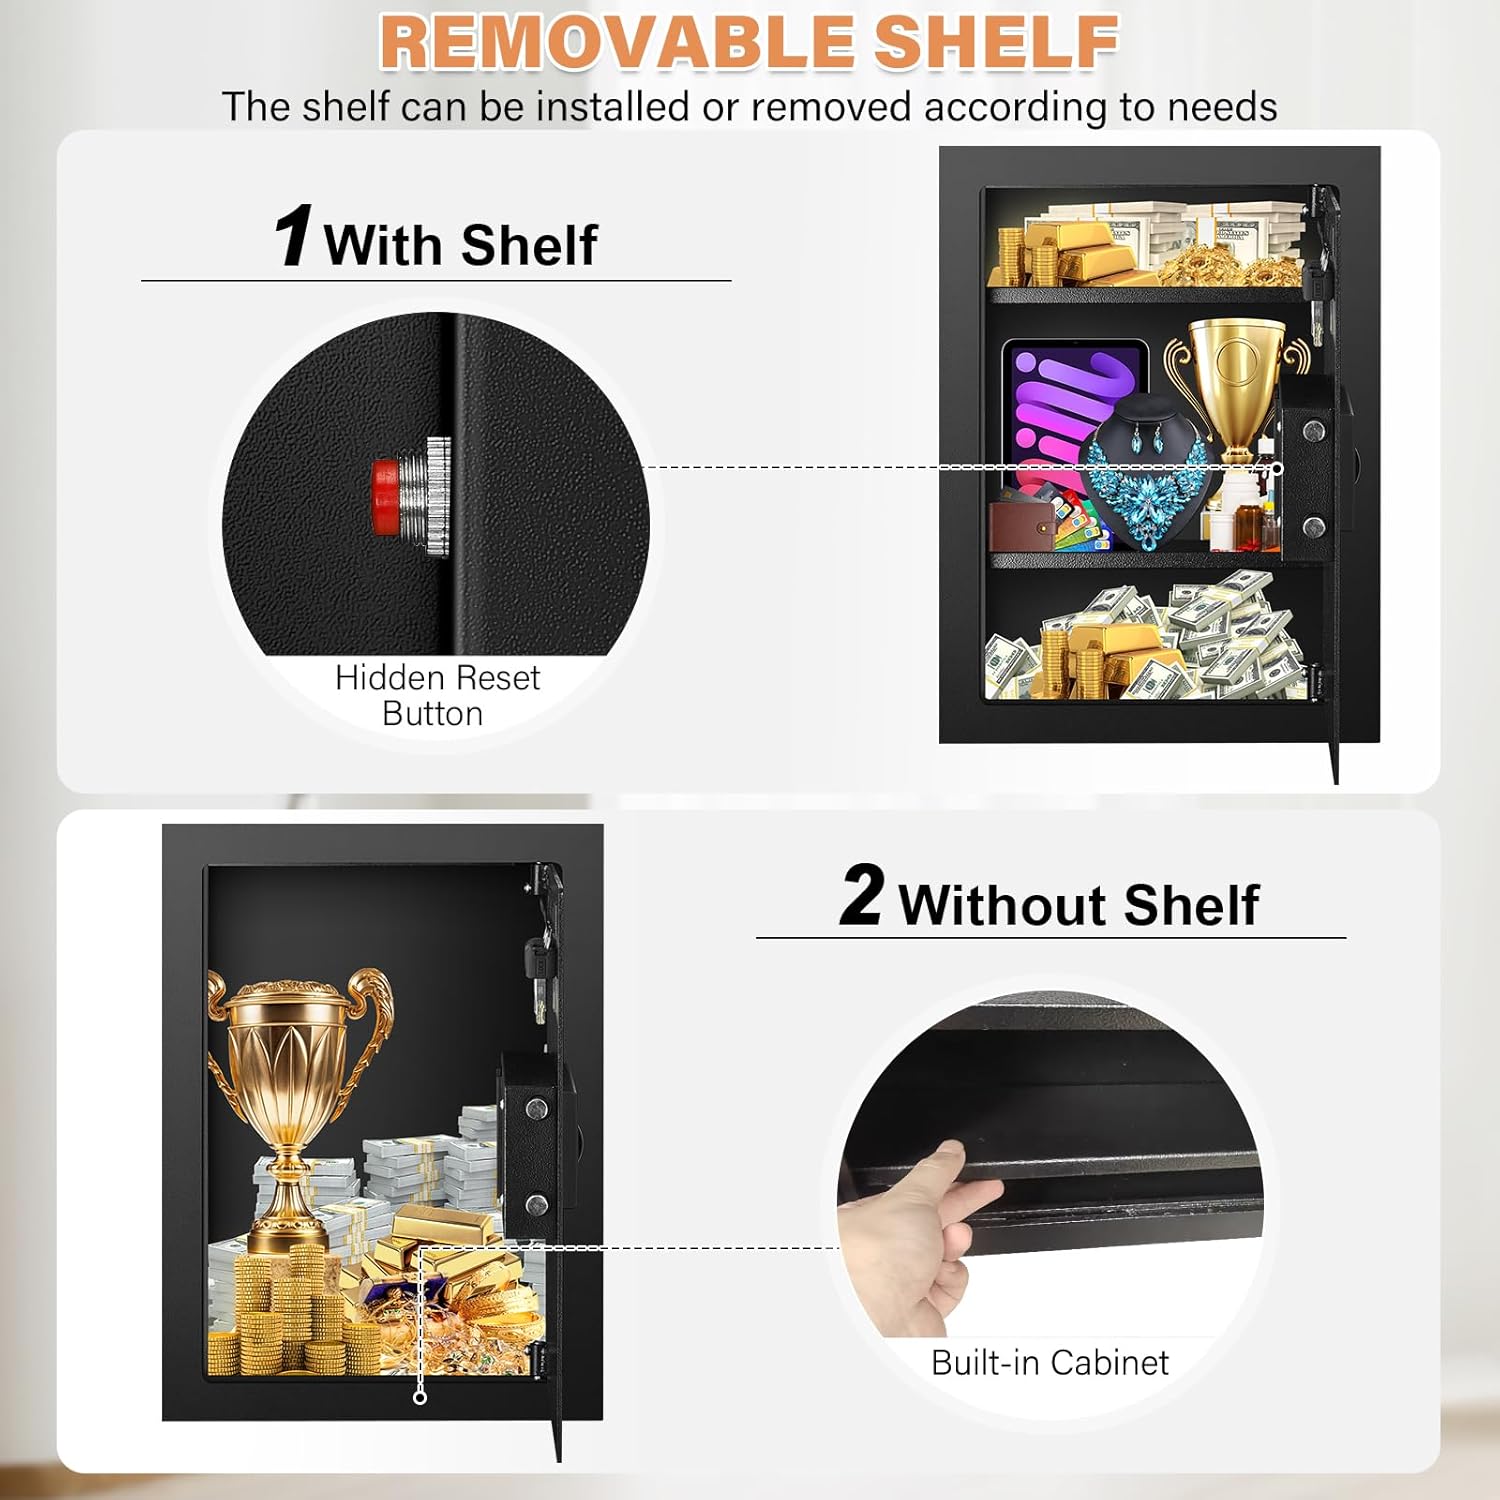
Image 7.1: The interior of the safe, demonstrating the removable shelf feature and the location of the hidden reset button for the combination lock.

Image 7.2: A view of the safe's interior, highlighting the false bottom which conceals an additional hidden compartment for valuables.
8. Maintenance
- Cleaning: Wipe the exterior and interior surfaces of the safe with a soft, damp cloth. Avoid using abrasive cleaners or solvents that could damage the finish.
- Battery Replacement: Replace the batteries in the electronic lock annually, or immediately if the low battery indicator appears or the keypad becomes unresponsive. Always use new, high-quality alkaline batteries.
- Lock Mechanism: Keep the lock mechanism free from dust and debris. Do not lubricate the electronic lock components.
9. Troubleshooting
| Problem | Possible Cause | Solution |
|---|---|---|
| Safe does not open with combination. | Incorrect combination entered. Dead or low batteries. Lock malfunction. | Re-enter combination carefully. Replace batteries with new ones. Use the emergency key to open. |
| Keypad is unresponsive. | Dead or low batteries. | Replace batteries immediately. |
| Forgotten combination. | Combination not remembered. | Use the emergency key to open the safe. Once open, reset the combination following the instructions in Section 6.3. |
10. Warranty and Support
Tiskgg is committed to providing high-quality products. While specific warranty details are not provided in this manual, we offer 24-hour online customer service to assist with any questions or concerns you may have regarding your safe.
For support, please refer to the contact information provided at the point of purchase or visit the official Tiskgg website.
