1. Introduction
Thank you for choosing the vidaXL Galvanized Steel Chicken Run. This outdoor enclosure is designed to provide a safe, spacious, and weatherproof environment for your poultry. Constructed from durable galvanized steel, it features a lockable door for security and a protective cover for weather resistance. This manual provides essential information for the proper assembly, operation, and maintenance of your chicken run to ensure its longevity and the well-being of your animals.
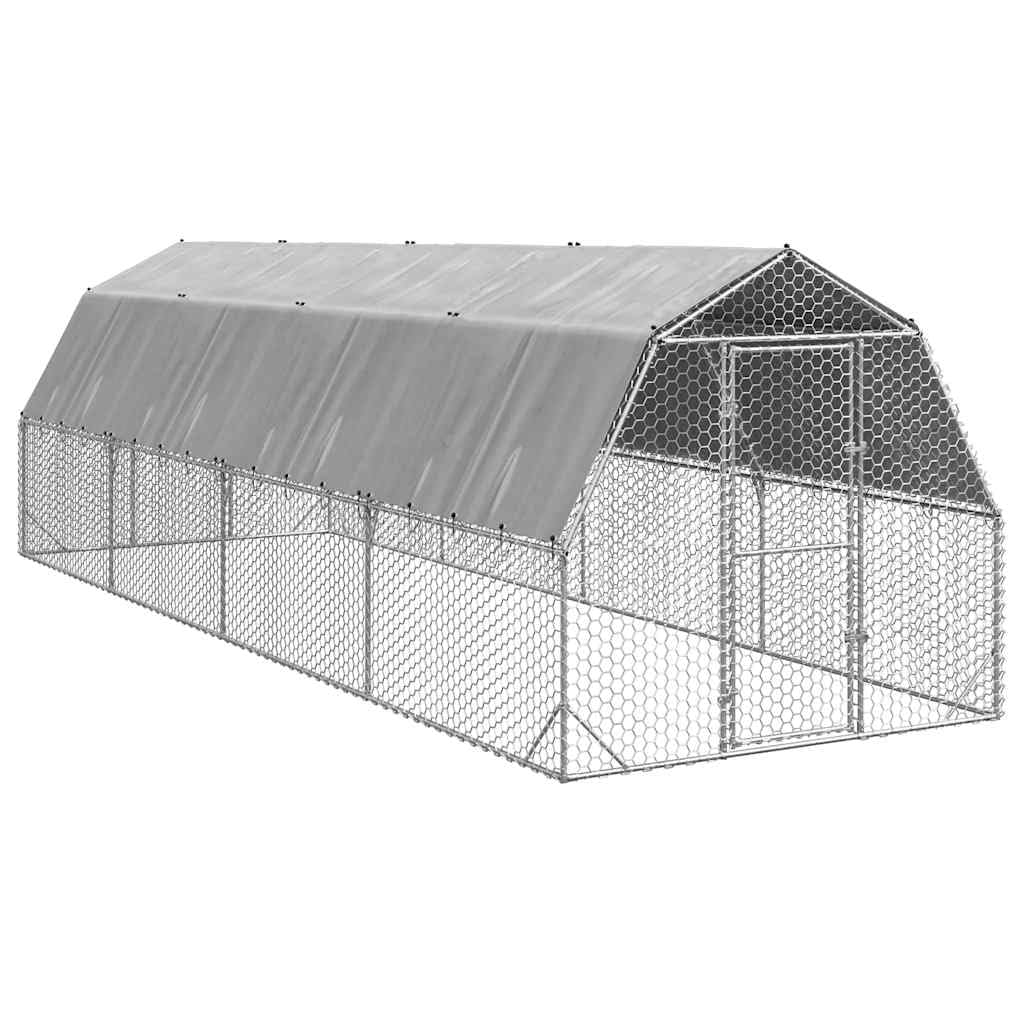
Image 1.1: The vidaXL Galvanized Steel Chicken Run assembled in an outdoor environment.
2. Safety Information
- Read all instructions: Before assembly and use, carefully read and understand all instructions in this manual.
- Adult assembly required: Assembly should be performed by at least two adults.
- Wear protective gear: During assembly, wear appropriate protective gear such as gloves to prevent cuts or pinches.
- Secure installation: Ensure the chicken run is assembled on a level surface and securely anchored to prevent tipping or collapse, especially in windy conditions.
- Regular inspection: Periodically inspect all components for damage, loose connections, or wear. Replace damaged parts immediately.
- Animal safety: Ensure the enclosure is free from sharp edges or hazards that could harm animals.
- Children and pets: Keep children and unauthorized pets away from the assembly area.
3. Package Contents
Please refer to the packaging and the included parts list for a complete and accurate inventory of all components. Ensure all parts are present and undamaged before beginning assembly. If any parts are missing or damaged, contact vidaXL customer support.
4. Setup and Assembly Instructions
Follow these steps for the correct assembly of your chicken run. It is recommended to have at least two people for assembly.
- Prepare the site: Choose a level, stable outdoor location for the chicken run. Clear any debris or obstacles.
- Unpack components: Carefully unpack all parts and lay them out, verifying against the parts list.
- Assemble the frame: Connect the galvanized steel frame tubes according to the diagrams provided in your specific assembly guide. Ensure all connections are tight and secure.
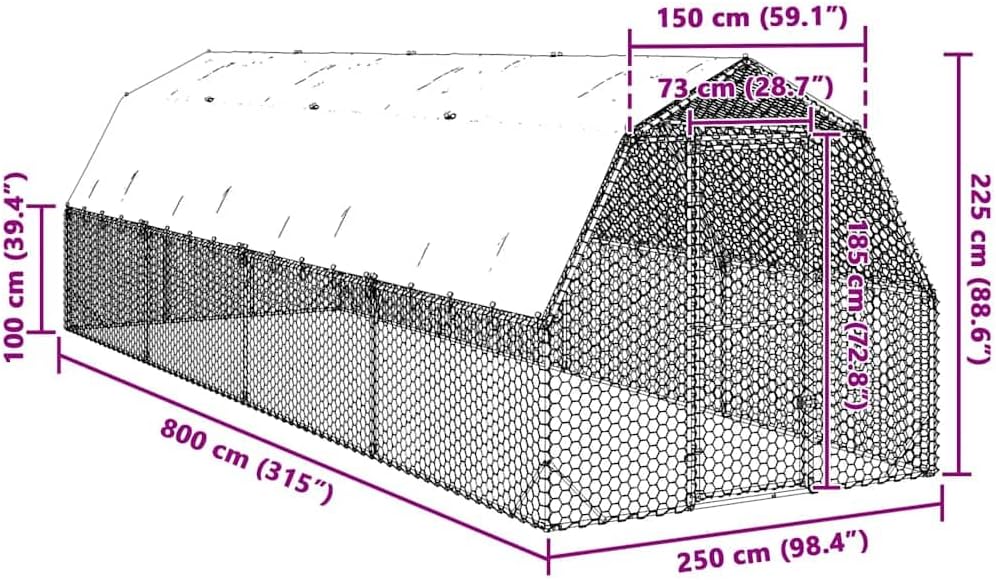
Image 4.1: Detail of the galvanized steel frame connection, showing secure joints.
- Attach wire mesh: Securely attach the wire mesh panels to the assembled frame using the provided fasteners. Ensure there are no gaps that could allow animals to escape or predators to enter.
- Install the door: Mount the lockable door into the designated frame opening. Test the latch mechanism to ensure it operates smoothly and securely.
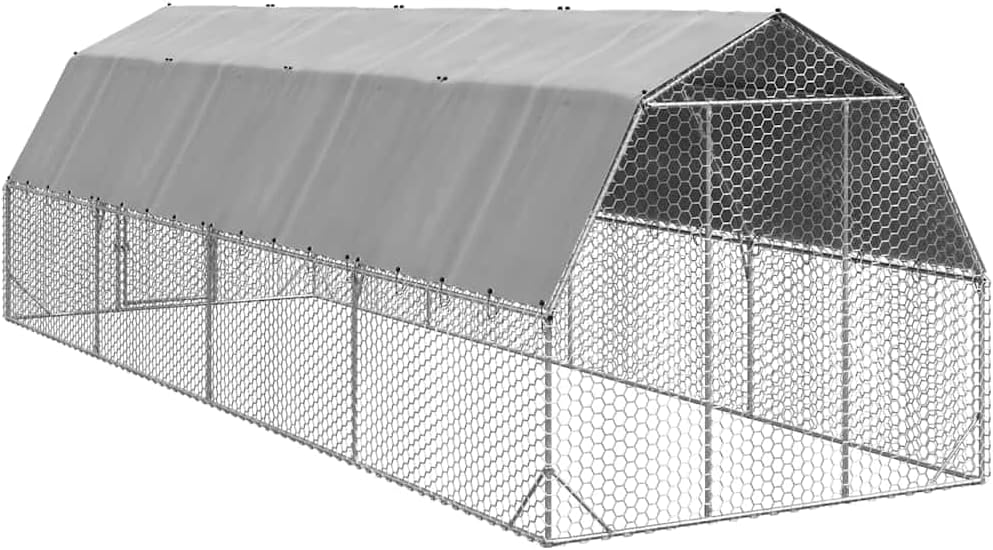
Image 4.2: An angled view of the chicken run frame with mesh installed, prior to cover placement.
- Install the weatherproof cover: Drape the weatherproof cover over the roof section of the frame. Secure it firmly using the provided attachments to protect against rain and sun.
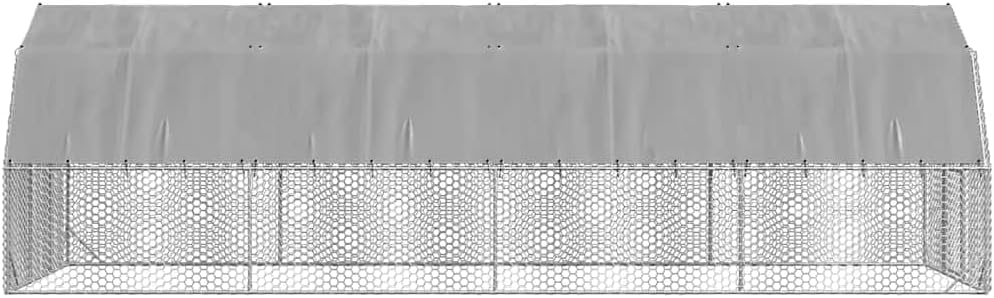
Image 4.3: Top-down perspective showing the weatherproof cover securely fitted over the chicken run.
- Final inspection: Double-check all connections, fasteners, and the security of the mesh and cover. Ensure the structure is stable and ready for use.
5. Operating Instructions
- Placement: Position the chicken run in an area that offers adequate drainage and some natural shade, if possible, in addition to the provided UV-protected cover.
- Accessing the enclosure: Use the lockable door for entry and exit. Always ensure the door is securely latched and locked when not in use to prevent escape and protect against predators.

Image 5.1: Detail of the lockable door mechanism, ensuring secure closure.
- Ventilation: The open mesh design provides natural ventilation. Ensure the area around the run is clear to allow for proper airflow.
- Weather protection: The weatherproof cover offers protection from rain and direct sunlight. In extreme weather conditions (e.g., heavy snow, strong winds), consider additional measures to secure the run or temporarily relocate animals to a more sheltered area.
6. Maintenance
- Cleaning: Regularly clean the chicken run. The galvanized steel and cover materials can be wiped down with warm water and a mild, non-toxic detergent. Rinse thoroughly.
- Inspection: Periodically inspect the entire structure for signs of wear, rust, or damage. Check all bolts, screws, and fasteners for tightness.
- Mesh integrity: Examine the wire mesh for any breaks, bends, or loose sections that could compromise the security of the enclosure. Repair or replace as needed.
- Cover condition: Check the weatherproof cover for tears or damage. Ensure it remains securely attached to provide optimal protection.
- Ground anchoring: Verify that the chicken run remains securely anchored to the ground, especially after strong winds or heavy rain.
7. Troubleshooting
- Run feels unstable: Ensure all frame connections are fully tightened. Verify the ground is level. Consider additional anchoring points if necessary.
- Door not closing/locking properly: Check for obstructions around the door frame or latch mechanism. Ensure the door is correctly aligned. Lubricate the latch if stiff.
- Water pooling on cover: Ensure the cover is taut and properly angled to allow water runoff. Clear any debris that may be collecting on the cover.
- Rust appearing on metal parts: While galvanized steel is rust-resistant, prolonged exposure to harsh conditions or damage to the coating can lead to rust. Clean affected areas and apply a rust-inhibiting primer and paint suitable for galvanized metal.
8. Specifications
| Feature | Specification |
|---|---|
| Model Number | 3328523 |
| Dimensions (L x W x H) | 314.96 x 98.43 x 88.58 inches (800 x 250 x 225 cm) |
| Material | Galvanized Steel Frame, Weatherproof Cover |
| Color | Grey |
| Item Weight | 165.7 pounds (75.3 kg) |
| Door | Lockable |
| Assembly Required | Yes |

Image 8.1: Dimensional diagram of the chicken run, indicating length, width, and height.
9. Warranty and Support
For warranty information, missing parts, or technical support, please contact vidaXL customer service. Refer to your purchase documentation or the official vidaXL website for contact details and specific warranty terms applicable to your region.
Online Support: Visit the vidaXL Store on Amazon for additional product information and support resources.


