1. Introduction
The LHQYA Ballistic Chronograph Speedometer is a precision instrument designed to measure the speed and kinetic energy of various projectiles. It features a clear display screen, intuitive controls, and the ability to store multiple measurement records. This manual provides essential information for the proper setup, operation, and maintenance of your device.
The device is suitable for measuring the flight speed of projectiles such as those from table tennis, badminton, bows and arrows, and for use in physical acceleration and free-fall experiments.
2. Key Features
- High Precision: Test error of less than 1% ensures accurate measurements.
- Intuitive Display: The display screen is positioned directly in front for clear and immediate data viewing.
- Data Storage: Records up to 36 sets of speed measurements and 36 sets of energy measurements.
- User-Friendly Design: Operation buttons are conveniently located on the front panel.
- Airflow Management: Ventilated design around the speedometer minimizes the impact of airflow on test results.
- Battery Protection: Integrated overcharge, over-discharge, and short-circuit protection for the lithium battery, along with intelligent shutdown and low-battery shutdown functions.
3. Setup Instructions
3.1 Unpacking and Assembly
Carefully remove all components from the packaging. The device consists of a main measurement unit and a base with a clamping mechanism.

Figure 1: The LHQYA Ballistic Chronograph Speedometer fully assembled on its base.
3.2 Positioning the Device
- Place the assembled chronograph on a stable, level surface.
- Ensure the area around the device is clear to allow for proper ventilation, which helps reduce airflow impact on measurements.
- The guide rail clamping mechanism should be positioned to allow the projectile to pass through the measurement area consistently. The path after fixing the equipment should be the same every time, and the guide rail can be made parallel to the projectile's trajectory for optimal accuracy.

Figure 2: Multiple views of the chronograph, illustrating the clamping system for securing the device.
4. Operating Instructions
4.1 Powering On/Off
Locate the power button on the front panel of the device. Press and hold to power on or off. The device features intelligent shutdown to conserve battery life.
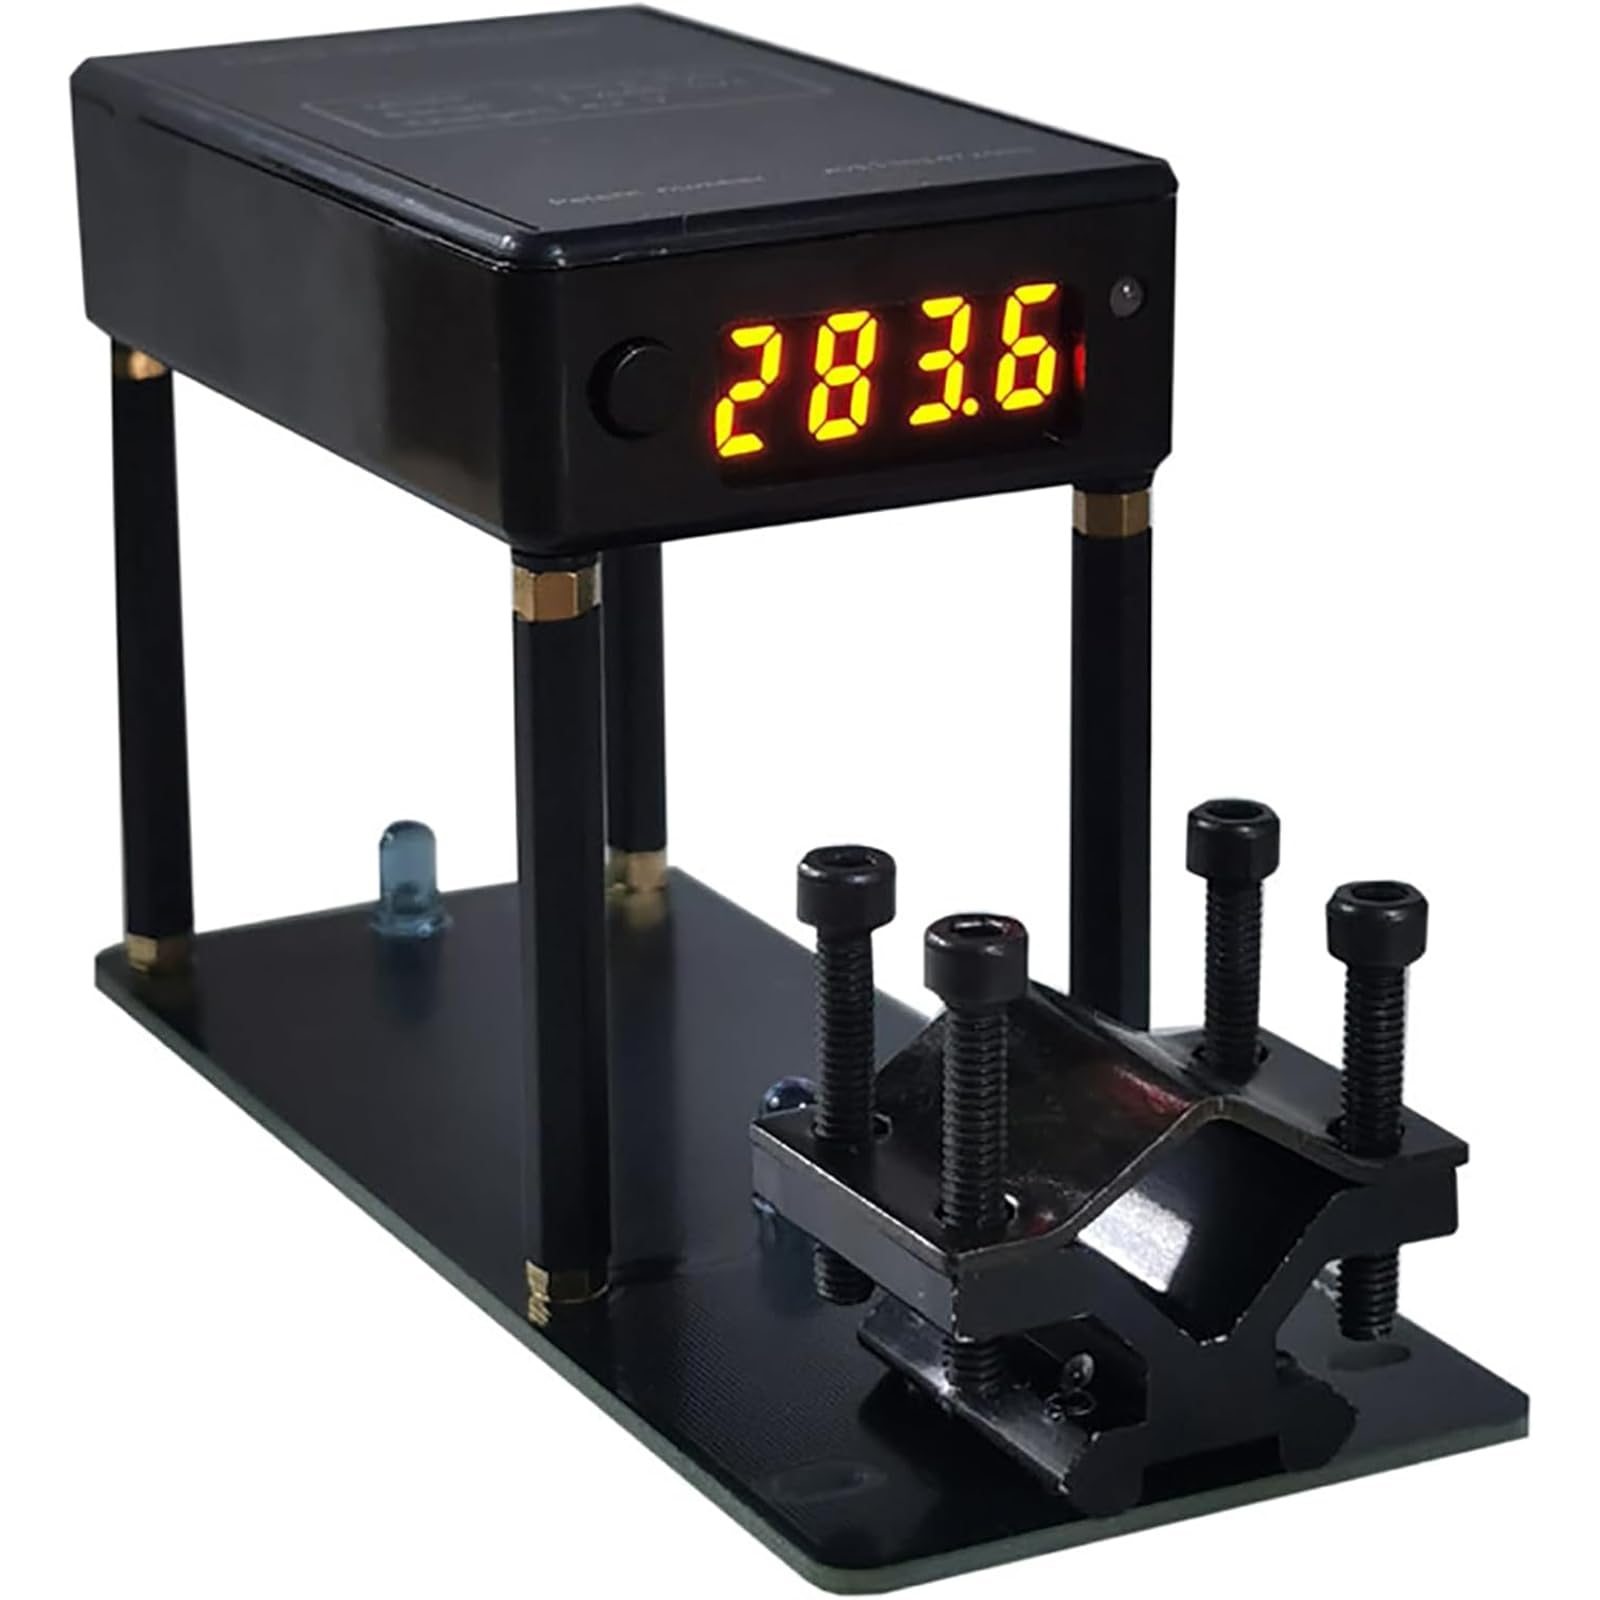
Figure 3: The chronograph's display screen showing a speed reading.
4.2 Taking Measurements
- Ensure the device is powered on and ready for measurement.
- Carefully launch the projectile through the designated measurement area of the chronograph. The device will automatically detect the projectile and display the speed and kinetic energy.
- The display surface and operation buttons are located on the front, making it convenient to operate and view test data immediately.

Figure 4: The chronograph actively measuring a projectile's speed and energy.
4.3 Viewing Stored Data
The device can record up to 36 groups of speed measurements and 36 groups of energy measurements. Use the control buttons on the front panel to navigate through the stored data. Refer to the on-screen prompts for specific navigation instructions.

Figure 5: The chronograph displaying kinetic energy data.
5. Maintenance
5.1 Cleaning
Wipe the device with a soft, dry cloth. Do not use abrasive cleaners or solvents, as these can damage the display or casing.
5.2 Battery Care
The integrated lithium battery has protection functions against overcharge, over-discharge, and short-circuits. To prolong battery life, charge the device using the provided charging cable when the low-battery indicator appears. Avoid storing the device in extreme temperatures.
6. Troubleshooting
- Inaccurate Readings (Test error > 1%):
- Ensure the projectile passes cleanly through the measurement area without touching the device.
- Verify that the guide rail is properly aligned and parallel to the projectile's trajectory.
- Check for strong air currents around the device. Ensure adequate ventilation to reduce airflow impact.
- Device Not Powering On:
- Ensure the battery is charged. Connect the device to a power source using the charging cable.
- If the device has been stored for a long time, it may require a longer charging period.
- Display Not Working:
- Restart the device.
- Ensure the battery is sufficiently charged.
7. Specifications

Figure 6: Physical dimensions of the chronograph.
| Parameter | Value |
|---|---|
| Accuracy | Test error <1% |
| Speed Measurement Range | 1-2000 meters/second (4-6500 FPS) |
| Energy Measurement Range | 1-2000 Joules |
| Speed Record Capacity | 36 groups |
| Energy Record Capacity | 36 groups |
| Weight | 0.27 kg |
| Overall Dimensions (L*W*H) | 130 * 50 * 72 mm |