Kmise 8439
Kmise Dual UHF Wireless Microphone System User Manual
Model: 8439
Introduction
Thank you for choosing the Kmise Dual UHF Wireless Microphone System. This system provides clear and stable audio transmission for various applications such as karaoke, parties, DJ events, weddings, and church services. This manual will guide you through the setup, operation, and maintenance of your new wireless microphone system.
Package Contents
Please check the package to ensure all items are present:
- 2 x Wireless Microphones (Grey and Orange)
- 1 x Rechargeable Receiver
- 1 x 3.5mm to 6.35mm Receiver Cable
- 1 x Receiver Charging Cable (USB)
- 2 x AA Batteries (for microphones)
- 1 x EVA Storage Case
- 2 x Anti-rolling Rings
- 1 x User Manual
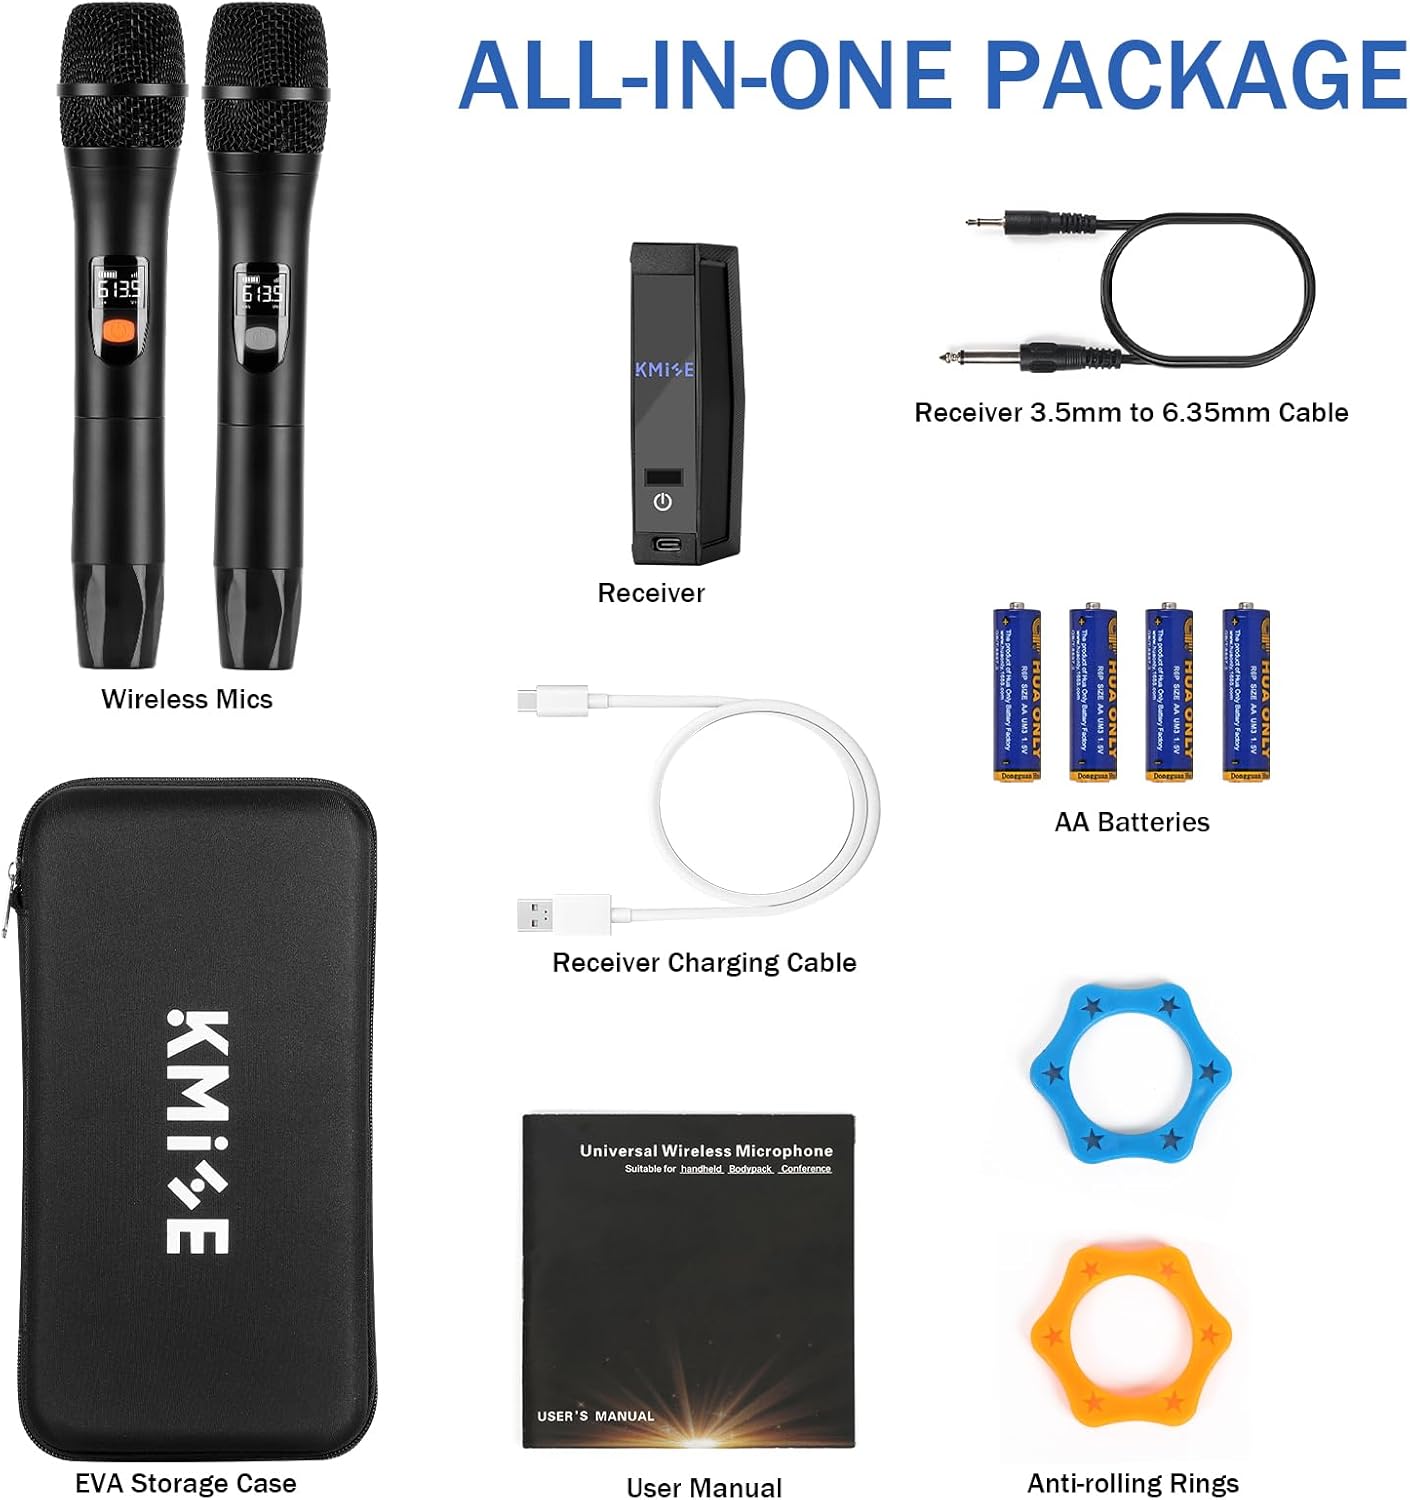
Image: All components included in the Kmise wireless microphone system package, laid out clearly.
Product Overview
Microphone Components

Image: A detailed diagram showing the components of the UHF handheld microphone, including the firm mic head cover, LCD display, power button, SET button for frequency changes, battery compartment for 2*AA batteries, and metal shell.
- Firm Mic Head Cover: Protects the microphone capsule.
- LCD Display: Shows frequency, battery level, and channel information.
- Power Button: Turns the microphone on/off.
- SET Button: Used to change the operating frequency.
- Battery Compartment: Holds 2 AA batteries.
- Metal Shell: Durable construction for impact and corrosion resistance.
Receiver Components

Image: The compact Kmise wireless receiver with its power button and charging port visible.
- Power Button: Turns the receiver on/off.
- Charging Port: USB port for recharging the receiver's internal battery.
- 6.35mm Output Jack: Connects to audio devices.
Setup Instructions
Follow these steps to set up your Kmise wireless microphone system:
- Charge the Receiver: Connect the receiver to a USB power source using the provided charging cable. A full charge takes approximately 3 hours and provides about 5 hours of use.
- Install Microphone Batteries: Open the battery cover of each microphone and insert 2 AA batteries (included), ensuring correct polarity.
- Turn on the Receiver: Press and hold the power button on the receiver until the indicator light illuminates.
- Turn on the Microphones: Press and hold the power button on each microphone. The microphones and receiver will automatically pair.
- Connect to Audio Device: Plug the receiver into the 6.35mm MIC jack of your audio mixer, karaoke machine, PA system, or speaker. If your device has a 3.5mm MIC jack, use the included 3.5mm to 6.35mm adapter cable.

Image: Visual guide demonstrating the three easy steps for setup: 1. Turn on the receiver, 2. Turn on the microphones, 3. Plug the receiver into the speaker's MIC jack.
Important Note: The microphone system is only compatible with devices that have a 6.35mm (1/4'') MIC input jack. It is NOT compatible with XLR, AUX port connections, laptops, or smartphones directly.

Image: A diagram illustrating compatible devices (Active Speaker, Karaoke Machine, Audio Mixer, Power Amplifier, Outdoor Speaker, PA Speaker System) and incompatible devices (smartphone, laptop, TV) for the microphone system.
Operating Instructions
Once set up, your wireless microphone system is ready for use. The system features automatic pairing for convenience.
Frequency Adjustment
The Kmise wireless microphone system offers 2x30 adjustable UHF frequencies to prevent interference. Each microphone (Grey and Orange) operates on a different frequency range:
- MIC (Grey): 520.5 - 549.5 MHz (30 frequencies)
- MIC (Orange): 550.5 - 579.5 MHz (30 frequencies)
If you experience noise or interference, or if using multiple microphone systems simultaneously, you may need to change the operating frequency:
- Open the battery cover of the microphone.
- Locate the round "SET" button inside the battery compartment.
- Press the "SET" button to cycle through the available frequencies.
- Ensure that each microphone is set to a different channel number to avoid interference.

Image: A close-up view of the microphone's internal "SET" button and the LCD display showing frequency changes from 520.9 MHz to 549.9 MHz.
Maintenance
- Cleaning: Use a soft, dry cloth to clean the microphones and receiver. Do not use liquid cleaners or solvents.
- Storage: When not in use, store the system in the provided EVA storage case in a cool, dry place away from direct sunlight and extreme temperatures.
- Battery Care: Remove AA batteries from the microphones if they will not be used for an extended period to prevent leakage. Recharge the receiver regularly to maintain battery health.
- Handling: Avoid dropping the microphones or exposing them to excessive moisture.
Troubleshooting
| Problem | Possible Cause | Solution |
|---|---|---|
| No sound from microphone. |
|
|
| Interference or static noise. |
|
|
| Receiver not charging. |
|
|
Specifications
| Brand | Kmise |
| Model Name | Wireless Microphones (Model 8439) |
| Connectivity Technology | UHF Wireless, 6.35 mm Jack |
| Microphone Frequencies | MIC (Grey): 520.5 - 549.5 MHz (30 frequencies) MIC (Orange): 550.5 - 579.5 MHz (30 frequencies) |
| Operating Range | Up to 200 feet (60 meters) in open space |
| Receiver Battery Life | Approx. 5 hours (after 3 hours charge) |
| Microphone Power Source | 2 x AA Batteries (per microphone) |
| Polar Pattern | Unidirectional (Cardioid) |
| Enclosure Material | Metal, Plastic |
| Item Weight | 0.85 Kilograms (total package) |
| Compatible Devices | Amplifier, Karaoke Machine, PA System, Speaker (with 6.35mm MIC input) |

Image: Dimensions of the microphone (26.5cm/10.5in length) and receiver (10cm/4in length) along with the storage case.
Warranty and Support
This Kmise product comes with a 6-month warranty from the date of purchase. This warranty covers manufacturing defects and malfunctions under normal use.
For technical support, warranty claims, or any questions regarding your product, please contact Kmise customer service through the retailer where you purchased the item or visit the official Kmise website for contact information.
Ask a question about this manual
Ask about setup, troubleshooting, compatibility, parts, safety, or missing instructions. Manuals+ will review the question and use this page’s manual context to help answer it.