1. Introduction
This manual provides comprehensive instructions for the installation, operation, and maintenance of your WXWBFAO 9-inch Android 13 Car Stereo. This unit features a 2.5D 1080P HD touchscreen, 4GB RAM, 64GB ROM, a quad-core CPU, and supports various functionalities including offline/online GPS navigation, Wi-Fi connectivity, RDS/FM radio, dual USB ports, 36-band EQ, wireless CarPlay, Android Auto, and steering wheel control. It is specifically designed for compatibility with Toyota Matrix (2003-2004) and Pontiac Vibe (2003-2008) vehicles.
Please read this manual thoroughly before installation and operation to ensure proper usage and to maximize your experience with the product.
2. Vehicle Compatibility
This car stereo is compatible with specific models of Toyota Matrix and Pontiac Vibe. Ensure your vehicle matches the specified years for proper fitment and functionality.
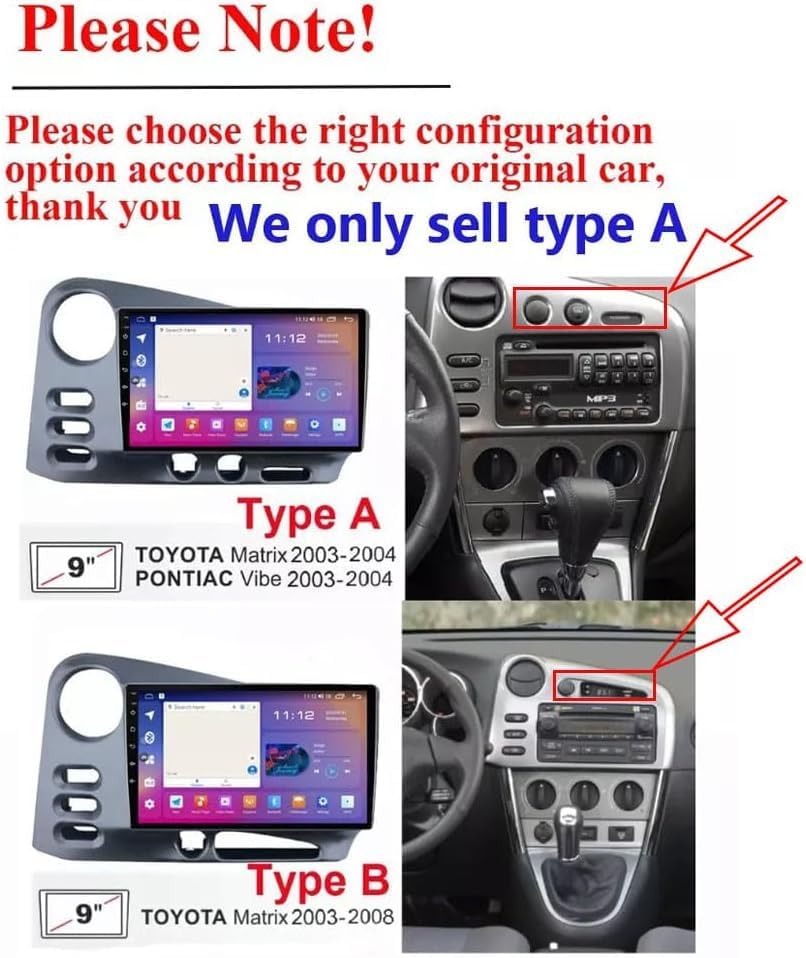
Note: If your vehicle has JBL speakers, please contact customer support for specific guidance regarding installation and wiring.
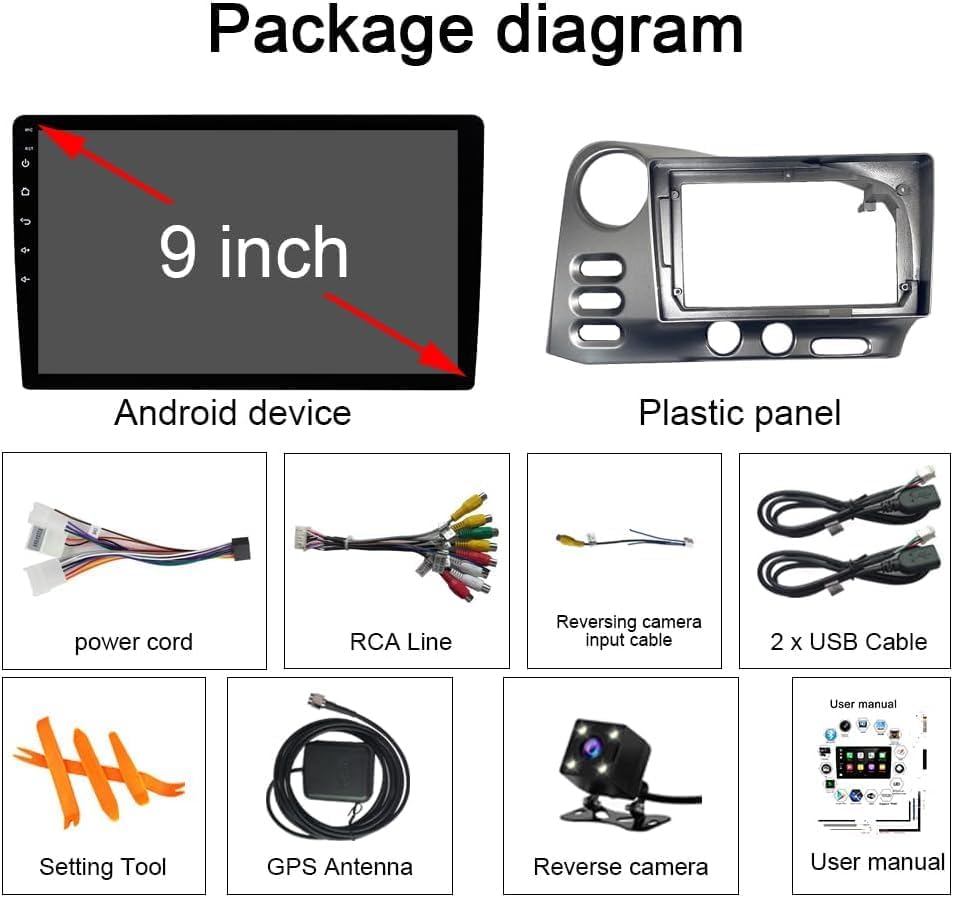
3. Package Contents
Verify that all items listed below are included in your package:
- 1x Car In-Dash GPS Navigation Unit (9-inch Android 13 Car Stereo)
- 1x Mounting Bezel
- 1x Wiring Harness Kit
- 1x Reversing Camera Input Cable
- 2x USB Cables
- 1x Setting Tool
- 1x GPS Antenna
- 1x Reverse Camera
- 1x User Manual
4. Setup and Installation
Professional installation is recommended. Ensure the vehicle's power is disconnected before beginning installation.
4.1. Wiring Connections
Connect the wiring harness kit to your vehicle's existing wiring. Refer to your vehicle's specific wiring diagram if necessary. Ensure all connections are secure.
4.2. GPS Antenna Installation
Connect the GPS antenna to the unit and place it in a location with a clear view of the sky, typically on the dashboard or under the windshield, away from metal obstructions.
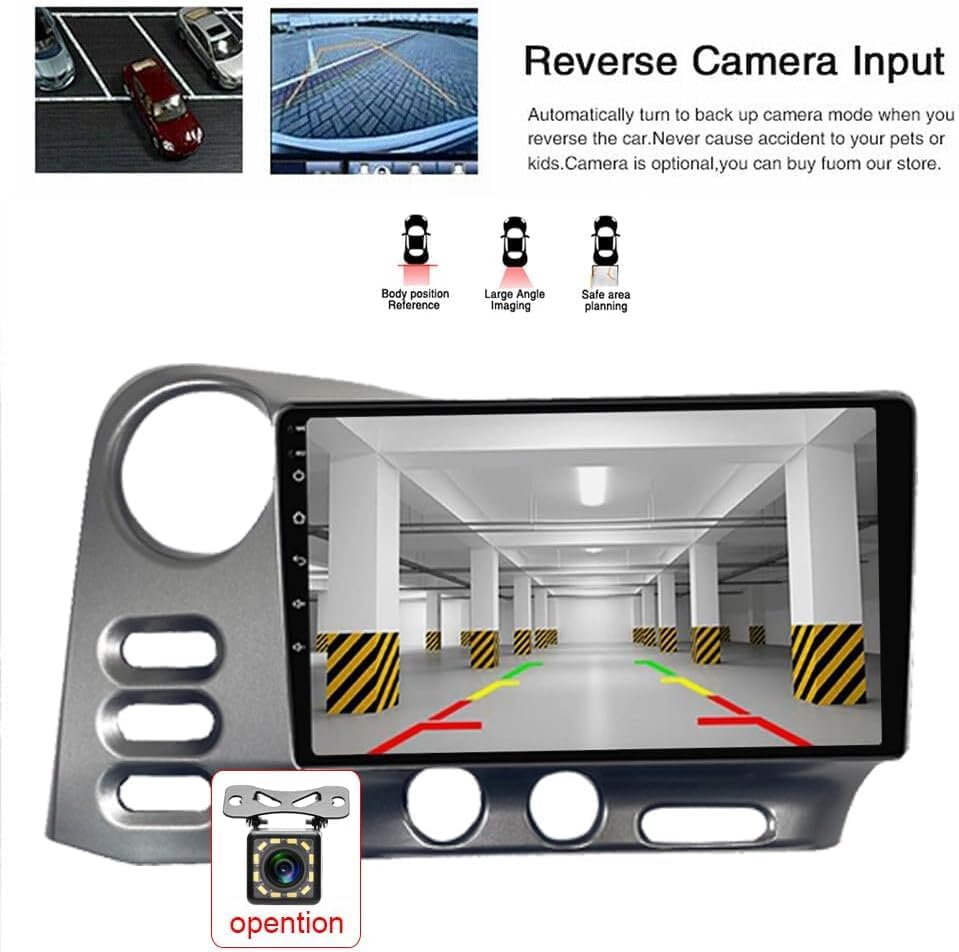
4.3. Reverse Camera Installation
Install the reverse camera at the rear of your vehicle, ensuring it has a clear view. Connect the camera's video output to the reversing camera input cable on the stereo unit. Connect the camera's power to the vehicle's reverse light circuit so it activates when the vehicle is in reverse.
4.4. Initial Power On and Basic Settings
After installation, power on the unit. You may need to set the date and time. Navigate to the settings menu to configure basic preferences.
5. Operating Instructions
5.1. Wireless CarPlay and Android Auto
The unit supports both wireless CarPlay and wired Android Auto. This allows for seamless integration with your smartphone, providing access to navigation, calls, messages, and music directly on the car stereo display.

To connect:
- Ensure your phone's Bluetooth is enabled.
- On the car stereo, go to the Bluetooth settings and pair with your phone. The default PIN is 0000.
- Once Bluetooth is connected, open the 'ZLINK' application on the car stereo.
- Follow the on-screen prompts to establish the CarPlay or Android Auto connection.
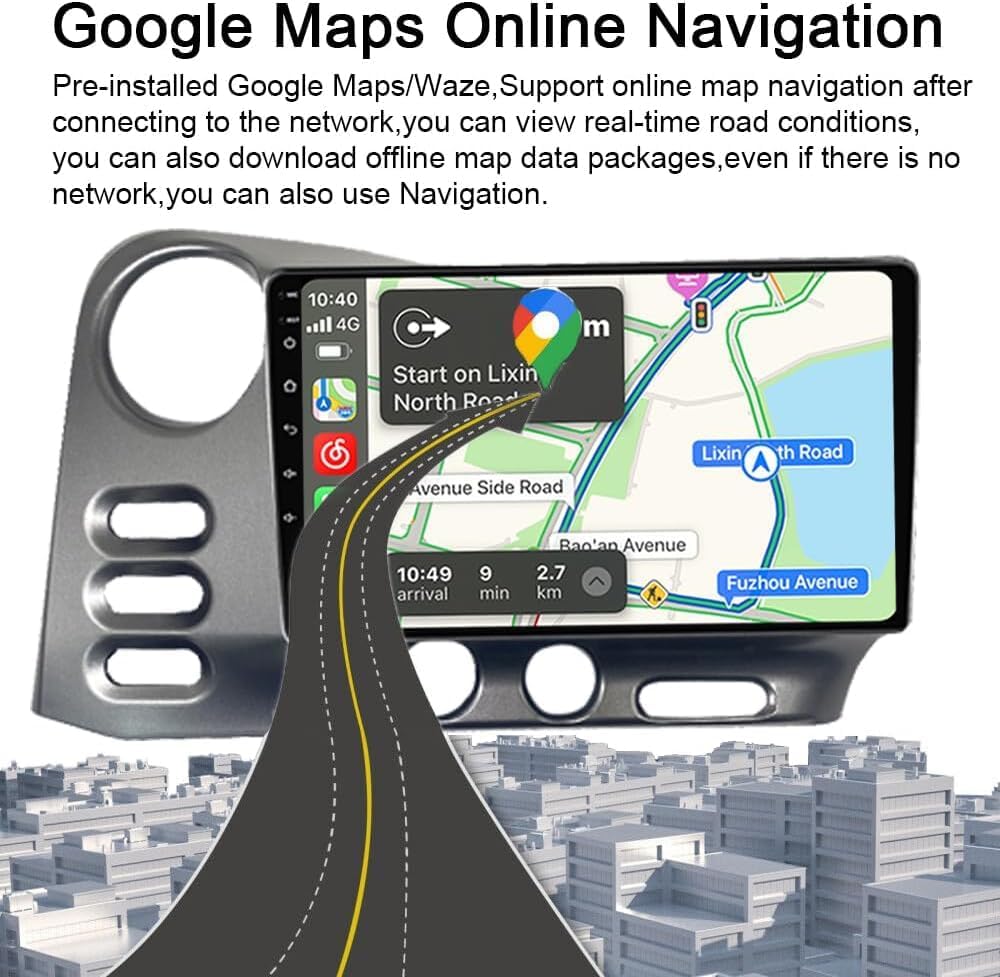
5.2. GPS Navigation
The unit comes with a built-in offline map of North America. Online navigation is also supported when connected to Wi-Fi, allowing for real-time traffic conditions and map updates.
5.3. FM/RDS Radio
The integrated radio chip supports FM radio with RDS (Radio Data System). You can automatically or semi-automatically search for radio stations and save your favorites.

5.4. Digital Sound Processor (DSP)
The built-in DSP allows for precise control over sound frequencies, offering a customizable audio experience. Adjust the 36-band EQ to suit your preferences (jazz, rock, pop, classic, etc.) and control individual speaker volumes.

5.5. Steering Wheel Control (SWC)
The unit supports steering wheel controls. After connecting the SWC wire, you can program the original steering wheel buttons to control various functions of the car stereo.

5.6. Bluetooth Connectivity
Answer/make calls hands-free using the built-in microphone and your car speakers. The unit also supports music streaming via Bluetooth.
5.7. Wi-Fi Connectivity
Connect to Wi-Fi to access online maps, download apps, stream music or videos, and browse the internet.
5.8. User Interface and Themes
The Android system offers a customizable user interface with various desktop themes and wallpapers to personalize your experience.
6. Specifications
| Feature | Detail |
|---|---|
| Model Name | 4GB RAM+64GB ROM |
| Brand | WXWBFAO |
| Operating System | Android 13 |
| Display Size | 9 Inches |
| Display Resolution | 1080P HD |
| RAM | 4GB |
| ROM | 64GB |
| CPU | Quad Core |
| Connectivity Technology | Bluetooth, USB, Wi-Fi |
| Special Features | Bluetooth, Touchscreen, Wireless CarPlay, Android Auto, GPS Navigation, RDS/FM Radio, 36-band EQ |
| Audio Output Mode | Stereo |
| Mounting Type | Dashboard Mount |
| Item Weight | 3.72 pounds |
| Package Dimensions | 14.8 x 10.04 x 5.67 inches |
7. Troubleshooting
If you encounter issues with your car stereo, refer to the following common solutions:
- Bluetooth Connection Failure: Ensure Bluetooth is enabled on both the stereo and your phone. Verify the correct PIN (0000) is entered. If issues persist, restart Bluetooth on both devices.
- Wi-Fi Connection Issues: Check that your phone's hotspot is active and visible. Ensure the correct Wi-Fi password is entered. If the connection is unsuccessful, manually connect to the vehicle's Wi-Fi hotspot, delete any previous history records, and then re-attempt ZLINK connection.
- Slow Performance: Close unused applications. Clear cache and temporary files from the system settings.
- No Sound: Check volume levels on both the stereo and your connected device. Verify speaker wiring connections.
- Steering Wheel Controls Not Responding: Ensure the SWC wire is correctly connected. Re-enter the 'Steering Learn' interface in settings and recalibrate the buttons.
For further assistance, please contact WXWBFAO customer support.
8. Warranty and Support
This WXWBFAO car stereo comes with a 90-day warranty. For warranty claims, technical support, or any questions regarding your product, please refer to the contact information provided with your purchase or visit the official WXWBFAO support website.