Important Safety Information
Always follow the assembly instructions carefully. Keep firearms unloaded and pointed in a safe direction when handling. Store firearms and ammunition separately. Always keep the cabinet locked when not in use. Do not attempt to force open the cabinet. Keep the cabinet away from heat sources and direct sunlight. Always wear appropriate safety gear when handling firearms.
Package Contents
Verify that all components are present before beginning installation:
- 1 x Emasme BN-B3-5D Digital Gun Safe
- 1 x Instruction Manual
- 2 x Emergency Keys (for main safe)
- 2 x Keys (for internal lock cabinet)
- 5 x Expansion Screws (for mounting)
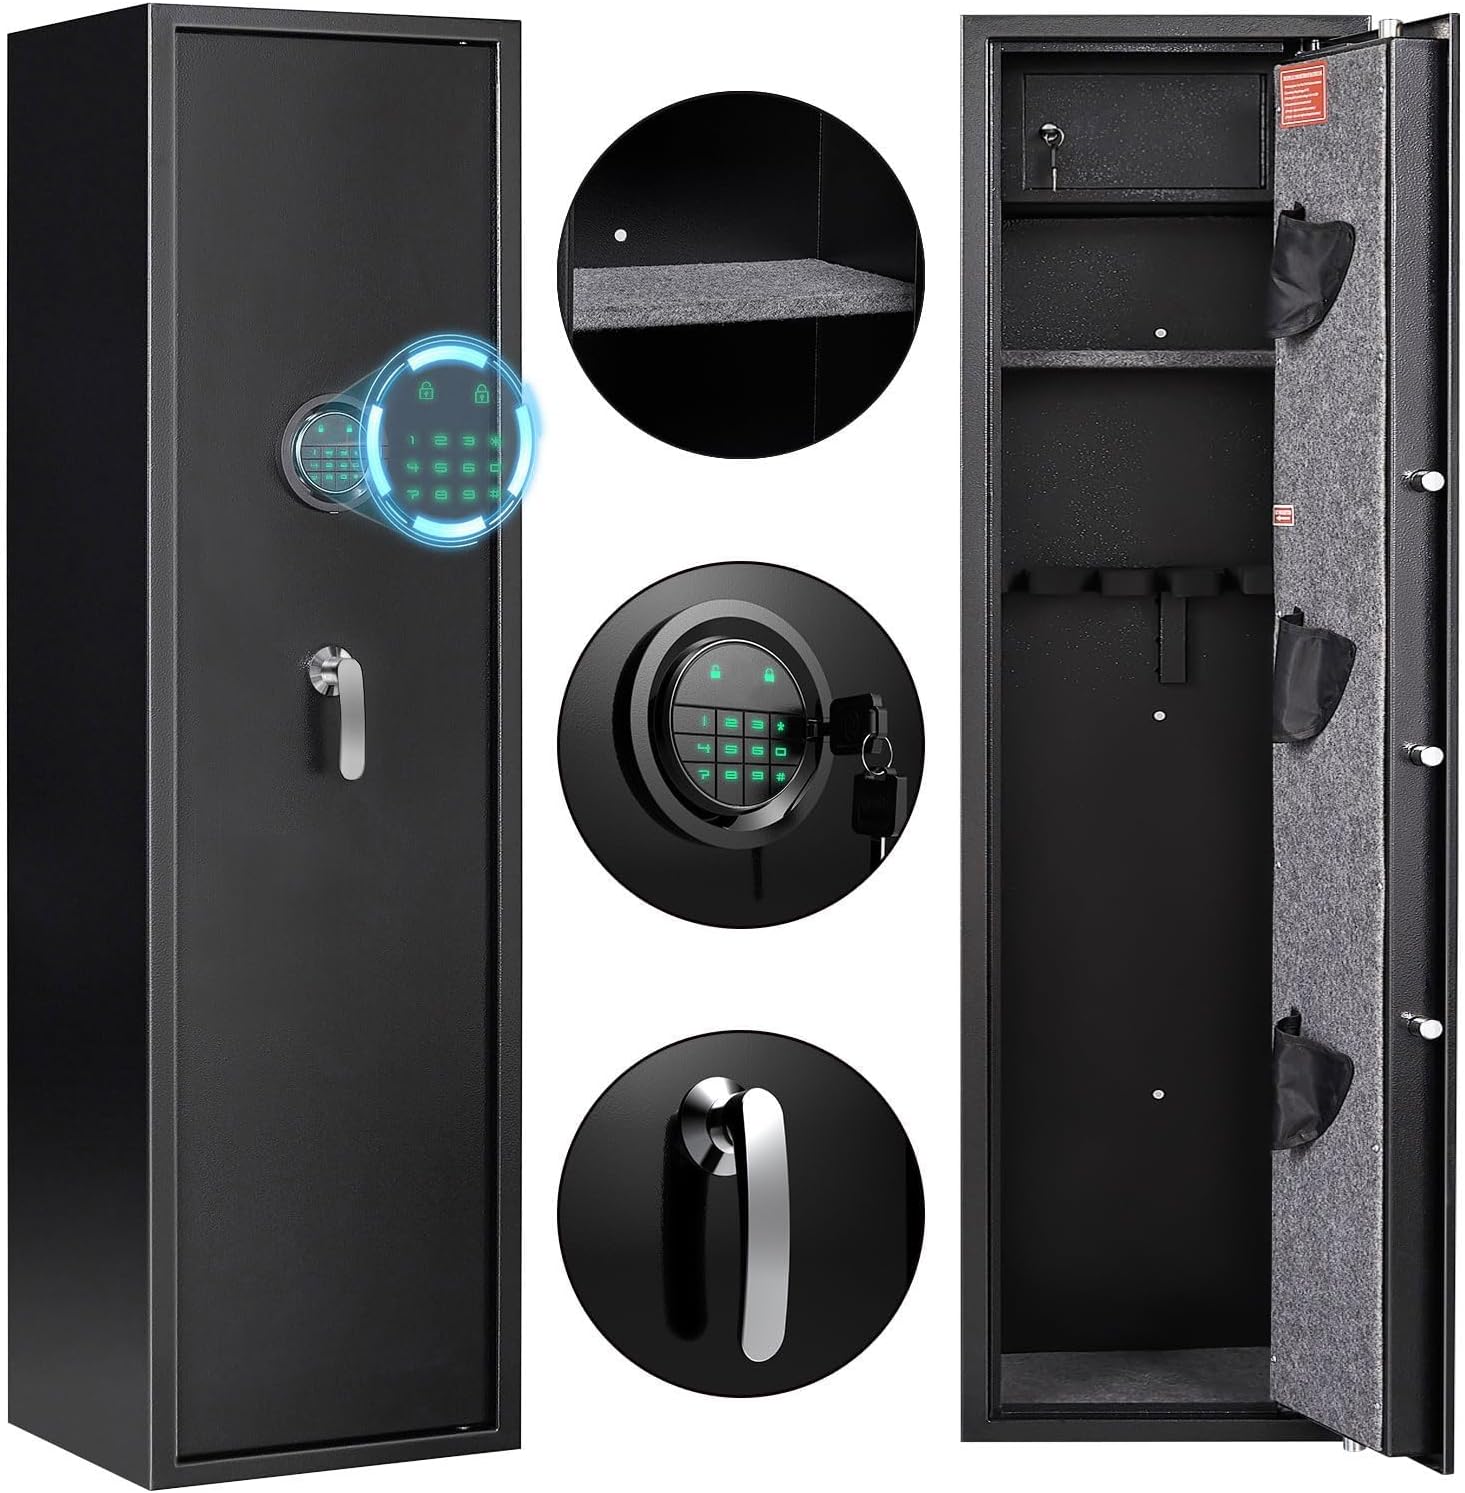
Image: The Emasme BN-B3-5D Digital Gun Safe, showing its exterior, digital keypad, and interior layout with shelves and gun racks.
Setup Instructions
1. Unpacking and Initial Inspection
Carefully remove the gun safe from its packaging. The main cabinet structure comes pre-assembled. Inspect the safe for any signs of damage. Report any damage to the retailer immediately.

Image: The Emasme gun safe positioned in a room, emphasizing its ready-to-use, pre-assembled cabinet design.
2. Battery Installation
The digital keypad requires batteries for operation. Locate the battery compartment, typically on the inside of the door or behind the keypad. Insert the required batteries (e.g., AA batteries, not included) according to the polarity markings. Close the compartment securely.
3. Initial Access (Emergency Key)
Before setting up the digital code, use the emergency key to open the safe. This allows access to the battery compartment and the internal lock box keys.
- Locate the emergency keyhole, usually concealed behind a cover on the keypad.
- Insert one of the emergency keys and turn it to unlock the safe.
- Turn the handle to open the door.
- Store emergency keys in a secure location outside the safe.

Image: Close-up of the digital keypad, showing the emergency key slot and the three unlocking methods.
4. Mounting the Safe (Optional but Recommended)
For enhanced security, it is highly recommended to mount the safe to a wall or floor using the provided expansion screws. The safe features pre-drilled holes for this purpose.

Image: Visual guide for wall and floor mounting, detailing the pre-drilled holes and the three-step installation process.
- Position the safe in the desired location.
- Mark the positions of the pre-drilled holes on the wall or floor.
- Drill pilot holes using an appropriate drill bit.
- Align the safe and secure it using the expansion screws.
Operating Instructions
1. Setting Your Digital Passcode
With the safe door open, locate the reset button (usually on the inside of the door near the hinge or battery compartment). Press the reset button, then enter your desired passcode (4-8 digits) on the keypad, followed by the '#' key. Test the new code with the door open before closing it.

Image: The three methods to unlock the safe: using an emergency key, a digital password, or a USB Type-C power source combined with a password.
2. Unlocking the Safe
- Digital Passcode: Enter your programmed passcode followed by '#'. The indicator light will confirm, then turn the handle to open.
- Emergency Key: Insert the emergency key into the keyhole, turn it, then turn the handle.
- USB Type-C Power (if batteries are depleted): Connect a USB Type-C power source to the port on the keypad. Once powered, enter your digital passcode followed by '#', then turn the handle.

Image: Detailed view of the backlit keypad, ensuring visibility in dark environments.
3. Internal Lock Box
The safe includes a separate internal lock box for smaller valuables. Use the dedicated keys provided to access this compartment.

Image: The internal lock box, designed for securing smaller items, shown with its key.
4. Internal LED Lighting
The safe is equipped with internal LED lights (one on top, one on the side) to illuminate the interior. These lights typically activate when the door is opened.

Image: The interior of the safe, brightly lit by the dual LED lights, showcasing stored firearms.
5. Dual Alarm System
The safe features a dual alarm system for enhanced security:
- Incorrect Passcode Alarm: If three consecutive incorrect passcode attempts are made, the safe will trigger an alarm.
- Vibration Alarm: If the safe detects violent blows or shaking, an inductive alarm will sound (exceeding 70 dB).

Image: Visual representation of the safe's dual alarm system, showing scenarios for vibration and incorrect password alarms.
Maintenance
- Battery Replacement: Replace batteries annually or when the low battery indicator appears. Use high-quality alkaline batteries.
- Cleaning: Wipe the exterior with a soft, damp cloth. Avoid abrasive cleaners.
- Key Storage: Always store emergency keys and internal lock box keys in a secure location away from the safe and out of reach of unauthorized individuals.
Troubleshooting
- Safe will not open with passcode:
- Ensure batteries are fresh and correctly installed.
- Try using the USB Type-C power interface if batteries are suspected to be dead.
- Verify the passcode is entered correctly.
- Use the emergency key as an override.
- Alarm sounds unexpectedly:
- Check for physical impacts or vibrations that might have triggered the vibration alarm.
- Ensure no one has attempted to enter an incorrect passcode multiple times.
- Keypad unresponsive:
- Replace batteries.
- Connect external USB Type-C power.
Specifications
| Brand | Emasme |
| Model Number | BN-B3-5D |
| Product Dimensions (External) | 13.78"D x 11.81"W x 57.09"H |
| Capacity | 6-8 Rifles/Shotguns (up to 49 inches) |
| Material | Alloy Steel |
| Special Features | Digital Keypad, Emergency Key Access, USB Type-C Power Interface, Dual Alarm System, Internal LED Lights, Removable Shelves, Internal Lock Box |
| Mounting Type | Freestanding, Wall & Floor Mountable (pre-drilled holes) |
| Item Weight | 60.4 Pounds |
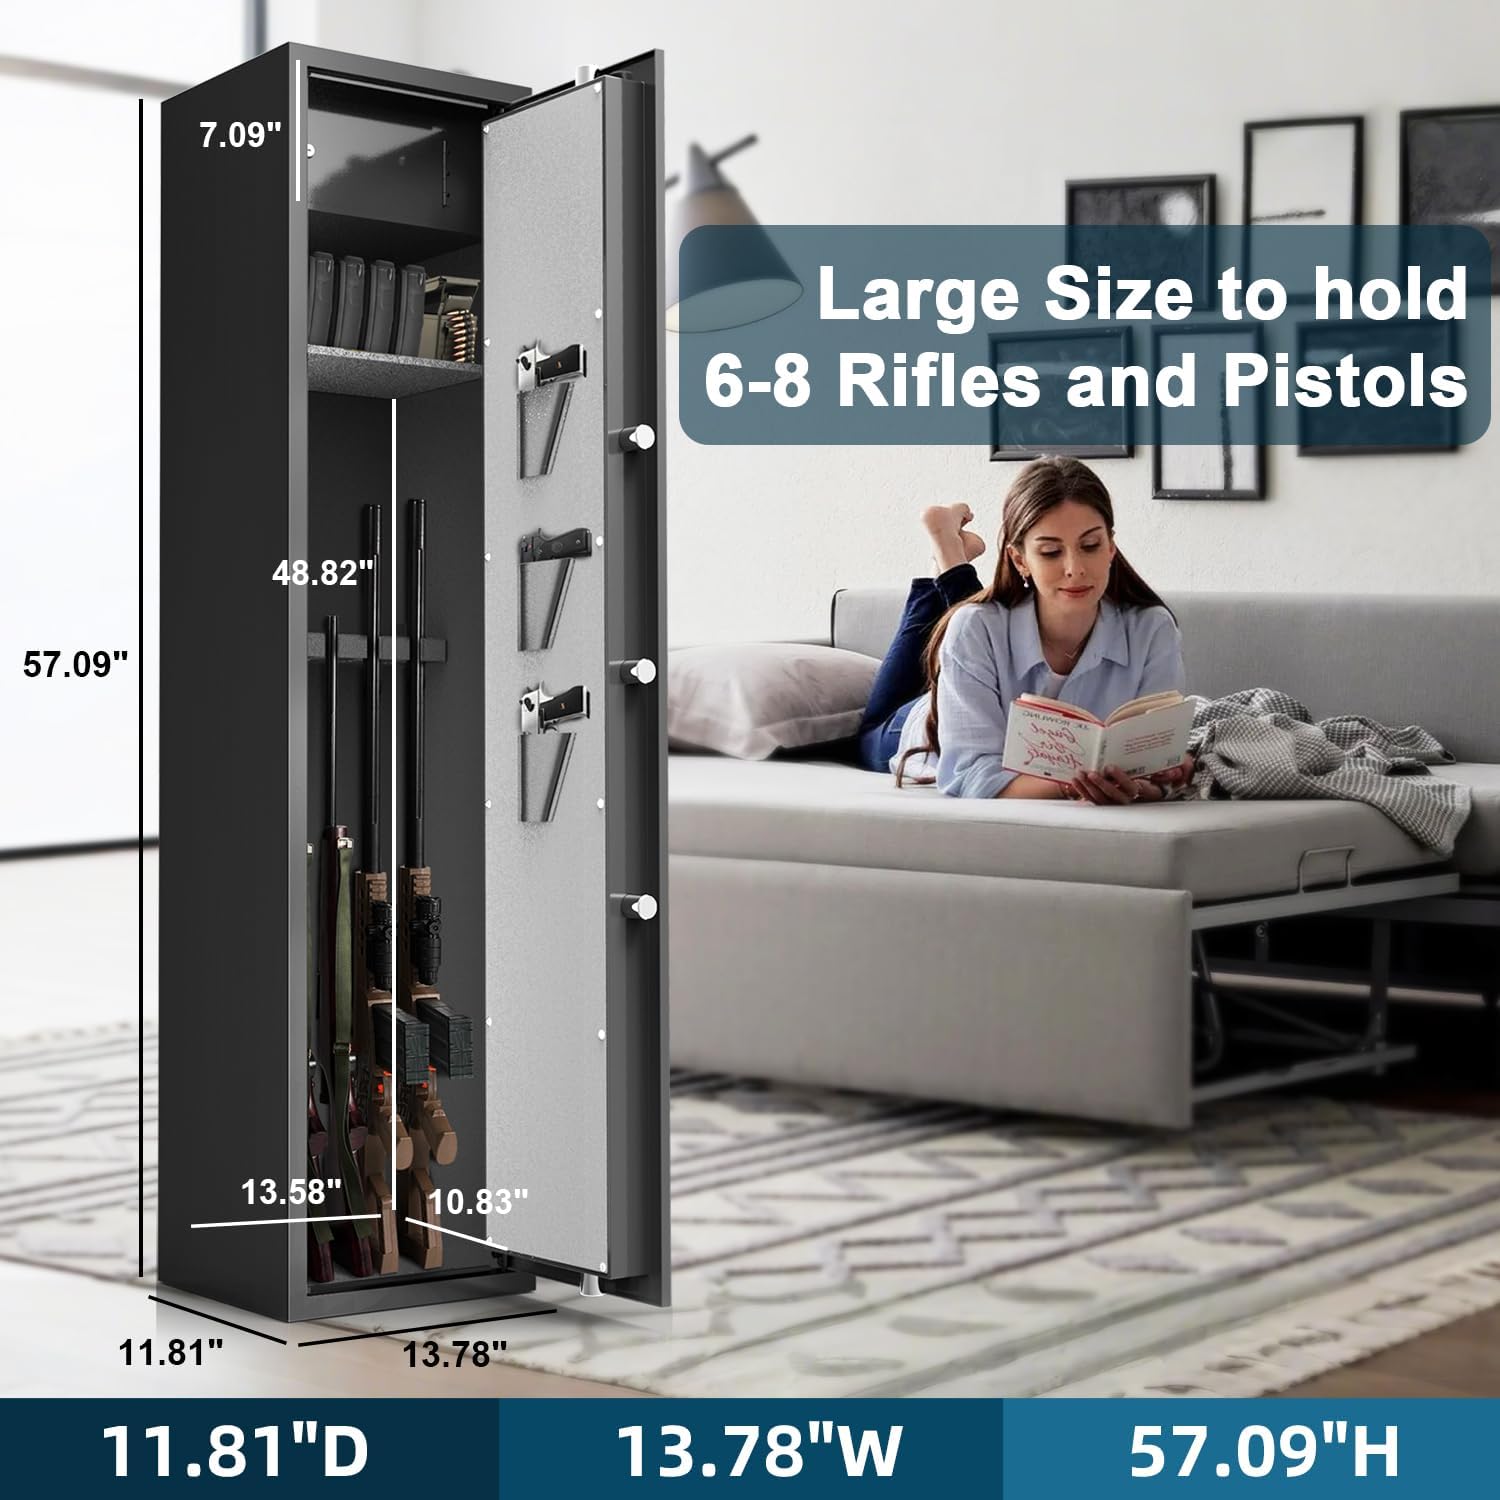
Image: The gun safe with key dimensions labeled, illustrating its capacity for multiple rifles and pistols.
Warranty Information
This product comes with a 30-day warranty from the date of purchase. Please retain your proof of purchase for any warranty claims. The warranty covers manufacturing defects under normal use. It does not cover damage resulting from misuse, unauthorized modification, or improper installation.
Customer Support
For further assistance, technical support, or to inquire about replacement parts, please contact Emasme customer service. Refer to your purchase documentation for contact details or visit the official Emasme website.