Introduction
Thank you for choosing the Hoestr A32 Body Camera. This compact and versatile device is designed for various recording needs, from personal security to outdoor sports and professional use. Featuring a 180° rotatable lens, motion detection, and high-definition video recording, the A32 ensures you capture every important moment. Please read this manual carefully to understand the camera's functions and ensure proper operation.

Figure 1: Hoestr A32 Body Camera and 64GB TF Card
What's in the Box
- 1 x Hoestr A32 Body Camera
- 1 x 64GB TF Card (pre-installed or separate)
- 1 x USB-C Cable
- 1 x User Manual
Product Overview
Familiarize yourself with the various components and controls of your A32 Body Camera.

Figure 2: A32 Body Camera Components and Controls
- Camera (180° Rotatable Lens): Captures video and photos. Can be rotated for various angles.
- Lanyard Hole: For attaching a wrist strap or lanyard.
- Record/Save Video Button: Slide up to start/stop video recording.
- Power On/Off; Play Button: Long press to power on/off. Short press to play/pause in playback mode.
- Pre Button: Navigation button for menu and playback.
- Next Button: Navigation button for menu and playback. Also used to mark/protect files during recording.
- Vol+ / Vol- Buttons: Adjust volume during playback.
- Record/Save Audio Button: Slide up to start/stop audio recording.
- Reset Hole: For factory reset (use a pin).
- Menu Button: Access camera settings and options.
- Return Button: Go back in menu or exit playback.
- Micro SD Slot: For inserting the TF (Micro SD) card. Supports up to 128GB (FAT32 format).
- USB Type-C Port: For charging and data transfer.

Figure 3: 180° Rotatable Lens Design
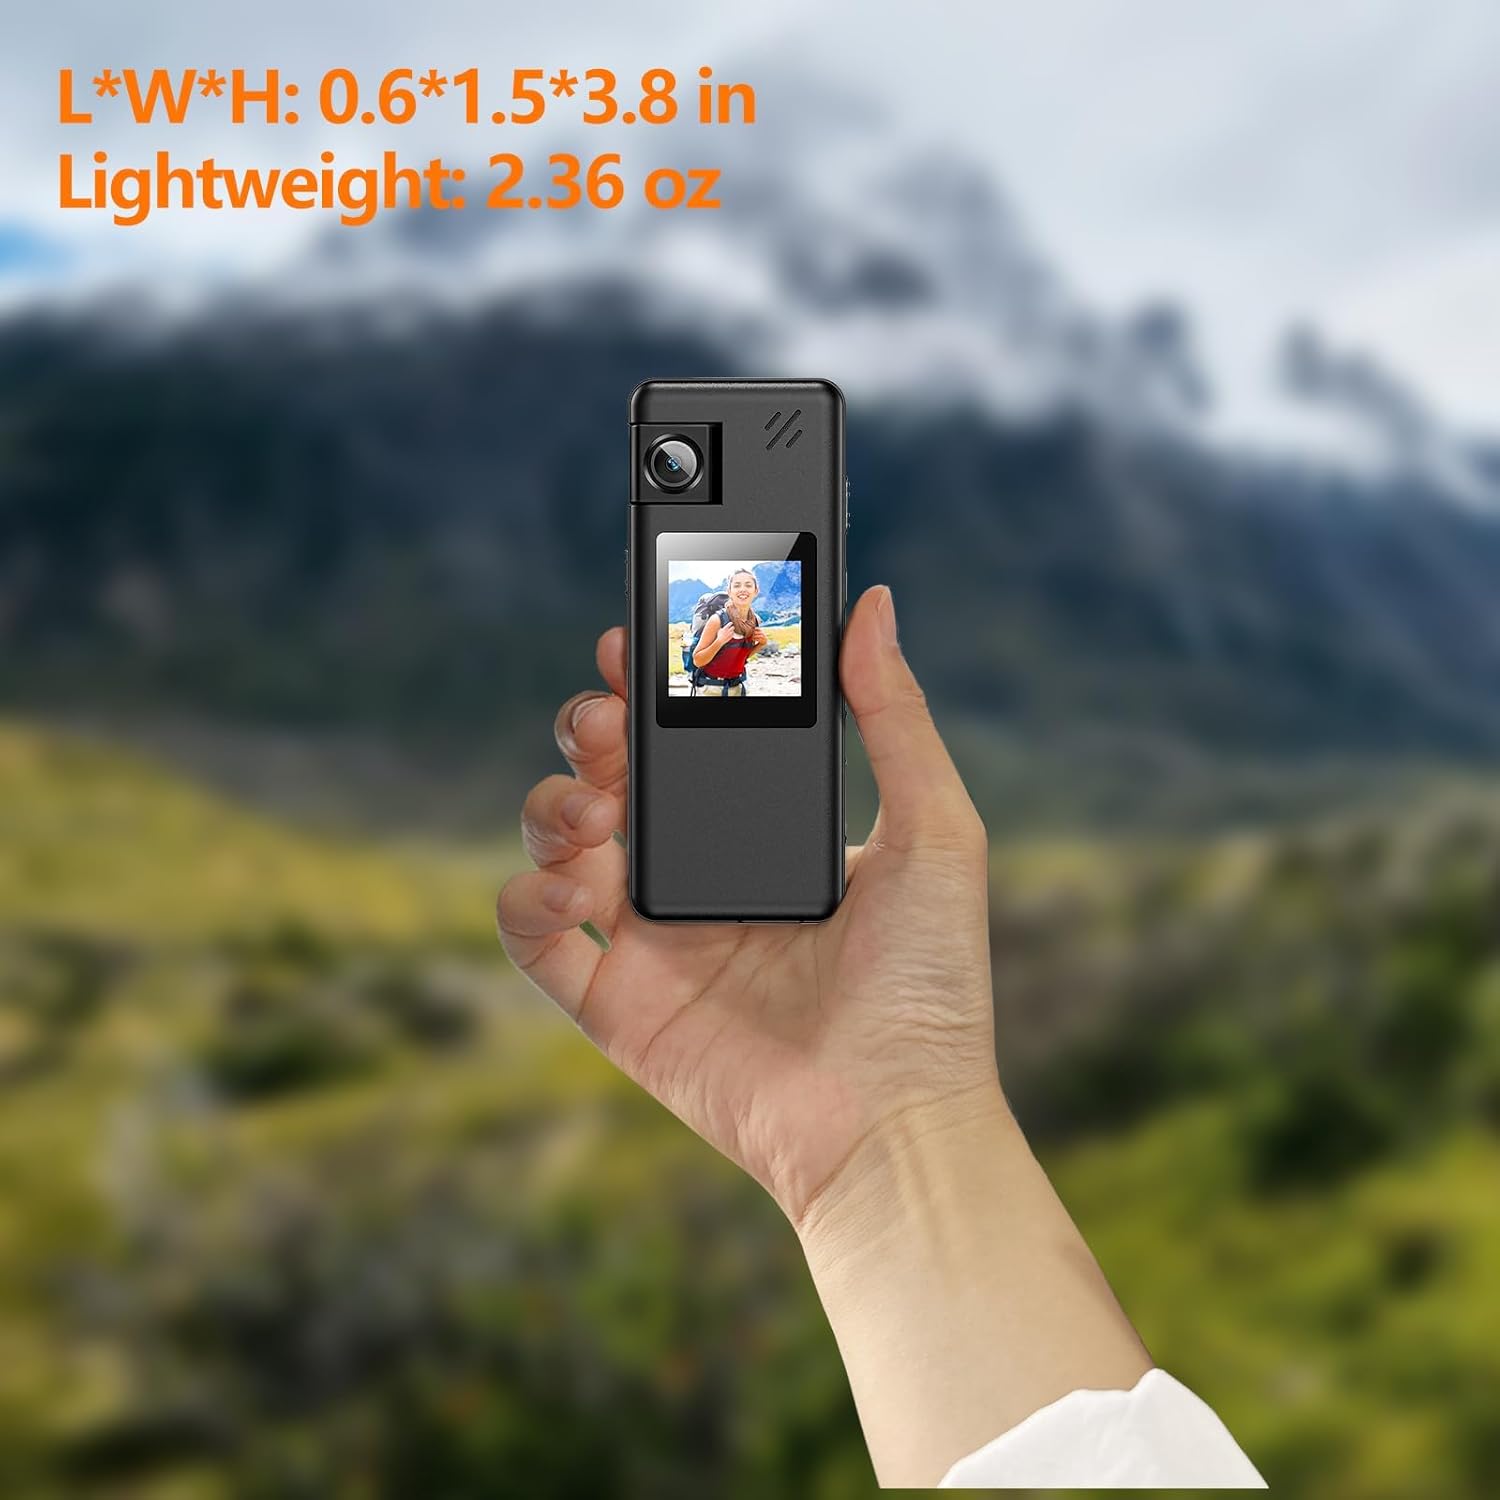
Figure 4: Compact Size and Lightweight Design
Setup
1. Inserting the TF Card
The A32 Body Camera comes with a 64GB TF card. Ensure it is properly inserted before use.
- Locate the Micro SD slot on the side of the camera.
- Gently push the TF card into the slot until it clicks into place. Ensure the gold contacts are facing the correct direction (usually towards the screen).
- To remove, push the card in again until it clicks, then release, and it will spring out.

Figure 5: Quick Operation Help - Step 1: Insert TF Card
2. Charging the Battery
The camera has a built-in 1800mAh rechargeable lithium battery. Fully charge the camera before first use.
- Connect the provided USB-C cable to the camera's USB Type-C port.
- Connect the other end of the cable to a USB power adapter (not included) or a computer's USB port.
- The charging indicator light will show the charging status. A full charge typically takes about 3 hours.

Figure 6: Battery Information and Charging
Operating Instructions
1. Power On/Off
- Power On: Long press the 'Power On/Off; Play' button until the screen lights up.
- Power Off: Long press the 'Power On/Off; Play' button until the screen turns off.
2. Video Recording
- Slide the 'Record/Save Video' button upwards to start video recording. The recording indicator will flash.
- Slide the 'Record/Save Video' button downwards to stop and save the video.
- During recording, you can press the 'Next' button to mark and protect important files from accidental deletion.

Figure 7: One-Touch Recording
3. Audio Recording
- Slide the 'Record/Save Audio' button upwards to start audio recording.
- Slide the 'Record/Save Audio' button downwards to stop and save the audio file.
4. Photo Capture
- From the main interface, press the 'Menu' button to switch to photo mode.
- Press the 'Play' button to take a snapshot.
5. Playback
- In standby mode, short press the 'Power On/Off; Play' button to enter playback mode.
- Use the 'Pre' and 'Next' buttons to navigate through recorded files.
- Press the 'Power On/Off; Play' button to play/pause the selected file.
- Use 'Vol+' and 'Vol-' buttons to adjust playback volume.
- Press the 'Return' button to exit playback mode.
6. Motion Detection
Activate motion detection in the camera settings. When enabled, the camera will automatically start recording when motion is detected.
7. Loop Recording
The camera supports loop recording, automatically saving files every 10 minutes to prevent loss due to excessively large files. When the memory card is full, the oldest files will be overwritten by new recordings.
8. File Management (Connecting to Computer)
You can manage your recorded files by connecting the camera to a computer.
- Connect the camera to your Windows/Mac computer using the provided USB-C cable.
- The camera will appear as a removable disk.
- You can view, play, delete, or rename video, audio, and photo files directly on your computer.
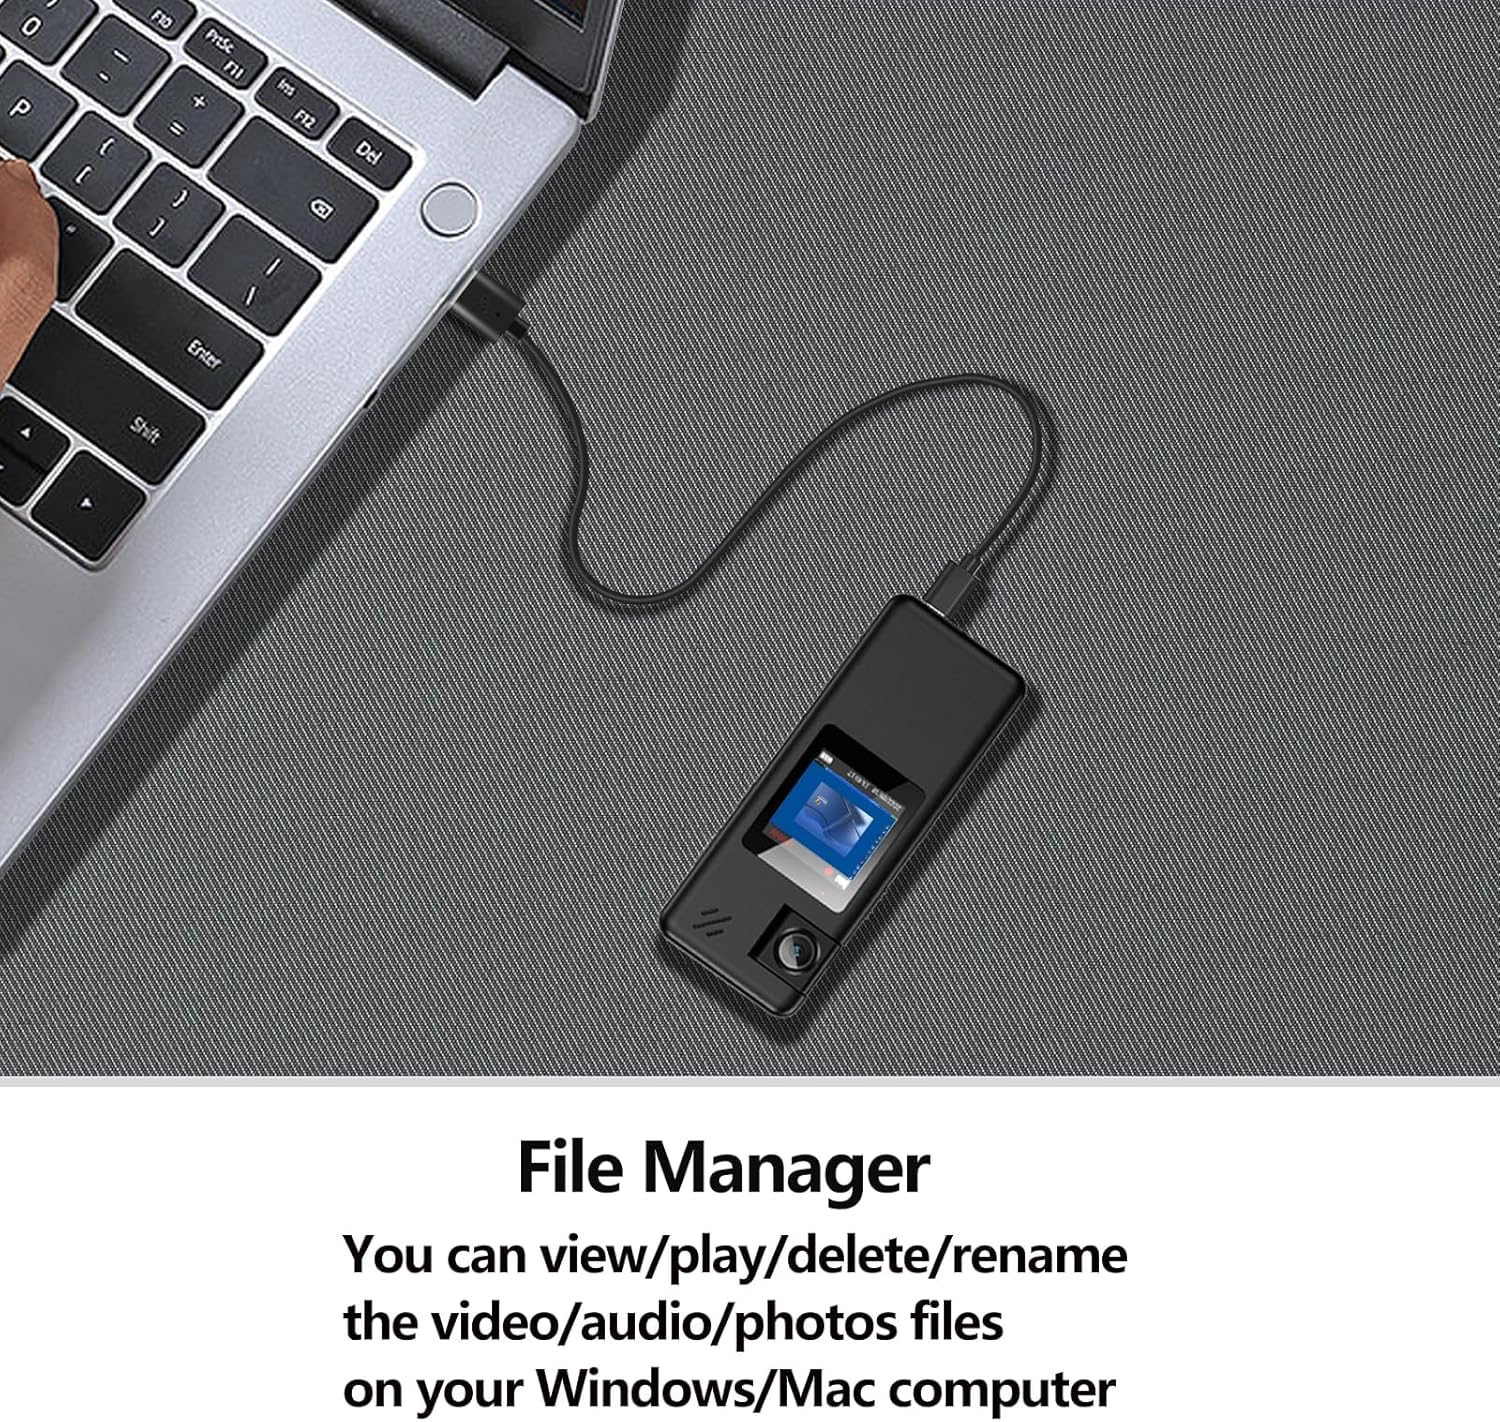
Figure 8: Connecting to Computer for File Management
9. Official Product Video Demonstration
Watch the official product video for a visual guide on the A32 Body Camera's features and operation.
Video 1: A32 128GB Body Camera Demonstration. This video showcases the camera's design, rotatable lens, ease of use, and various recording capabilities.
Maintenance
- Keep the camera clean. Use a soft, dry cloth to wipe the lens and body.
- Avoid exposing the camera to extreme temperatures, direct sunlight, or high humidity.
- Do not disassemble the camera, as this will void the warranty.
- Store the camera in a cool, dry place when not in use.
Troubleshooting
| Problem | Possible Cause | Solution |
|---|---|---|
| Camera does not power on. | Low battery; System crash. | Charge the camera fully. Insert a pin into the reset hole to restart the device. |
| Cannot record video/audio. | TF card full; TF card not inserted or faulty; Incorrect mode. | Delete old files or replace TF card. Ensure TF card is properly inserted. Check recording mode. |
| Poor video/audio quality. | Lens dirty; Low light conditions; Microphone obstructed. | Clean the lens. Ensure adequate lighting. Check microphone for obstructions. |
| Camera freezes. | Software issue. | Insert a pin into the reset hole to restart the device. |
Specifications
| Feature | Detail |
|---|---|
| Model | A32 |
| Video Capture Resolution | 1080FHD/1080P/720P |
| Lens Rotation | 180° |
| Wide Angle | Approximately 130° |
| Display Screen | 1.3-inch LCD |
| Battery Capacity | 1800mAh Lithium Ion |
| Video Recording Time | 8-10 hours (screen off) |
| Audio Recording Time | 14 hours (screen off) |
| Charging Time | Approx. 3 hours |
| Storage | Supports Micro SD (TF) card up to 128GB (FAT32 format) |
| Dimensions (L*W*H) | 3.8 x 0.6 x 1.5 inches |
| Weight | 2.36 ounces |
| Connectivity | USB Type-C |
| Video Capture Format | MOV |
| Supported Audio Format | MP3, WAV |
Warranty and Support
Hoestr provides a 2-year warranty from the date of purchase. If you encounter any non-human quality problems with your product within this period, please contact our after-sales team through the backend channel. We are committed to providing a money-back or new product replacement within 24 hours on working days.
For further assistance or inquiries, please refer to the contact information provided with your purchase or visit the official Hoestr store on Amazon.
Hoestr Store Link: Visit the Hoestr Store