1. Introduction
The CRIDENG A3006 Pen Test Multimeter is a versatile 2-in-1 tool combining a digital multimeter and a non-contact voltage tester. It features an automatic range function, a 4000-count LCD display, and capabilities for measuring AC/DC voltage, resistance, capacitance, and frequency. This manual provides detailed instructions for safe and effective use of the device.
2. Package Contents
Verify that all items listed below are present in your package:
- 1 x CRIDENG A3006 Pen Multimeter
- 1 x Test Leads
- 1 x Instruction Manual

Image: The CRIDENG A3006 Pen Test Multimeter shown with its included test leads and removable pen tip.
3. Product Overview
Familiarize yourself with the components of your CRIDENG A3006 Pen Test Multimeter:
- Humanized Pen Holder: For convenient carrying and storage.
- LCD Screen Display: Shows measurement readings and function indicators.
- LED Prompt Light: Indicates live wire detection and NCV alerts.
- Flashlight Lamp: Provides illumination in dim environments.
- Positive Watch Pen/Removable Replacement Nib: The primary test probe.
- COM Negative Meter Pen Jack: Connection point for the negative test lead.
- Buttons: Power/Function Toggle, Data Hold/Flashlight, NCV Sensing/Zero Firewire.

Image: Labeled diagram highlighting the key components of the CRIDENG A3006 Pen Test Multimeter, including the LCD screen, buttons, and pen holder.

Image: Technical drawing showing the dimensions of the CRIDENG A3006 Pen Test Multimeter: 190mm (7.48 inches) length, 28.7mm (1.12 inches) width, and 27.7mm (1 inch) thickness.
4. Setup
4.1 Battery Installation
The multimeter requires two AAA (No. 7) batteries for operation. To install or replace batteries:
- Locate the battery compartment cover on the back of the device.
- Open the cover.
- Insert two AAA batteries, ensuring correct polarity (+/-).
- Close the battery compartment cover securely.
4.2 Connecting Test Leads
For measurements requiring test leads:
- Insert the black test lead into the COM (negative) jack at the bottom of the multimeter.
- Insert the red test lead into the positive jack (usually the removable pen tip).
5. Operating Instructions
5.1 Power On/Off and Function Selection
- Power On/Off: Long press the On/Off button.
- Toggle Function: Single press the On/Off button to cycle through measurement modes (e.g., Voltage, Resistance, Capacitance).
5.2 Data Hold and Flashlight
- Data Hold: Single press the HOLD button to freeze the current reading on the display. Press again to release.
- Flashlight: Long press the HOLD button to turn the flashlight on or off.
5.3 Measurement Functions
The A3006 features automatic ranging, simplifying measurements.
- AC/DC Voltage Measurement: Select the voltage mode. Connect the test leads in parallel to the circuit or component. The device will automatically detect AC or DC voltage.
- Resistance Measurement: Select resistance mode. Ensure the circuit is de-energized. Connect test leads across the component to measure resistance.
- Capacitance Measurement: Select capacitance mode. Ensure the capacitor is discharged before connecting test leads.
- Frequency Measurement: Select frequency mode. Connect test leads to the signal source.
- Diode Test: Select diode mode. Connect test leads across the diode to check its forward voltage drop.
- Continuity Test (On-off buzzer): Select continuity mode. Touch the test leads to the points to be tested. A buzzer will sound if continuity exists (low resistance).
5.4 Special Features
- Neutral and Live Wire Identification: Single press the N/L button. Insert the test pen into a socket hole. A red indicator light will flash and a buzzer will alarm if it detects a live wire.
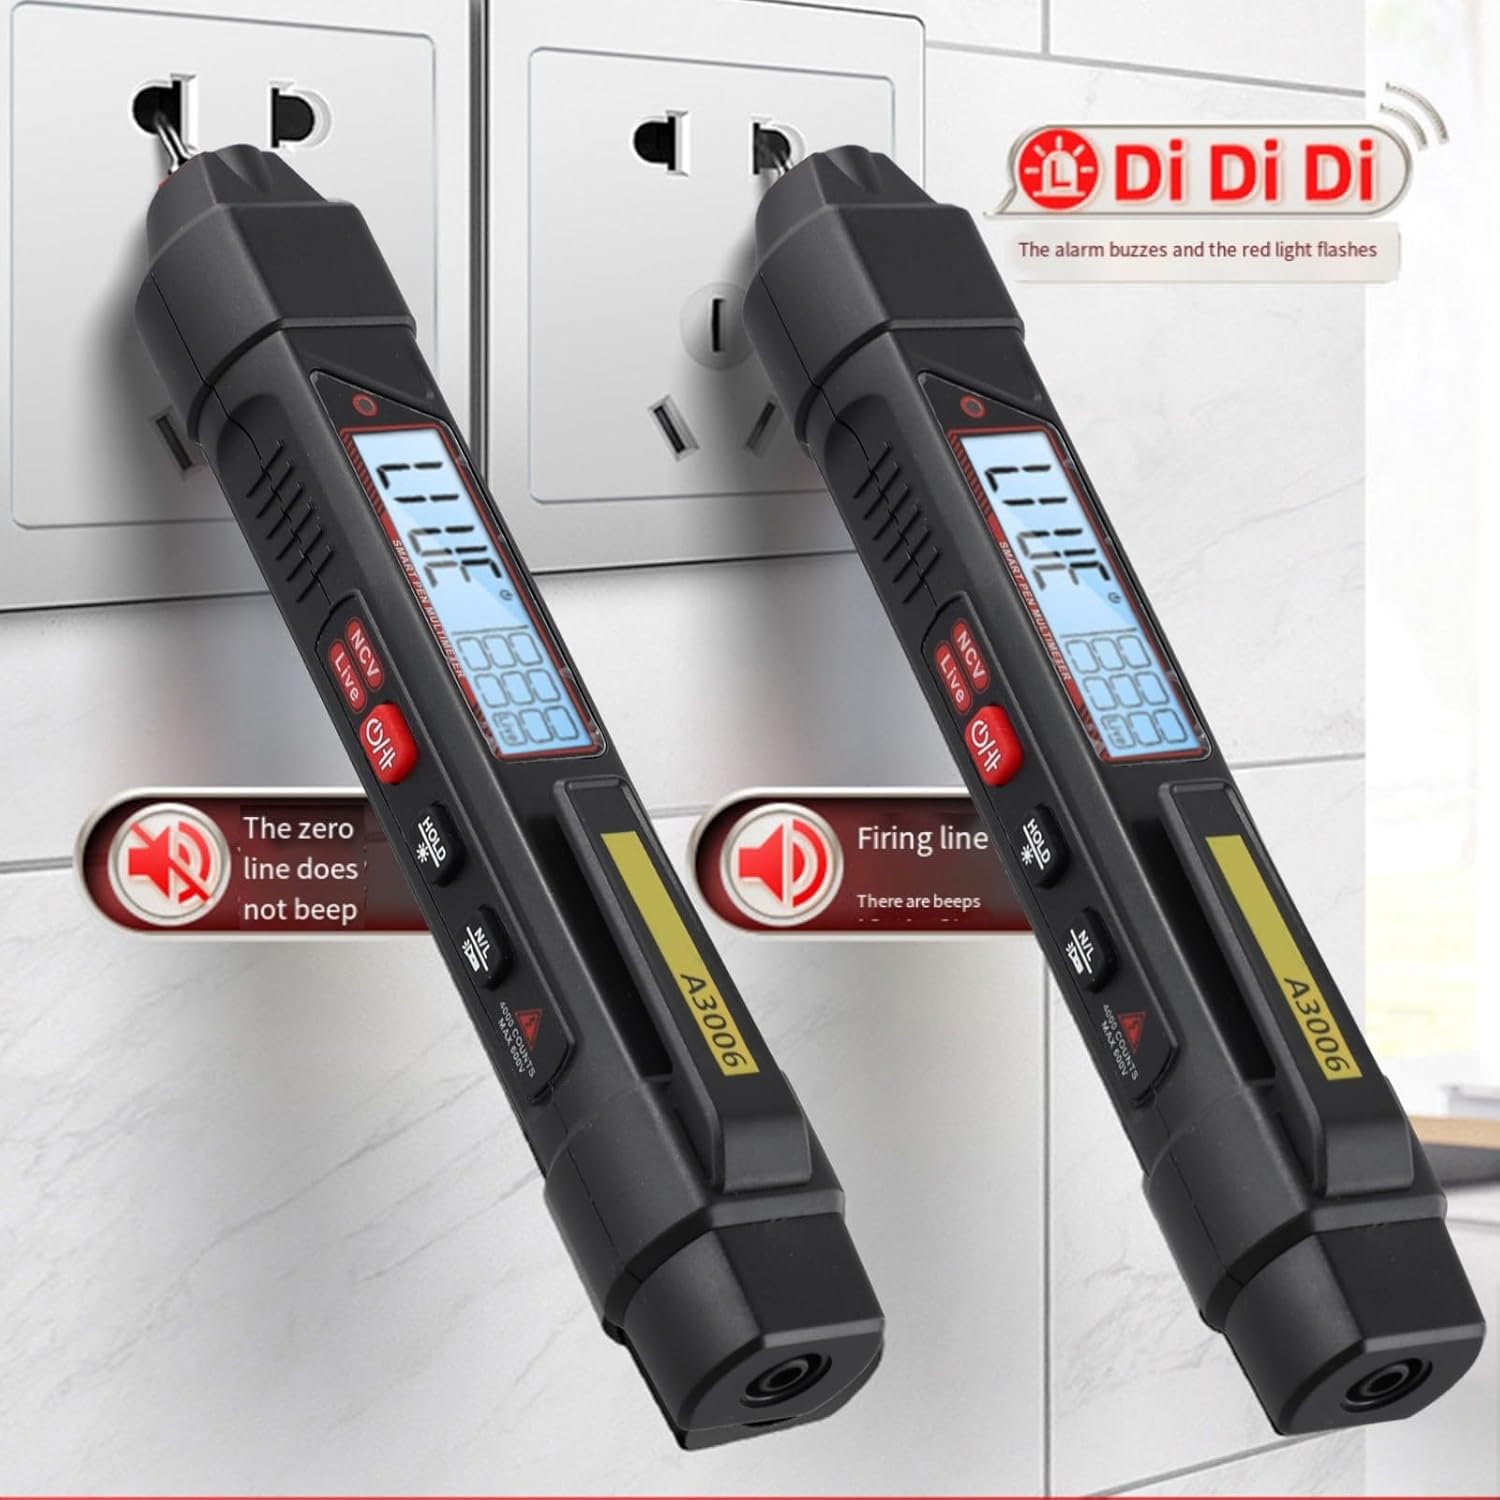
Image: The CRIDENG A3006 Pen Test Multimeter demonstrating live wire identification. The device beeps and flashes red when inserted into the live socket, while remaining silent for the neutral socket.
- Non-Contact Voltage (NCV) Induction: Long press the N/L button to activate NCV mode. Move the pen tip near a wire or electrical component. The device will detect AC voltage without direct contact, indicated by a flashing red light and buzzer alarm. This feature is useful for line breakpoint searching; the connected position will flash red and alarm, while the unlit position indicates a line disconnection point.
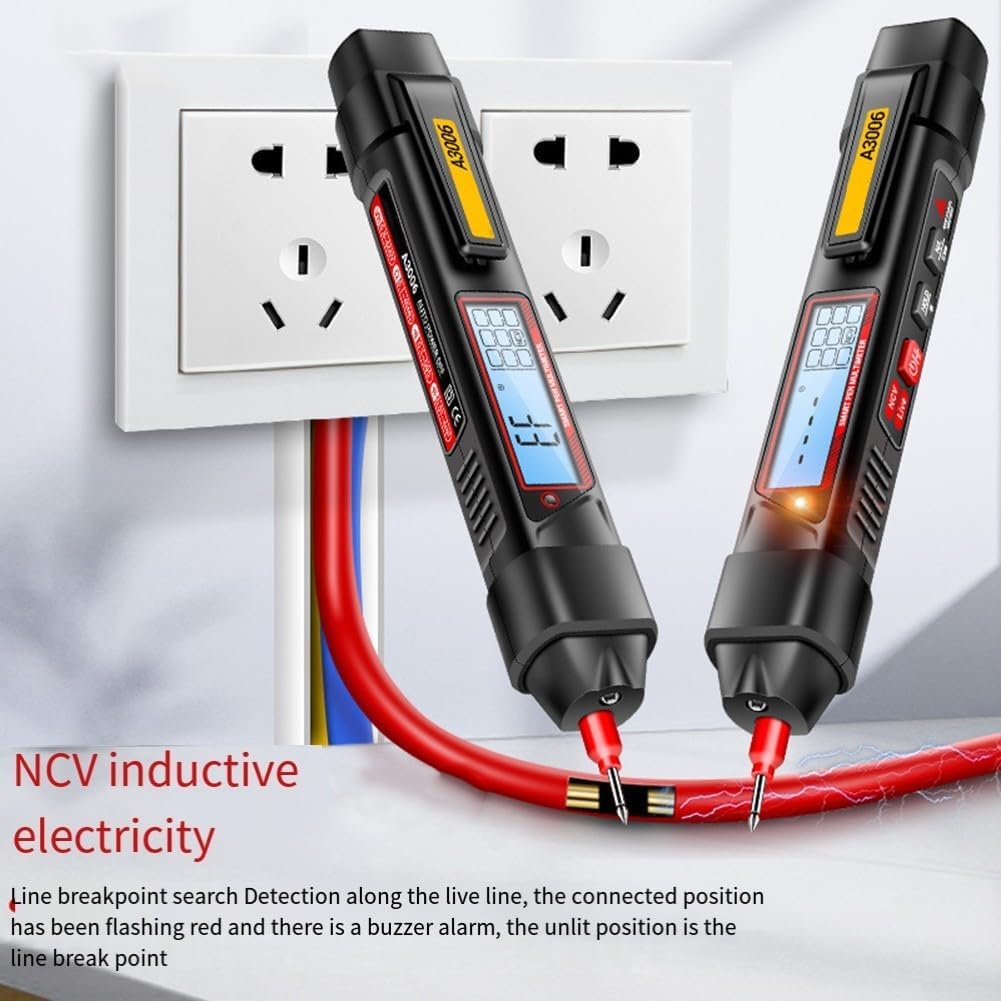
Image: The CRIDENG A3006 Pen Test Multimeter detecting NCV inductive electricity. The device is shown near a live wire, indicating detection with a red light and buzzer, and identifying a breakpoint where the signal stops.
- Auto Shutdown: The multimeter will automatically shut down after 15 minutes of inactivity to conserve battery life.
- Backlight Screen: The LCD screen features a backlight for improved visibility in low-light conditions.
- Low Battery Symbol: An indicator will appear on the display when the battery level is low, signaling the need for replacement.
6. Maintenance
6.1 Cleaning
Wipe the device with a dry, soft cloth. Do not use abrasive cleaners or solvents.
6.2 Removable Pen Tip
The positive pen tip is removable and silver-plated for durability. It can be rotated out and replaced if necessary. Always ensure the cap protection is used when not in use.

Image: A close-up view of the CRIDENG A3006 Pen Test Multimeter's removable pen tip, showing it detached from the main unit.
6.3 Battery Replacement
Replace batteries when the low battery symbol appears on the display. Refer to section 4.1 for battery installation instructions.
7. Troubleshooting
- No Display: Check battery installation and ensure batteries are not depleted. Replace if necessary.
- Inaccurate Readings: Ensure test leads are properly connected. Verify the correct measurement mode is selected. Check for external interference.
- No NCV/Live Wire Detection: Ensure the feature is activated correctly (long/single press N/L button). Check battery level.
8. Specifications
| Parameter | Value |
|---|---|
| Model | A3006 |
| AC Voltage Range | 0.8V - 600V |
| DC Voltage Range | 0.8V - 600V |
| Resistance Range | 0.1Ω - 40MΩ |
| Capacitance Range | 0.01nF - 4mF |
| Frequency Range | 10Hz - 10MHz |
| Diode Test | Yes |
| Continuity Buzzer | Yes |
| Neutral/Live Wire Detection | Yes |
| NCV Induction Electricity | Yes |
| Data Retention | Yes |
| Backlight Screen | Yes |
| Flashlight Lighting | Yes |
| Low Battery Symbol | Yes |
| Auto Shutdown | After 15 minutes of no use |
| Maximum Count | 4000 counts |
| Probe Material | PVC/Brass |
| Probe Length | 93cm (36.6 inches) |
| Battery Type | 2 x AAA (No. 7) batteries |
| Dimensions (L x W x H) | 190 x 28.7 x 27.7 mm (7.48 x 1.12 x 1 inch) |
| Weight | 116 Grams |
| Minimum Operating Voltage | 0.8 Volts |
9. Safety Information
Always observe basic safety precautions when using electrical testing equipment:
- Do not use the device if it appears damaged or is operating abnormally.
- Do not apply voltage or current that exceeds the maximum specified limits.
- Exercise extreme caution when working with live circuits.
- Ensure your hands are dry and you are standing on an insulated surface.
- Always disconnect power to a circuit before measuring resistance or capacitance.
- Replace batteries promptly when the low battery indicator appears.
10. Warranty and Support
For warranty information and technical support, please refer to the documentation provided at the point of purchase or contact the retailer/manufacturer directly. Keep your purchase receipt as proof of purchase.