Complete Cuisine CC-DP401-CS-BLK
Complete Cuisine 4 Liter Electric Deep Fryer User Manual
Model: CC-DP401-CS-BLK
Important Safety Instructions
When using electrical appliances, basic safety precautions should always be followed, including the following:
- Read all instructions before operating the deep fryer.
- Do not touch hot surfaces. Use handles or knobs.
- To protect against electrical shock, do not immerse cord, plugs, or heating element in water or other liquid.
- Close supervision is necessary when any appliance is used by or near children.
- Unplug from outlet when not in use and before cleaning. Allow to cool before putting on or taking off parts.
- Do not operate any appliance with a damaged cord or plug, or after the appliance malfunctions or has been damaged in any manner.
- The use of accessory attachments not recommended by the appliance manufacturer may cause injuries.
- Do not use outdoors.
- Do not let cord hang over edge of table or counter, or touch hot surfaces.
- Do not place on or near a hot gas or electric burner, or in a heated oven.
- Extreme caution must be used when moving an appliance containing hot oil or other hot liquids.
- Always attach plug to appliance first, then plug cord into the wall outlet. To disconnect, turn any control to "off", then remove plug from wall outlet.
- Do not use appliance for other than intended use.
- Ensure the oil level is between the MIN and MAX marks inside the oil pot.
- Never mix different types of oil or old and new oil.
- Always ensure food is dry before frying to prevent oil splattering.
Product Overview
The Complete Cuisine 4 Liter Electric Deep Fryer is designed for convenient and efficient home frying. It features a large capacity, adjustable temperature control, and comes with three versatile fryer baskets.
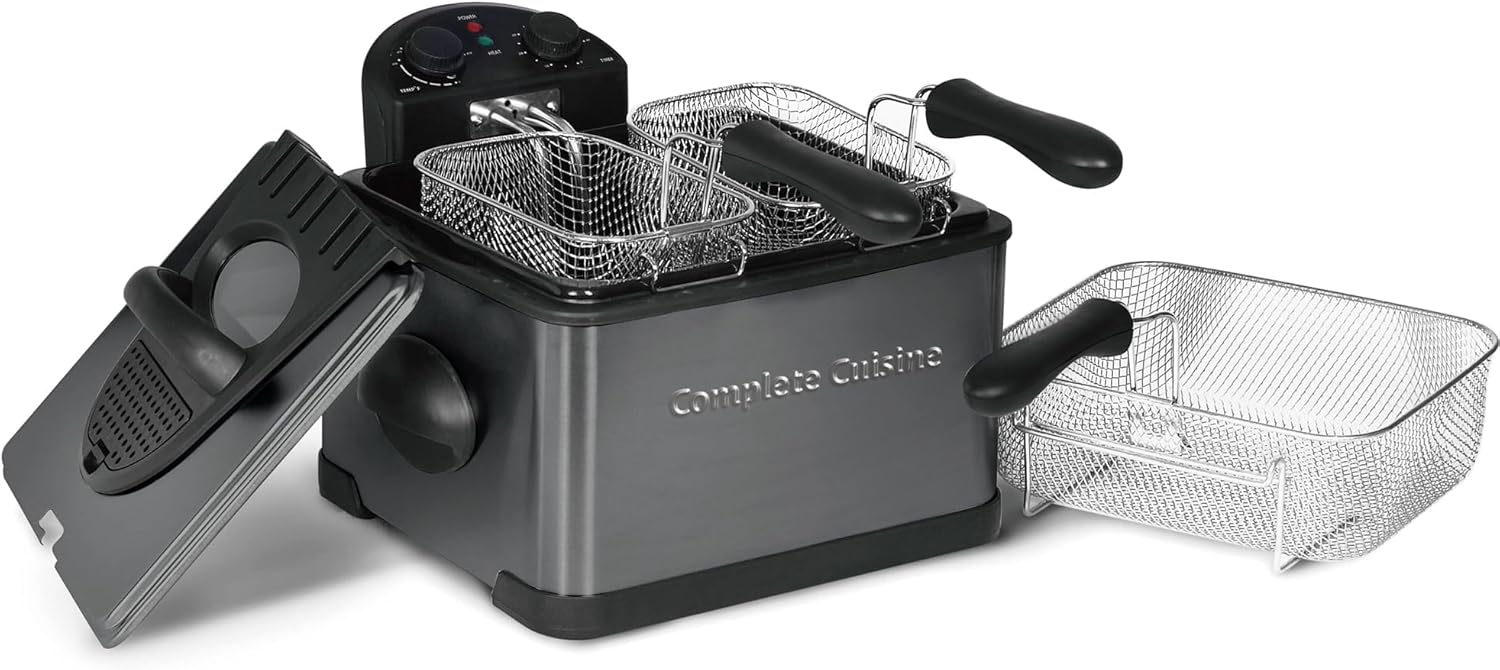
Image: The Complete Cuisine 4 Liter Electric Deep Fryer, showcasing its main unit, lid, and three included fryer baskets. The unit is black with a stainless steel pot and control panel.
Components:
- Main Fryer Unit with Heating Element
- Removable Stainless Steel Oil Pot (4 Liter Capacity)
- Control Panel with Temperature Dial and Timer
- Lid with Viewing Window and Filter
- One Large Fryer Basket
- Two Small Fryer Baskets
- Non-Skid Feet

Image: A close-up view of the deep fryer's control panel, showing the temperature and timer dials, along with the two smaller fryer baskets inserted into the oil pot.
Setup
- Unpacking: Carefully remove all components from the packaging. Retain packaging for future storage or transport.
- Initial Cleaning: Before first use, wash the removable oil pot, fryer baskets, and lid in warm, soapy water. Rinse thoroughly and dry completely. Wipe the exterior of the main unit with a damp cloth. Ensure all parts are completely dry before assembly.
- Assembly:
- Place the main fryer unit on a stable, heat-resistant, and dry surface, away from walls and flammable materials. Ensure adequate ventilation.
- Insert the clean, dry stainless steel oil pot into the main fryer unit.
- Ensure the heating element is properly seated within the oil pot.
- Place the lid on top of the oil pot.
- Adding Oil: Pour cooking oil (suitable for deep frying) into the oil pot. Fill the oil between the MIN and MAX fill lines indicated inside the pot. Do not overfill or underfill.
Operating Instructions
- Power Connection: Ensure the fryer is properly assembled and filled with oil. Plug the power cord into a grounded electrical outlet. The power indicator light may illuminate.
- Setting Temperature: Turn the temperature control dial to your desired frying temperature. Refer to recipe guidelines for specific food items. The "Heat" indicator light will turn on, indicating the heating element is active.
- Preheating: Allow the oil to preheat to the set temperature. This typically takes 10-13 minutes. The "Heat" indicator light will turn off when the desired temperature is reached, and cycle on/off during frying to maintain temperature.
- Preparing Food: Ensure food items are dry before placing them into the fryer baskets. Excess moisture can cause oil to splatter.
- Frying:
- Carefully lower the fryer basket(s) containing the food into the hot oil. Do not overload the baskets.
- Place the lid on the fryer during cooking to minimize splattering and retain heat. The viewing window allows monitoring.
- Use the timer dial to set the desired cooking time, if applicable.
- Removing Food: Once food is cooked to your preference, carefully lift the basket(s) and hook them onto the edge of the oil pot to allow excess oil to drain.
- Serving: Transfer fried food to a plate lined with paper towels to absorb any remaining oil.
- Shutting Down: When finished frying, turn the temperature dial to the "OFF" position and unplug the fryer from the wall outlet. Allow the oil and fryer to cool completely before cleaning or storing.

Image: The deep fryer in operation, with two small baskets containing freshly fried onion rings and french fries, ready for serving.
Maintenance and Cleaning
Regular cleaning ensures optimal performance and extends the life of your deep fryer. Always ensure the fryer is unplugged and completely cool before cleaning.
- Draining Oil: Once the oil has cooled completely, carefully pour it into a suitable container for disposal or reuse. Filtered oil can be reused for a limited number of times depending on the food fried.
- Disassembly: Remove the oil pot, heating element, and lid from the main unit.
- Cleaning Components:
- The removable enameled oil pot, fryer baskets, and lid can be washed in warm, soapy water. For stubborn residue, soak them for a period before scrubbing.
- The heating element and control panel should not be immersed in water. Wipe them with a damp cloth and mild detergent if necessary, then dry thoroughly.
- Wipe the exterior of the main fryer unit with a damp cloth. Do not use abrasive cleaners or scouring pads.
- Drying and Storage: Ensure all parts are completely dry before reassembling or storing the fryer. Store in a cool, dry place.

Image: The deep fryer with its components separated, including the main unit, lid, and all three baskets, illustrating its easy-to-clean design.
Troubleshooting
| Problem | Possible Cause | Solution |
|---|---|---|
| Fryer does not turn on. | Not plugged in; power outlet issue; thermal cut-off activated. | Ensure plug is fully inserted. Check circuit breaker. Allow unit to cool completely and try again. |
| Oil not heating up. | Temperature dial not set; heating element not properly seated. | Turn temperature dial to desired setting. Ensure heating element is correctly positioned. |
| Excessive smoke or burning smell. | Oil too old or dirty; food residue in oil; oil level too low. | Change oil. Clean oil pot thoroughly. Ensure oil is between MIN/MAX lines. |
| Food is not crispy. | Oil temperature too low; too much food in basket; food not dry. | Allow oil to reach set temperature. Fry in smaller batches. Ensure food is patted dry before frying. |
| Oil splattering. | Food contains too much moisture; oil level too high. | Pat food dry before frying. Do not overfill oil. Lower food slowly into oil. |
Specifications
| Feature | Detail |
|---|---|
| Model Name | 4L Electric Deep Fryer |
| Brand | Complete Cuisine |
| Material | Metal |
| Color | Black |
| Product Dimensions (D x W x H) | 15.5"D x 15.1"W x 9.8"H |
| Wattage | 1700 watts |
| Oil Capacity | 4 Liters |
| Item Model Number | CC-DP401-CS-BLK |
| UPC | 079902205967 |
Warranty and Support
Specific warranty information for this product is not available in the provided data. Please refer to the product packaging or contact Complete Cuisine customer support for details regarding warranty coverage and technical assistance.
For customer support, please visit the official Complete Cuisine website or refer to the contact information provided with your purchase.
Ask a question about this manual
Ask about setup, troubleshooting, compatibility, parts, safety, or missing instructions. Manuals+ will review the question and use this page’s manual context to help answer it.