1. Introduction
This manual provides essential instructions for the safe and efficient operation of your Woxcker S1 3.5W Mini Laser Engraving Machine. The Woxcker S1 is a compact and portable laser engraver designed for various materials such as wood, acrylic, leather, and paper, offering precise engraving capabilities for DIY projects and creative applications.
Key features include user-friendly operation with pre-assembly, limit switches for enhanced safety, a compact design for portability, versatile engraving capabilities with a 1.6W/3.5W laser, high engraving quality with an ultra-fine laser beam, a generous 130 x 130 mm engraving area, and precise positioning with an integrated laser scale.
2. Safety Precautions
Operating a laser engraving machine involves potential hazards. Adhere to the following safety guidelines to prevent injury and damage:
- Eye Protection: Always wear the provided protective goggles when the laser is in operation. Never look directly at the laser beam.
- Ventilation: Operate the machine in a well-ventilated area to dissipate fumes and smoke produced during engraving.
- Flammable Materials: Do not engrave highly flammable materials without proper precautions. Keep a fire extinguisher nearby.
- Supervision: Never leave the machine unattended while it is operating.
- Children and Pets: Keep children and pets away from the operating area.
- Power Supply: Ensure the power supply matches the machine's requirements and is properly grounded. Disconnect power before maintenance or moving the machine.
- Tilt Stop Feature: The machine is equipped with a 15° tilt stop feature that automatically shuts down the laser if it tips over, preventing potential hazards.
- Laser Head Cover: The laser head includes a protective cover to shield users from harmful laser light and reduce material debris.
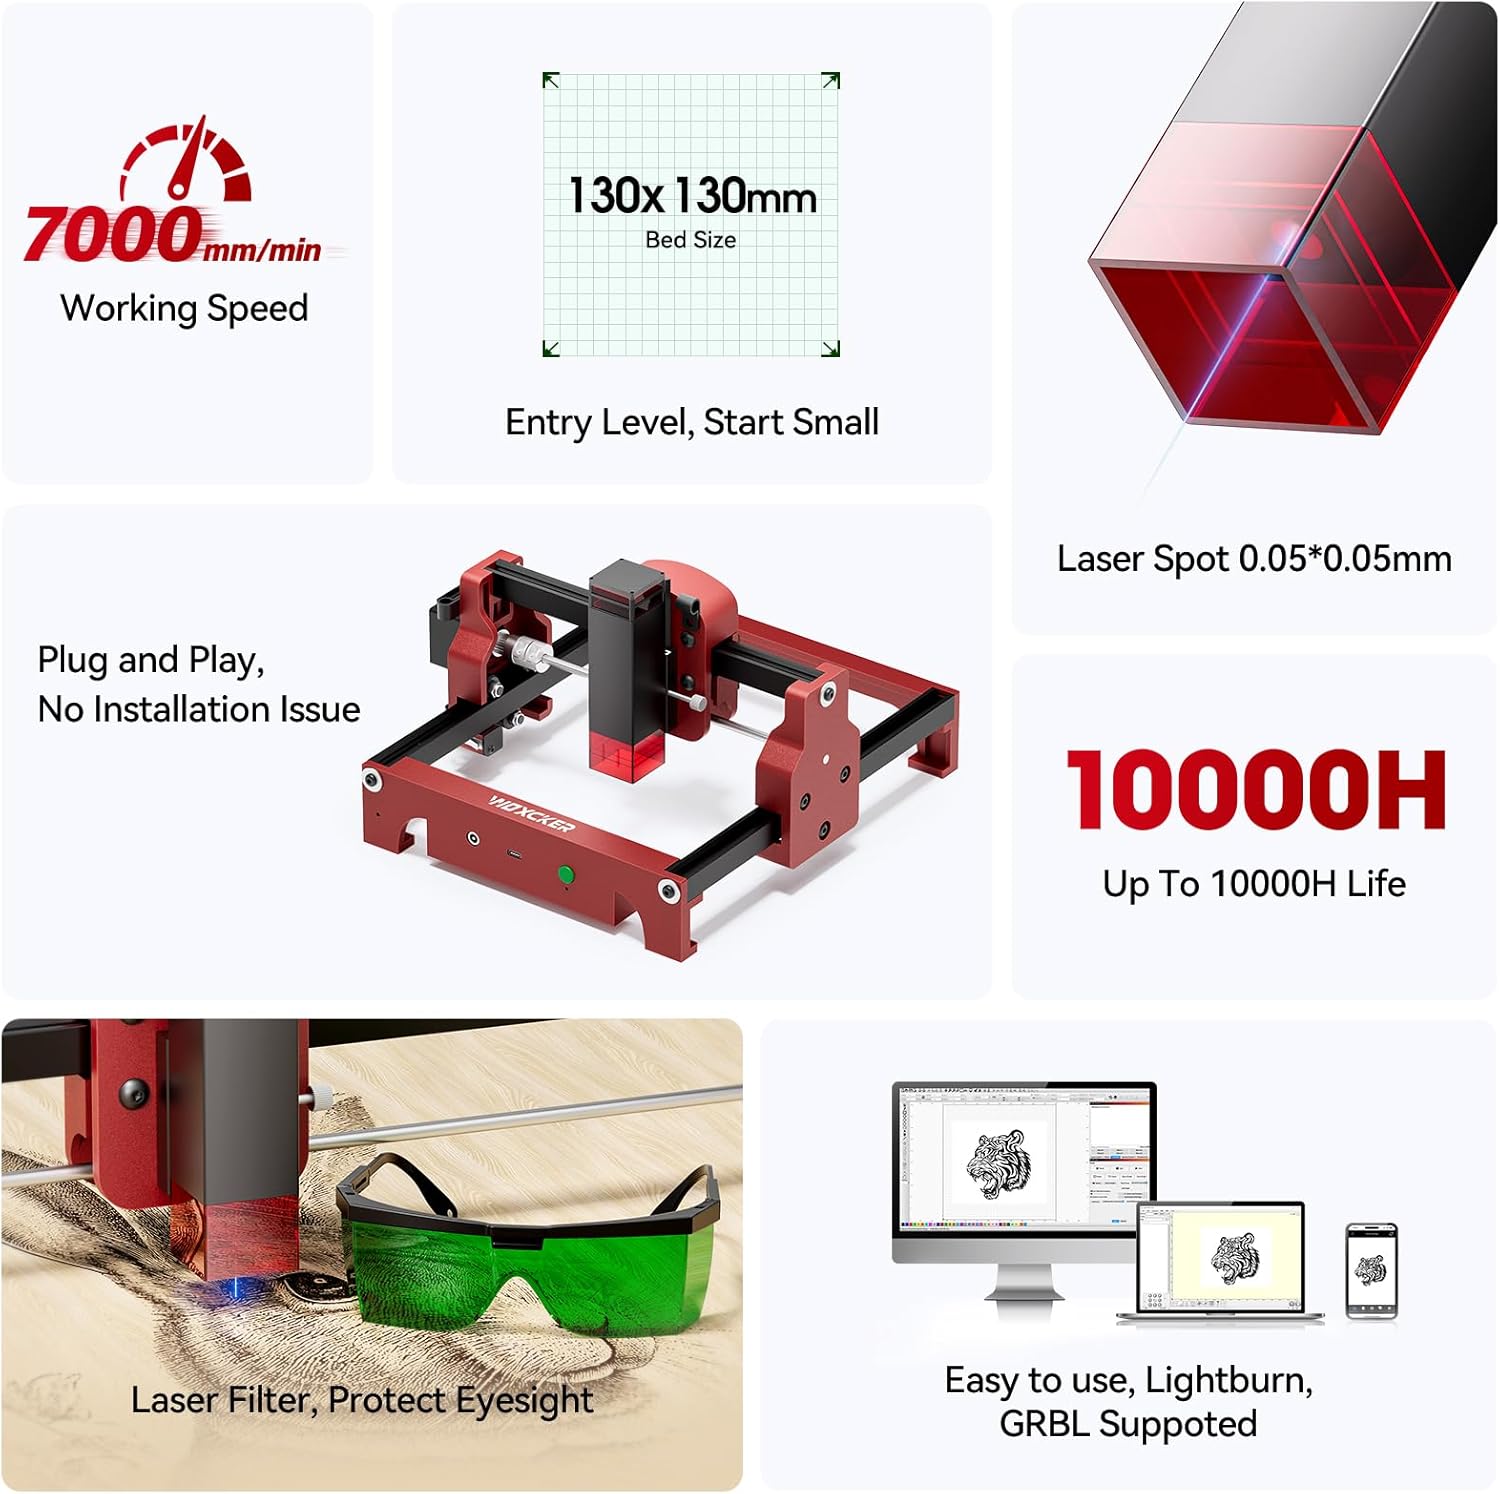
Image: Overview of the Woxcker S1 highlighting key features like the laser filter, working speed, and bed size.

Image: Illustration of the 15° tilt stop safety mechanism, showing the machine automatically shutting down if tilted.

Image: Diagram showing the laser head with its protective cover, illustrating how it shields from laser light and reduces debris.

Image: Close-up of the green protective goggles, emphasizing the importance of eye protection during operation.
3. Package Contents
Upon opening the package, verify that all components are present and undamaged:
- Woxcker S1 Mini Laser Engraving Machine (pre-assembled)
- Power Adapter
- USB Cable
- Protective Goggles
- Sample Materials (e.g., wood, paper, acrylic)
- User Manual
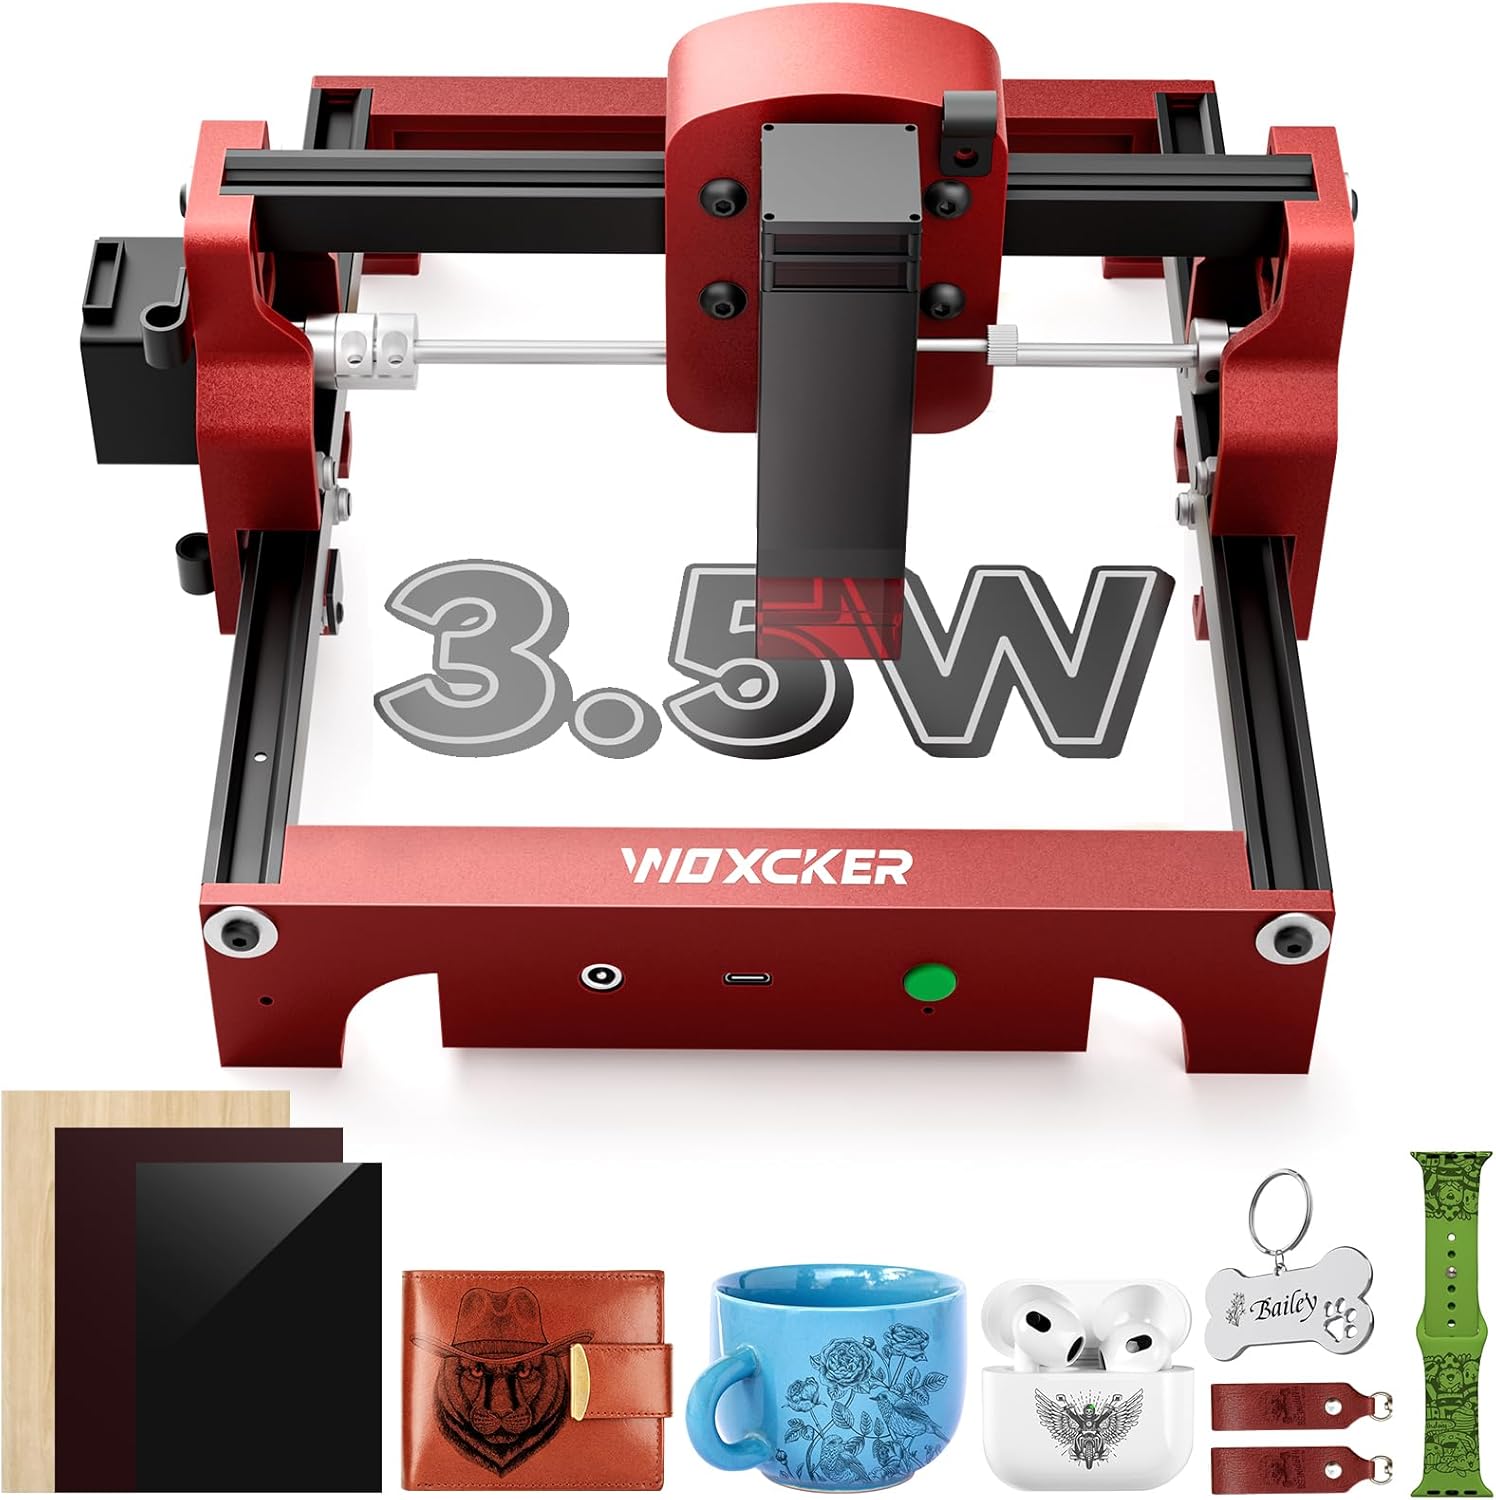
Image: The Woxcker S1 laser engraver along with various sample materials and accessories like a wallet, mug, and earbud case, demonstrating potential engraving applications.
4. Product Overview
Familiarize yourself with the main components of the Woxcker S1:

Image: Labeled diagram of the Woxcker S1 machine, pointing out the Laser Filter Window, Integration, Goggle, Laptop Connection Port, Power, Dump switch, and High-strength Aluminum frame.
- Laser Module: The core component responsible for engraving. Features a detachable magnetic cover and a focus adjustment knob.
- Engraving Platform: The 130 x 130 mm area where materials are placed for engraving.
- X and Y Axes: Movement mechanisms for precise laser positioning. Equipped with limit switches.
- Control Panel: Includes power button and connection ports.
- Protective Goggles: Essential safety equipment.

Image: Detailed view of the laser module, highlighting the cooling fan, focus adjustment knob, and detachable magnetic laser head cover for easy maintenance.
5. Setup Instructions
The Woxcker S1 comes pre-assembled for immediate use. Follow these steps to set up your machine:
- Unpack: Carefully remove the laser engraver and all accessories from the packaging.
- Placement: Place the machine on a stable, level surface in a well-ventilated area.
- Power Connection: Connect the power adapter to the machine and then to a suitable power outlet.
- USB Connection: Connect the machine to your computer using the provided USB cable.
- Software Installation: Download and install the recommended engraving software (e.g., LightBurn, LaserGRBL) on your computer. Refer to the software's documentation for installation and setup.
- Safety Goggles: Put on your protective goggles before powering on the machine.
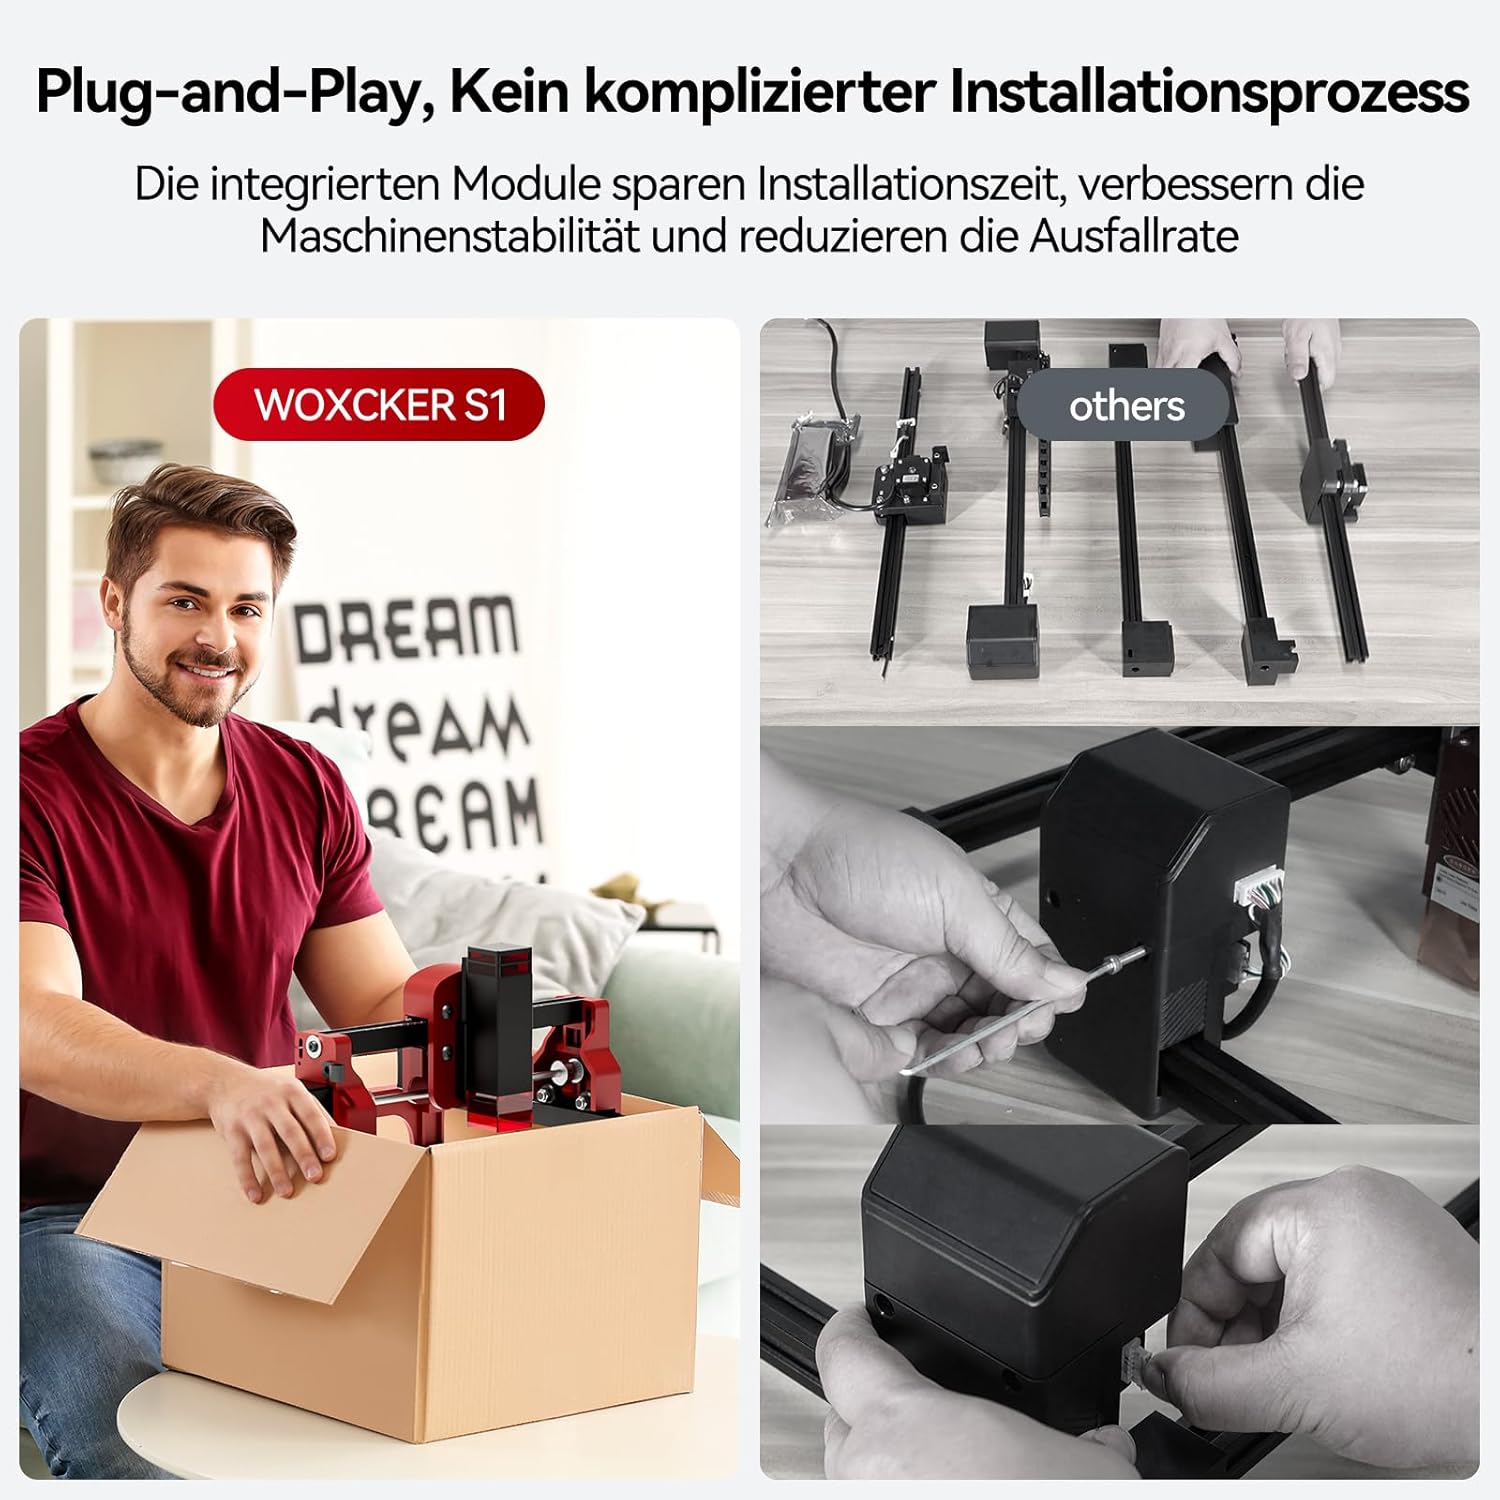
Image: A person unboxing the Woxcker S1, demonstrating its pre-assembled, ready-to-use nature, contrasting with a disassembled machine.

Image: The Woxcker S1 connected to a computer, displaying compatibility with LightBurn and LaserGRBL software for Windows and Mac.
6. Operating Instructions
Once set up, you can begin your engraving projects. Always ensure safety goggles are worn.
6.1 Software Compatibility
The Woxcker S1 is compatible with standard engraving software such as LightBurn (Windows/Mac) and LaserGRBL (Windows). It supports various file formats including JPEG, BMP, PNG, JPG, GIF, DXF, PLT, and HPGL. Connection is via USB-A to Type C.
6.2 Material Compatibility
The S1 can engrave over 100 different materials. Common compatible materials include:
- Wood
- Acrylic
- Leather
- Paper
- Leaf
- Some metals (for engraving, not cutting)
- Ceramic (for engraving)
Always test on a small, inconspicuous area of your material first to determine optimal laser settings.

Image: Various materials like wood, acrylic, leather, and paper, demonstrating the versatility of the Woxcker S1 for engraving different surfaces.
6.3 Engraving Process
- Design Preparation: Create or import your design into the engraving software. Adjust size, position, and other parameters as needed.
- Material Placement: Place your material securely on the engraving platform within the 130 x 130 mm working area. Use the integrated laser scale for precise positioning.
- Focus Adjustment: Adjust the laser focus according to your material thickness. The laser module has a focus adjustment knob.
- Parameter Settings: Set the laser power, speed, and passes in the software based on your material and desired engraving depth/darkness. Refer to software guidelines or material test results.
- Start Engraving: Initiate the engraving process from the software. Monitor the machine during operation.
- Completion: Once engraving is complete, wait for the laser to stop and cool down before removing the material.
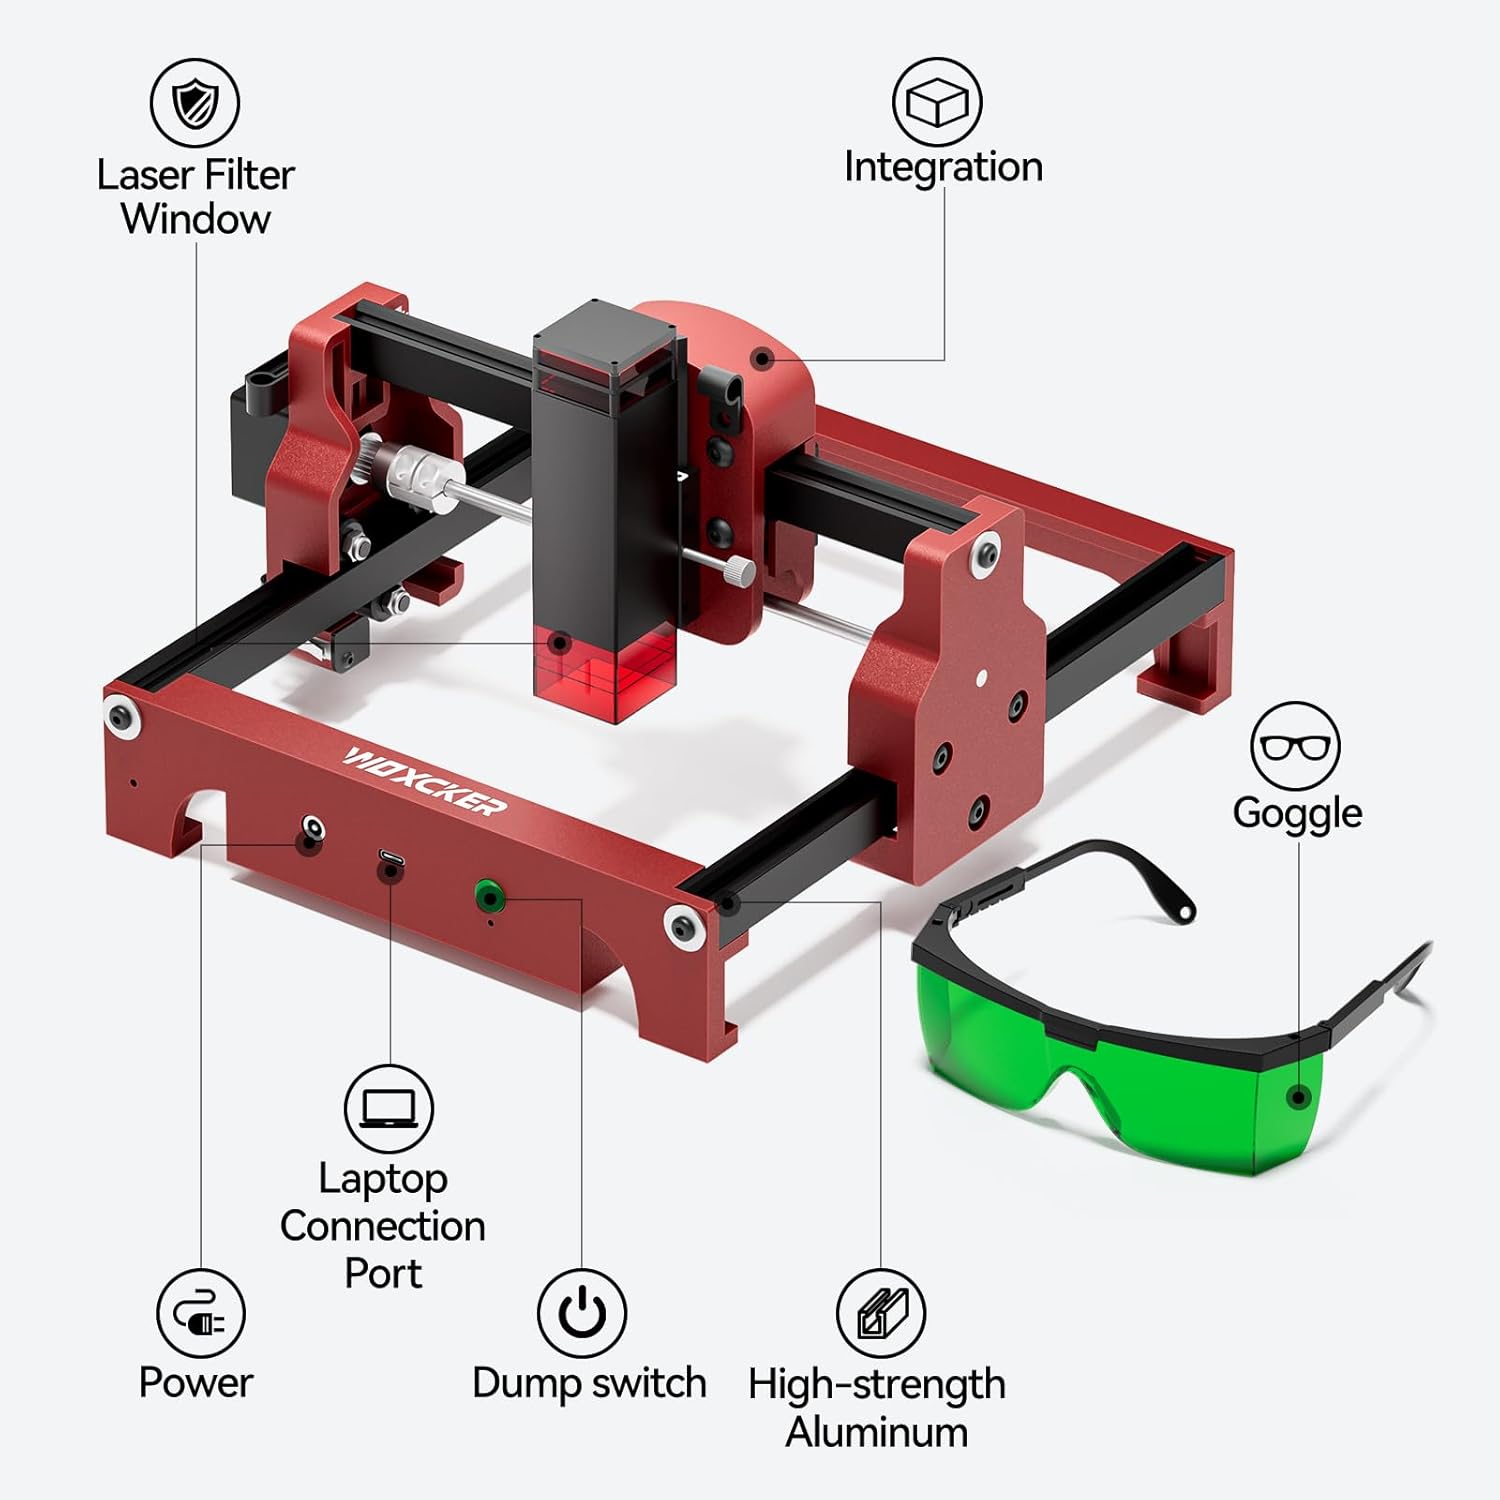
Image: A close-up comparison showing the fine detail achieved by the Woxcker S1's 0.05*0.05mm laser spot versus a larger 0.15*0.15mm spot from another machine, illustrating superior engraving quality.

Image: The Woxcker S1 machine illustrating its 7000mm/min engraving speed, with a comparison of detailed pet tag engravings ("Ours" vs "Others") to highlight precision and speed benefits.

Image: Close-up of the Woxcker S1's integrated laser scale (Exact Tick Axis) on the frame, demonstrating its use for accurate and precise material positioning.
7. Maintenance
Regular maintenance ensures optimal performance and extends the lifespan of your Woxcker S1.
- Cleaning the Lens: Periodically clean the laser lens with a soft, lint-free cloth and lens cleaning solution. Ensure the machine is powered off and unplugged.
- Cleaning the Machine: Wipe down the machine's exterior with a dry or slightly damp cloth. Avoid using harsh chemicals.
- Lubrication: Occasionally apply a small amount of lubricant to the moving parts of the X and Y axes to ensure smooth operation.
- Firmware Updates: Check the Woxcker website or software provider for any available firmware updates for your machine.
Image: Detailed view of the laser module, showing the detachable magnetic laser head cover which facilitates easy cleaning and maintenance.
8. Troubleshooting
Refer to this section for solutions to common issues:
| Problem | Possible Cause | Solution |
|---|---|---|
| Laser not firing | Power not connected, software error, laser module issue. | Check power connections. Restart software and machine. Ensure protective goggles are worn. |
| Poor engraving quality | Incorrect focus, wrong power/speed settings, dirty lens, unsuitable material. | Adjust laser focus. Optimize power/speed settings for the material. Clean the laser lens. Use recommended materials. |
| Machine not connecting to computer | USB cable issue, driver not installed, software not recognizing device. | Try a different USB port or cable. Reinstall drivers. Ensure software is up-to-date and correctly configured. |
| Machine stops mid-engraving | Loose connection, software crash, tilt sensor triggered. | Check all connections. Restart software. Ensure machine is on a stable surface and not tilted. |
9. Specifications
| Feature | Detail |
|---|---|
| Model | S1 |
| Laser Power | 3.5W (also available in 1.6W) |
| Engraving Area | 130mm x 130mm |
| Laser Spot Size | 0.05mm x 0.05mm |
| Working Speed | Up to 7000mm/min |
| Item Weight | 2.64 pounds (approx. 1.2 kg) |
| Product Dimensions | 10.43 x 10.24 x 6.06 inches (265 x 260 x 154 mm) |
| Material | Aluminum Alloy |
| Software Compatibility | LightBurn (Windows/Mac), LaserGRBL (Windows) |
| File Formats | JPEG, BMP, PNG, JPG, GIF, DXF, PLT, HPGL |
| Connection | USB-A to Type C |
| Laser Lifespan | More than 10,000 hours |

Image: The Woxcker S1 machine with its dimensions (10.43in / 265mm, 10.23in / 260mm, 6.06in / 154mm) clearly labeled, demonstrating its compact size.
10. Warranty and Support
The Woxcker S1 comes with a manufacturer's warranty. Please refer to the warranty description provided with your product for specific terms and conditions. For technical support, troubleshooting assistance, or warranty claims, please contact Woxcker customer service through their official website or the retailer where the product was purchased.
Manufacturer: Woxcker
Warranty Description: 1 (This typically refers to a 1-year warranty, but specific details should be confirmed with the manufacturer).
Date First Available: November 15, 2024