1. Introduction
This manual provides detailed instructions for the installation, operation, and maintenance of your USKI 24V 150W Automatic Pressure Regulator Water Booster Pump. This device is designed to effectively boost water pressure for various household applications, including water heaters and general home water supply, especially in low-pressure environments. Please read this manual thoroughly before installation and use to ensure safe and efficient operation.
2. Safety Information
Always observe the following safety precautions to prevent injury or damage to the product.
- Ensure the power supply matches the pump's specifications (24V).
- Do not operate the pump with damaged cords or plugs.
- Keep the pump away from flammable materials.
- Disconnect power before performing any maintenance or installation.
- Installation should be performed by a qualified professional if you are unsure.
- The pump is designed for water boosting; do not use it for other liquids without consulting the manufacturer.
- Ensure proper ventilation around the pump during operation.
3. Product Overview and Features
The USKI Water Booster Pump is a compact and efficient solution for improving water pressure in your home. It features both automatic and manual operation modes.
Key Features:
- Structure: Booster pump
- Power: Electric (24V)
- Function: Manual and automatic operation in one unit
- Pressure: Designed for low-pressure water systems
- Application: Water boosting for domestic use, including water heaters, showers, and faucets.
- Temperature Resistance: Up to 90 degrees Celsius
- Protection Class: IP56
Product Views:
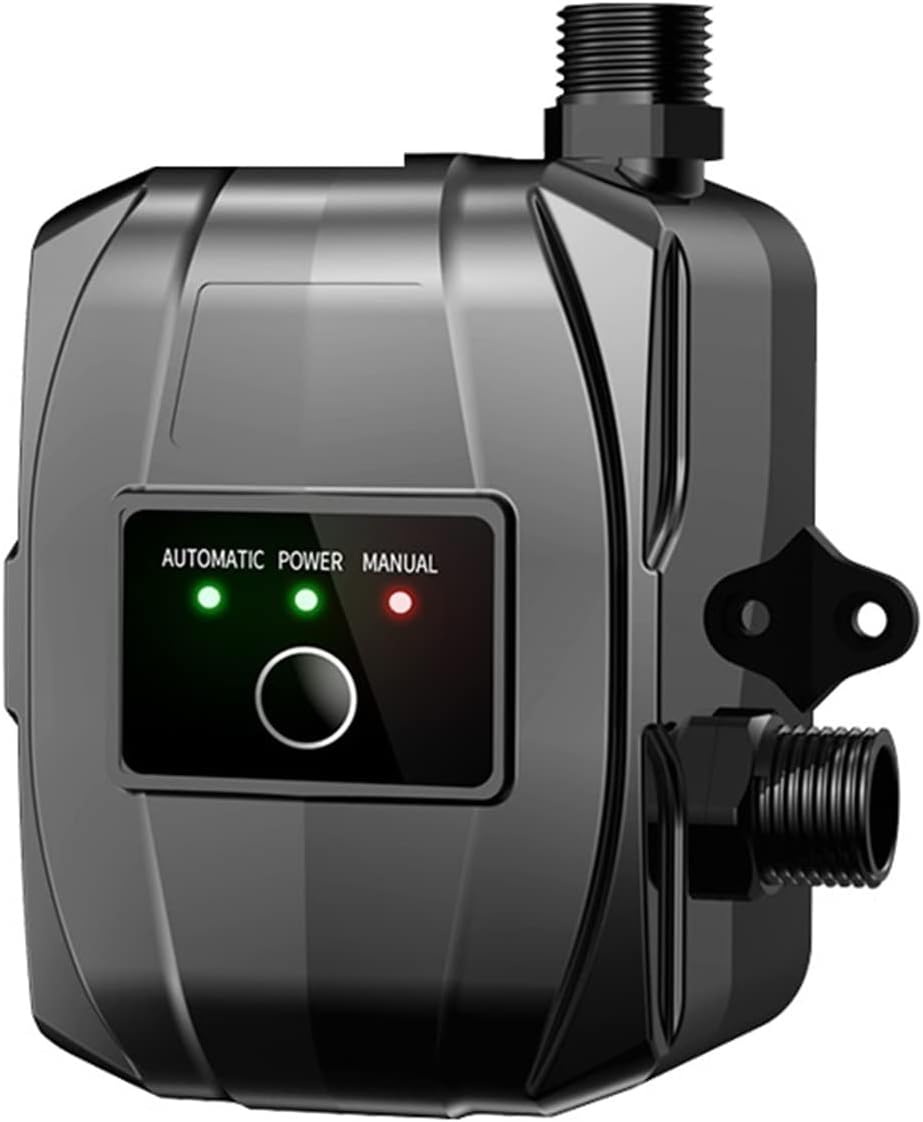
Figure 3.1: Front view of the USKI water booster pump, showing the control panel with automatic and manual mode indicators.

Figure 3.2: The USKI water booster pump, indicating the 100W power variant.

Figure 3.3: Comparison of pump characteristics, highlighting automatic and manual control options.
4. Specifications
| Specification | Value (100W Model) |
|---|---|
| Product Name | Household Booster Pump |
| Function | Manual and Automatic in one |
| Power | 100W (also available in 120W/150W variants) |
| Flow | 28L/min (for 100W model, 30L/32L/min for others) |
| Head | 16m (for 100W model, 20m/22m for others) |
| Current | 3A (for 100W model, 3.5A/4A for others) |
| Temperature Resistance | 90 degrees Celsius |
| Pipe Inner Diameter | 15 mm |
| Protection Class | IP56 |
| Theory | Rotary pump |
| Manufacturer | USKI |
| Item Model Number | 1005004225425877 |
| Item Weight | 500 g |
5. Setup and Installation
Proper installation is crucial for the optimal performance and longevity of your booster pump. Ensure all connections are secure and leak-free.
Installation Steps:
- Choose Location: Select a dry, well-ventilated location near your water supply and the appliance requiring boosted pressure (e.g., water heater, shower). Ensure it's easily accessible for maintenance.
- Prepare Plumbing: Turn off the main water supply. Drain the pipes. Cut into the existing water line where the pump will be installed. The pump is typically installed on the cold water inlet line to the appliance or main water line for whole-house boosting.
- Connect Inlet/Outlet: Connect the inlet of the pump to the low-pressure water source and the outlet to the appliance/system requiring boosted pressure. Use appropriate fittings and ensure all connections are watertight. The pipe inner diameter for connection is 15mm.
- Secure the Pump: Mount the pump securely using the provided mounting points. Ensure it is stable and level to minimize vibration.
- Electrical Connection: Connect the pump to a 24V power supply. Ensure the power adapter is suitable for your region (e.g., European, US, UK plugs are supported).
- Restore Water Supply: Slowly turn on the main water supply and check for any leaks at the connections.
- Bleed Air: Open a faucet downstream from the pump to allow any trapped air to escape the system. Run water until it flows smoothly without sputtering.
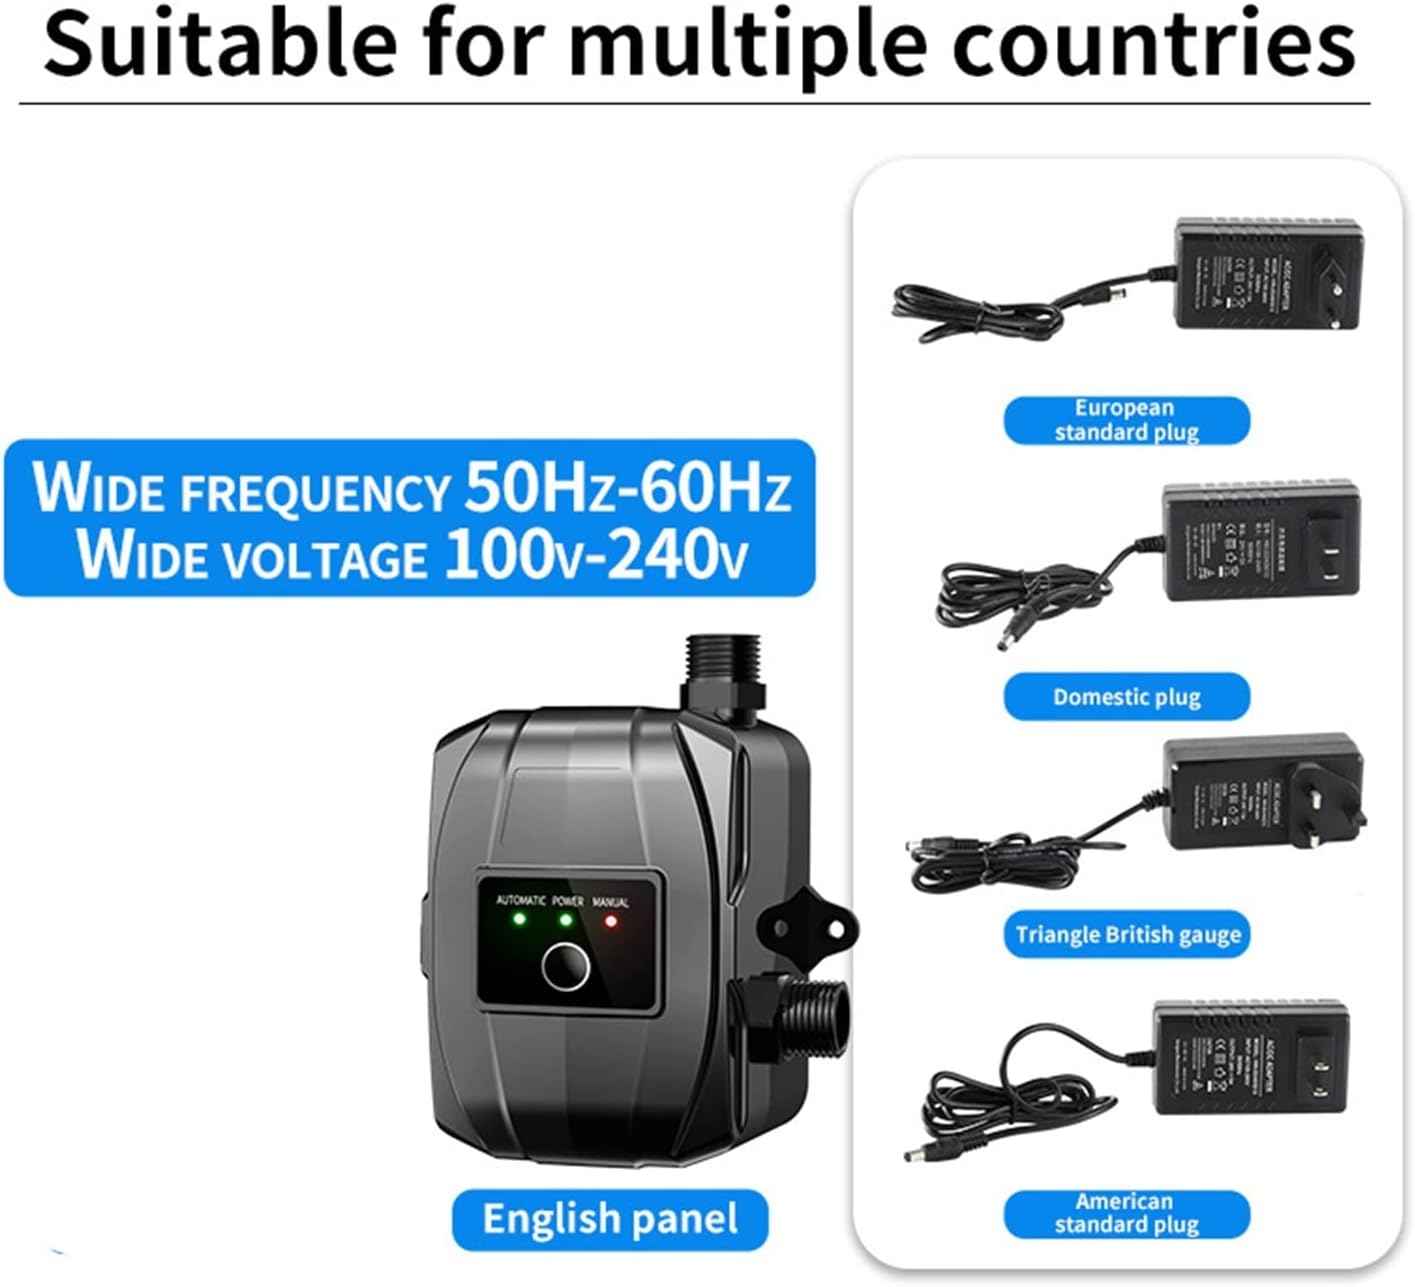
Figure 5.1: Power adapter compatibility for various regions.

Figure 5.2: Examples of typical installation scenarios for the booster pump.
6. Operating Instructions
The pump offers both automatic and manual operation modes.
Operating Modes:
- Automatic Mode: In this mode, the pump will automatically detect water flow and pressure changes. It will start when water is drawn (e.g., faucet opened) and stop when the flow ceases. This is the recommended mode for most household applications. The green indicator light on the control panel will illuminate when in automatic mode.
- Manual Mode: In manual mode, the pump will run continuously regardless of water flow. This mode is typically used for specific tasks or troubleshooting. The red indicator light on the control panel will illuminate when in manual mode. Use this mode sparingly to avoid dry running the pump.
To switch between modes, press the button on the control panel. Observe the indicator lights to confirm the selected mode.

Figure 6.1: Example of the pump boosting shower water pressure.
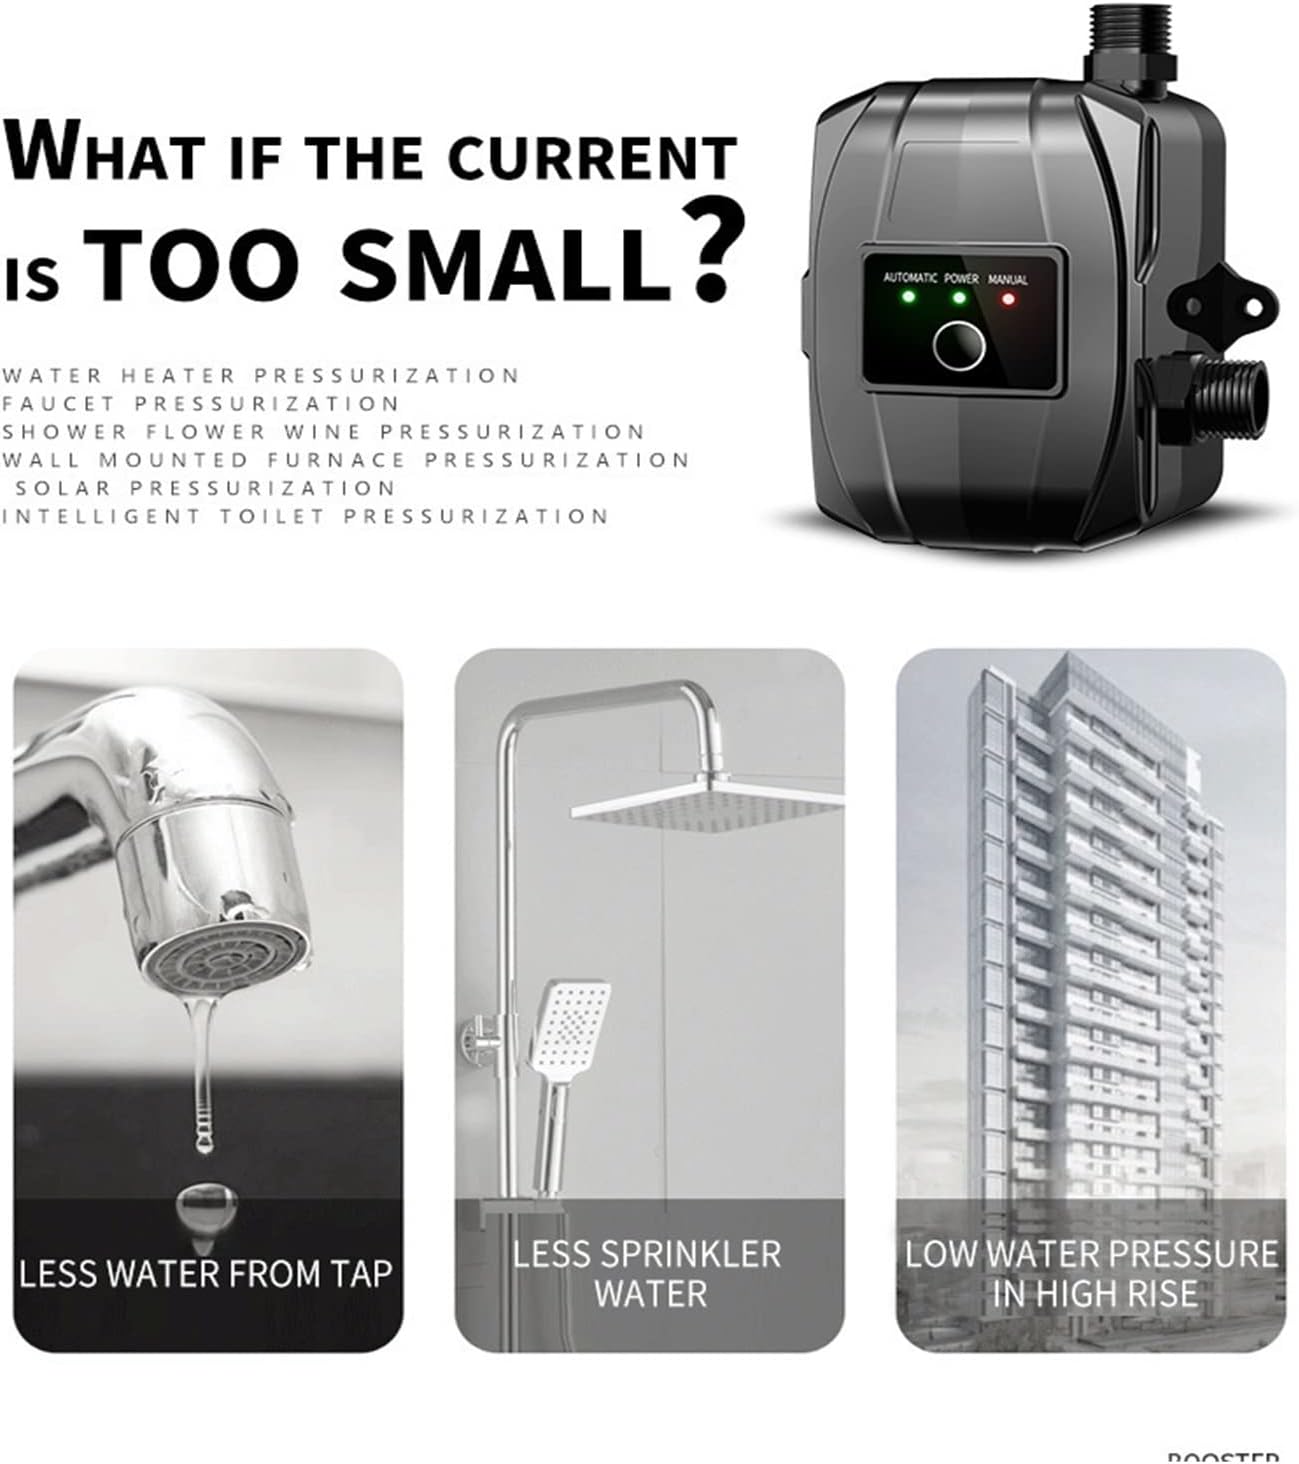
Figure 6.2: Common scenarios where the booster pump improves water flow and pressure.
Official Product Videos:
No official product videos from the seller are available at this time.
7. Maintenance
Regular maintenance ensures the longevity and efficient operation of your booster pump.
- Regular Inspection: Periodically check for any signs of leaks, corrosion, or damage to the pump body or connections.
- Clean Exterior: Wipe down the exterior of the pump with a damp cloth to remove dust and dirt. Do not use abrasive cleaners or solvents.
- Check Connections: Ensure all plumbing and electrical connections remain tight and secure.
- Winterization (if applicable): If the pump is installed in an area subject to freezing temperatures, drain the pump and associated pipes to prevent damage from ice expansion.
8. Troubleshooting
If you encounter issues with your booster pump, refer to the following common problems and solutions:
| Problem | Possible Cause | Solution |
|---|---|---|
| Pump does not start | No power; tripped circuit breaker; faulty wiring; pump in manual mode but no flow. | Check power connection and outlet; reset breaker; inspect wiring (call professional if unsure); switch to automatic mode or ensure water flow in manual mode. |
| Low water pressure after pump installation | Air in the system; clogged filter; incorrect installation direction; pump too small for demand. | Bleed air from pipes; clean any inline filters; verify inlet/outlet connections; consider a higher power model if demand is too high. |
| Pump runs continuously (in automatic mode) | Leak in the system; faulty flow sensor; small continuous drip. | Check all plumbing for leaks; contact support if flow sensor is suspected to be faulty. |
| Unusual noise or vibration | Loose mounting; air in pump; debris in impeller. | Tighten mounting bolts; bleed air; disconnect power and inspect impeller for obstructions (if safe to do so). |
9. Warranty and Support
For warranty information, please refer to the documentation provided with your purchase or contact the seller directly. If you require technical support or have questions not covered in this manual, please reach out to USKI customer service or your retailer.
Manufacturer: USKI
Item Model Number: 1005004225425877
ASIN: B0DNQ8P7NM