ELIDAIP T-M9
ELIDAIP T-M9 Super Mini Walkie Talkies with Earpieces Instruction Manual
Model: T-M9 | Brand: ELIDAIP
1. Introduction
This manual provides essential information for the safe and efficient operation of your ELIDAIP T-M9 Super Mini Walkie Talkies. Please read it thoroughly before using the device to ensure proper functionality and to prevent damage.

Image 1: ELIDAIP T-M9 Super Mini Walkie Talkies with earpieces and charging cables.
2. What's in the Box
- Mini Walkie Talkies (x2)
- G-shape designed ear hook (x2)
- USB Cable (x2)
- Power Adaptor (x2)
- English Manual (x1)
3. Product Overview
The ELIDAIP T-M9 is a compact and lightweight two-way radio designed for clear communication in various environments. It features an ergonomic earpiece, smart LED display, and convenient Type-C charging.

Image 2: Mini Walkie-Talkie Function Key Diagram.
- Power Button: Turns the device on/off.
- P Key: Used for locking/unlocking the device.
- Microphone: For voice input.
- Earphone and Charging Hole: Multi-purpose port for earpiece and charging.
- - Key: Decreases channel or volume.
- + Key: Increases channel or volume.
- PTT Key (Push-to-Talk): Press and hold to transmit voice.
Earpiece Design
The included G-shaped ear hook earpieces are designed for comfort during extended wear. They feature a 360-degree rotating head, allowing use in either the left or right ear.

Image 3: 360-Degree Rotating Headset Details.
Smart LED Display
The mini two-way radio features an LED display that clearly shows channel/volume settings and charging status. A smart security lock prevents accidental key presses.
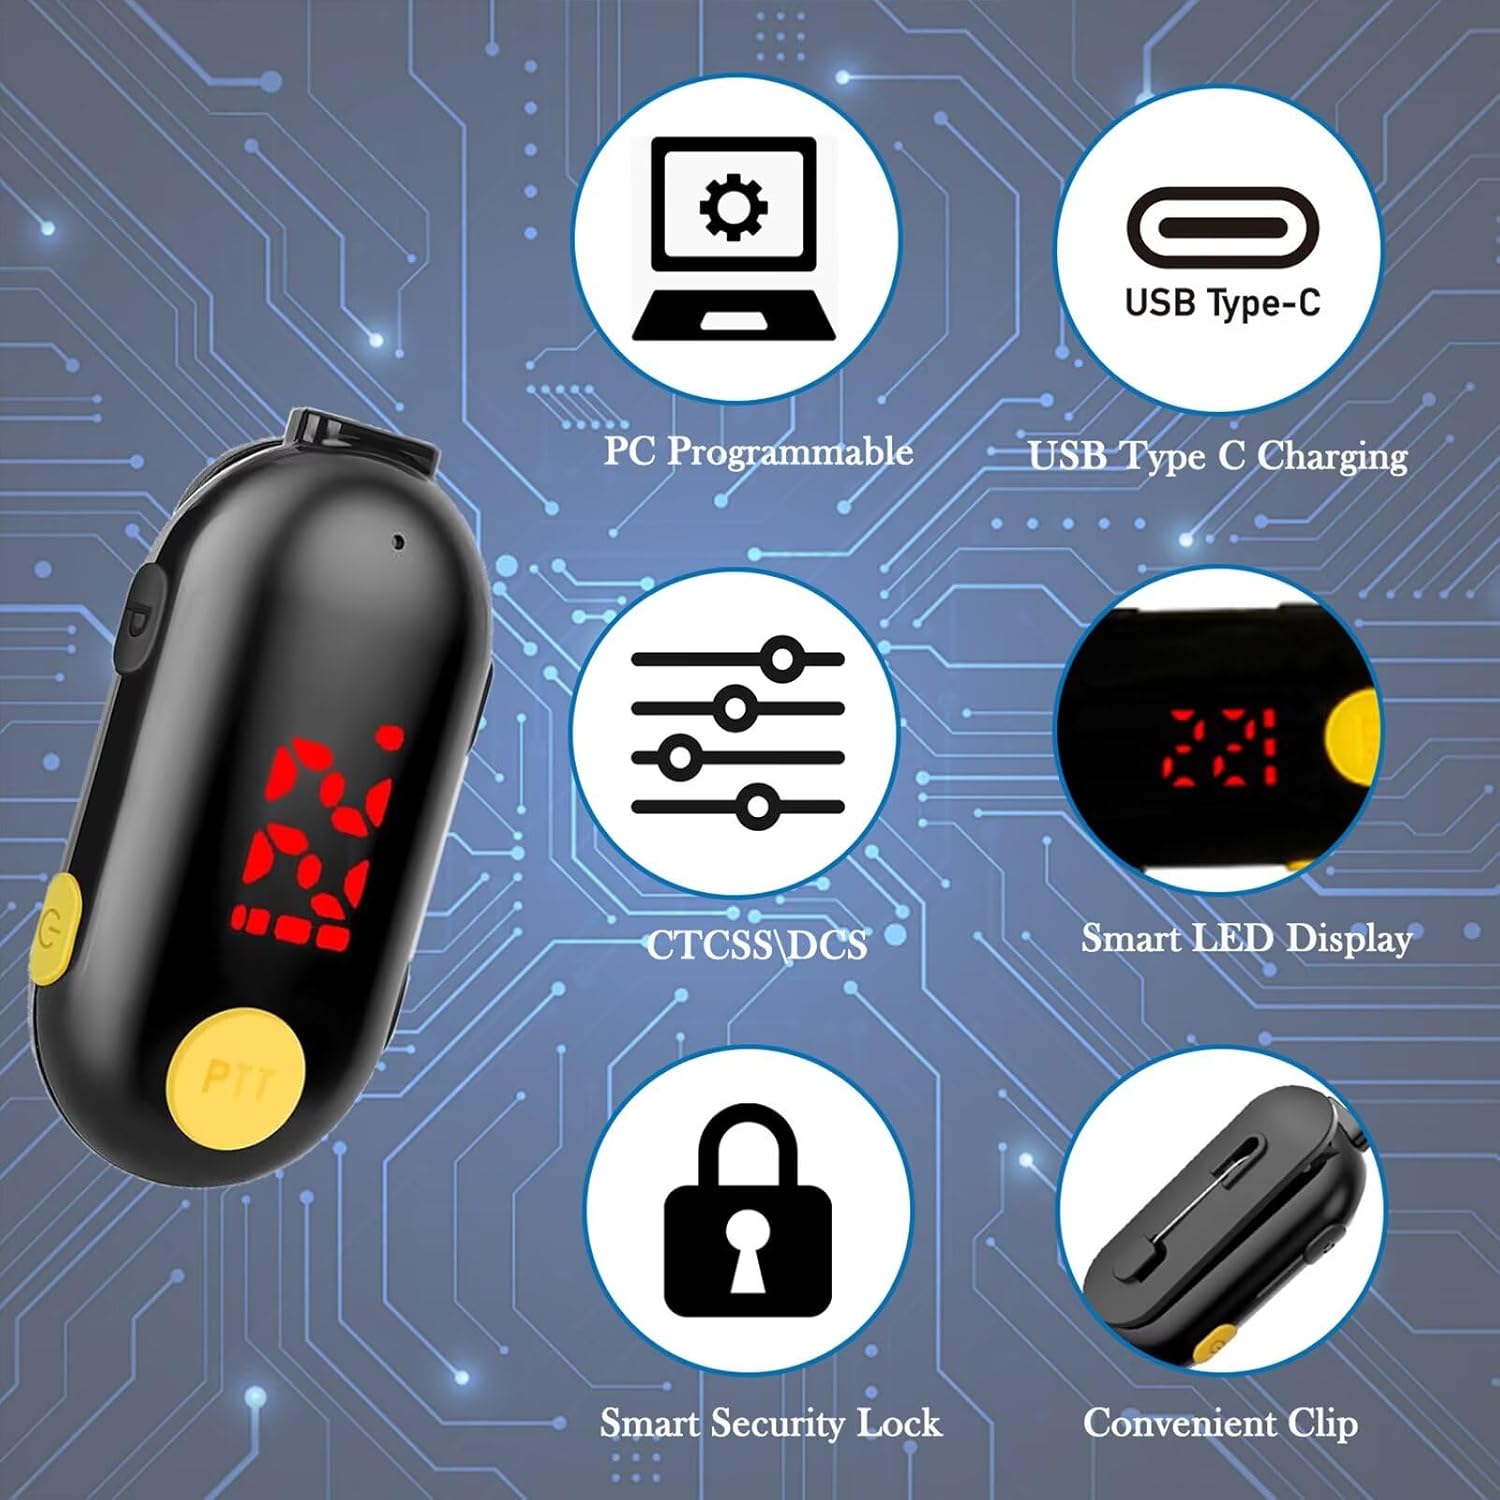
Image 4: Key Features of the T-M9 Walkie Talkie.
4. Setup
4.1 Charging the Device
Before first use, fully charge your walkie talkie. Use the provided USB-C cable and power adapter. The LED display will indicate charging status.
Video 1: Demonstrates the charging status display on the T-M9 walkie talkie.
4.2 Attaching the Earpiece
Connect the G-shaped ear hook earpiece to the designated port on the walkie talkie. Ensure it is securely fastened.
Video 2: Shows how to wear the T-M9 Super Mini Walkie Talkie headset.
5. Operating Instructions
5.1 Power On/Off
To power on the device, press and hold the Power Button until the LED display illuminates. To power off, press and hold the Power Button again.
5.2 Channel Selection
The T-M9 supports 25 channels. To change the channel:
- Press the - Key or + Key to enter channel adjustment mode. The display will show 'CH' followed by the current channel number.
- Use the - Key or + Key to select your desired channel.
- Press the PTT Key to save the setting and return to standby mode.
Video 3: Demonstrates automatic frequency calibration and channel selection.
5.3 Volume Adjustment
The device offers 8 volume levels. To adjust the volume:
- First, ensure you are not in channel adjustment mode. If you are, press the PTT Key to save the channel setting.
- Long press the - Key or + Key to enter volume adjustment mode. The display will show 'VL' followed by the current volume level.
- Use the - Key or + Key to select your desired volume level.
- Press the PTT Key to save the setting and return to standby mode.
5.4 Push-to-Talk (PTT)
To transmit your voice, press and hold the PTT Key. Speak clearly into the microphone. Release the PTT Key to stop transmitting and listen for replies.
5.5 Lock/Unlock Function
To prevent accidental changes to settings, you can lock the device:
- Press the P Key once to lock the device. A lock icon will appear on the LED display.
- Press the P Key again to unlock the device. The lock icon will disappear.
6. Usage Scenarios
The ELIDAIP T-M9 walkie talkies are versatile and suitable for a wide range of applications:
- Business: Restaurants, hotels, shopping malls, supermarkets, hospitals, security, construction sites.
- Outdoor Activities: Camping, hiking, cycling, family travel, sports events.
- Personal Use: Coordinating with family or friends in large venues or during events.

Image 5: Applicable in Various Environments/Scenarios.
7. Communication Range
The transmission range of the T-M9 walkie talkies depends on various factors such as terrain, weather conditions, and obstructions. In an open, flat area with no high obstacles, the talking range is approximately 2 miles.

Image 6: Communication Range and Battery Life.
8. Maintenance
- Keep the device dry. Avoid exposure to rain, moisture, or liquids.
- Clean the device with a soft, dry cloth. Do not use harsh chemicals or cleaning solvents.
- Store the walkie talkie in a cool, dry place when not in use.
- Ensure the charging port cover is properly sealed to maintain water resistance.
9. Troubleshooting
| Problem | Possible Cause | Solution |
|---|---|---|
| No power | Battery is depleted. | Charge the walkie talkie using the provided USB-C cable and adapter. |
| Cannot communicate | Different channels or privacy codes. | Ensure both walkie talkies are set to the same channel and privacy code (if applicable). |
| Poor audio quality | Out of range, obstructions, or low battery. | Move closer to the other device, ensure clear line of sight, or recharge battery. |
| Keys unresponsive | Keypad is locked. | Press the P Key to unlock the device. |
10. Specifications
- Model Number: T-M9
- Brand: ELIDAIP
- Item Weight: 0.6 ounces
- Product Dimensions: 2.08 x 0.59 x 0.84 inches
- Batteries: 2 Lithium Polymer batteries (included)
- Display Type: LED full-array
- Color: Black
- Number of Channels: 25
- Frequency Range: 462.55-467.71MHz
- Talking Range Maximum: 2 Miles (in open, flat areas)
- Voltage: 3.7 Volts (DC)
- Water Resistance Level: Water Resistant
- Special Features: Mini, Lightweight, Rechargeable, Adjustable, Noise Reduction
11. Warranty & Support
This product comes with a manufacturer's warranty. For specific warranty details or technical support, please refer to the contact information provided in your product packaging or visit the official ELIDAIP website.
For additional information or to explore other ELIDAIP products, visit the ELIDAIP Store on Amazon.
Related Documents - T-M9
 |
T-888 Walkie Talkies User's Instructions Comprehensive guide for T-888 Walkie Talkies, covering operation, features, safety, and technical specifications for reliable two-way communication. |
 |
Shenzhen Sinuo Xinda Walkie Talkies MODEL:T-388 User Manual This comprehensive user manual provides detailed instructions for operating the Shenzhen Sinuo Xinda MODEL:T-388 walkie talkies, covering setup, features, functions, and technical specifications. |
 |
Walkie Talkies T-388 User Manual User manual for the T-388 Walkie Talkies. Includes setup instructions, operation guides for channels, CTCSS, VOX, and technical specifications. |
 |
T-388 Walkie Talkies User Manual Comprehensive user manual for the T-388 Walkie Talkies. Includes setup instructions, operation guides, technical specifications, and safety recommendations. |
 |
Quanzhou HengLiDa Mini Radio T-M12 User Manual Comprehensive user manual for the Quanzhou HengLiDa Mini Radio (Model T-M12), covering product inspection, features, basic operation, button functions, FCC compliance, and RF exposure guidelines for occupational use. |
 |
USA Fencing Penalty Chart: Offenses and Penalties Official penalty chart from USA Fencing detailing offenses, articles, and corresponding penalties for sanctioned fencing competitions. It outlines yellow, red, and black card sanctions, along with specific penalty touches and exclusions. |
Ask a question about this manual
Ask about setup, troubleshooting, compatibility, parts, safety, or missing instructions. Manuals+ will review the question and use this page’s manual context to help answer it.