1. Introduction
This manual provides essential information for the safe and effective operation, maintenance, and troubleshooting of your HYCO PH65 Corded Electric Demolition Hammer. Please read this manual thoroughly before using the tool to ensure proper handling and to prevent injury or damage.
The HYCO PH65 is a heavy-duty demolition hammer designed for breaking concrete, masonry, and rubble. It features a powerful 2000W motor, a 25.07 mm chuck for quick bit changes, and a shock absorber for enhanced user comfort.
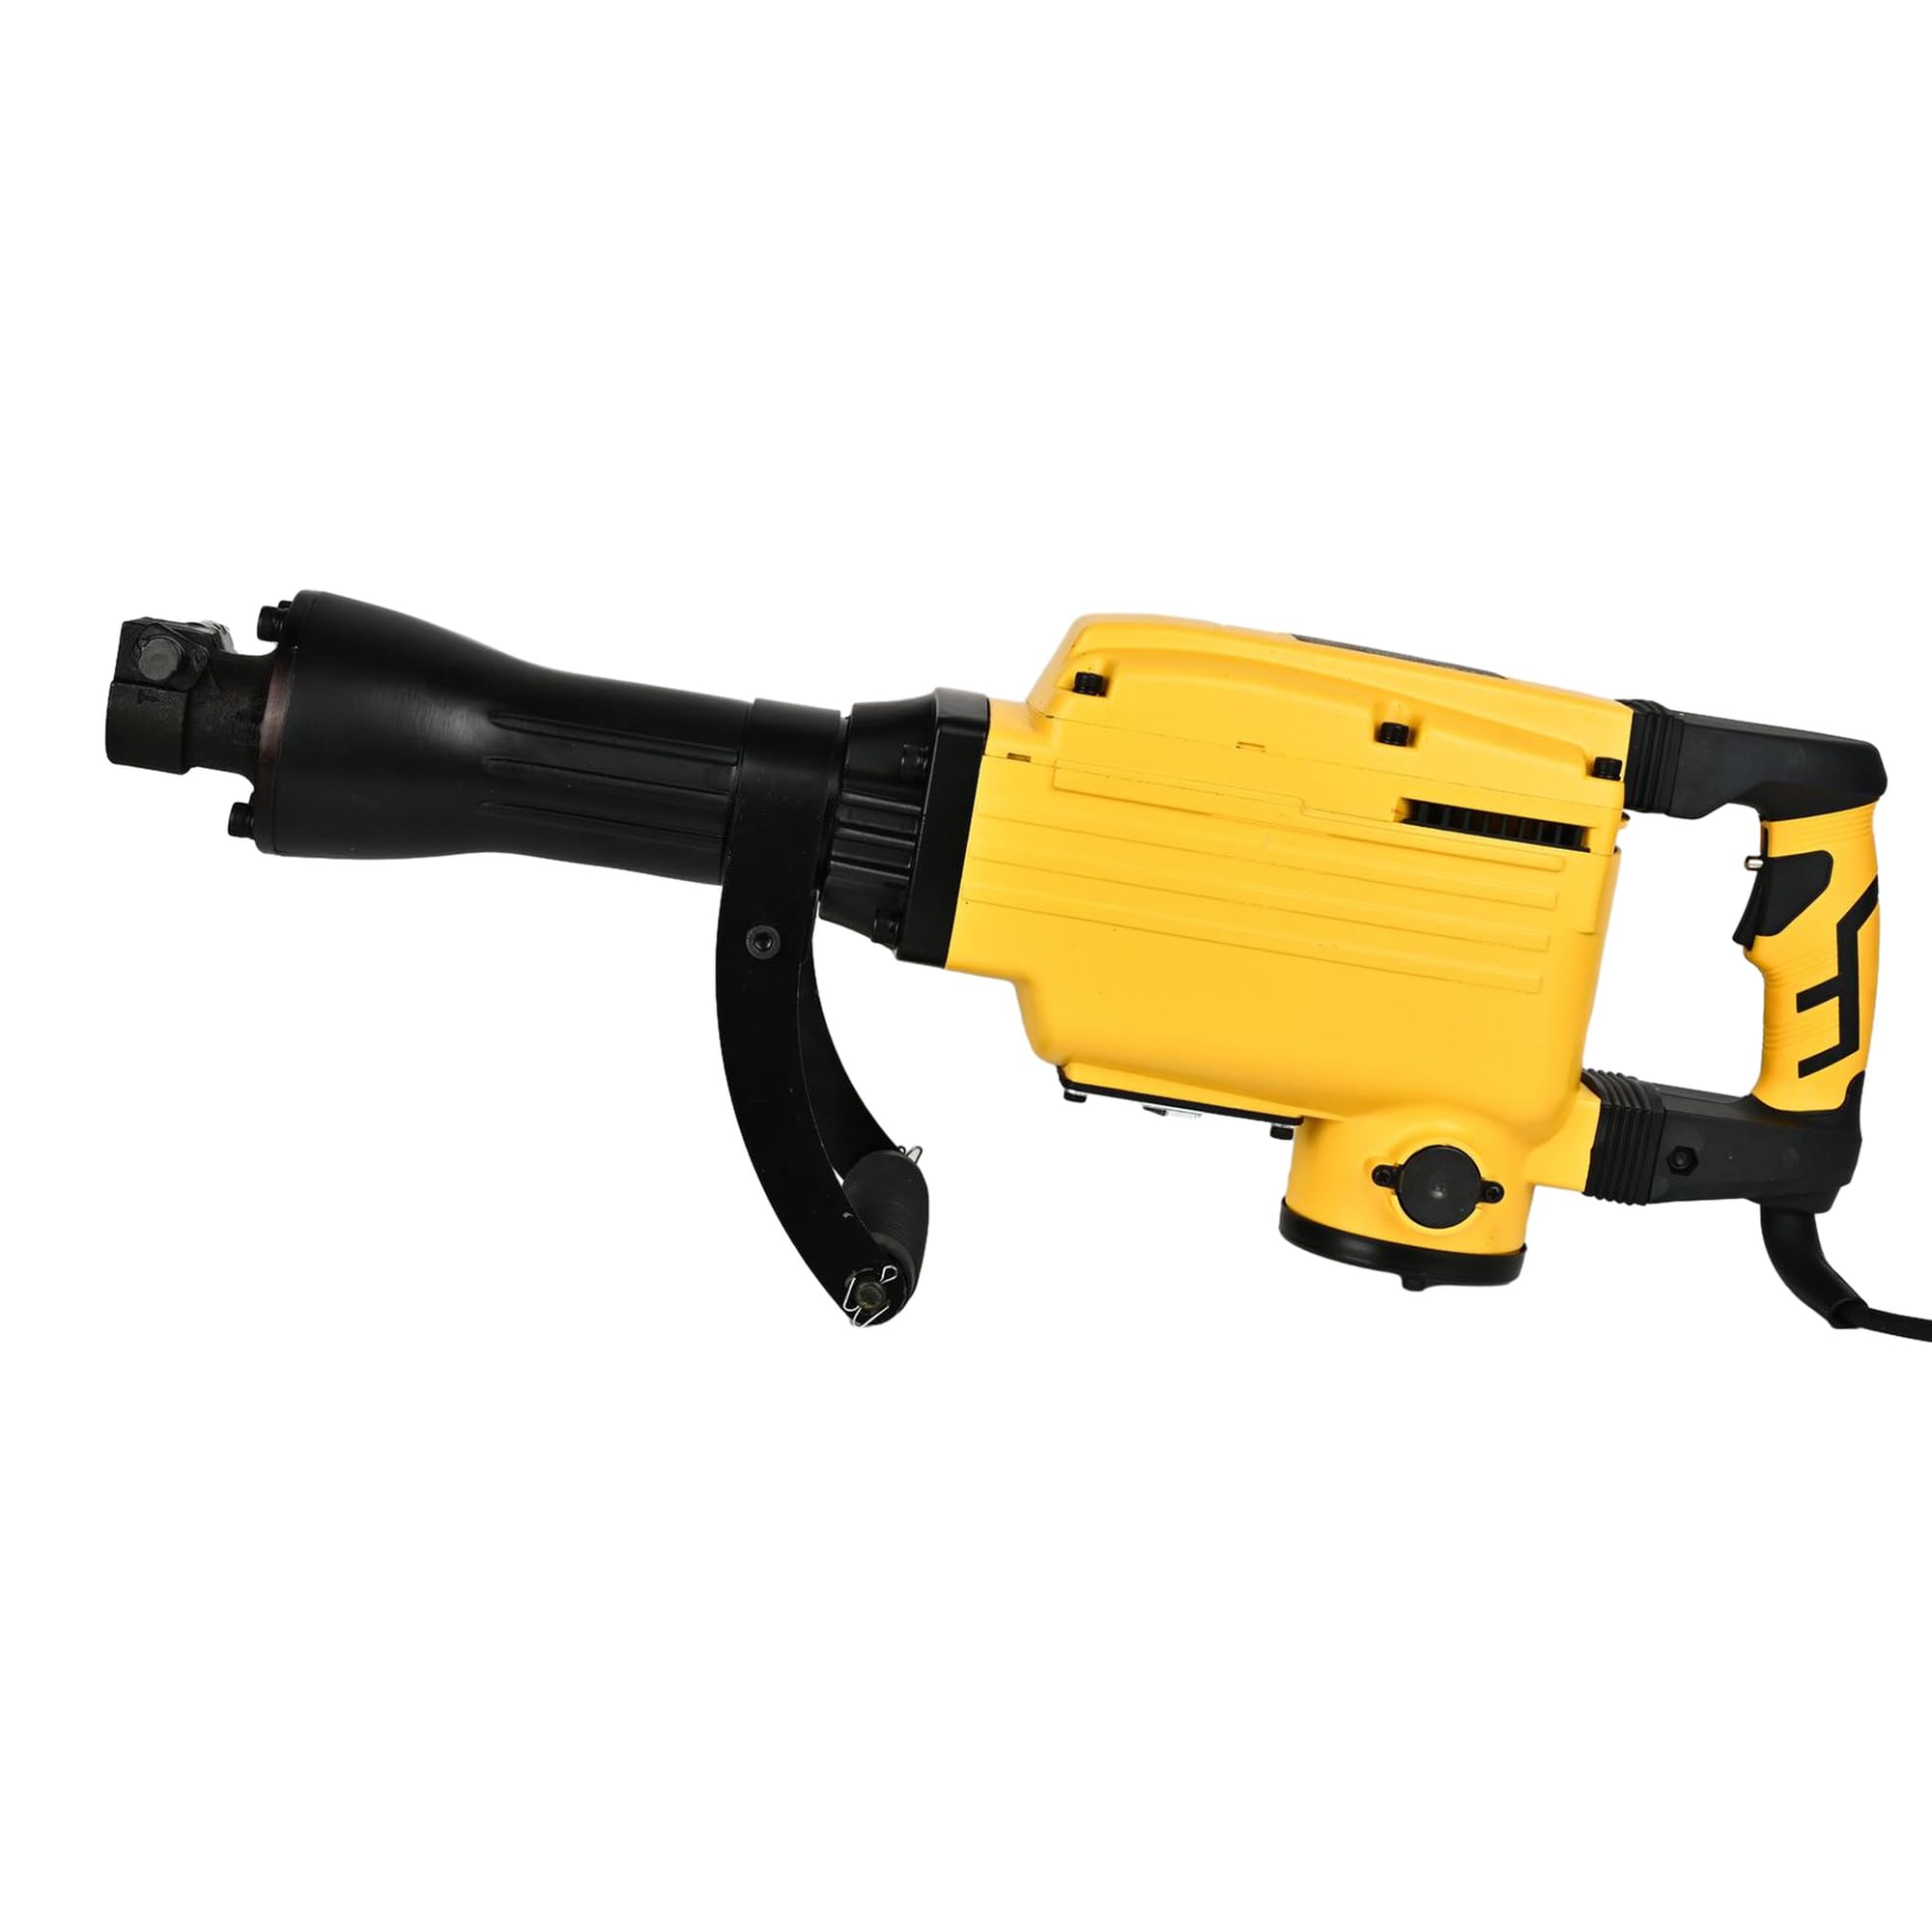
Figure 1: General view of the HYCO PH65 Demolition Hammer.
2. Safety Instructions
Always follow basic safety precautions to reduce the risk of fire, electric shock, and personal injury when operating power tools.
- Work Area Safety: Keep the work area clean and well-lit. Cluttered or dark areas invite accidents. Do not operate power tools in explosive atmospheres, such as in the presence of flammable liquids, gases, or dust.
- Electrical Safety: Power tool plugs must match the outlet. Never modify the plug in any way. Avoid body contact with earthed or grounded surfaces such as pipes, radiators, ranges, and refrigerators.
- Personal Safety: Always wear eye protection. Use hearing protection when operating the tool. Wear a dust mask if working in dusty conditions. Dress properly; avoid loose clothing or jewelry.
- Tool Use and Care: Do not force the power tool. Use the correct power tool for your application. Disconnect the plug from the power source before making any adjustments, changing accessories, or storing power tools.
- Safety Lock-on Button: The tool incorporates a safety lock-on button to prevent unintentional start-up. Ensure you understand its operation before use.
- Vibration Dampening: The tool is designed with vibration dampening for operator comfort. However, prolonged use can still cause discomfort. Take regular breaks.
3. Product Overview
Familiarize yourself with the components of your HYCO PH65 Demolition Hammer.

Figure 2: Main handle and trigger assembly.

Figure 3: Side view showing the auxiliary handle for better control.

Figure 4: Product label with model and electrical specifications.
4. Specifications
| Specification | Value |
|---|---|
| Brand | Hyco |
| Model | PH65 |
| Power Source | Corded Electric |
| Voltage | 220 Volts |
| Maximum Power | 2000 Watts |
| Maximum Chuck Size | 25.07 Millimeters |
| Item Weight | 16 Kilograms |
| Product Dimensions | 78L x 42W x 22H Centimeters |
| Drill Type | Hammer Drill |
| Included Components | Comes as a Combo Set |
5. Setup
5.1 Attaching the Auxiliary Handle
The auxiliary handle provides additional control and stability during operation. Securely attach it to the tool body in a comfortable position for your working posture.
5.2 Installing/Changing Chisels or Bits
- Ensure the tool is unplugged from the power source.
- Locate the chuck mechanism. The 25.07 mm chuck is designed for quick bit changes.
- Insert the chisel or bit firmly into the chuck until it locks into place. Pull on the bit to ensure it is securely seated.
- To remove, follow the chuck's release mechanism (refer to specific chuck design if different from standard push-and-twist).
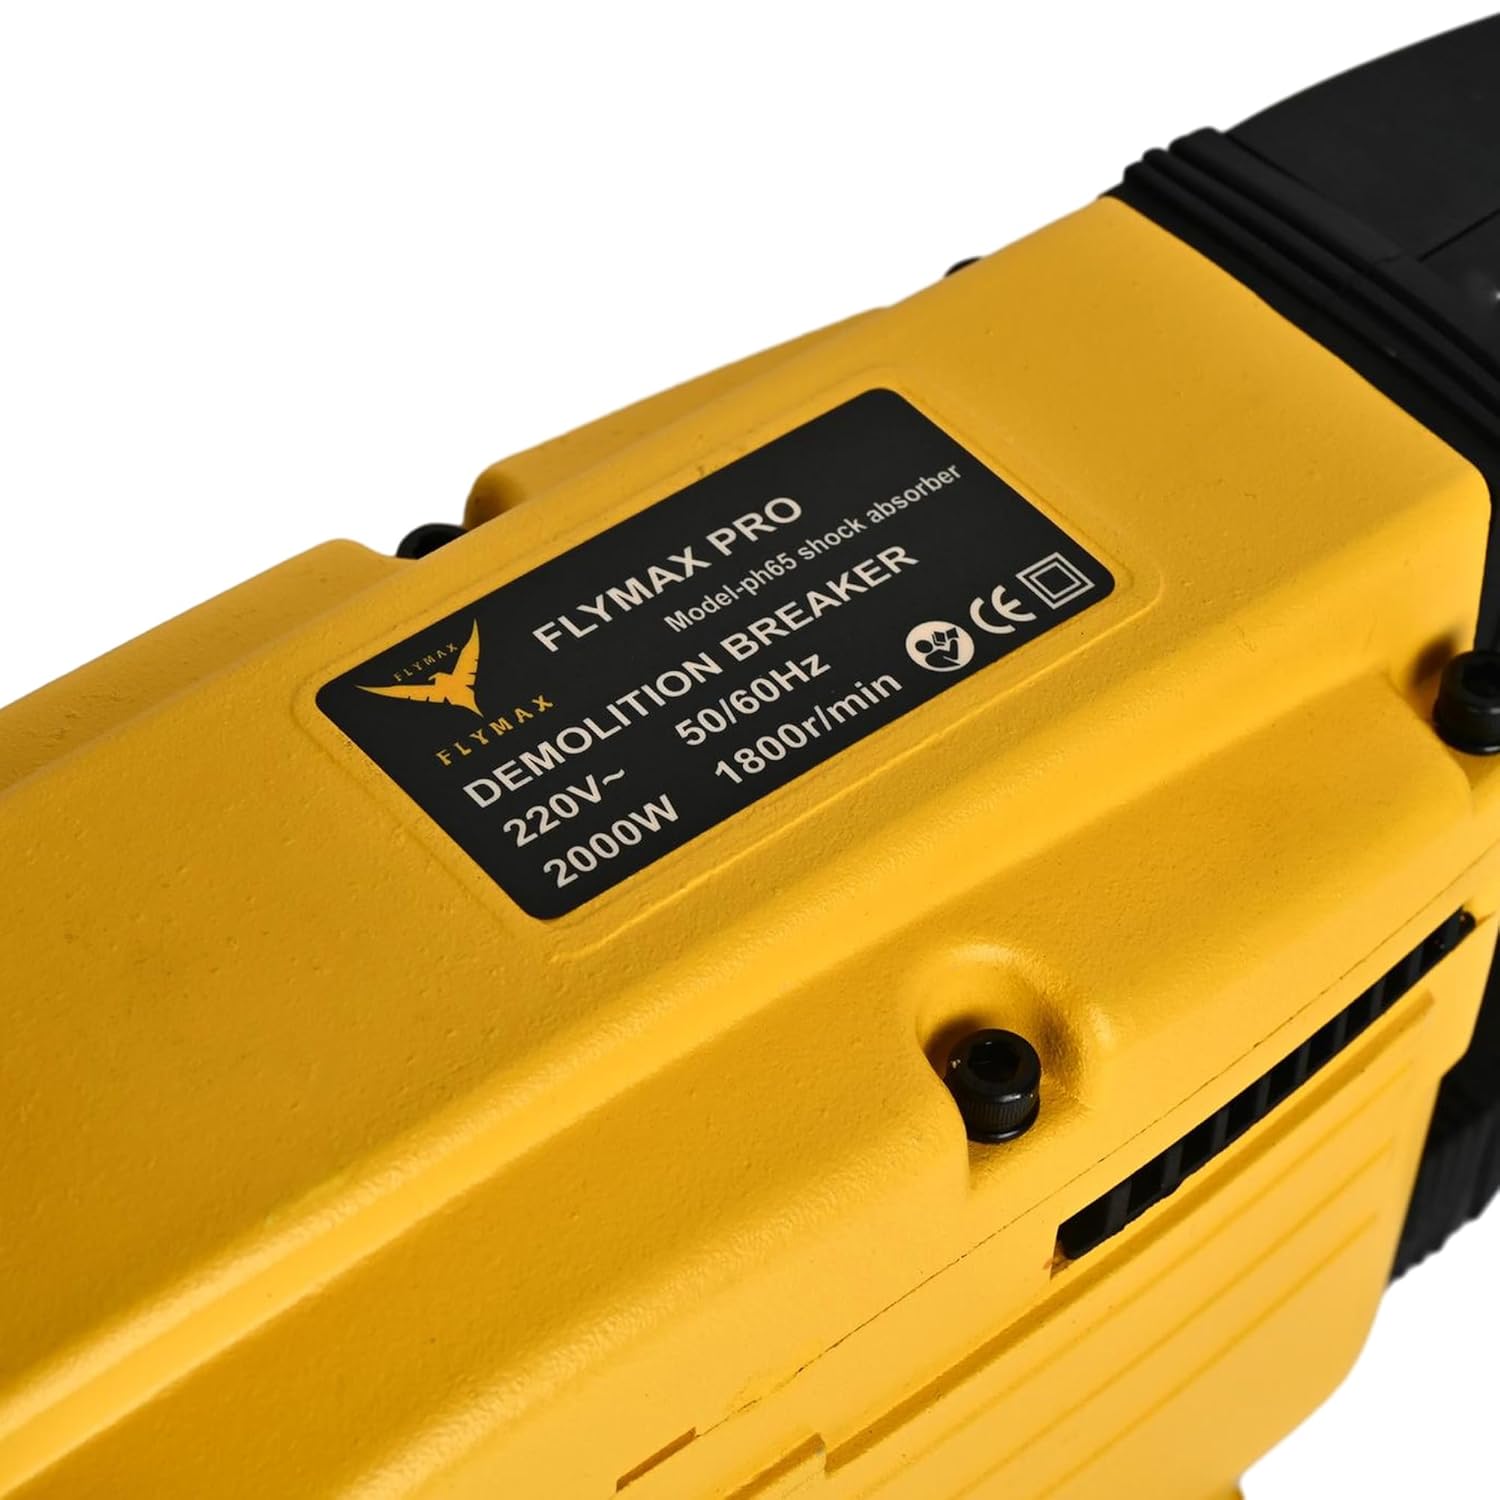
Figure 5: Chuck mechanism for bit insertion.
6. Operating Instructions
6.1 Power Connection
Connect the power cord to a suitable 220V electrical outlet. Ensure the power source is stable and capable of handling the tool's 2000W power consumption.
6.2 Starting the Tool
Press the trigger to start the demolition hammer. If equipped, release the safety lock-on button before pressing the trigger. The tool is designed for heavy-duty demolition, chiseling, and concrete breaking jobs.
6.3 Demolition Technique
- Hold the tool firmly with both hands, utilizing the main and auxiliary handles.
- Position the chisel or bit against the material to be broken.
- Apply steady, firm pressure. Allow the tool's impact energy to do the work. Do not apply excessive force, as this can reduce efficiency and increase wear.
- Work systematically, breaking material into manageable pieces.
6.4 Continuous Operation
For extended use, the tool's corded electric power ensures continuous operation without battery recharging. However, take regular breaks to prevent fatigue and ensure safe handling.
7. Maintenance
Regular maintenance ensures the longevity and optimal performance of your demolition hammer.
7.1 Cleaning
- After each use, clean the tool to remove dust, debris, and concrete residue.
- Use a dry cloth or soft brush. Do not use solvents or abrasive cleaners.
- Ensure the ventilation openings are clear to prevent overheating.
7.2 Lubrication
Periodically lubricate the internal mechanisms as indicated by the lubrication port. Refer to the tool's specific lubrication requirements and recommended lubricants.

Figure 6: Lubrication port.
7.3 Inspection
- Regularly inspect the power cord for damage. Replace immediately if frayed or cut.
- Check the chuck for wear and ensure bits are held securely.
- Inspect the housing for cracks or damage. The robust all-steel housing is designed for durability, but severe impacts can cause damage.
8. Troubleshooting
If you encounter issues with your HYCO PH65 Demolition Hammer, refer to the following common problems and solutions.
| Problem | Possible Cause | Solution |
|---|---|---|
| Tool does not start | No power supply; Damaged cord; Faulty switch | Check power outlet and circuit breaker; Inspect power cord for damage; Contact service center if switch is faulty. |
| Reduced impact force | Worn chisel/bit; Insufficient lubrication; Internal wear | Replace worn chisel/bit; Check and replenish lubrication; Contact service center for internal inspection. |
| Excessive vibration or noise | Loose components; Internal damage; Worn parts | Tighten any loose screws; Discontinue use and contact service center for inspection. |
For problems not listed or if solutions do not resolve the issue, contact HYCO customer support.
9. Warranty and Support
For warranty information, service, or technical support, please refer to the warranty card included with your product or visit the official HYCO website. Keep your purchase receipt as proof of purchase for warranty claims.