1. Introduction
This manual provides essential information for the safe and efficient operation, installation, and maintenance of your VEVOR Commercial Snowflake Ice Machine, model QLX100F2-1. Please read these instructions thoroughly before using the appliance and retain them for future reference.
The VEVOR Commercial Snowflake Ice Machine is designed for producing snowflake ice from various liquids, suitable for commercial environments such as bakeries, cafes, and tea shops. It features an air-cooling system and an intelligent touch control panel for ease of use.
2. Safety Instructions
- Always ensure the machine is placed on a stable, level surface.
- Do not operate the machine with wet hands or near flammable materials.
- Ensure proper ventilation around the machine to prevent overheating.
- Unplug the appliance before cleaning or performing any maintenance.
- Keep children and unauthorized personnel away from the operating machine.
- Use only liquids specified for ice production; avoid corrosive or highly viscous substances.
- Do not insert foreign objects into the ice outlet or any other part of the machine.
- In case of malfunction, switch off and unplug the machine immediately and contact customer support.
3. Product Overview
3.1 Key Features
- Efficient Ice Production: Produces approximately 397 lbs (180 kg) of snowflake ice per day with a 40-second pre-cooling time and 3-second rapid ice release.
- Versatile Ice Shapes: Adjustable roller speed allows for various ice textures including snow ice, spaghetti, and waterfall shapes.
- Intelligent Touch Control: Features a digital LED touch panel for speed adjustment, one-touch cleaning, and monitoring roller rotation speed.
- Durable Construction: Machine body made of SUS201 stainless steel, food-grade SUS304 stainless steel roller, and 5CR15 stainless steel blade for rust resistance and easy cleaning.
- Air Cooling System: Ensures rapid heat dissipation for stable and continuous operation.
3.2 Components and Accessories
The VEVOR Commercial Snowflake Ice Machine comes with the following components and accessories:
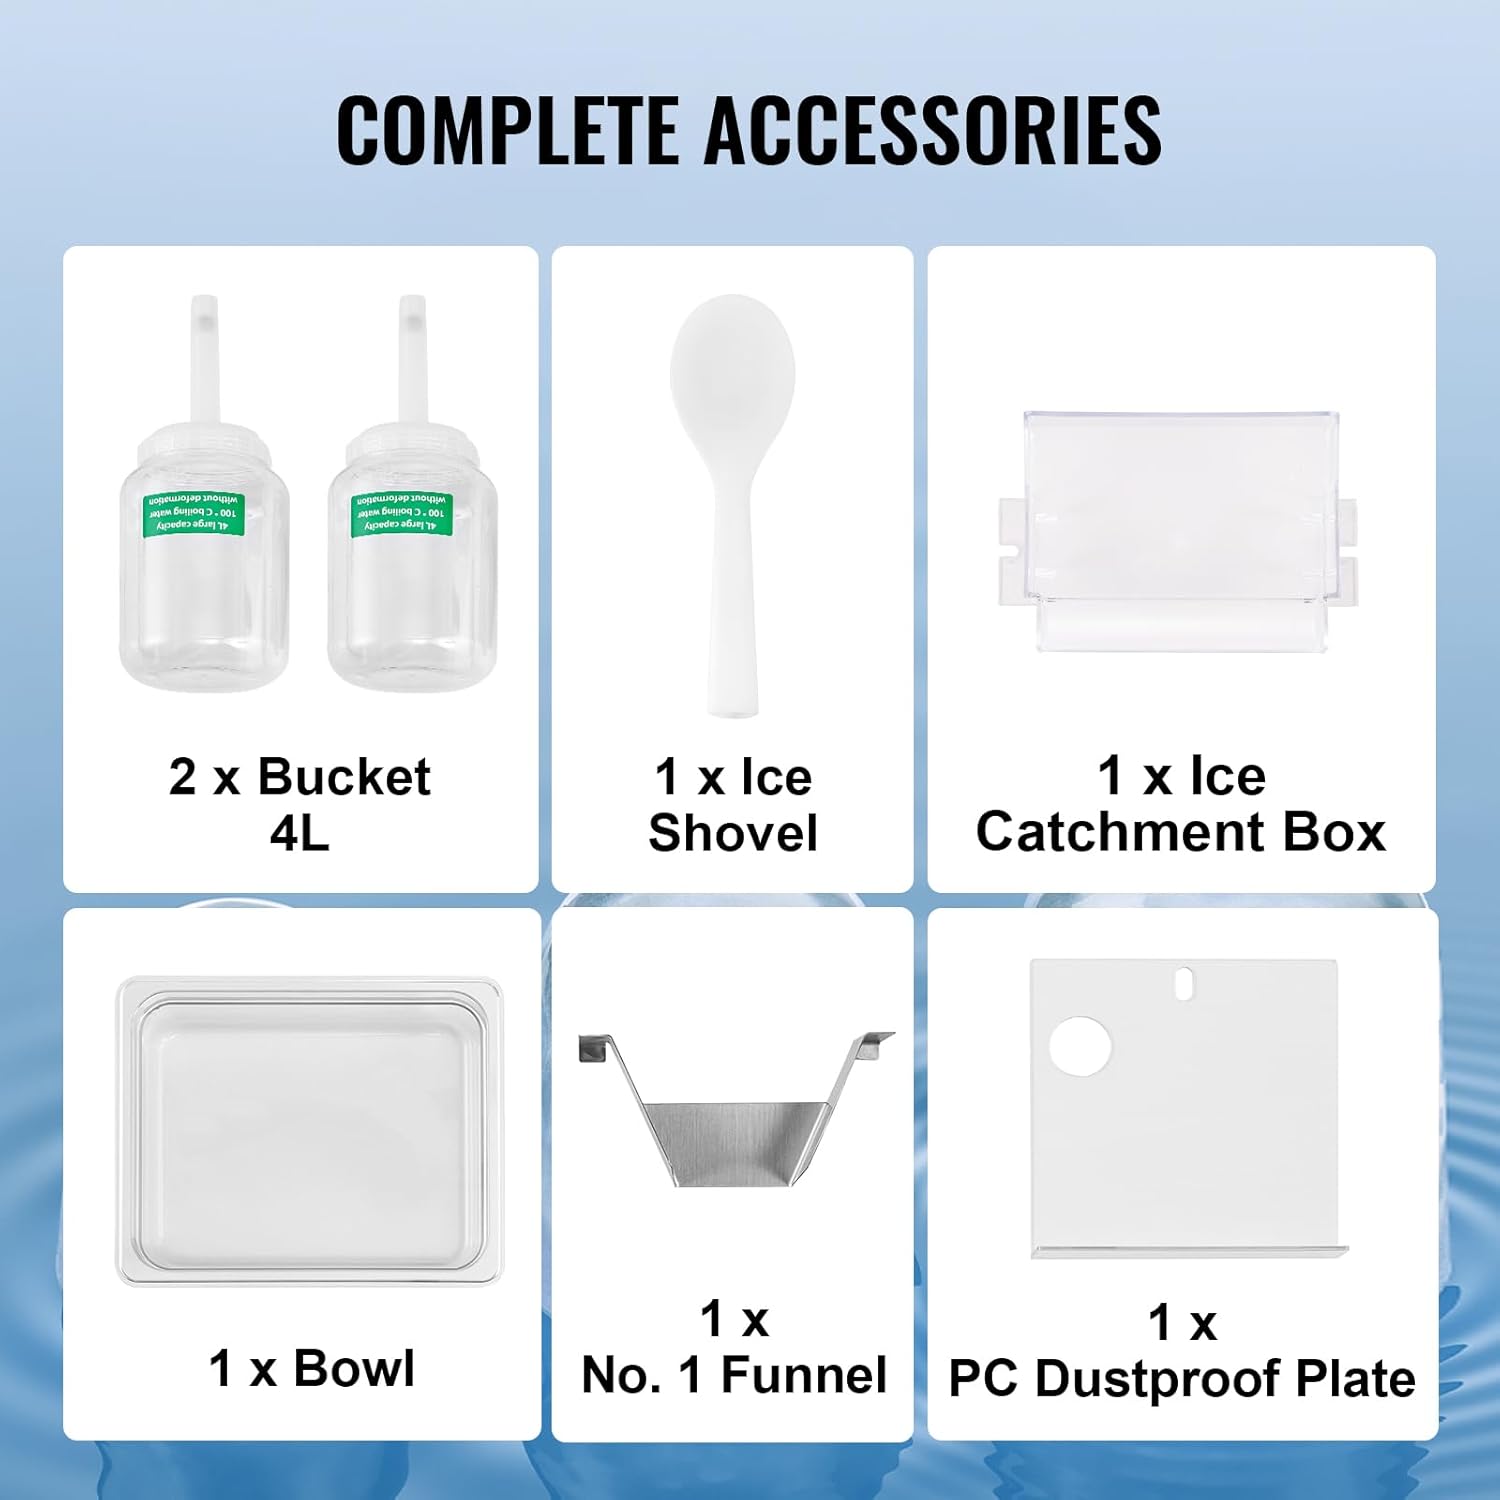
Image: Included accessories for the VEVOR Snowflake Ice Machine, showing two 4L buckets, an ice shovel, an ice catchment box, a bowl, a funnel, and a PC dustproof plate.
- 2 x 4L Buckets
- 1 x Ice Shovel
- 1 x Ice Catchment Box
- 1 x Bowl
- 1 x No. 1 Funnel
- 1 x PC Dustproof Plate

Image: Close-up view of the ice machine's internal components, highlighting the SUS304 refrigeration roller, 5CR15 stainless steel blade, and SUS201 stainless steel shell, emphasizing durability and ease of cleaning.
4. Setup Instructions
- Unpacking: Carefully remove the machine from its packaging. Inspect for any shipping damage. Retain packaging for future transport if needed.
- Placement: Place the ice machine on a stable, level, and dry surface. Ensure there is adequate space around the machine (at least 10 cm on all sides) for proper air circulation and heat dissipation, especially around the air cooling grille.
- Power Connection: Connect the power cord to a grounded electrical outlet that matches the machine's voltage requirements (refer to specifications).
- Initial Cleaning: Before first use, clean all parts that will come into contact with liquids, including the roller and ice catchment area, according to the cleaning instructions in Section 6.
- Liquid Reservoir: Place the liquid reservoir (bucket) securely on top of the machine. Ensure it is properly seated to allow liquid to flow into the ice-making mechanism.
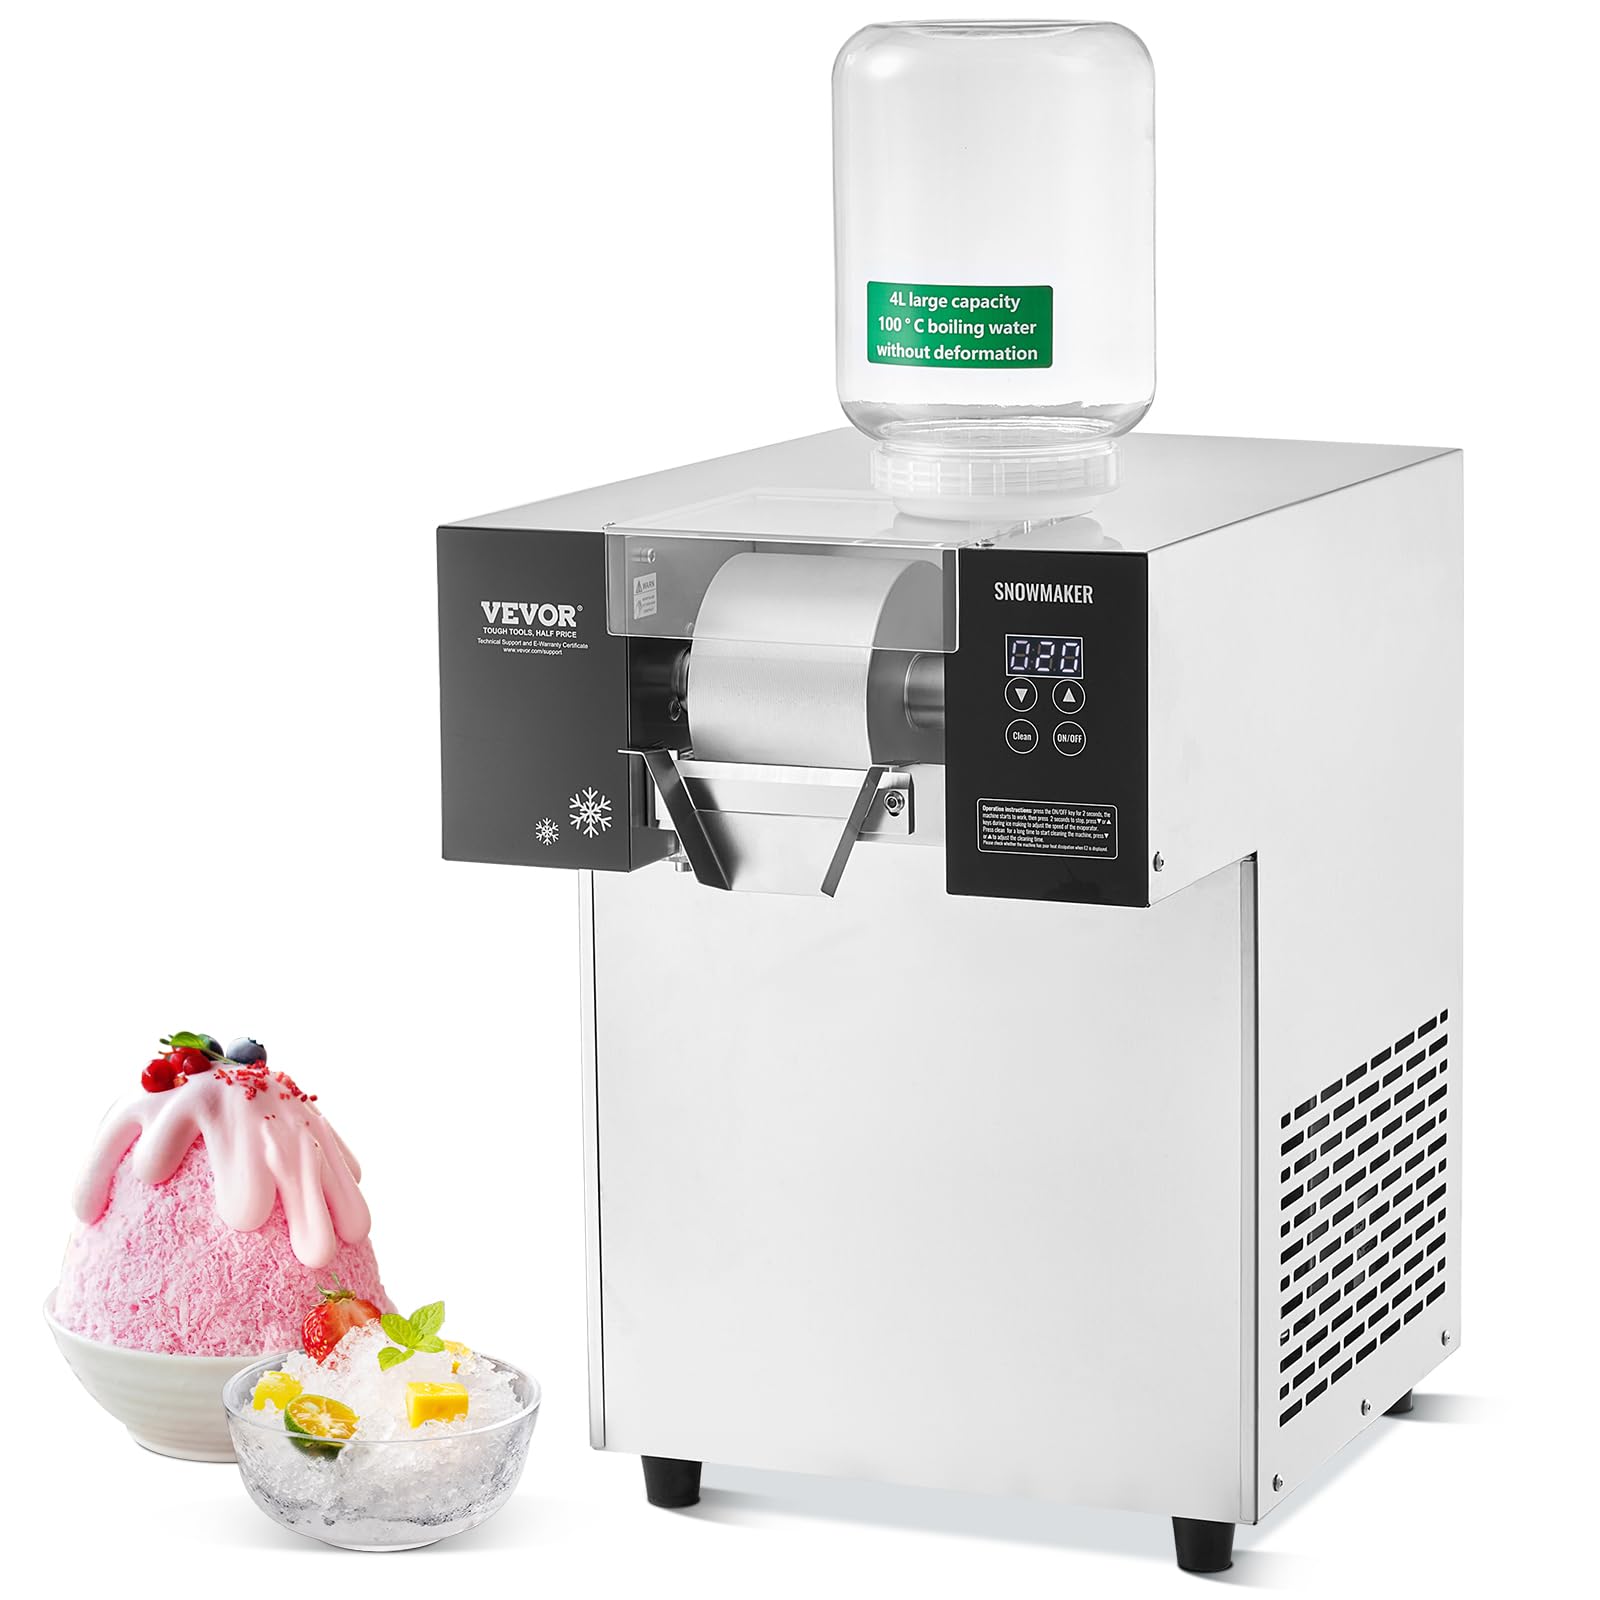
Image: The VEVOR Commercial Snowflake Ice Machine with a liquid reservoir placed on top, ready for operation in a kitchen setting.
5. Operating Instructions
- Fill Liquid Reservoir: Pour your desired liquid (e.g., sugar drinks, fruit juice, milk, alcoholic beverages with less than 10% alcohol content) into the 4L bucket placed on top of the machine.
- Power On: Press and hold the "ON/OFF" button on the digital LED touch screen for 2 seconds to start the machine. The machine will begin its pre-cooling cycle.
- Ice Production: After the pre-cooling phase (approximately 40 seconds), the machine will start producing snowflake ice. Ice will be released in about 3 seconds.
- Adjust Roller Speed (Ice Shape):

Image: Close-up of the digital LED touch screen and the ice-making roller, illustrating the adjustable roller speed feature for different ice textures.
Use the up (▲) and down (▼) arrow buttons on the control panel to adjust the roller's rotation speed. Different speeds will produce different ice textures:
- Fine Snow Ice Shape: Typically achieved at higher roller speeds.
- Refreshing Spaghetti Shape: Achieved at moderate roller speeds.
- Smooth Waterfall Shape: Achieved at lower roller speeds.
The display screen will show the current roller rotation speed for monitoring.
- Stop Operation: To stop ice production, press the "ON/OFF" button again.
- Empty Ice Catchment: Regularly empty the ice catchment box to prevent overflow and ensure continuous operation.
5.1 Operational Video Guide
Video: An official VEVOR video demonstrating the operation of the Commercial Snowflake Ice Machine, including filling the reservoir, starting the machine, and observing ice production.
6. Maintenance
6.1 Daily Cleaning
- One-Touch Cleaning: The machine is equipped with a one-touch cleaning function. Press the "Clean" button on the control panel to initiate an automatic cleaning cycle.
- Manual Cleaning: For thorough cleaning, unplug the machine. Remove the liquid reservoir and ice catchment box. Wash these components with mild soap and warm water. Rinse thoroughly and dry completely before reassembling.
- Wipe Exterior: Wipe the exterior of the machine with a damp cloth. Do not use abrasive cleaners or immerse the main unit in water.

Image: The digital LED touch screen of the VEVOR Snowflake Ice Machine, highlighting the "Clean" button for easy maintenance.
6.2 Long-Term Storage
If the machine will not be used for an extended period, perform a thorough cleaning. Ensure all parts are dry. Store the machine in a cool, dry place, covered to protect it from dust.
7. Troubleshooting
| Problem | Possible Cause | Solution |
|---|---|---|
| Machine does not turn on | No power supply; Power cord not properly connected; Power button not pressed for 2 seconds. | Check power outlet; Ensure power cord is securely plugged in; Press and hold "ON/OFF" button for 2 seconds. |
| No ice production | Liquid reservoir empty; Pre-cooling not complete; Roller not rotating. | Refill liquid reservoir; Wait for pre-cooling cycle to complete; Check for obstructions around the roller. |
| Ice texture is not as desired | Roller speed setting incorrect. | Adjust roller speed using the ▲/▼ buttons on the control panel. |
| Machine is noisy or vibrating excessively | Unstable surface; Internal component issue. | Ensure machine is on a stable, level surface; If problem persists, contact customer support. |
| Error code displayed (e.g., E2) | Specific internal fault. | Refer to the specific error code in the full manual (if available) or contact VEVOR customer support with the error code. |
For issues not listed above, please contact VEVOR customer support for assistance.
8. Specifications
| Attribute | Detail |
|---|---|
| Brand | VEVOR |
| Model Name | Commercial Snowflake Ice Machine |
| Item Model Number | QLX100F2-1 |
| Capacity (Ice Production) | 397 lbs / 180 kg per 24 hours |
| Wattage | 700 watts |
| Main Material | Stainless Steel + PP + PC |
| Refrigeration Roller Material | SUS304 Stainless Steel |
| Blade Material | 5CR15 Stainless Steel |
| Cooling Method | Air Cooling |
| Bucket Capacity | 4 L / 1.1 gal |
| Gear | Stepless Speed Regulation |
| Refrigeration Speed | 40 seconds (pre-cooling) |
| Product Dimensions | 20.08 x 15.55 x 21.26 inches (510 x 395 x 540 mm) |
| Item Weight | 94.1 pounds / 38 kg |
| UPC | 197988998938 |

Image: Diagram showing the dimensions of the VEVOR Commercial Snowflake Ice Machine and a summary of its key specifications.
9. Warranty and Support
VEVOR products are designed for durability and performance. For warranty information, product registration, or technical support, please visit the official VEVOR website or contact their customer service directly.
You can find more information and support at the VEVOR Store on Amazon.


