1. Introduction
This manual provides detailed instructions for the installation, operation, and maintenance of your REDTIGER F7N Elite 4K HDR Dash Cam. This device features a front 4K camera and a rear 1080P camera, STARVIS 2 Sensor, 5.8GHz WiFi, voice control, and includes a 128GB SD card and an OBD hardwire kit for continuous power and parking monitoring. Please read this manual thoroughly before use to ensure proper functionality and safety.
2. Package Contents
Verify that all items are present in the package:
- REDTIGER F7N Elite Front Dash Cam
- Rear Camera with connection cable
- OBD Hardwire Kit (Type-C USB)
- 128GB MicroSD Card
- Windshield Mount
- User Manual
- Cable Clips (if included)
- Pry Tool (if included)
3. Product Overview
Familiarize yourself with the main components of the dash cam system.
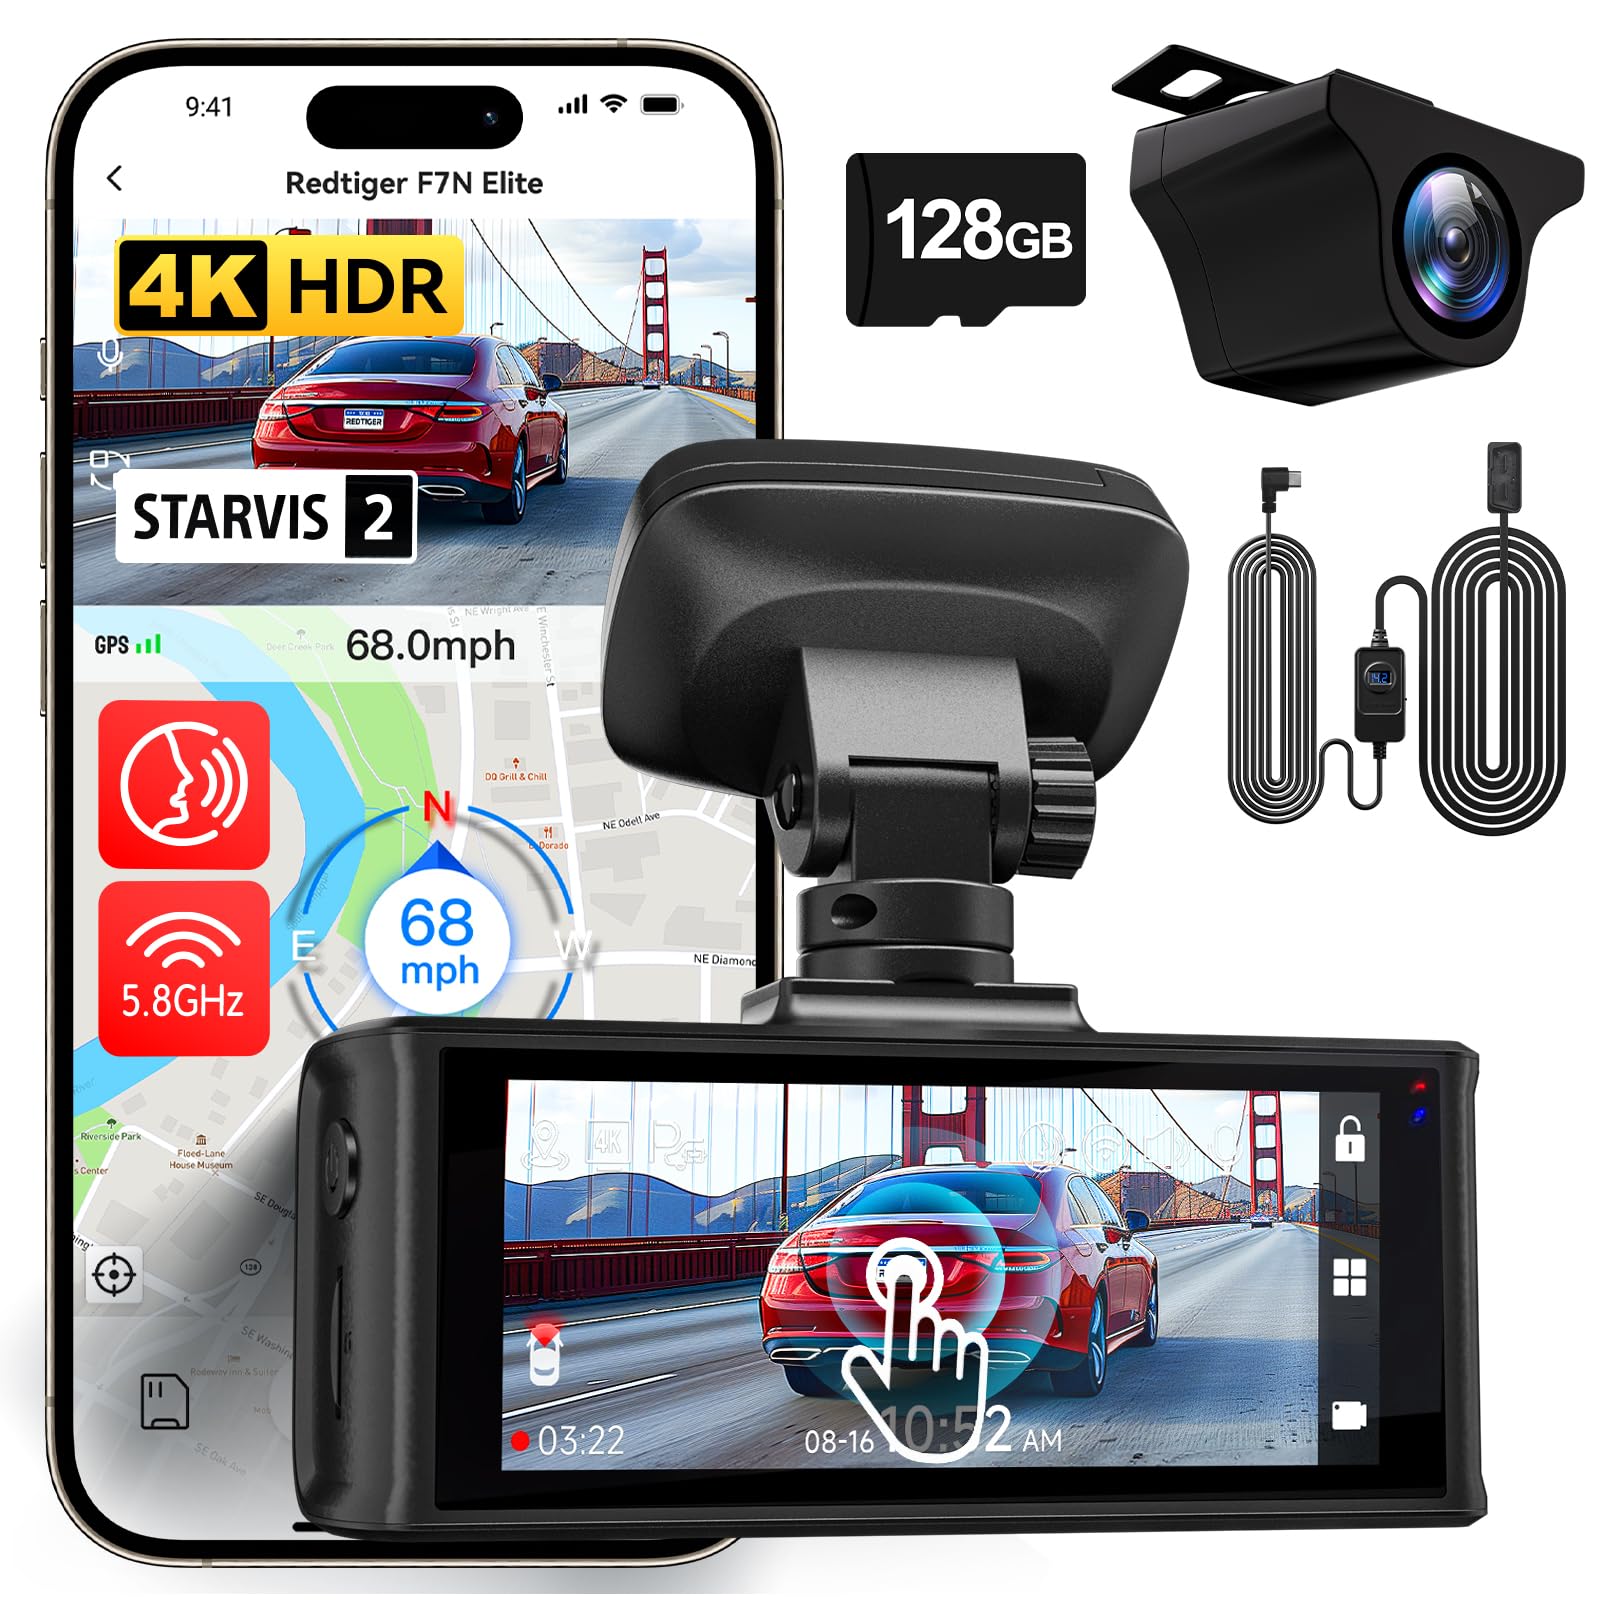
Image: Overview of the REDTIGER F7N Elite Dash Cam, showing the front camera unit and the rear camera.
Front Camera
- Lens: Records 4K video.
- Display: Touchscreen for interaction.
- Mounting Slot: For attaching to the windshield mount.
- Power Port: Type-C USB for power input.
- Rear Camera Port: For connecting the rear camera.
- MicroSD Card Slot: For memory card insertion.
- Microphone: For audio recording and voice control.
Rear Camera
- Lens: Records 1080P video.
- Connection Cable: For connecting to the front camera.
OBD Hardwire Kit
- OBD Plug: Connects to the vehicle's OBD-II port.
- Hardwire Kit Switch: For adjusting low voltage protection settings.
- Type-C USB Output: Connects to the dash cam.

Image: Detailed view of the OBD Hardwire Kit, showing the OBD plug, the hardwire kit switch with voltage display, and the Type-C USB connector.
4. Setup and Installation
4.1. MicroSD Card Insertion
- Ensure the dash cam is powered off.
- Insert the provided 128GB MicroSD card into the MicroSD card slot until it clicks into place.
- Note: For optimal performance, format the MicroSD card within the dash cam settings before first use and periodically thereafter.
4.2. Front Camera Installation
- Clean the windshield area where the dash cam will be mounted.
- Attach the windshield mount to the front dash cam.
- Peel off the protective film from the adhesive pad on the mount.
- Firmly press the mount onto the windshield, ideally behind the rearview mirror, ensuring a clear view of the road. Hold for 30 seconds.
- Adjust the camera lens angle to capture the road ahead.
4.3. Rear Camera Installation
- Mount the rear camera on the rear windshield, ensuring a clear view.
- Route the rear camera cable to the front dash cam. Use the provided cable clips to secure the cable along the headliner and A-pillar.
- Connect the rear camera cable to the designated port on the front dash cam.
4.4. Power Connection with OBD Hardwire Kit
- Locate your vehicle's OBD-II port (usually under the dashboard on the driver's side).
- Plug the OBD plug of the hardwire kit into the vehicle's OBD-II port.
- Route the Type-C USB cable from the hardwire kit to the front dash cam's power input port.
- Secure any excess cable.
- Adjusting Low Voltage Protection: The OBD Hardwire Kit Switch allows adjustment of the vehicle battery's low voltage cutoff. Refer to the image below for settings. Slide the switch to the desired voltage protection level (e.g., 12.0V for 12V vehicles, 24.0V for 24V vehicles). This prevents the dash cam from draining your car battery when parked.

Image: Diagram illustrating the adjustable low voltage protection settings on the OBD Hardwire Kit switch for both 12V and 24V vehicles.
5. Operating Instructions
5.1. Power On/Off
- The dash cam will automatically power on and begin recording when the vehicle's ignition is turned on (with OBD hardwire kit).
- It will power off automatically when the ignition is turned off, or enter parking monitoring mode if configured.
5.2. Basic Recording
- Upon power-on, the dash cam automatically starts continuous loop recording.
- Front camera records in 4K (3840x2160) and rear camera in 1080P (1920x1080).

Image: Illustration of the dual recording capability, showing the front camera capturing 4K footage and the rear camera capturing 1080P footage simultaneously.
5.3. Touchscreen Interface
Navigate through settings and playback using the touchscreen display.

Image: Depiction of the dash cam's touchscreen interface and examples of voice commands like "Take Picture", "Lock the Video", and "Show front camera".
5.4. Voice Control
The dash cam supports voice commands for hands-free operation. Common commands include:
- "Take Picture"
- "Lock the Video"
- "Show front camera"
- "Show rear camera"
- "Turn on Wi-Fi"
- "Turn off Wi-Fi"
5.5. Wi-Fi Connectivity and App
The dash cam features 5.8GHz Wi-Fi for faster data transfer to your smartphone via the REDTIGER app.
- Download the "REDTIGER" app from the Apple App Store or Google Play Store.
- Enable Wi-Fi on the dash cam (via touchscreen or voice command).
- Connect your smartphone to the dash cam's Wi-Fi network (SSID and password displayed on the dash cam screen).
- Use the app to view live footage, download recordings, and adjust settings.

Image: Visual representation of 5.8GHz Wi-Fi for faster downloads and GPS tracking functionality, including route and speed display on a map.
5.6. GPS Tracking
The built-in GPS module records driving route and speed data, which can be viewed via the REDTIGER app or a dedicated PC player.
5.7. Parking Monitoring (24H/48H)
With the OBD hardwire kit, the dash cam can provide continuous parking surveillance.
- G-Sensor Triggered Recording: If the G-sensor detects a sudden impact while parked, the dash cam will automatically record a locked video segment.
- Time-Lapse Recording: Condenses hours of parking footage into short, reviewable clips, saving storage space.

Image: Graphic indicating 24-hour and 48-hour parking monitoring capabilities, powered by the OBD hardwire kit.

Image: Illustration of key protection features including G-Sensor for impact detection, Loop-Recording for continuous coverage, and Time-Lapse for efficient review of long periods.
6. Key Features
- 4K HDR Front Camera: Captures high-resolution video with improved clarity in varying light conditions.
- 1080P Rear Camera: Provides a clear view of the rear of your vehicle.
- STARVIS 2 Sensor: Enhances low-light performance for clearer night recordings.
- 5.8GHz Wi-Fi: Offers faster video download speeds to your mobile device.
- Voice Control: Allows hands-free operation for common functions.
- G-Sensor: Automatically detects collisions and locks the current video file to prevent overwriting.
- Loop Recording: Continuously records by overwriting the oldest unlocked footage when the memory card is full.
- Time-Lapse Recording: Compresses long periods of recording into short videos, useful for parking surveillance.
- OBD Hardwire Kit with Low Voltage Protection: Provides continuous power for parking monitoring while protecting your vehicle's battery from excessive discharge.
- GPS Tracking: Records location and speed data.
7. Maintenance
7.1. MicroSD Card Care
- Format the MicroSD card monthly to maintain optimal performance and prevent data corruption.
- Replace the MicroSD card every 6-12 months, as continuous overwriting can degrade its lifespan.
7.2. Cleaning the Dash Cam
- Use a soft, dry cloth to clean the camera lenses and display screen.
- Do not use abrasive cleaners or solvents.
7.3. Firmware Updates
Check the REDTIGER official website periodically for firmware updates to ensure your dash cam has the latest features and bug fixes.
8. Troubleshooting
8.1. Dash Cam Not Powering On
- Ensure the OBD hardwire kit is securely connected to both the vehicle's OBD-II port and the dash cam.
- Check the vehicle's ignition status.
- Verify the vehicle's battery voltage is above the low voltage protection threshold set on the hardwire kit.
8.2. Recording Issues (e.g., freezing, corrupted files)
- Format the MicroSD card within the dash cam settings.
- Ensure the MicroSD card is a high-speed (Class 10 or U3) card.
- Replace the MicroSD card if issues persist.
8.3. Wi-Fi Connection Problems
- Ensure Wi-Fi is enabled on the dash cam.
- Confirm you are connecting to the correct Wi-Fi network displayed on the dash cam.
- Restart both the dash cam and your smartphone.
8.4. Voice Control Not Responding
- Speak clearly and directly towards the dash cam.
- Ensure the vehicle's interior is not excessively noisy.
- Check dash cam settings to ensure voice control is enabled.
9. Specifications
| Feature | Detail |
|---|---|
| Brand | REDTIGER |
| Model Name | Elite |
| Front Video Resolution | 4K (3840x2160) |
| Rear Video Resolution | 1080p (1920x1080) |
| Optical Sensor Technology | CMOS (STARVIS 2 Sensor) |
| Field Of View | 170 Degrees (Front & Rear) |
| Connectivity Technology | 5.8GHz Wi-Fi |
| Control Method | Voice, Touchscreen |
| Mounting Type | Windshield Mount |
| Flash Memory Type | MicroSD Card (128GB included) |
| Max Flash Memory Supported | 128 GB |
| Display Type | Touchscreen |
| Supported Standards | H.264, H.265, USB |
| Frame Rate | 24, 30, 60 fps (depending on resolution) |
| Power Input | 12V-24V to 5V (via OBD Hardwire Kit) |
10. Warranty and Support
For warranty information and technical support, please refer to the official REDTIGER website or contact their customer service directly. Keep your purchase receipt as proof of purchase.
REDTIGER Official Website: www.redtiger.com
11. Video Resources
No relevant official product videos from the seller were found in the provided data to embed in this manual.